To manage product table columns, a special tab called “column manager” has been designed in our plugin.

In this section, you can see two parts including “Column Profile” and “Create New Profile“.
Column manager section
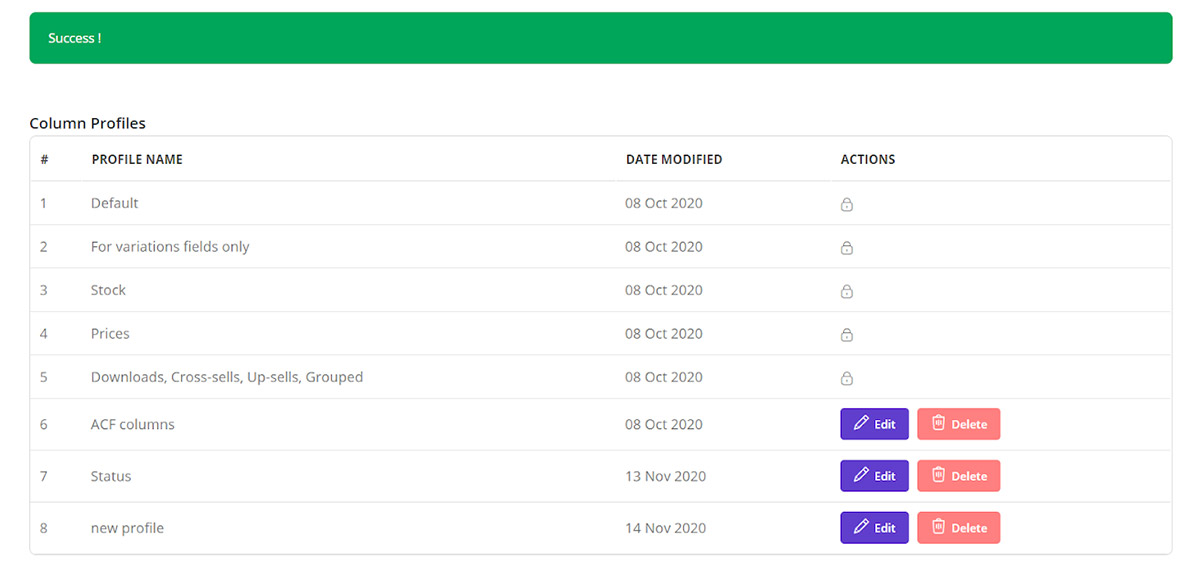
In the first part of this section, default column profiles and created profiles – by the store manager – are available.
The default profiles are not editable as you can see a lock icon in front of them assigned to the “Actions”.
The user created profiles are editable and you are able to edit or delete them according to the options displayed under “Actions”.
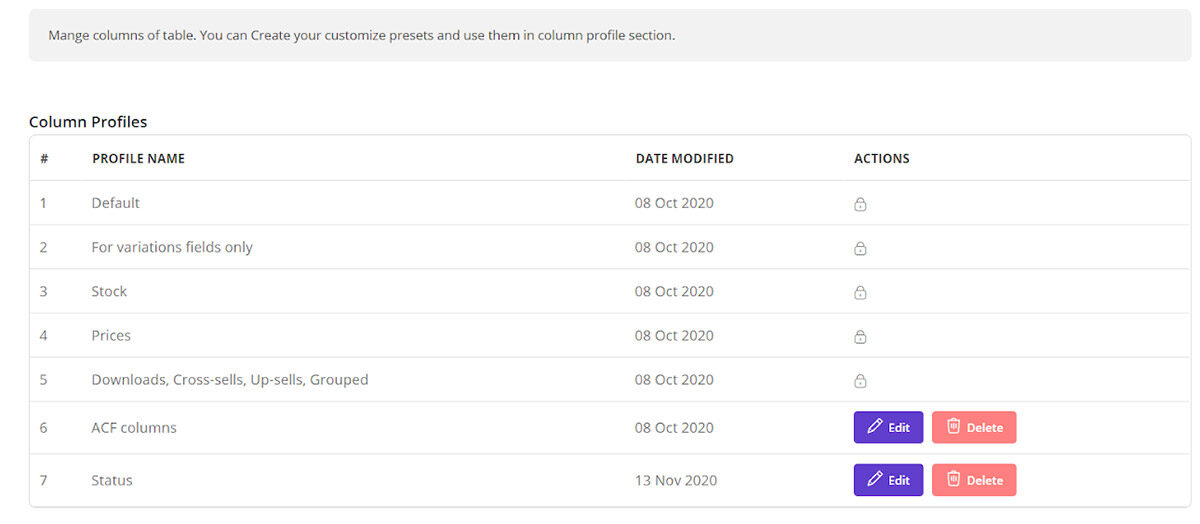
Create new profile
For adding a new profile with the desired column in VBULKiT – Bulk Edit WooCommerce Variations – plugin you should create a new profile and add your preferred column on initialize.
To manage product columns and create a new profile, you can search the fields you need to add to the product table or find them from the below list and check the checkbox next to them as below:
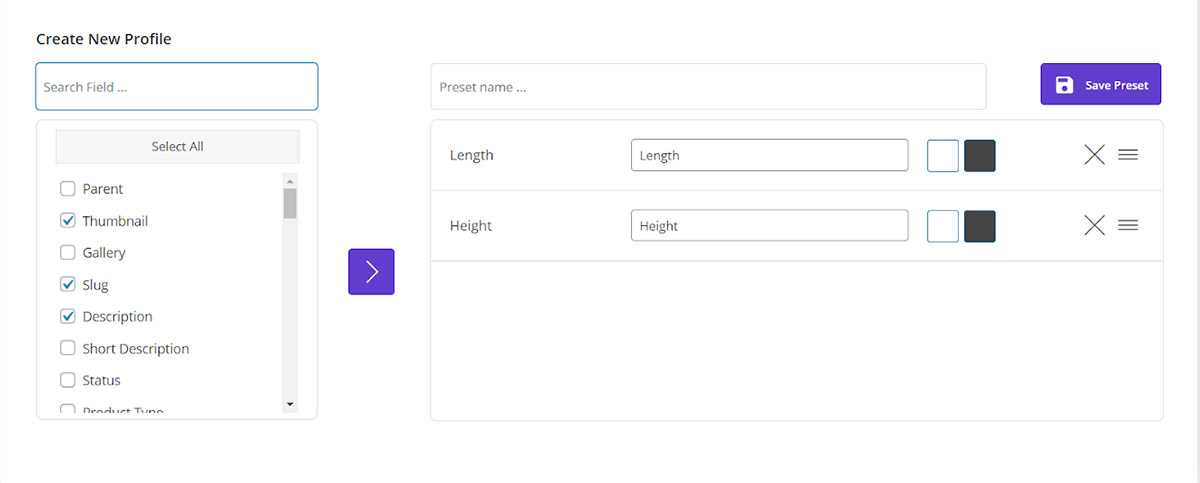
Move your desire fields by clicking on the arrow in front of the table.
In this new form, we make it possible for you to manage product columns by using following features:
Change the title of columns
There is a text field for each column that you can set your custom title for each column or leave it as default.
For Example, we want to change ‘height’ to ‘product height’.
Choose a background color
There is an option for the store manager to change the background of the table’s columns.
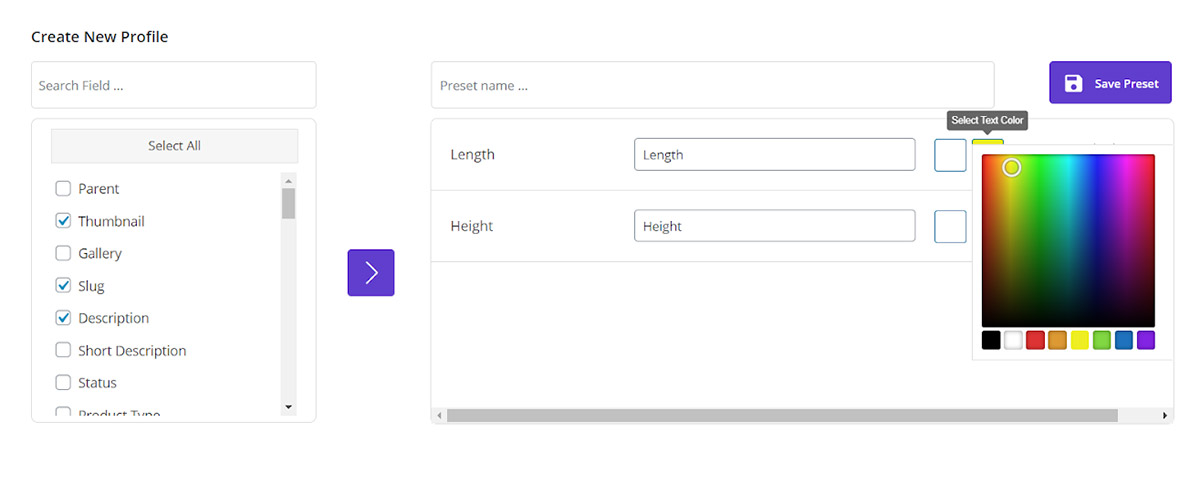
8 different colors as default are available below the color palette; however you can select any color as you wish by moving the cursor on the palette.
For example, we chose a yellow color for the length (Check the result at the end of this tutorial.)
Change the order of columns
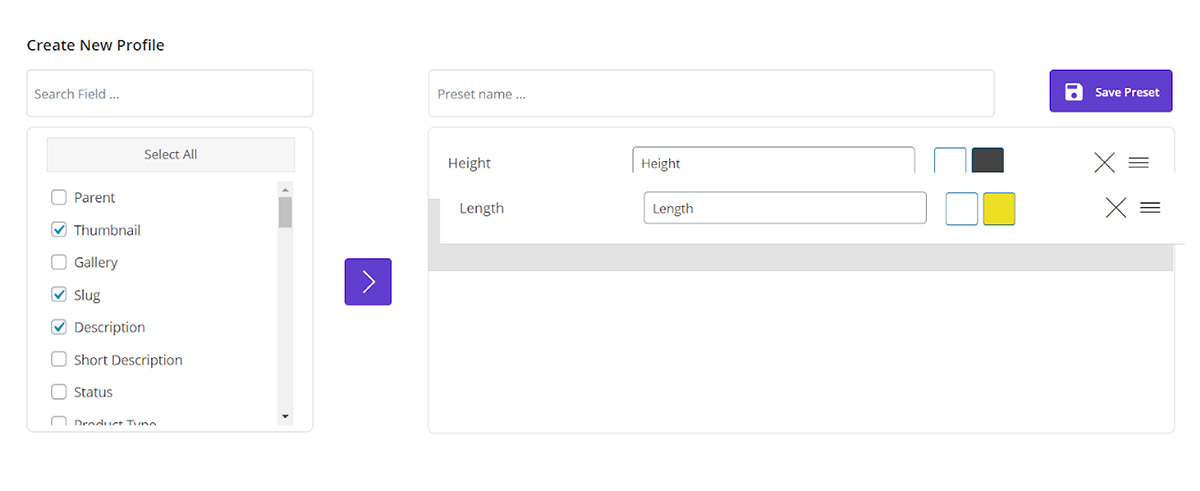
To better manage the column profile, you can change the order of fields you have already added to the list by holding the cursor on three lines and drag the item you need up or down.
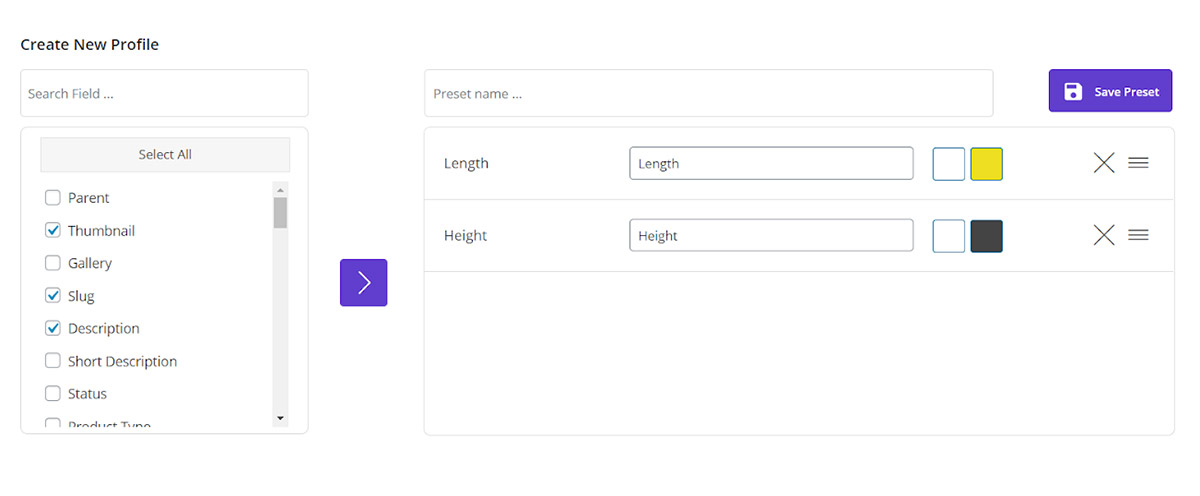
For example, to manage product columns we drag and drop length after height in the below picture.
Delete unnecessary columns
If you want to delete a column from a preset, just click on the cross icon to remove your field.
Save preset
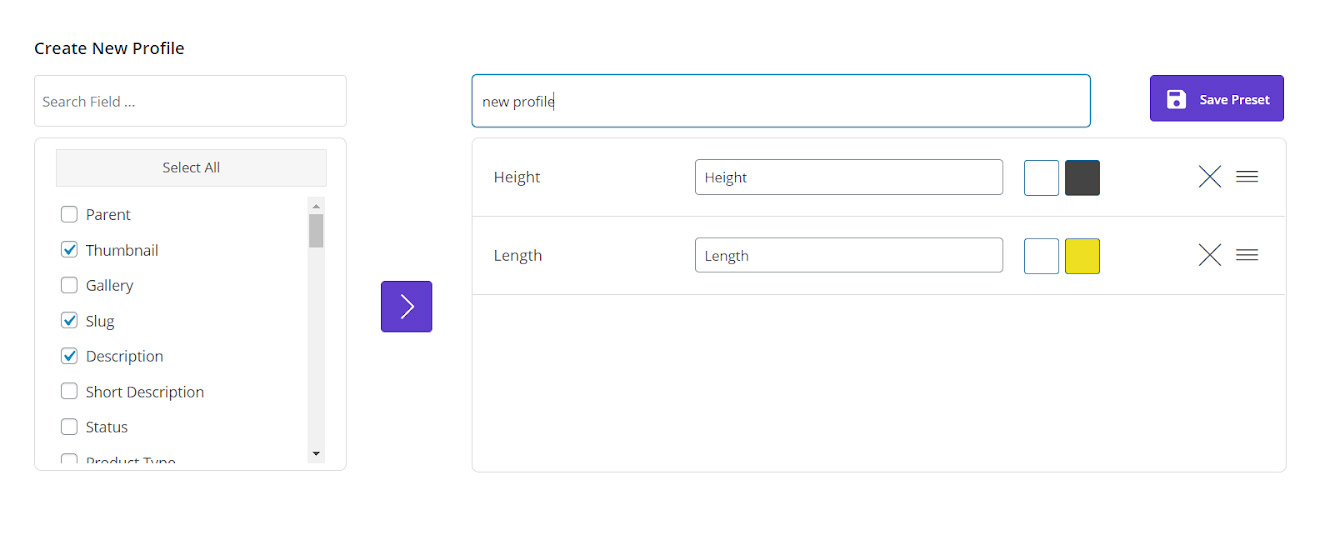
When everything looks good, it’s the time to type a name for this new column profile in the “Preset Name” box and click on “Save Preset” button.
In this way, you have later a feasible access to this column profile to easily manage product columns.
In this tutorial to manage product columns, we selected “New Profile” as the name of our new profile column.
By scrolling up, you can now find new row as “New Profile” at the end of list.
As we mentioned before, to customize these created profiles you can click on “Edit” or “delete” in front of each field.
If you click on “Edit”, a new popup called “Edit Column preset” will be displayed and you are able to add or remove any column for that column profile.
For example, we added gallery to “New Profile” by clicking on “Edit” as you can see in the below picture:
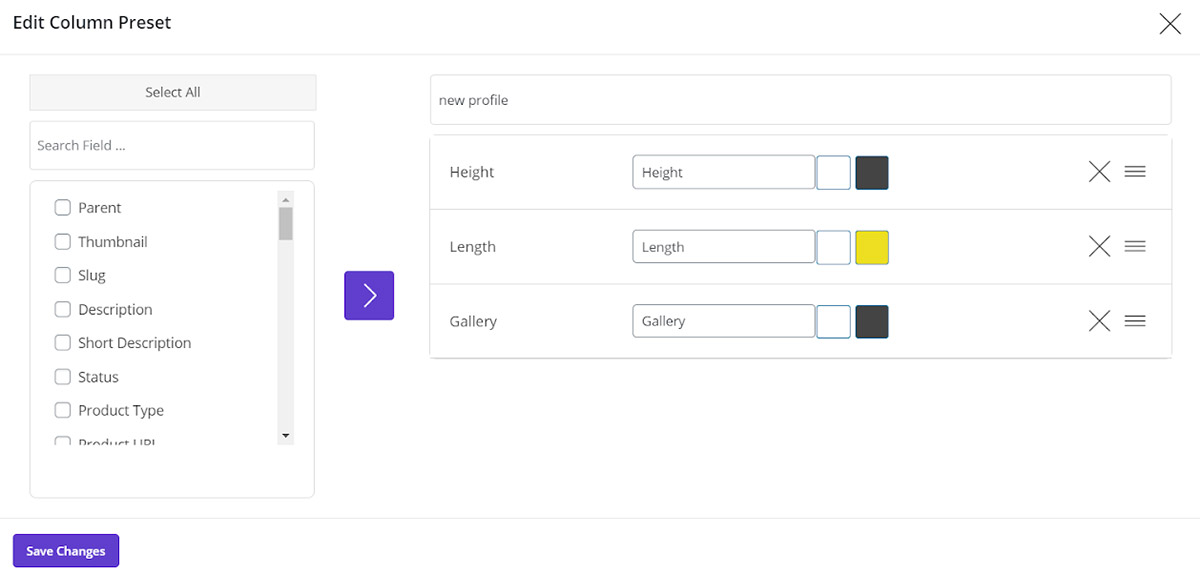
After editing, to save column changes, you have to click on “Save Changes”.
Final step of managing product table columns
We will completely describe how to choose this new column profile in the next tutorial. However, as we promised before, you can see that how our customization changes the appearance of product table in the main page:

As you can see in addition to the “ID’ and “Product Title” which are always displayed as the default columns in the product table, exactly 3 other columns with the specified order including height, length and gallery are displayed in the table.
The color of data in the Length column is yellow as we selected before. To manage product columns of your profiles you are also able to choose the “column Profile” option in the toolbar which we will discuss about it later.

Comments