


WordPress private post is an important feature to improve the WordPress site’s quality. Making posts private in WordPress can help you provide special conditions for special users. Unlike public posts, private posts can only be viewed by users with special permissions to log in to the site. As a result, Only certain logged-in users can navigate to the post and view what’s on it.
In this post, we will show you how to create a WordPress private blog post and let WordPress make all posts private with and without plugin.
What is a private post or page in WordPress?
The private post is a type of content in WordPress that cannot be displayed to the public so, only users who log in with valid permissions can view these posts among other blog posts. In fact, by making posts private, WordPress allows people with specific user roles to view or edit them in WordPress.
To better understand WordPress private blog posts, it is better to get familiar with the types of user roles in WordPress first:
- Administrator: The administrator role in WordPress is the site owner who has access to all options including add, edit, delete, and publish posts and pages. Admin has also other authorities like adding/removing users, installing themes and plugins, and editing settings in the WordPress dashboard.
- Editor: The editor role in WordPress has access to the posts and can add, edit, delete, or publish them in the blog. However, they are not able to install WordPress plugins or themes.
- Author: The author role in WordPress is one of the user roles that can modify, publish, and delete their own posts.
- Contributor. Contributors are only authorized to write and modify their own posts. However, they are not allowed to publish them.
- Subscriber: Subscriber roles are just allowed to view posts and manage their profiles after logging in.
Among the above-mentioned user roles, only the Administrator and Editor roles can see the private posts. Authors are not allowed to view or modify the private posts of other users. However, they can view, create, edit, and delete their own posts.
Other user roles can’t view or modify Private posts unless the Administrator changes the visibility of WordPress private posts to public.
Benefits of WordPress private posts
Private WordPress posts prevent all unauthorized users from viewing and modifying the content. The main advantage of publishing private posts is granting certain logged-in users to view, edit, or delete them.
If you are wondering what is the advantages of publishing WordPress private blog posts, continue reading to introduce some of them to you:
- Share tutorial content with granted users: This is one of the most common advantages of private WordPress blog post. If you are sharing a writing guide, customer support training instruction, or a specific tutorial for experts, and you don’t want to let public visitors see those content, you can grant access to specific users and allow them to view or edit the guide or tutorial posts in private.
- Inform stakeholders about specific products or services: If you are working with several stakeholders and you want to inform them about new products or services and receive their feedback, the private post or page is useful. In this way, unregistered users or guests cannot view the information. The admin can also grant access to one or more stakeholders to see the private post.
- Let editors customize the post before publishing it to the public: Sometimes you are publishing some posts that need to be reviewed and tweaked by Editors. The advantage of private blog WordPress posts is their visibility for Editors that admin grants them access. So, those editors can modify the content and make the necessary changes then publish them.
- For the private community: Another advantage of private posts is keeping content exclusive for specific forums and membership communities. If you are working with special people in an organization and you need to share exclusive content with them on the website, using WordPress private posts makes sense.
- Share personal information with friends or family: Sometimes you want to share personal information and content on your website just with your family and friends. WordPress private posts give you this opportunity to give friends or family permission to view or modify the content without concern about sharing your personal information with public users of your blog.
How to create a WordPress private blog post?
To make a private WordPress blog, you must first create a new post and then set its visibility to private. WordPress allows you to create WordPress private posts in both classic and Gutenberg editors. In the following, we will teach you how to create a WordPress private blog post in each editor.
Create a private WordPress blog in the classic editor
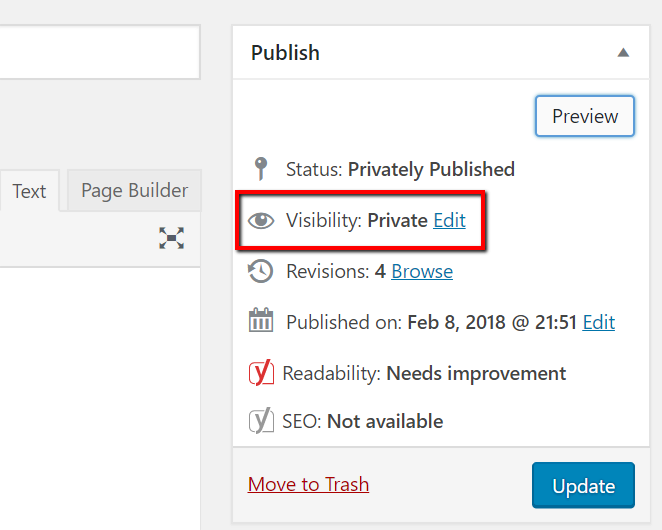
When creating a WordPress page or post in the WordPress classic editor, look over the “Visibility” area in the Publish meta box.
Click on the Edit button to see the Visibility options, including:
- Public,
- Password Protected,
- and Private.
Choose Private from the list and press Update to create a WordPress private blog post.
Create private WordPress blog post in the Gutenberg editor
If you have created a post in the Gutenberg editor, you just need to open the Post tab in the right panel. Then in the Summary section, click on the Visibility and choose Private from the list.
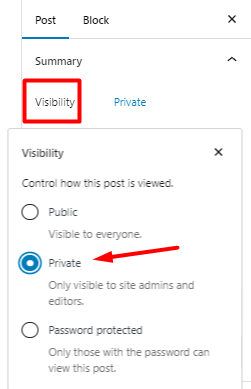
By pressing the Publish button, your post will be turned into a WordPress private blog post.
How to bulk edit all WordPress posts to private?
If you have already published some posts on your WordPress website and you want to let WordPress make all posts private, it is possible to use 2 methods for change all posts to private mode:
Continue reading to get familiar with both methods.
How does the default WordPress editor make all posts private without a plugin?
To use WordPress default editor for making all posts private, try to:
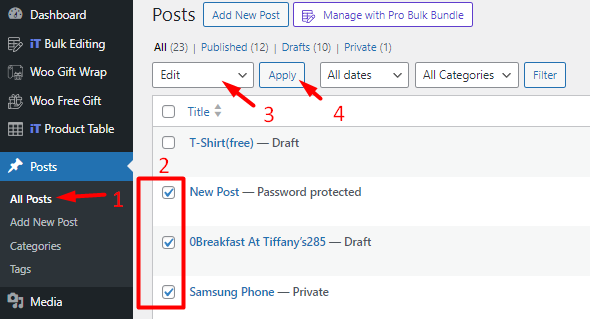
- Go to WordPress Dashboard > Posts > All posts.
- Mark desired posts in the table.
- Open Bulk Actions and choose Edit from the list.
- Press the Apply button.
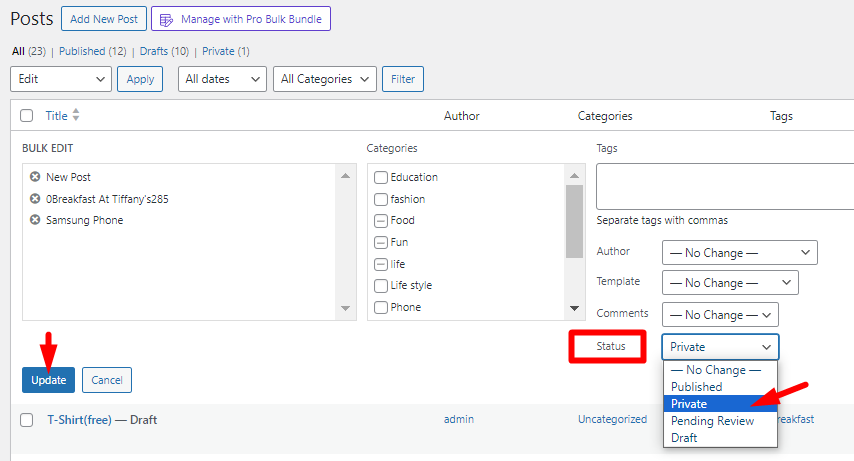
- In the Bulk Actions form, find the Status field and choose Private from the list.
- Press Update to make private WordPress blog posts.
As you may notice, on the All post page, you have access to some filtering options for finding the posts you want to change their visibility to private. The available filters on this page are:
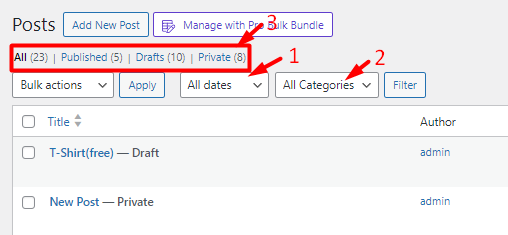
- Filter by date: You can choose one month to see the WordPress posts published in that month.
- Filter by category: You can choose one of the categories to filter the WordPress posts related to them in the table.
- Filter by status: You can click on one of the statuses like Published, Drafts, Private, etc. to see the related posts in the table.
Although bulk editing WordPress private blog posts with the default editor is simple and easy, the filtering options are not so flexible. That’s why we recommend you use a WordPress post private plugin that helps you quickly find your preferred posts and bulk edit private blogs in WordPress.
Let’s review a step-by-step guide to using the WordPress posts/pages bulk editing plugin for making all posts private.
How to set all WordPress posts to private with a plugin?
Making private WordPress blog in bulk with the WordPress posts/pages bulk edit plugin is quite easy. You can bulk edit any fields of WordPress posts including visibility, post date, author, password, title, description, etc. with few clicks. In addition to an advanced bulk edit form, you have access to a comprehensive filter form for finding your preferred posts.
In the following, we want to show you how to use the awesome features of this plugin for bulk editing WordPress private posts.
WPBULKiT – Bulk Edit WordPress Posts / Pages plugin by ithemeland
The easy way to bulk change all posts to private in WordPress

Step 1: Install WordPress post private plugin
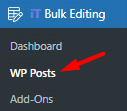
After installing and activating the WordPress posts bulk editing plugin, you must enter the iT Bulk Editing menu from the WordPress dashboard and select the Woo Posts.
If you need more information to install the plugin, read this guide.
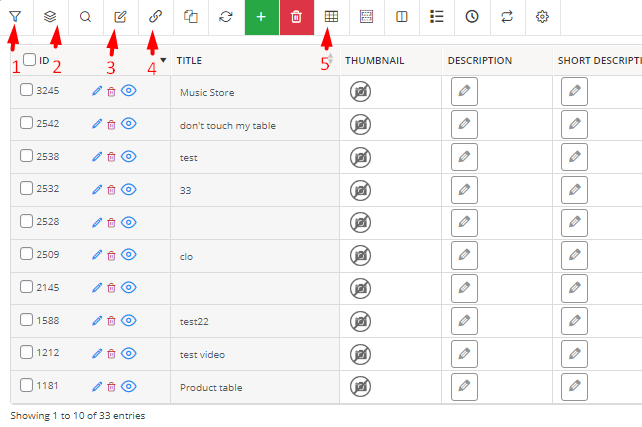
On the main page, you will see a toolbar on top of the posts table containing all the tools you need to bulk edit WordPress blog posts, including:
- Filter form
- Post type tool
- Bulk edit form
- Bind edit tool
- Column profile form
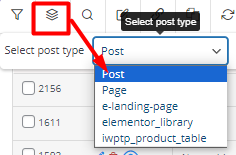
If you want to let WordPress make all posts private, first you need to click on the Post Type tool and choose Posts from the list. In this list, all custom posts, along with Post and Page options are displayed so you can switch to other options any time to see the related items in the table.
Now you are ready to use other tools for bulk editing WordPress private blog posts. Let’s see how.
Step 2: Filter WordPress posts
WordPress post private plugin comes with a great Filter Form supporting all WordPress fields such as Post ID, Post title, Post Content, Author, Date, Type, Visibility, Etc. You have access to flexible options for filtering WordPress posts before bulk editing their fields.
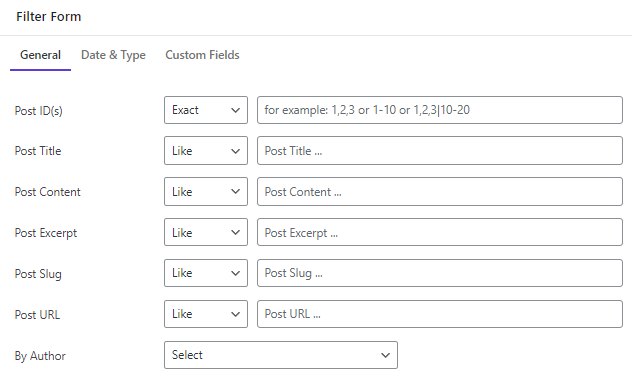
There is no limitation for adding multiple filters and finding the exact posts you need to bulk edit their features. So, feel free to set different items for filtering WordPress posts and listing them in the table. Now, you can proceed to the next step to make private WordPress blog in bulk.
Step 3: Make all posts private in WordPress
After filtering, you can use various methods in the WordPress posts bulk editing plugin to let WordPress make all posts private. Read the following to get familiar with them and recognize which one has the best result for you.
Bulk edit WordPress private posts
The first method we are introducing for making WordPress private posts is using the Bulk Edit form. To utilize this method, follow the below steps:
- Mark desired posts in the table.
- Press the Bulk Edit tool icon in the toolbar to open the bulk edit form.
- Go to the Date & Type tab in the Bulk edit form.
- Choose Private from the list of Post Status field.
- Press the Do Bulk Edit button.
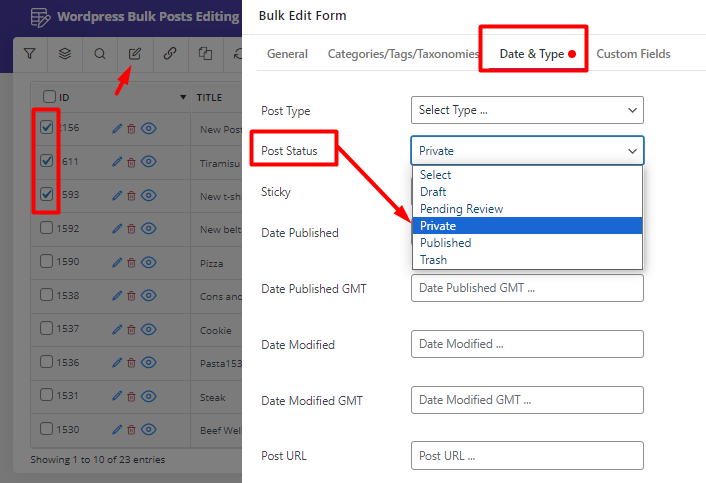
The plugin will automatically change the visibility of selected posts to private.

Bind edit WordPress private blog post
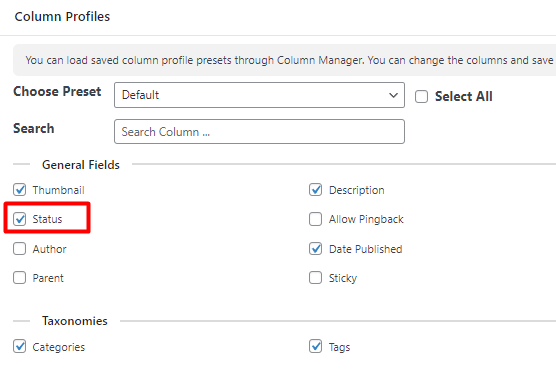
The second method is useful when you want to quickly make private WordPress blog post with one click. The Bind Edit tool allows you to make any changes directly in the table cells. So, to apply your desired changes, first, you need to open the Column Profile form and add the proper columns to the table.
In this tutorial, we aimed to make WordPress private blog post. So, we marked the Status column in the Column Profile form to see the Post status column in the table.
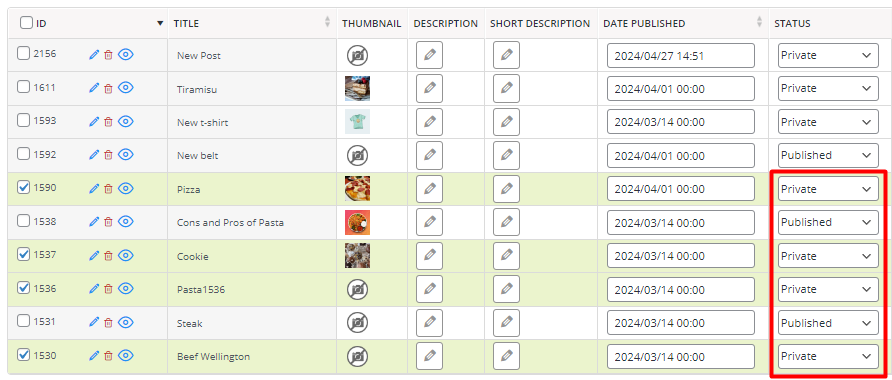
Now, by following the below instructions, we tried to make private blog WordPress posts in bulk:
- Mark desired posts in the table.
- Select the Bind Edit tool from the toolbar.
- Open the dropdown list of the Status column related to one of the selected posts.
- Choose Private and wait for the plugin to apply the same changes on all selected posts.
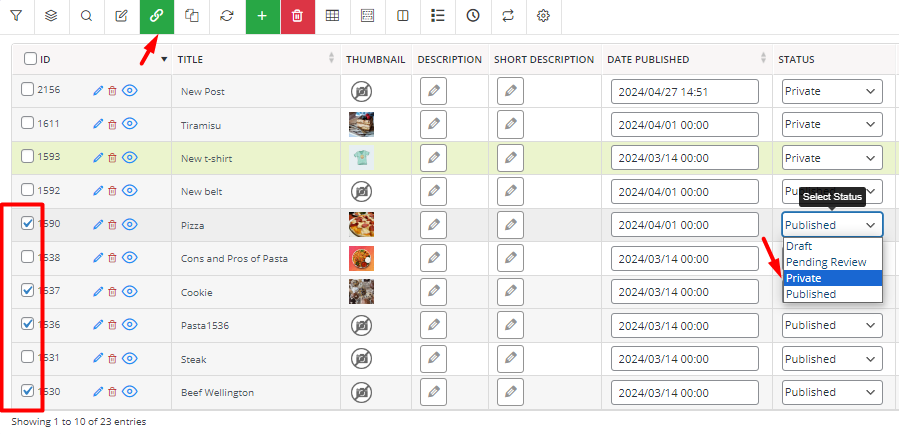
The result is exactly as we expected.
WPBULKiT – Bulk Edit WordPress Posts / Pages plugin by ithemeland
The easy way to bulk change all posts to private in WordPress
Conclusion
A private post in WordPress is visible only to certain users who have been given access by the admin. If, as a site administrator, you need to make part of the blog posts private, you can use the WordPress posts/pages bulk edit plugin and change the visibility of WordPress posts in bulk with the flexible methods we have described in this tutorial.


