


Managing a growing WooCommerce store often means adding dozens or even hundreds of new products at once. Manually creating products one by one is time-consuming, repetitive, and highly prone to errors. That is why many store owners search for the fastest way to perform a WooCommerce bulk product upload.
Whether you are launching a new collection, migrating from another platform, or expanding your inventory, bulk adding products can save hours of work. WooCommerce allows you to upload products using a CSV file, but many store managers find this method technical and frustrating when dealing with formatting rules and image URLs.
Fortunately, there are two practical ways to bulk add products in WooCommerce. You can either import a properly formatted CSV file using WooCommerce’s built-in importer, or you can use a professional bulk edit plugin that lets you create and manage multiple products directly inside a powerful table interface.
In this guide, you will learn both methods step by step, so you can choose the fastest and most efficient way to upload products to your WooCommerce store.
Benefits of WooCommerce bulk product upload
Bulk upload to WooCommerce is an efficient method for store managers to add multiple products simultaneously to their online shop. Saving time and resources, ensuring Accuracy, and preventing errors or inconsistencies in product descriptions, prices, or other details are some of the advantages of this practical method.
All in all, bulk product upload is a straightforward process, which is essential for the following reasons:
Efficiency
With WooCommerce bulk product upload you have better time management to add new products to your online store. Bulk uploading converts the time-consuming and tedious task of importing products, especially for businesses with a large inventory, to a fast and efficient duty which will result in saving time and energy.
Accuracy
Store managers can ensure data consistency and accuracy by uploading products to WooCommerce and editing their features in bulk. The simple process of bulk adding products facilitates the management and organization of your online store with high accuracy and productivity.
Scalability
As your businesses develop and grow, the number of products you need to upload will increase. The ability to bulk upload products in WooCommerce means store managers can quickly scale up their online shop without getting bogged down by the upload process.
Method #1: Bulk product upload in WooCommerce by importing a CSV file
If you have the list of your products ready in an Excel file prepared in the format accepted by WooCommerce, bulk add products to your online store in the fastest possible way. In this method, you don’t need to install any plugin, and you can add your products to the site with just a few clicks.
But the main problem is preparing the Excel file. To prepare this file, you have to insert the information of each product manually into the file, which is a very time-consuming task.
Another problem is entering the product data in the correct format, which must exactly match the WooCommerce default format. In this guide, we also share with you the solution to fix these problems.
Let’s see how, in 3 steps, you can bulk add products to WooCommerce by importing the right Excel format file.
Step 1: Export a default WooCommerce product format
If you have a complete list of products, it is better to first sort them in an Excel file for the sake of simplicity, this sorting will make it easy to insert all the products. But if you don’t have the WooCommerce product default format, don’t worry. You can simply export this default format from your WooCommerce site by following the below instructions:
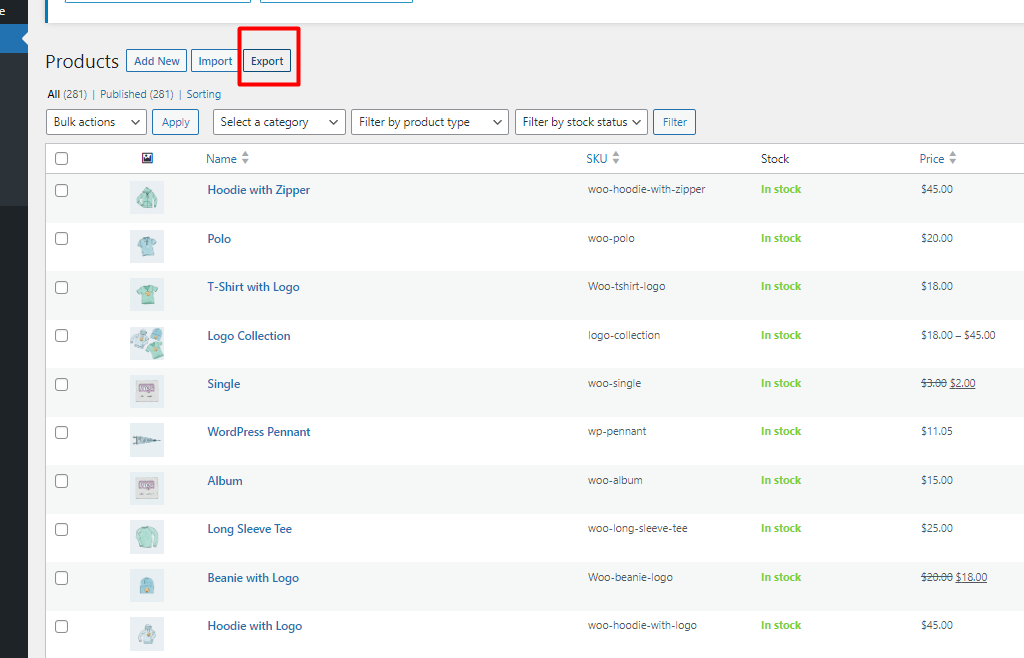
- In the WordPress dashboard, go to Products > All Products and press the Export button.
- In the new page, you have to set the below configurations:
- Which columns should be exported: You can choose all columns or mark as many columns as you need in the list.
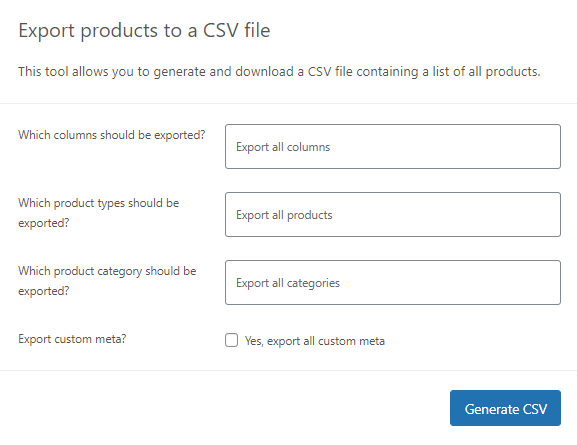
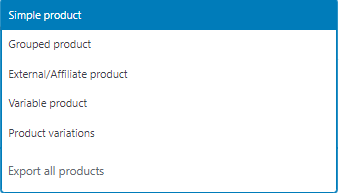
- Which product types should be expected: It is possible to export all types of products or choose one of them, like grouped, variable, external, etc. from the list.
- Which product category should be exported: In this field, you can choose all categories or one of them from the list to export the products related to it in the Excel file.
- Export custom meta: If you want to export custom fields as well, mark “Yes,… “
- Press Generate CSV to download the default format of the WooCommerce Excel file
Step 2: Preparing the Excel file of products
Now, you have the default Excel format – like below- for preparing your products list and bulk add products in WooCommerce.
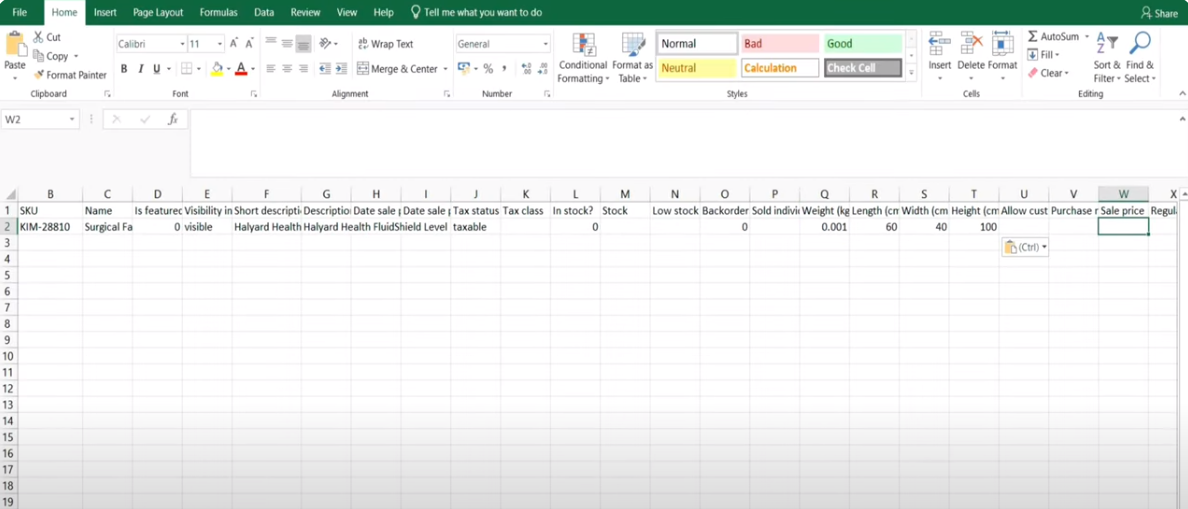
Let’s suppose that we want to insert information to the Excel file from the below picture:

The exported CSV file columns with the value which you can assign are as follows:
| Product field | Value in the Excel file | Our example |
| ID | ID number | |
| Type | Product types like simple, Variable, … | |
| SKU | SKU number | Kim-28810 |
| Name | Product name as text | Surgical … |
| Published | 0 or 1 | |
| Is featured? | 0 or 1 | 0 |
| Visibility in catalog | Visible or leave empty | Visible |
| Short description | Text | Halyard Heart … |
| Description | Text | Halyard Heart … |
| Date sale price starts | date format like 2023-08-12 | |
| Date sale price ends | date format like 2023-08-12 | |
| Tax status | Taxable or leave it empty | Taxable |
| Tax class | ||
| In stock? | 0, 1 | 0 |
| Stock | Stock quantity as number | |
| Low stock amount | number | |
| Backorders allowed? | 0, 1 | 0 |
| Sold individually? | 0, 1 | |
| Weight (kg) | number | 0.001 |
| Length (cm) | number | 60 |
| Width (cm) | number | 40 |
| Height (cm) | number | 100 |
| Allow customer reviews? | 0, 1 | |
| Purchase note | text | |
| Sale price | number | |
| Regular price | number | 16 |
| Categories | Text, use comma as a separator and > for subcategories | Medical> Mask, Medical |
| Tags | Text, use comma as a separator | |
| Shipping class | ||
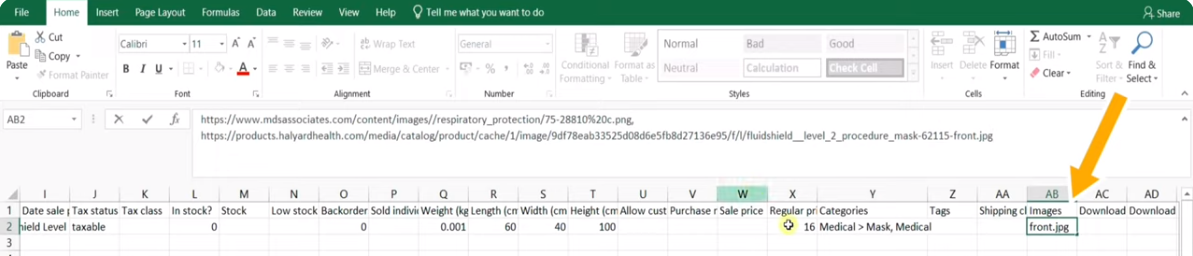
| Images | URL, use comma as a separator if there are more URLs for product gallery | As illustrated in the below picture |
| Download limit | number | |
| Download expiry days | number | |
| Parent | text | |
| Grouped products | text | |
| Upsells | text | |
| Cross-sells | text | |
| External URL | URL | |
| Button text | text | |
| Position | ||
| Download | ||
| Attributes | Text, taxonomy term hierarchy is denoted with > while terms are separated with commas |
Important points to consider when preparing the Excel file:
- Sort products by ID. For example, for 100 products, put IDs from 1001 to 1100. With this, creating URLs and image IDs for importing to the Excel file is easier.
- The information such as name, title, short description, description, and price must be inserted exactly as a text or number.
- All site images must be named according to the ID number of products. (For example, for the product with the ID 1001, set the name of the featured image as 1001 and the gallery images as 1_1001 and 2_1001) and then enter all of them into the WordPress media (WordPress menu > Media > Add New). Now, you can copy the URL of one of the products and then replace the ID of the images and place it in the Excel file under the image column.
- For true or false values, use 1 or 0 (respectively).
- Separate multiple values with commas.
- Denote hierarchy with >.
- Save the CSV file in UTF-8 format.
Step 3: Import CSV file to bulk upload products to WooCommerce
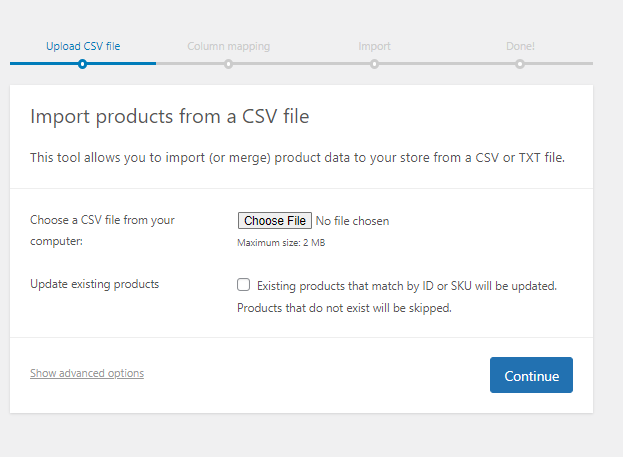
When the CSV file has been prepared, you can go to the All Product page and press the Import button.
Now, to bulk add products in WooCommerce using the product file, proceed with the following:
- Press the Choose file button and upload the Excel file from your system.
- If you want to update some data in the products that you have already added to WooCommerce, mark Update existing products.
- Press the Continue button.
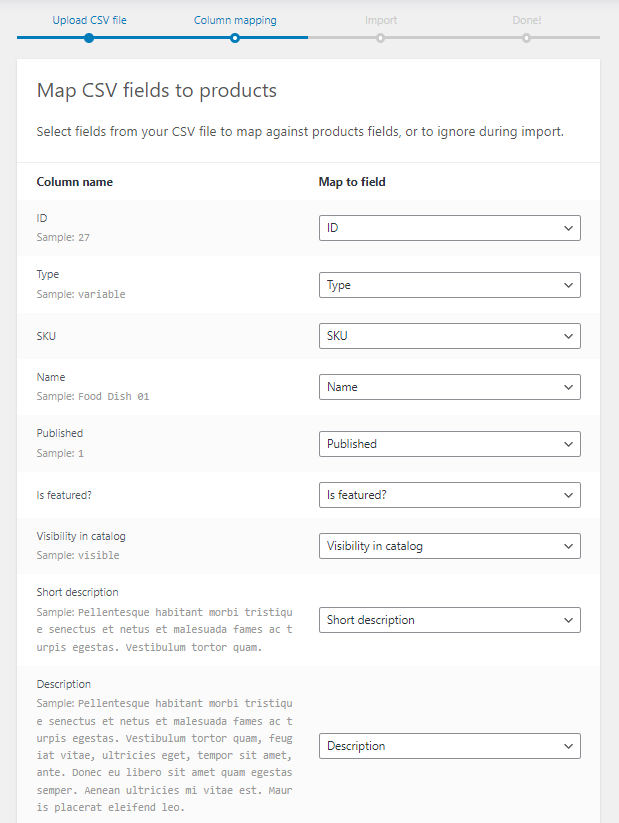
- On the next page, you can match the columns of the CSV file with the WooCommerce field. To do this, you need to open the dropdown list in front of each field and choose one of the CSV columns. If you have edited the default format of WooCommerce exported from your website, you can ignore this step.
- Press the Run the importer button.
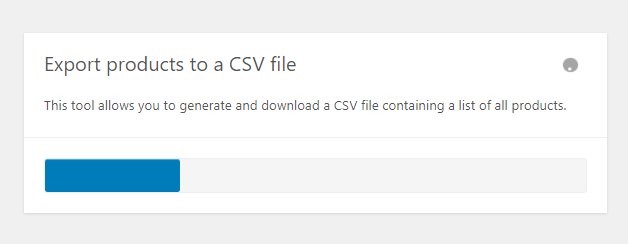
- Wait some minutes to let the plugin import data from your file.
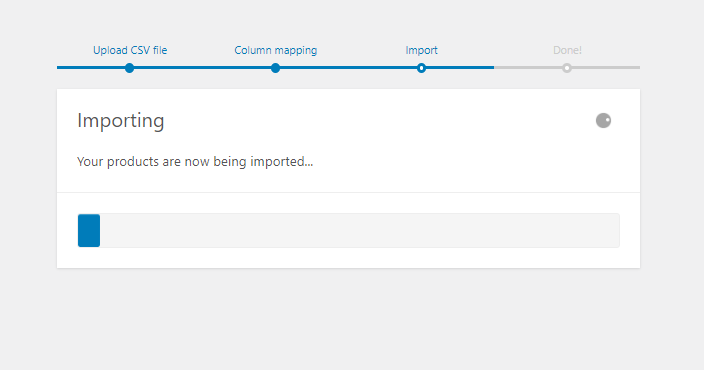
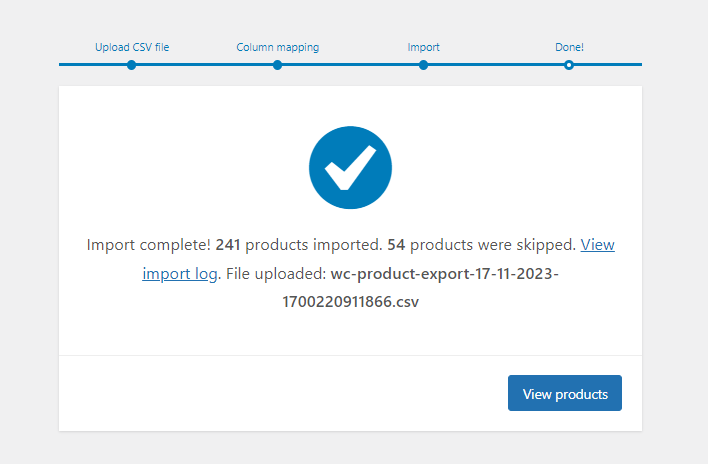
- In the end, when you see a message like below, you can make sure that you have bulk add products to WooCommerce , successfully.
Step 4: Check the result of upload products to WooCommerce
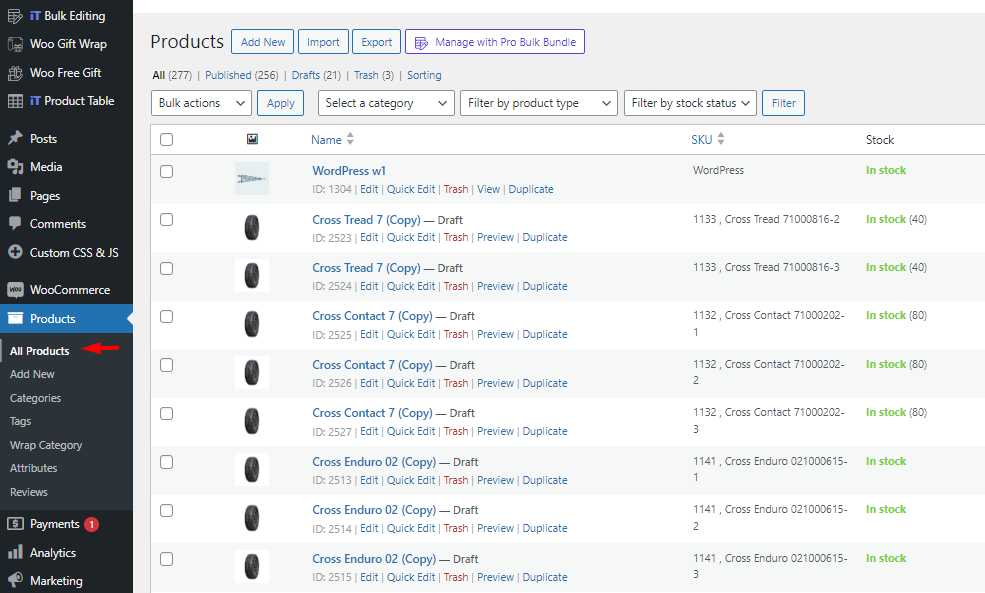
To ensure that all products have been uploaded to your website, go to the all product page:
WordPress Dashboard > WooCommerce > All products
On this page, you can see a list of all products in your WooCommerce store. The new products that bulk upload to WooCommerce are also displayed in the table and you can check them to be uploaded correctly.
Although bulk add products to WooCommerce by getting help from this complete guide is successfully possible, it is really time-consuming and frustrating. Store managers usually don’t have enough time to edit the data of Excel files manually, especially when they need to import a lot of products quickly into their stores.
If you are in the same situation and looking for a quick and easy solution, let’s introduce the WooCommerce products bulk edit pro plugin, which is a handy tool for bulk adding products in WooCommerce efficiently.
Method #2: Bulk upload products in WooCommerce by WooCommerce products bulk edit pro plugin
The WooCommerce products bulk edit plugin is a useful and practical tool for managing WooCommerce products that you can easily work with their options without any need to write codes or use Excel files.
By getting help from this plugin, bulk editing any WooCommerce field, like categories, prices, images, etc., is quickly possible. In this plugin, all products of your website are displayed in a table where you can make changes to each of them individually or in bulk. This plugin supports 40+ WooCommerce product fields and all custom fields for filtering and bulk editing. In addition to bulk editing, you can bulk add products in WooCommerce with just one click.
In the following, we review the simple steps of quick add multiple products with this plugin:
Step 1: Download and install the plugin
The first step to using WooCommerce products bulk edit is to download and install it on your WordPress website.
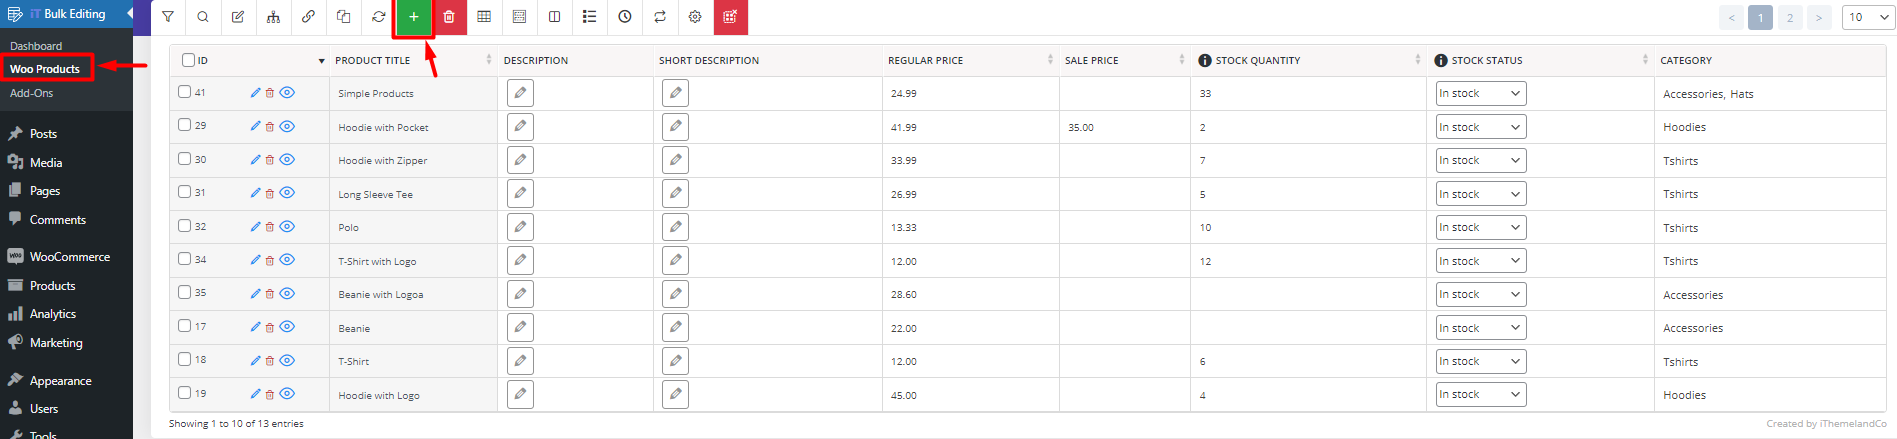
After activating the plugin, go to the WordPress dashboard and navigate to the below address:
IT bulk editing > Woo Products
Here, you can find a list of all products in a table with all the necessary tools you need to manage your products in a toolbar above the table.
PBULKiT – Bulk Edit WooCommerce Products
The easy way to quickly add multiple products to WooCommerce stores

Step 2: Bulk add new products to WooCommerce
To quick add multiple products, click on the + button of the toolbar.
Now, you can see a pop-up asking you to insert the number of new products you want to add to your online store.
You can type any number in this box, or use the Up and Down arrows on the right corner to increase/decrease the number.
For example, we wrote 20 in the box to bulk add 20 new products in WooCommerce.
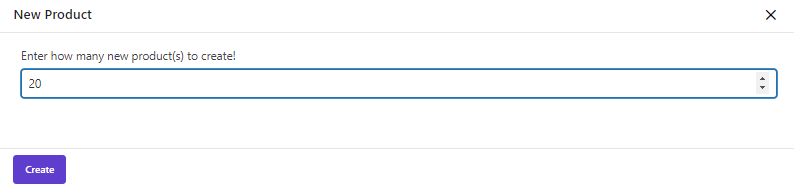
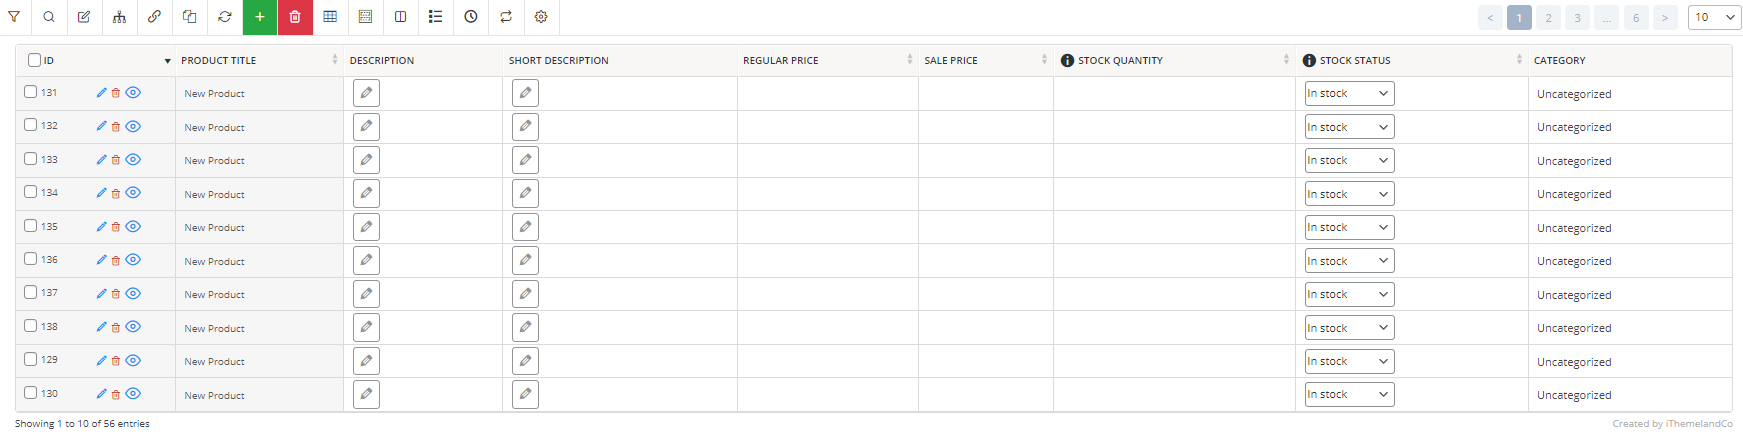
As soon as pressing the Create button, 20 new products are added to WooCommerce with empty fields. So, in the next step, you need to use one of the editing methods to assign data to the WooCommerce fields of these products.
Step 3: Edit new product fields
One of the amazing features of the WooCommerce products bulk edit plugin is displaying all products in an editable table. So, when you bulk add new products in WooCommerce, all of them are listed in the table, and you have access to different tools to edit their data directly in the table or by using a comprehensive bulk edit form.
Let’s review these tools briefly.
First method: Inline edit newly added product fields
The easiest method for editing the product fields directly in the table is Inline Edit. Let’s make some examples to see how inline editing works in our plugin.
Example 1: Inline edit WooCommerce product name
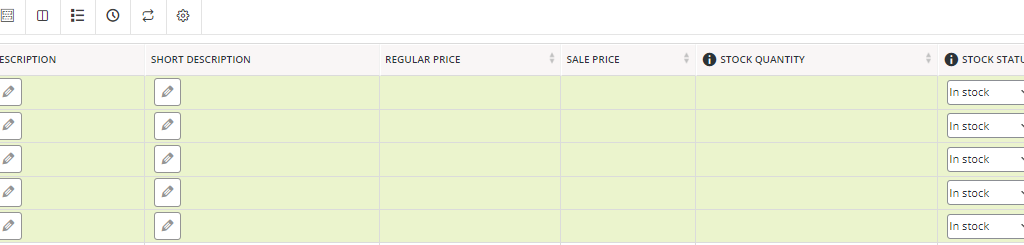
Suppose that the list of your products is like below, and you want to change the name of the first new product to Food Dish.

To do this, follow the below steps:
- Open the Column Profile form and mark Product Title to add this column to the table.
- Find the product you want to change its name in the table.
- Click on the related cell in the table.
- Type Food Dish.
- Press Enter on the Keyboard.
That’s it. You easily changed the product title in the table.
Example 2: Inline edit WooCommerce product description
In this example, we want to insert the below description to the table for one of the new products.

As we mentioned before, first, we need to add the product description column to the table by using the Column Profile form.
Then, we can easily copy the description by CTRL + C.
Then, click on the Description Cell of the targeted product in the table to see the below pop-up page.

Now, by pressing CTRL + V, we can paste the copied description in the text area.
By pressing the Apply Changes, the description is assigned to the given product as we expected.
Method2: Bulk edit multi product fields
The bulk edit method is useful when there is some similar data to be added to multiple products at once.
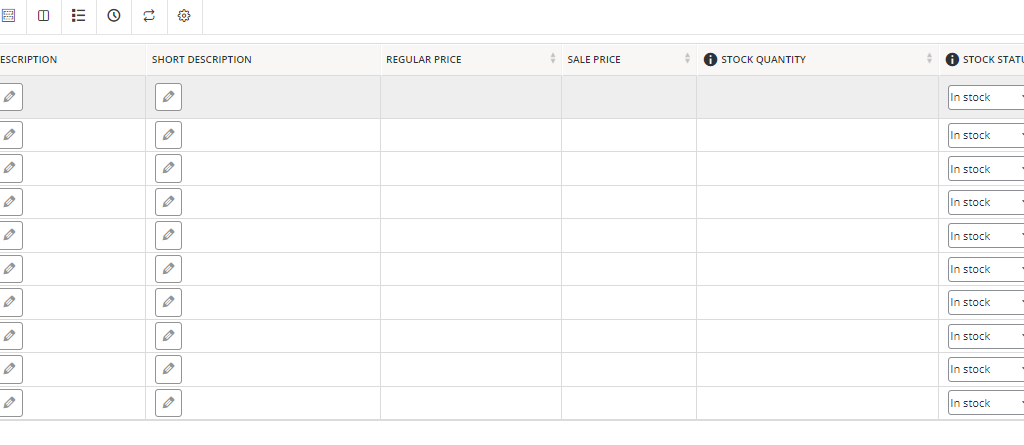
To bulk edit WooCommerce products, you can follow the below instructions:
- Mark some of the products in the table.
- Press the Bulk edit icon on the Toolbar.
- Find the field you want to edit in the Bulk Edit form.
- Make your desired changes and press the Do Bulk Edit button.
Now let’s make some examples to see how you can bulk edit the data of newly added products very quickly.
Example 1: Bulk edit multi product category
Let’s suppose that you want to add some of the newly added products in the Accessories category.

As we mentioned before, you need to select some products and then open the bulk edit form, now:
- Go to the Categories/Tax/Taxonomies tab.
- Find the Product Categories field. Choose Append in the Operator field then choose Accessories from the categories list.
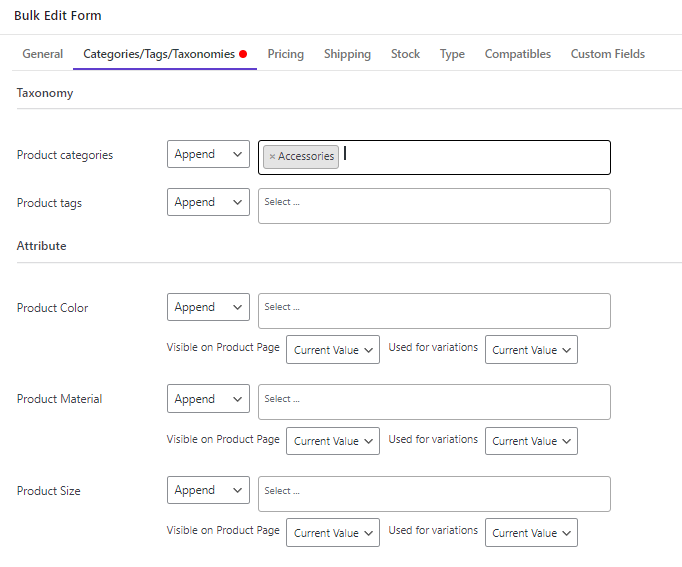
- Press the Do Bulk button.
As you can see in the below picture, the Accessories category is appended to the selected products.
What are the advantages of bulk product upload in WooCommerce with plugins over Export/Import?
The main advantage of bulk add products by WooCommerce products bulk editing plugin is uploading many products at once with no need to create a CSV file from scratch. Without using this plugin, you have to export a CSV file from WooCommerce to have an initial format for preparing a new CSV file based on the products you want to add to your store. The process is really time-consuming and frustrating. Additionally, you can make many mistakes when trying to add data to the CSV file.
The WooCommerce bulk product upload option in the WooCommerce bulk edit products plugin is a great solution for eliminating these problems. In addition to simplifying the process of bulk adding products to WooCommerce, you have access to an advanced bulk edit form enabling you to mass edit the features of products uploaded to your website with one click.
The other advantages that make product handling so convenient for store managers with this plugin are:
Time Efficiency
Manually adding products and editing their features one by one is highly tedious. By automating the process of bulk product upload in WooCommerce and bulk editing the products, this plugin helps you save endless hours and spend your time efficiently on other essential duties that include strategic planning, customer service, and marketing.
Accuracy and Consistency
Any inconsistencies or mistakes in importing product details can damage your customer trust and turn away potential clients. Bulk uploading products in WooCommerce with this plugin helps you to prevent errors and keep your product listings accurate and consistent.
PBULKiT – Bulk Edit WooCommerce Products
The easy way to quickly add multiple products to WooCommerce stores
Conclusion
Bulk uploading products in WooCommerce is essential for any store that plans to grow efficiently. While the default CSV import feature works well for structured data migration, it requires careful formatting and manual preparation, which can be time-consuming and error-prone.
Using a bulk edit plugin like PBULKiT, offers a faster and more flexible solution. Instead of preparing CSV files and dealing with column mapping, you can instantly create multiple products and edit all product fields directly inside an editable table. This approach significantly reduces human error and improves productivity.
If you regularly need to add or update multiple products at once, choosing the right bulk upload method can save you hours of work and help you scale your WooCommerce store more effectively.
FAQ
What is WooCommerce bulk product upload?
WooCommerce bulk product upload is the process of adding multiple products to a WooCommerce store at the same time instead of creating them individually. This can be done using the built-in CSV import tool or by using a bulk edit plugin that allows creating and editing products in batches.
How do I bulk add products in WooCommerce?
You can bulk add products in WooCommerce by preparing a CSV file in the correct format and importing it through the Products section in your dashboard. Alternatively, you can use a WooCommerce bulk edit plugin like PBULKiT, that allows you to create multiple products instantly and manage their fields directly in a table view.
Can I upload products to WooCommerce without using a CSV file?
Yes, you can upload products without a CSV file by using a PBULKiT plugin. This plugin allows you to quickly generate multiple empty products and then assign data to them using inline editing or advanced bulk editing tools.
Why is bulk upload important for WooCommerce stores?
Bulk upload helps store owners save time, maintain data consistency, and scale their inventory efficiently. Instead of manually creating products one by one, store managers can quickly import or generate multiple products and focus on marketing and growth.
Is CSV import better than using a plugin for bulk upload?
CSV import is useful for migrating data from other platforms or structured databases, but it requires strict formatting and preparation. PBULKiT plugin is generally faster and more user-friendly for ongoing product management and frequent updates.


