Want to take full control of your WooCommerce store’s payments? Whether you need to integrate a local payment provider, a custom solution, or a third-party service not supported by default, add custom payment gateway to WooCommerce is the way to go!
In this guide, we’ll show you two powerful methods to add a custom payment gateway:
- Add custom payment gateway by coding (for developers who want full customization)
- Add custom payment gateway using a third-party plugin (for a faster, no-code solution)
By the end, you’ll be able to process payments your way, improving flexibility and customer experience. Let’s dive in!
Why Add a Custom Payment Gateway in WooCommerce?
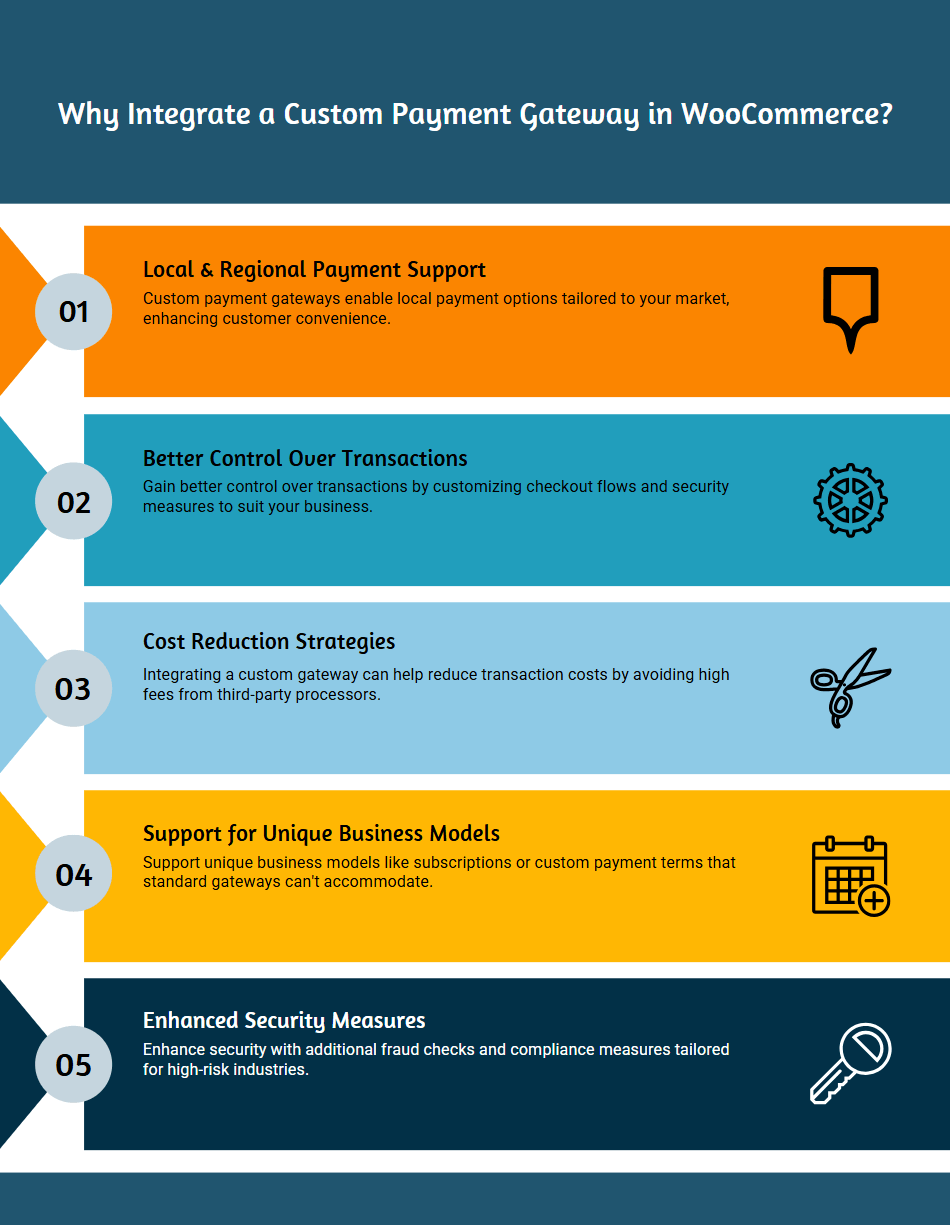
WooCommerce supports popular payment methods like PayPal and Stripe, but sometimes you need more flexibility. Here’s why a custom gateway can be essential:
- Local & Regional Payment Support: Add banks, digital wallets, or cash-on-delivery options specific to your market.
- Better Control: Customize the checkout flow, fees, or security measures to fit your business needs.
- Reduce Costs: Avoid high transaction fees from third-party processors by integrating directly with a payment provider.
- Unique Business Models: Support subscriptions, deposits, or custom payment terms not available in standard gateways.
- Enhanced Security: Implement extra fraud checks or compliance steps for high-risk industries.
Whether you’re a developer coding a solution or using a plugin, add custom payment gateway to WooCommerce helps boost conversions and streamline payments, tailored exactly for your store.
Method 1: Add Custom Payment Gateway with Code
Adding a custom payment gateway via code gives you full control over functionality, security, and integration. This method is ideal for developers who want a tailored solution without relying on third-party plugins.
Before adding a custom payment gateway to WooCommerce by coding, take these essential precautions to avoid breaking your site, losing data, or disrupting live transactions.
- Backup Your Site: Prevent data loss if something goes wrong.
- Use a Staging Site: Test safely without affecting live customers.
- Use a Child Theme: Avoid losing code on theme updates.
- Test Thoroughly: Check payments, refunds, and errors before launch.
By considering these points, you can follow the steps below to add a custom payment gateway to WooCommerce by coding:
Step 1: Create a Custom Gateway Class
In WooCommerce, payment gateways are implemented as PHP classes that extend the base WC_Payment_Gateway class. This class handles all gateway-related logic, including settings, payment processing, and validation.
To create the class in WooCommerce, you need to:
- Create a new PHP file in your theme’s /wp-content/themes/your-theme/WooCommerce/ directory or use a custom plugin like the code snippet.
- Define your class by extending WC_Payment_Gateway:
if (!defined('ABSPATH')) exit; // Exit if accessed directly
class WC_Custom_Payment_Gateway extends WC_Payment_Gateway {
    // Gateway logic goes here
}- Initialize properties in the constructor (ID, title, description, etc.).
Creating a WooCommerce class helps you to establish the foundation of your payment gateway and ensure WooCommerce recognizes it as a valid payment method.
Step 2: Define Core Methods (init_form_fields, process_payment, etc.)
A WooCommerce payment gateway requires several essential methods to function properly, including:
A. init_form_fields() – Configure Gateway Settings
This method defines the admin settings that appear in WooCommerce > Payments.
Example:
public function init_form_fields() {
    $this->form_fields = array(
        'enabled' => array(
            'title'   => 'Enable/Disable',
            'type'    => 'checkbox',
            'label'   => 'Enable Custom Payment',
            'default' => 'yes'
        ),
        'title' => array(
            'title'       => 'Title',
            'type'        => 'text',
            'description' => 'Payment method title (shown at checkout).',
            'default'     => 'Custom Payment',
        ),
    );
}
By adding this code, merchants can configure the gateway (e.g., enable/disable, set title, fees, etc.).
B. process_payment($order_id) – Handle Payment Processing
This is the most critical method, where you define what happens when a customer places an order.
Example:
public function process_payment($order_id) {
    $order = wc_get_order($order_id);
    // Mark as "on-hold" (or "processing" if payment is complete)
    $order->update_status('on-hold', __('Awaiting payment confirmation', 'WooCommerce'));
    // Reduce stock levels
    wc_reduce_stock_levels($order_id);
    // Empty cart
    WC()->cart->empty_cart();
    // Redirect to "Thank You" page
    return array(
        'result'   => 'success',
        'redirect' => $this->get_return_url($order)
    );
}
Add custom payment gateway WooCommerce by this code updates the order status (e.g., “processing,” “on-hold,” or “completed”), clears the cart after successful payment, and redirects the customer to the order confirmation page.
Other Useful Methods:
- Payment_fields() – Customize the checkout page HTML (e.g., show extra fields for bank transfers).
- Validate_fields() – Add custom validation before processing payment.
- Check_response() – Handle API callbacks (if using an external payment processor).
Step 3: Add the Gateway to WooCommerce
After defining your class, you need to register it with WooCommerce by following the steps below:
- Use the WooCommerce_payment_gateways filter to add your gateway.
add_filter('WooCommerce_payment_gateways', 'add_custom_gateway');
function add_custom_gateway($gateways) {
    $gateways[] = 'WC_Custom_Payment_Gateway';
    return $gateways;
}- Test the Gateway to ensure it appears in WooCommerce > Settings > Payments and works at checkout.
If you have done all these steps successfully, you can make your gateway visible in WooCommerce’s payment options and ensure seamless integration with the checkout process.
However, suppose you have no experience in writing code. In that case, you should follow the instructions in the second method and get help from a third-party plugin to add a custom payment gateway to WooCommerce.
Method 2: Use a Third-party Plugin to add a Custom Payment Gateway to WooCommerce
If coding isn’t your preference, specialized plugins offer a faster, no-code solution to integrate custom payment gateways in WooCommerce. Below is a detailed breakdown of the best plugins to add a custom payment gateway to WooCommerce.
Top Plugins to add custom payment gateway to WooCommerce
Instead of building a gateway from scratch, you can use powerful plugins to integrate custom payment methods without coding. These tools help you:
- Accept regional payment options (bank transfers, mobile money, etc.)
- Set up subscriptions, deposits, or partial payments
- Reduce transaction fees with direct processor integrations
- Stay PCI-compliant while handling sensitive data
In the following, we’ll explore the best WooCommerce plugins to add custom payment gateway to WooCommerce.
WooCommerce Payments (by Automattic)
As the official payment solution developed by WooCommerce itself, the WooCommerce payment plugin provides a seamless and secure way to accept payments on your store. Designed specifically for WooCommerce users, it eliminates the need for third-party integrations while offering robust features and compliance.
Best for: Credit/Debit Cards, Local Payment Methods.
Key Features:
- Built by WooCommerce (official, secure)
- Supports Apple Pay, Google Pay, SEPA, iDEAL, and more
- PCI-compliant with fraud protection
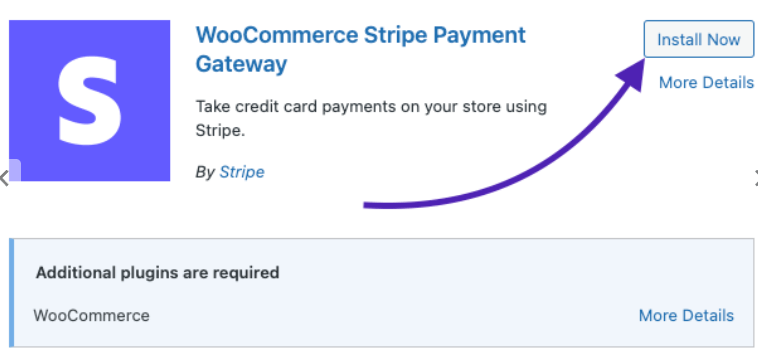
Stripe for WooCommerce

The WooCommerce Stripe payment plugin brings enterprise-grade payment processing to online stores of all sizes, with support for the latest payment technologies and global currencies.
Best for: Global Payments (Cards, Wallets, BNPL)
Key Features:
- Supports 135+ currencies
- One-click subscriptions & saved cards
- Strong fraud detection (Radar)
Authorize.Net Gateway
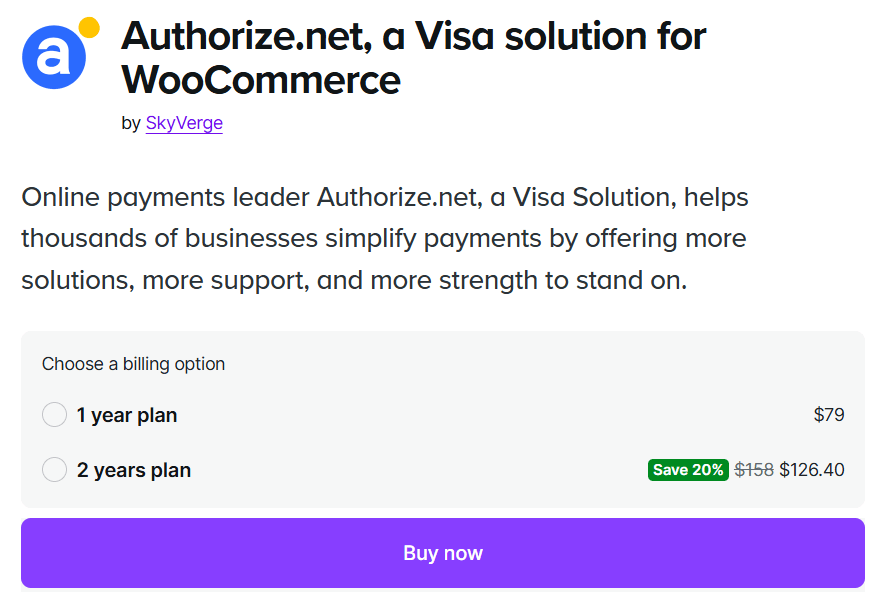
A trusted payment solution for U.S. businesses, Authorize.Net gateway plugin offers reliable transaction processing with advanced security features tailored for various industries.
Best for: US Businesses (ACH, eChecks, Cards)
Key Features:
- Reliable for high-risk industries.
- Recurring billing support.
- Advanced Fraud Detection Suite (AFDS).
WooPayments: Integrated WooCommerce Payments
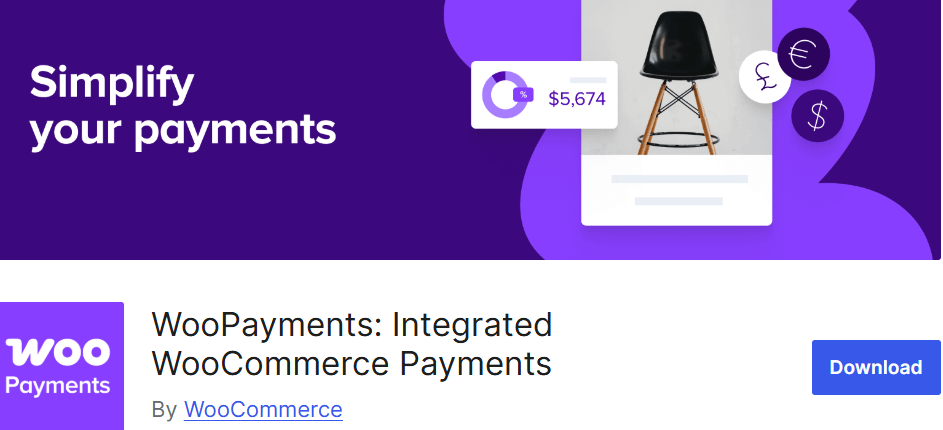
The WooPayments plugin enables store owners to add custom payment gateway to WooCommerce without writing a single line of code, perfect for unique business requirements.
Best for: Custom Gateways (Debit cards, allow customers to pay directly without leaving the WooCommerce store)
Key Features:
- No-code setup
- Accept major credit and debit cards
- See payments and track cash flow into your bank account
How to configure plugins to add custom payment gateway to WooCommerce effectively?
The configuration settings to add custom payment gateway to WooCommerce mostly depend on the plugin you have chosen. Meanwhile, the general steps that you need to follow are the same.
Let’s review them briefly:
Step 1: Install & Activate the Plugin
To begin, navigate to your WordPress dashboard and select Plugins > Add New. In the search bar, type the name of your chosen payment gateway plugin (like “Stripe for WooCommerce”).
Once located, click Install Now and then Activate to enable the plugin on your site.

This process integrates the payment solution with your WooCommerce store, making it available for configuration.
Some plugins may require additional setup wizards or prompts after activation – follow these if they appear, as they often help streamline the connection process with your payment processor.
Step 2: Connect Your Payment Processor
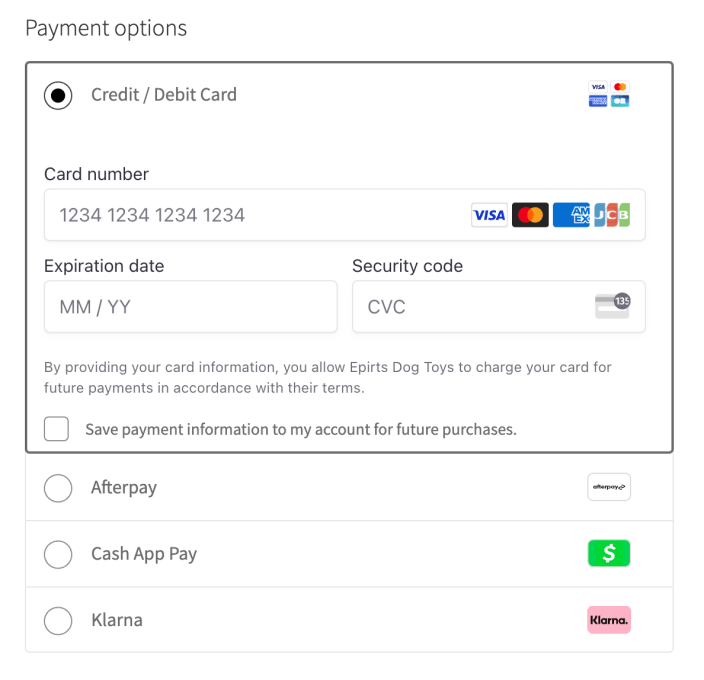
After activation, go to WooCommerce > Settings > Payments in your WordPress admin panel. Here you’ll see a list of available payment methods – locate your newly installed gateway and click the Setup or Manage button.
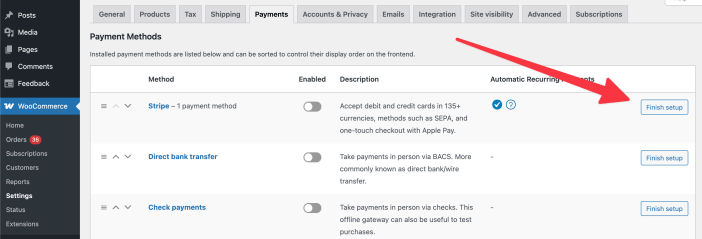
The most crucial step is entering your API keys (typically found in your payment processor’s dashboard, like Stripe or PayPal). These keys authenticate the connection between your store and the payment provider.
Some gateways may also require additional details like merchant IDs or secret keys to add a custom payment gateway to WooCommerce.
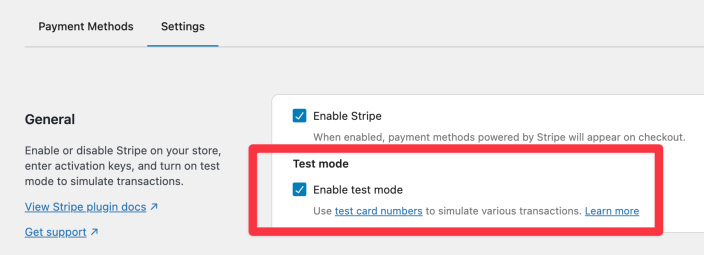
Be sure to select the correct payment environment (test/sandbox mode for initial setup, production/live mode when ready to go live).
Step 3: Customize Checkout Settings
Within the gateway’s settings page, you can personalize how the payment method appears to customers.
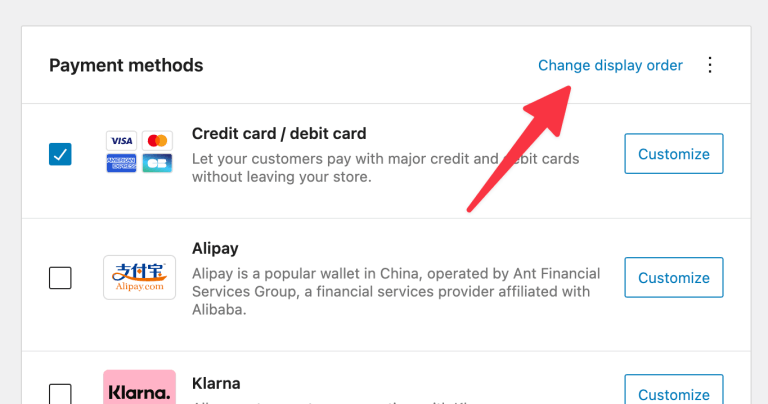
Set a clear Title (e.g., “Credit Card Payment”) and Description that explains the option (e.g., “Pay securely with your Visa, Mastercard, or AMEX”).
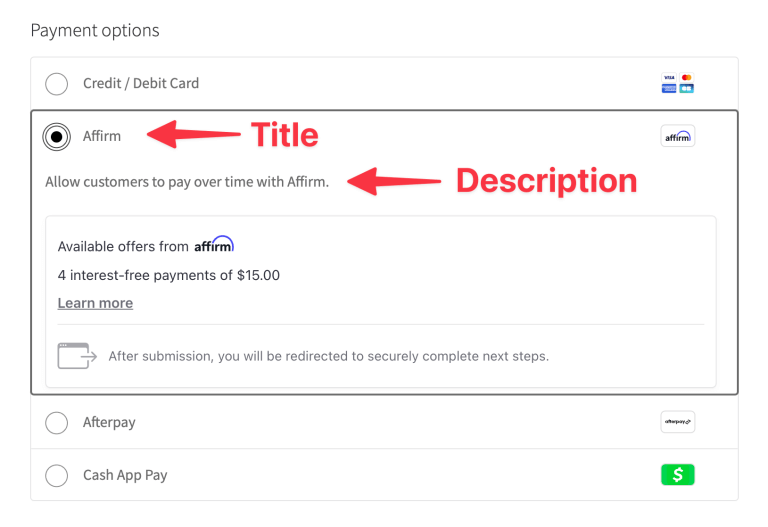
Most importantly, enable Test Mode at this stage to avoid processing real transactions during setup.
If your business model requires it, configure additional options to add custom payment gateway to WooCommerce, like:
- Payment fees,
- Accepted card types,
- Or country-specific restrictions.
These settings ensure the payment method aligns perfectly with your store’s checkout flow and business requirements.
Step 4: Test Transactions after adding new payment gateway
Before going live, thoroughly test the payment process by placing test orders while in sandbox mode. Use test credit card numbers (provided by your payment processor) to simulate successful payments, declines, and refunds.
Verify that:
- Orders receive the correct status (Processing/Completed),
- Customers receive payment confirmation emails,
- And the system properly handles failed transactions.
This step is crucial for identifying any configuration issues that might prevent real customers from completing purchases. For subscription-based products, test recurring billing cycles to ensure they process correctly.
Step 5: Go Live & Monitor
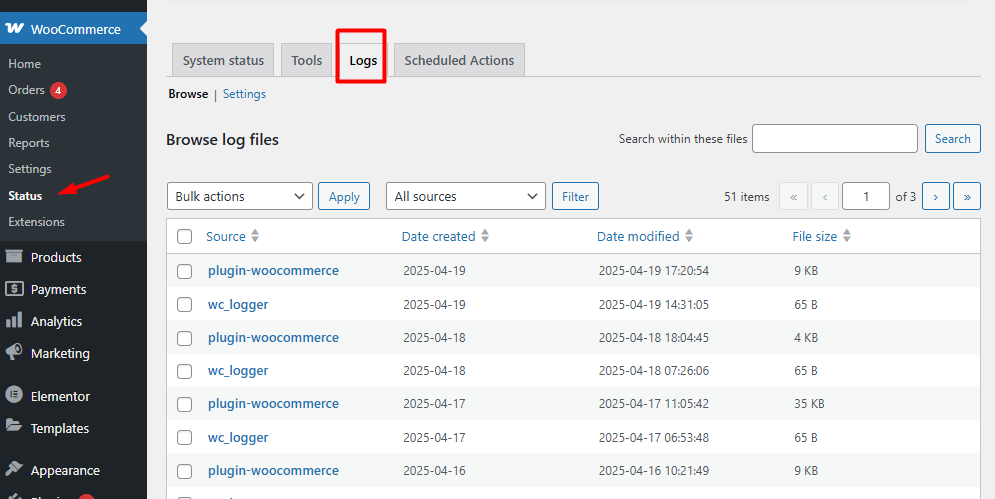
Once testing is complete, return to the payment gateway settings and disable test mode to start accepting real payments. It’s wise to initially monitor all transactions closely by:
- Checking WooCommerce > Status > Logs for errors,
- Reviewing your payment processor’s dashboard for discrepancies,
- And enabling any available fraud protection filters.
Set up transaction alerts if available, and be prepared to troubleshoot any issues that arise during the initial live period.
Regular monitoring ensures your payment gateway continues operating smoothly as your store grows and processes more orders.
Security Best Practices for Custom Gateways
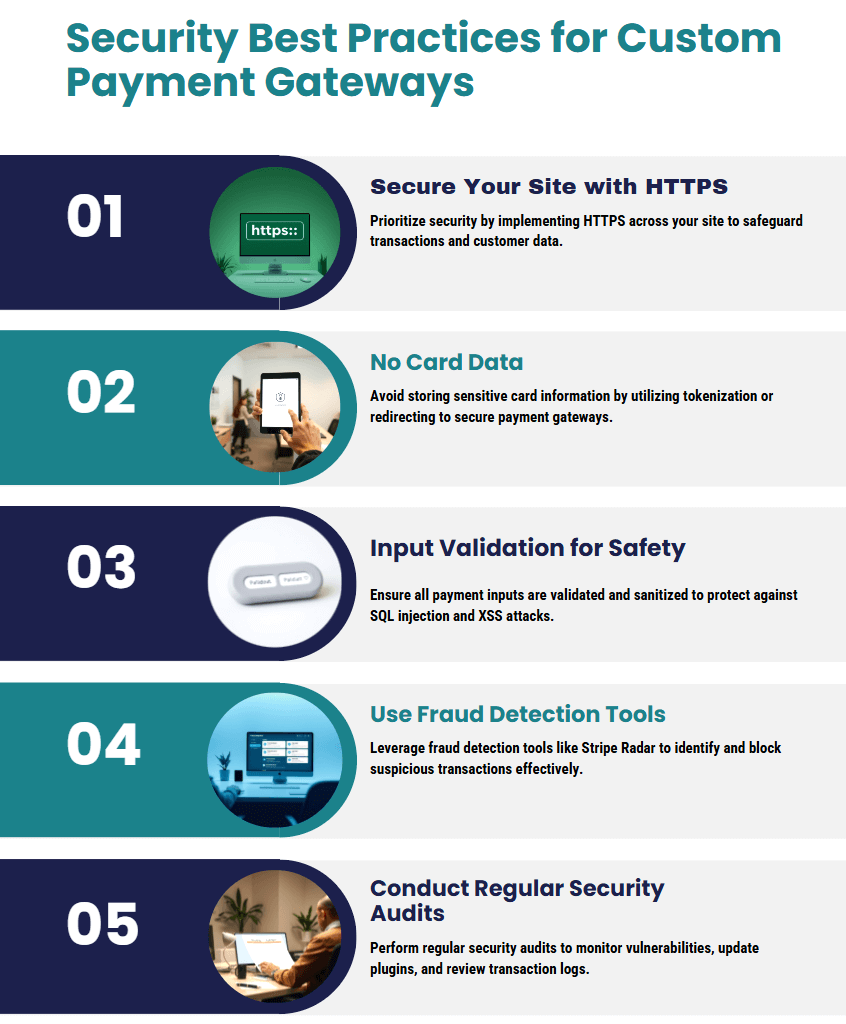
When adding a custom payment gateway in WooCommerce, security should be your top priority to protect customer data and prevent fraud. Here are the key best practices:
- Use HTTPS & SSL: Ensure your entire site runs on SSL encryption to secure transactions.
- Never Store Raw Card Data: Avoid PCI compliance risks by using tokenization (Stripe, PayPal) or redirecting to secure payment pages.
- Validate & Sanitize Inputs: Prevent SQL injection and XSS attacks by filtering all payment form inputs.
- Enable Fraud Detection: Use built-in tools like Stripe Radar or Authorize.Net AFDS to block suspicious transactions.
- Regular Security Audits: Monitor logs, update plugins, and test for vulnerabilities.
How to track sales by payment gateway?
Tracking sales by payment gateway is essential for optimizing your store’s checkout performance and improving business decisions. By analyzing which payment methods customers prefer, you can identify trends, such as whether credit cards, digital wallets, or bank transfers generate more revenue.
This data helps you promote the most popular options at checkout, potentially increasing conversion rates and reducing cart abandonment.
Additionally, tracking payment gateway performance helps manage costs and detect issues.
Different payment processors charge varying transaction fees—some may be more expensive but convert better, while others might be cheaper but underutilized.
By comparing revenue against processing fees, you can determine which gateways offer the best ROI.
It also helps spot technical problems, like if a specific gateway has unusually high failure rates, allowing you to troubleshoot before losing more sales.
For subscription-based businesses, monitoring sales reports by payment gateway is especially crucial for predicting cash flow.
The WooCommerce Reports plugin enhances your store’s analytics by providing detailed, customizable reports on payment gateway performance. Unlike WooCommerce’s basic reports, this plugin offers advanced filtering, visual dashboards, and export options, making it ideal for data-driven decision-making.

Key Features:
- Payment Gateway-Specific Reports: Compare sales across different payment methods (e.g., PayPal vs. Stripe) by month.
- Custom Date Ranges: Use a built-in calendar to easily set the date range.
- Export to CSV/Excel/PDF: Share reports with your accounting or marketing team.
Read More: 2 ways to get WooCommerce report by payment method
REPORTiT – Advanced WooCommerce Reporting
The easy way to track sales by payment gateways
Conclusion
Adding a custom payment gateway to WooCommerce—whether through custom coding or a plugin-based solution—gives your store greater flexibility, improves customer experience, and can even reduce transaction costs. By following best practices in security, testing, and compliance, you ensure smooth transactions while protecting sensitive customer data.Whichever method you choose, tracking sales by payment method is crucial for optimizing conversions, reducing costs, and improving your store’s financial performance. While WooCommerce provides basic reporting, the WooCommerce reports plugin helps you to better analyze the sales performance with advanced features like flexible filtering, visual dashboards, and exportable reports.