Add WordPress meta key / custom field to WPBULKiT – Bulk Edit WordPress Posts / Pages Plugin enables you to have access to them for bulk editing or filtering.
You can add as many custom fields as assigned to your posts in the WordPress custom field to our plugin as shown in the picture below:
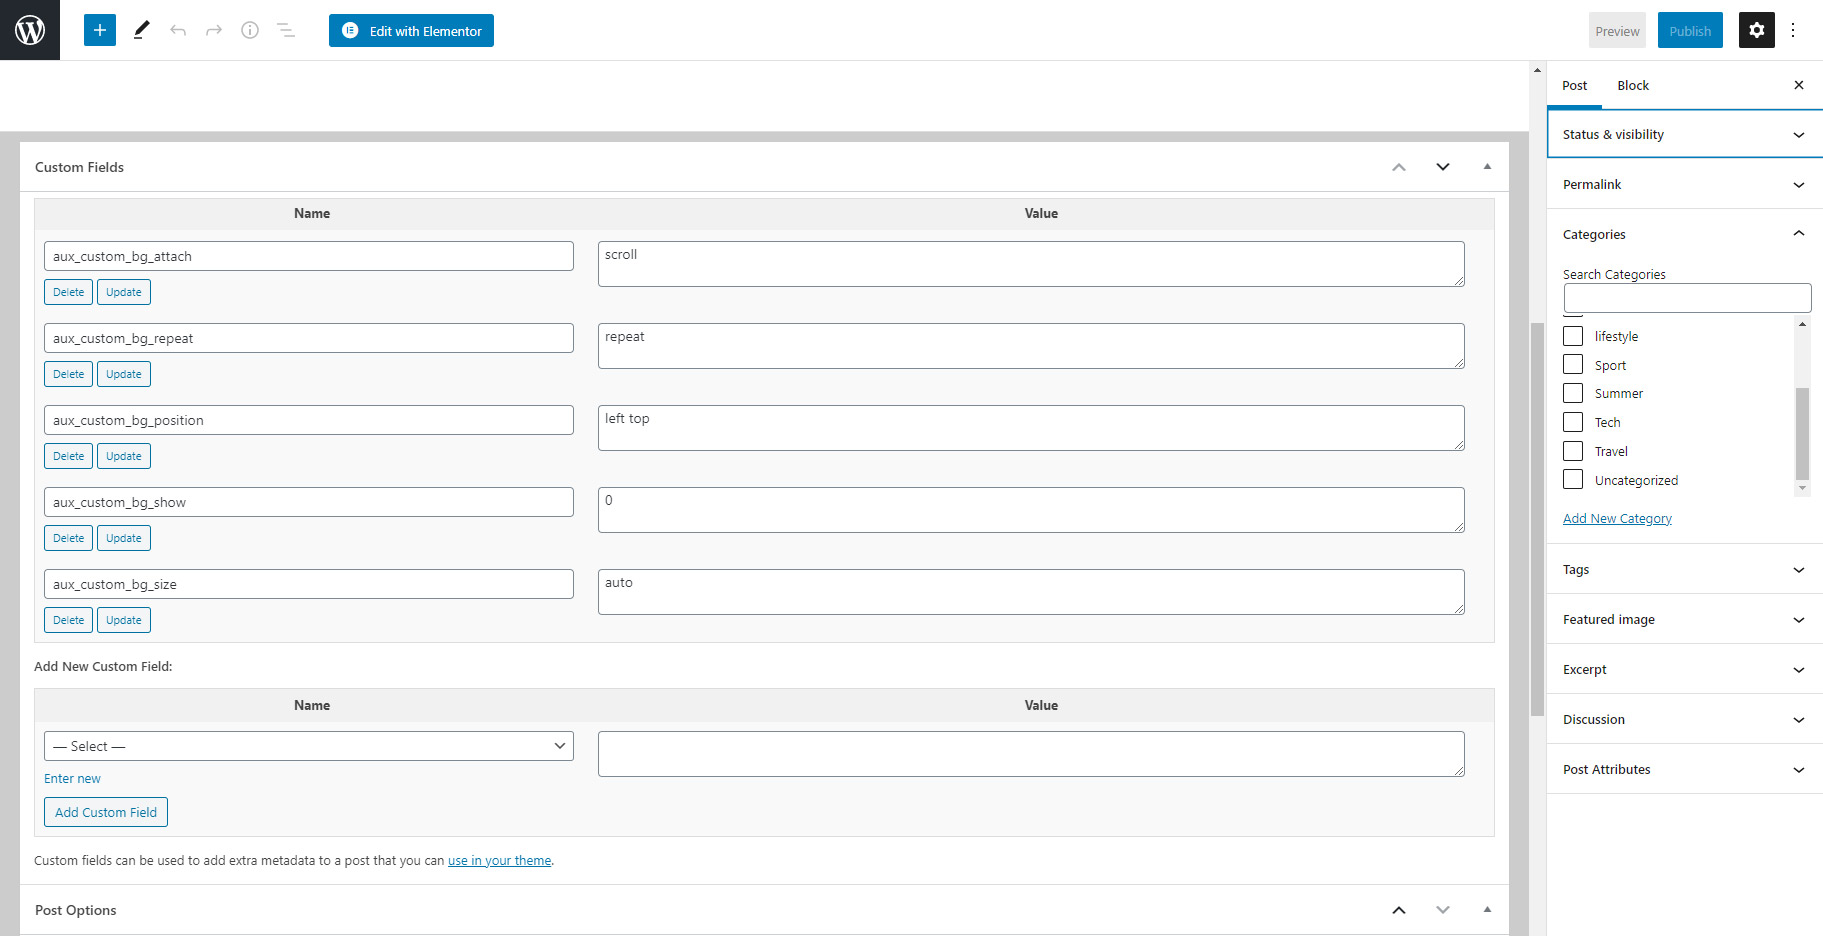
Add custom field / meta key to WPBULKiT – Bulk Edit WordPress Posts / Pages Plugin
To add custom field / meta key to WPBULKiT plugin, you need to open “Meta Fields” tab by going to below address:
WordPress Dashboard > iThemeland > WPBULKiT > Meta Fields
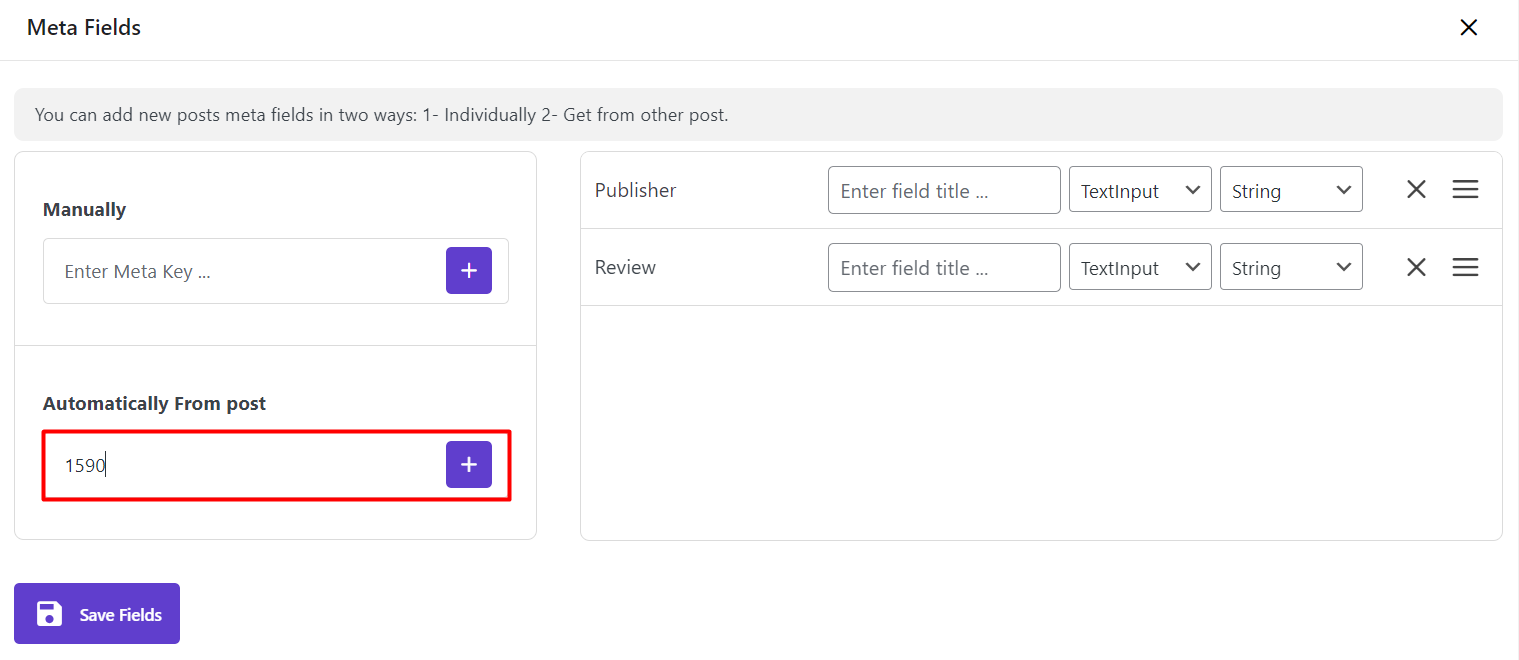
As shown in the below picture, you can add custom fields manually or automatically from a post:
Add a WordPress post custom field manually
To add a WordPress post meta field manually, you need to type the name of the custom field in the text box exactly according to the name assigned to the posts in WordPress, then click on the “+” button.
For example, as we have assigned “Publisher” and “Review” to our posts in WordPress:
We have added them to our plugin by doing below actions:
- Type “Publisher” in the text box under “Manually” field
- Click on “+” button
- Type “Review” in the text box under “Manually” field
- Click on “+” button
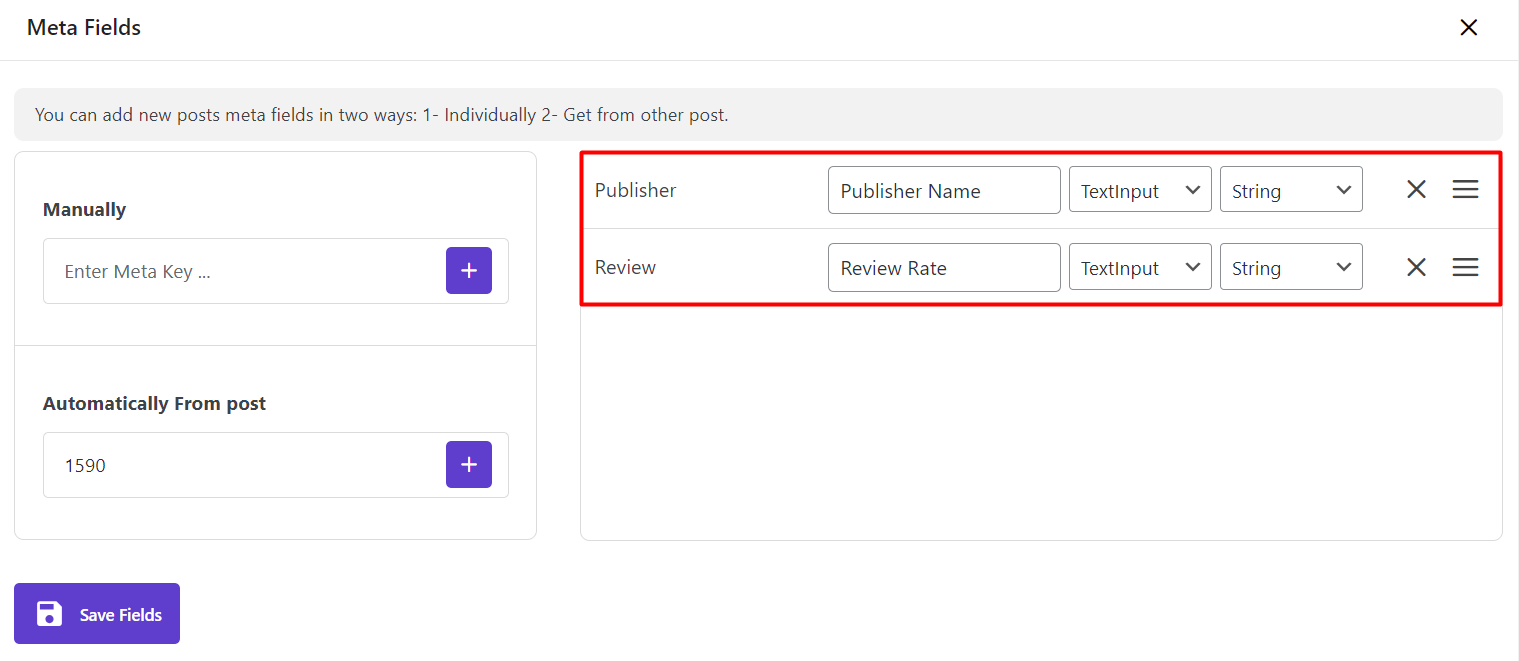
As soon as you click on the “+” button, a custom field will be added to the opposite box, and you can:
- Edit the name of the custom field.
For example, we typed “Publisher Name” in the text box in front of the “Publisher” custom field
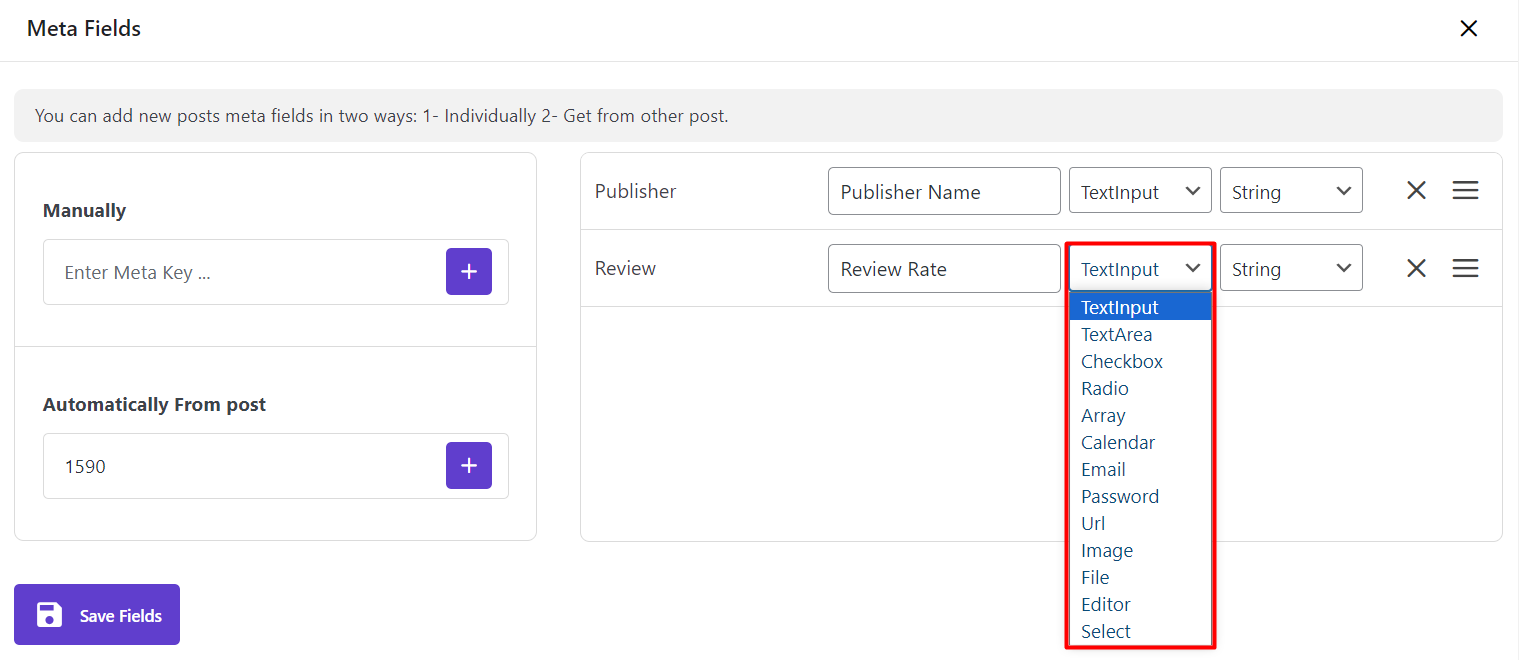
- Specify how the values related to this custom field to be displayed or edited in our plugin.
You have to choose one of the below items:
- TextInput
- Checkbox
- Radio
- Array
- Calendar
- Password
- URL
- Image
- File
- Editor
- Select
For some of them, you can assign other options to be displayed. For example, it is possible to choose “Text Input” to be displayed either as a “String” field or “Number” field as we did for the below Meta keys:
- Publisher name: TextInput > String
- Review: TextInput > Number
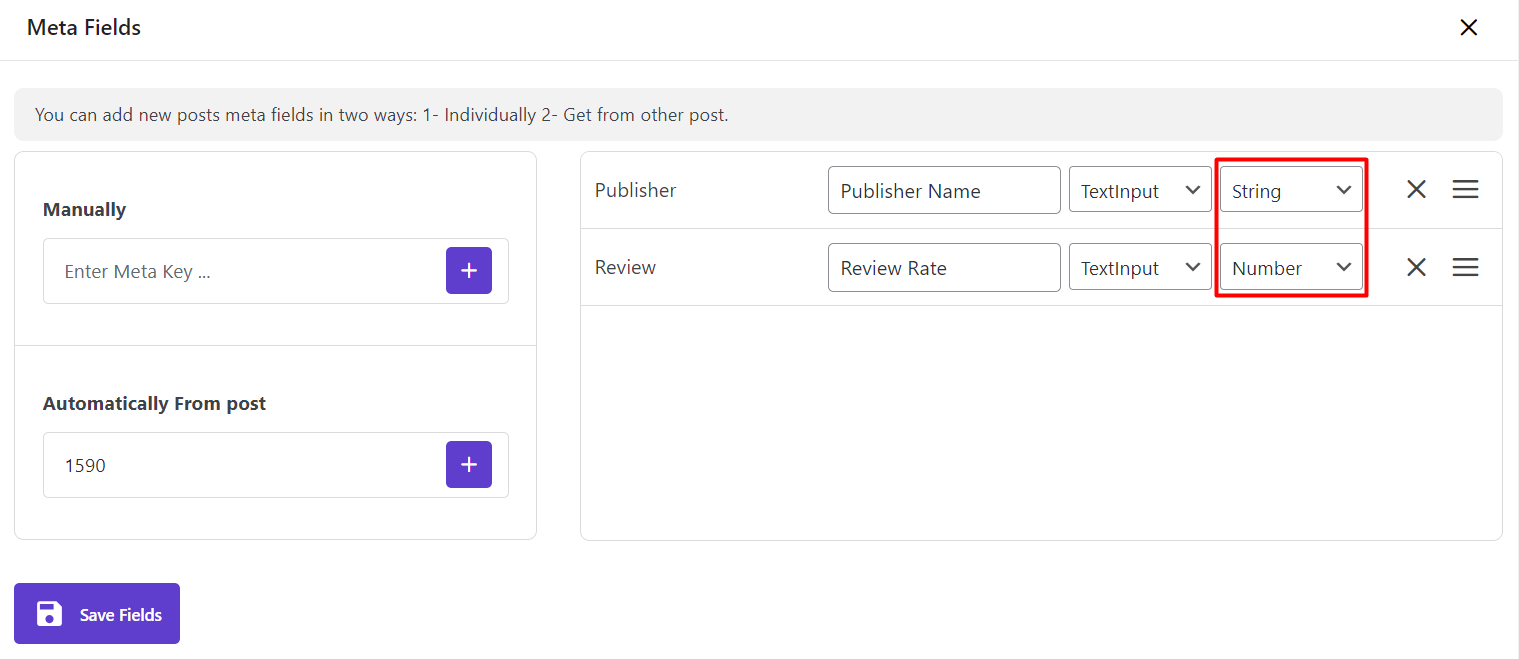
To better understand how to assign the right item to your custom field, we are going to make some examples in the next step.
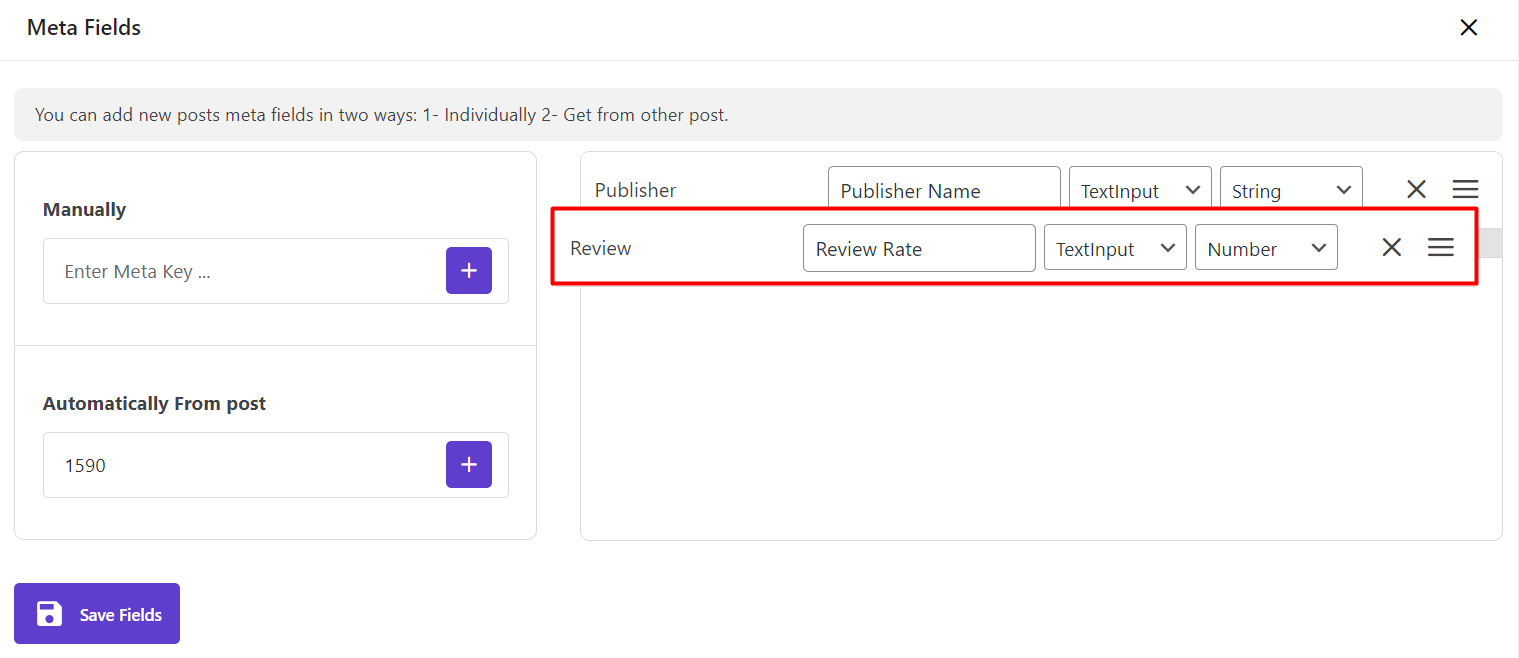
- Change order or delete the custom fields
If you add more than one custom field, you can easily “Change their Order” or “Delete” them by using the related Icon in each field.
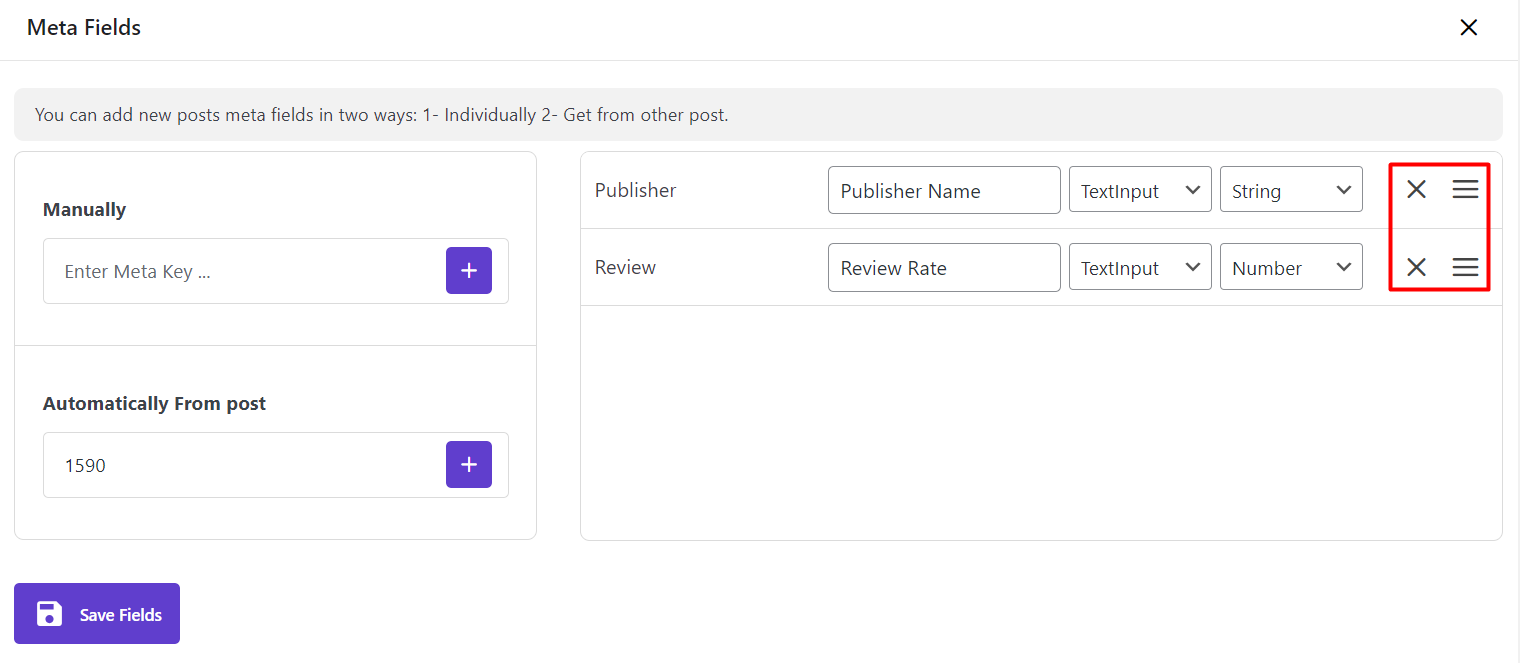
For example, in the picture below, we drag the “Review” field and try to drop it above the “Publisher” custom field:
Add a custom field automatically from a post
If you need to add some custom fields related to a post to our plugin, you just need to type the post “ID” in the text box under this field and then click on “+”.
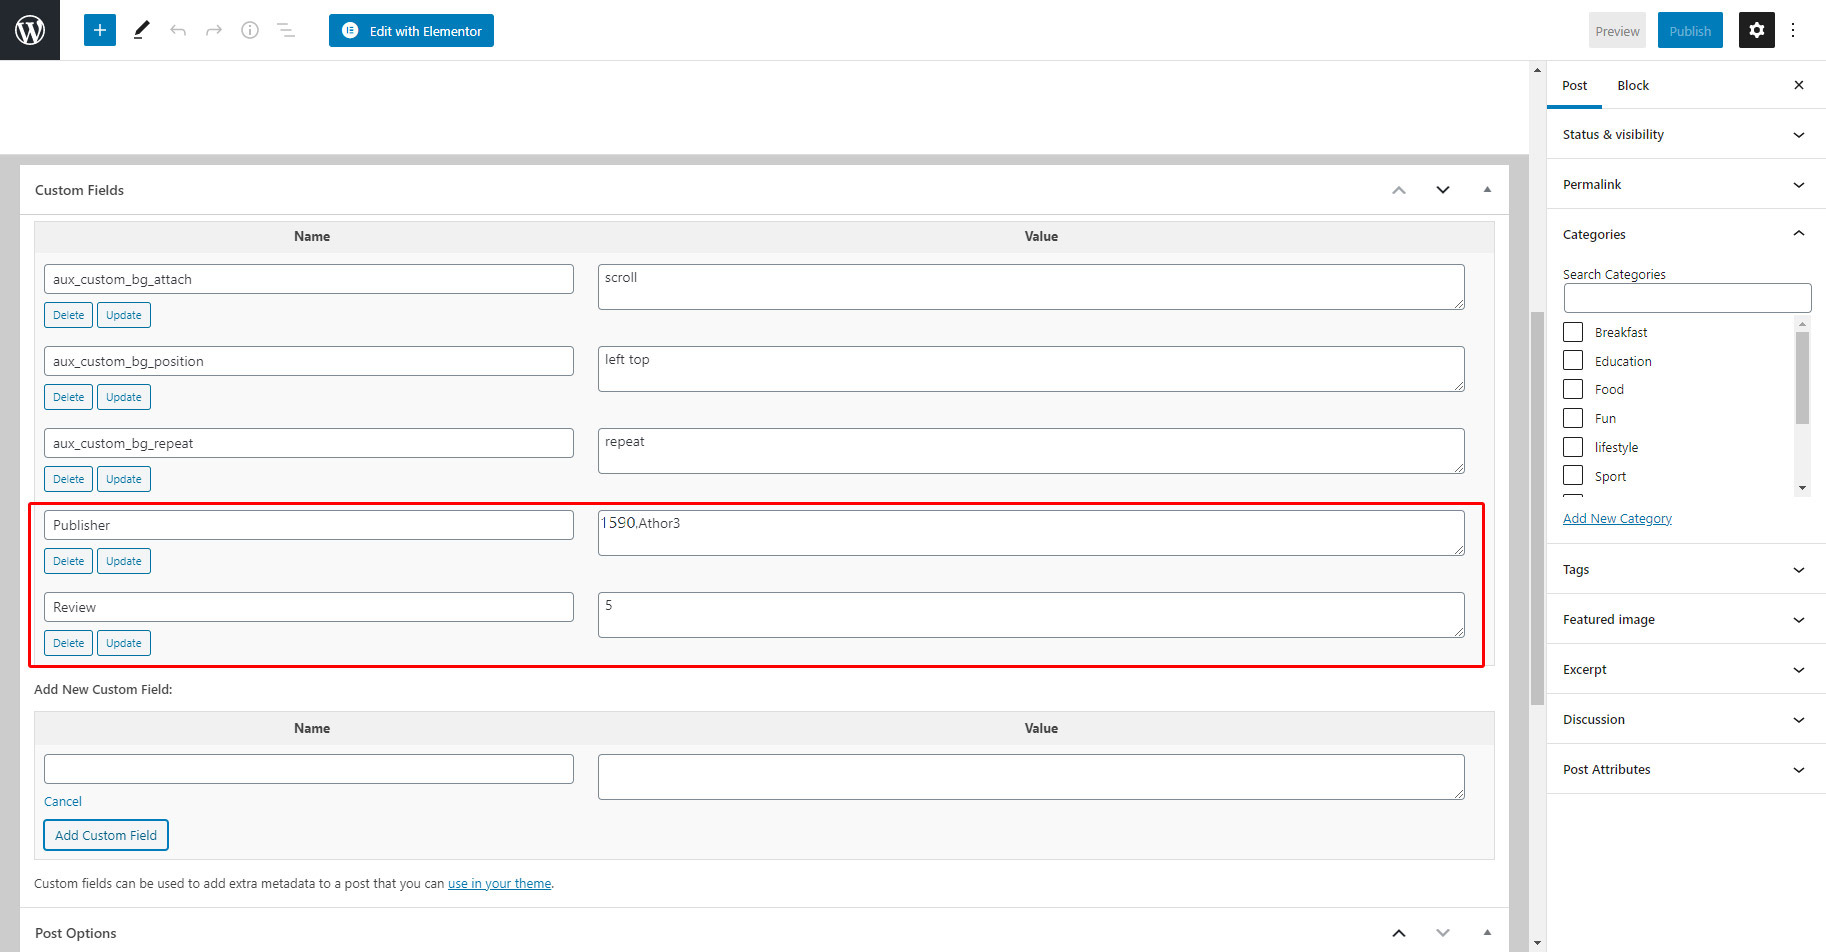
For example, we typed “1590” and clicked on “+”, so the custom fields assigned to those posts were displayed in the opposite box:
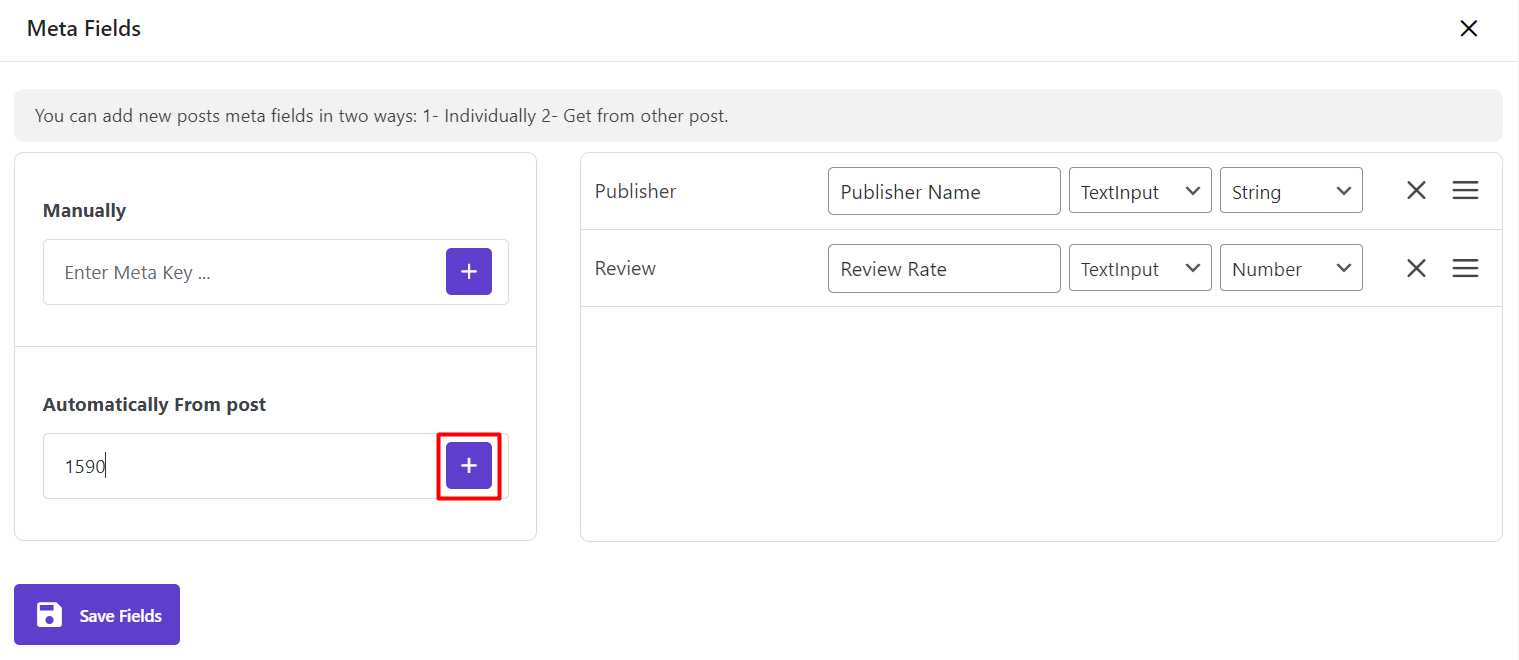
Then, by clicking on “Save Fields”, you have access to those custom fields in the plugin:
- Bulk Edit Form.
- Filter Form.
- Column Profile.
Bulk edit post meta in WordPress
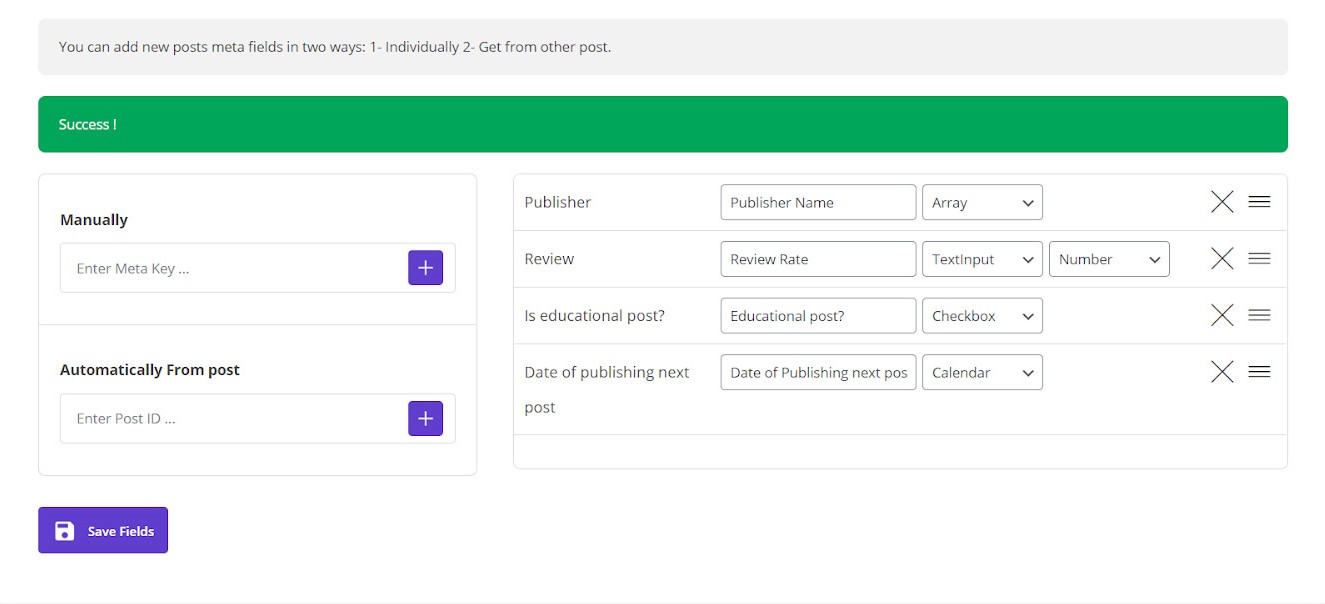
By clicking on the “Bulk Edit” tab, you can see the “Custom Fields” tab as shown below:

As we expected, all the custom fields we added in the “Meta Fields” tab are displayed here. Now, let’s check how those Options are helping us to bulk edit these custom fields:
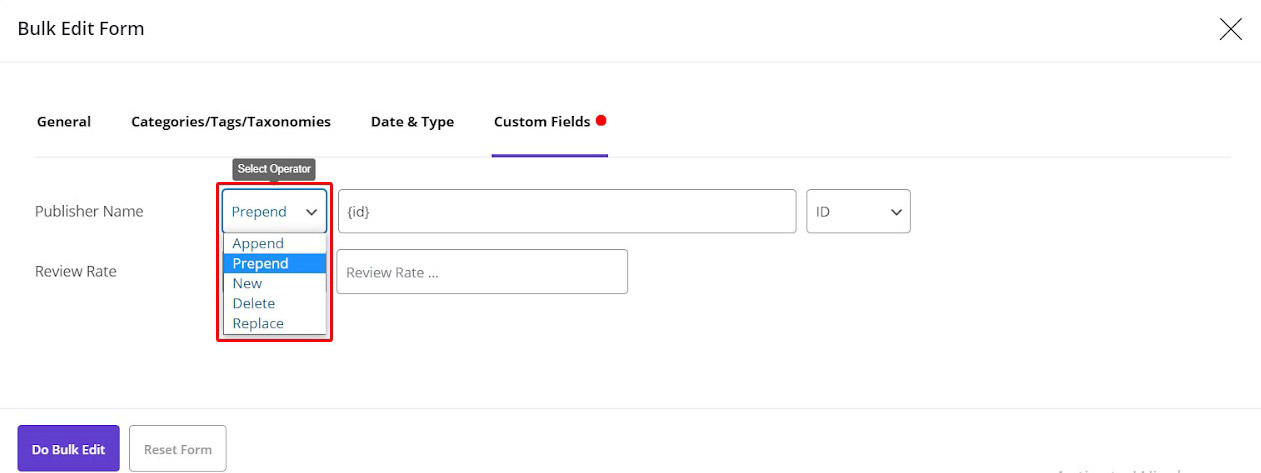
TextInput:: String
As we assigned “TextInput” as a string option to the “Publisher”, we now have access to the condition box, including:
- Append: to add value at the end of the publisher name
- Prepend: to add value at the beginning of the publisher name
- New: to replace the whole name with a new one
- Delete: to remove some part of publisher’s name
- Replace: to replace some part of the publisher name
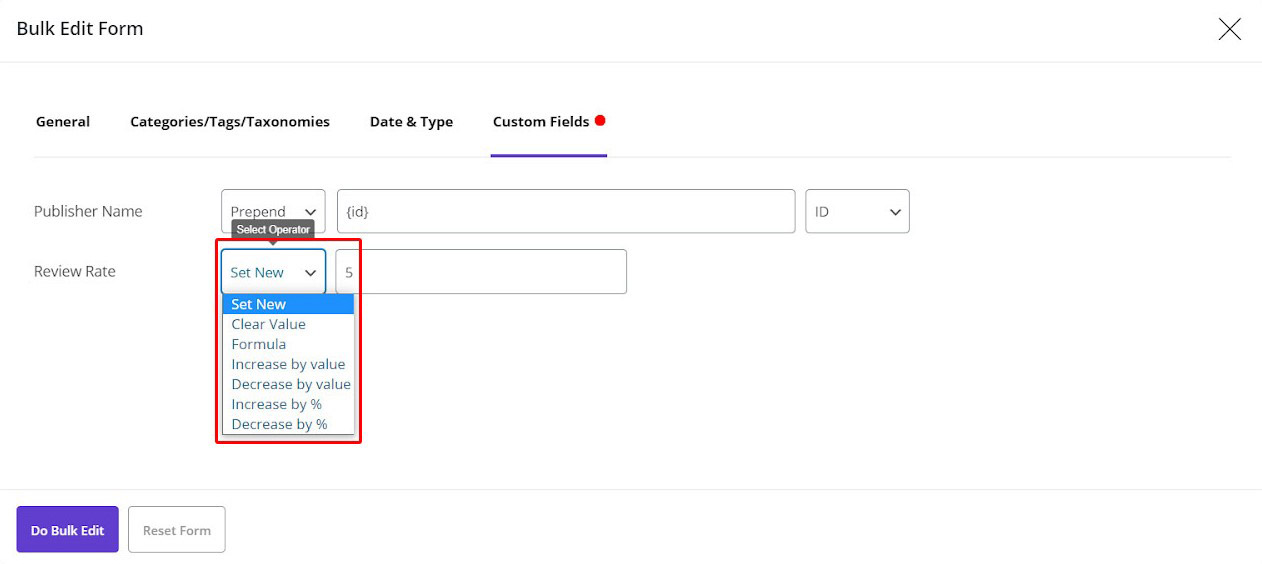
TextInput :: Number
For the “Review”, as we assigned “TextInput” as Number, we have access to the items in the condition box which are related to editing its value as a number, including:
- Set New: Replace the current value by a new number
- Clear Value: to remove the value
- Formula: to change the number according to a formula
- Increase by value: to increase the number by a value
- Decrease by value: to decrease the number by a value
- Increase by %: to decrease the number by a value%
- Decrease by %: to decrease the number by a value%
Some other options including below:
- TextArray
- Password
- Website
Are the same as “TextInput”, so, there is no need to explain them again, you can just choose the right option and enjoy editing the values related to them in an easy and effective way.
The other options available in the custom field tab, are displayed as below in the bulk edit form:
Checkbox
If you choose the checkbox, a combo box will be assigned to that meta key. So you have to choose one of the values from the drop down list to bulk edit the custom field.
For example, we added “Is educational post?” as a custom field and assigned checkbox to it:
So, when we opened bulk edit form, a dropdown list including “Yes” or “No” option, had been created:

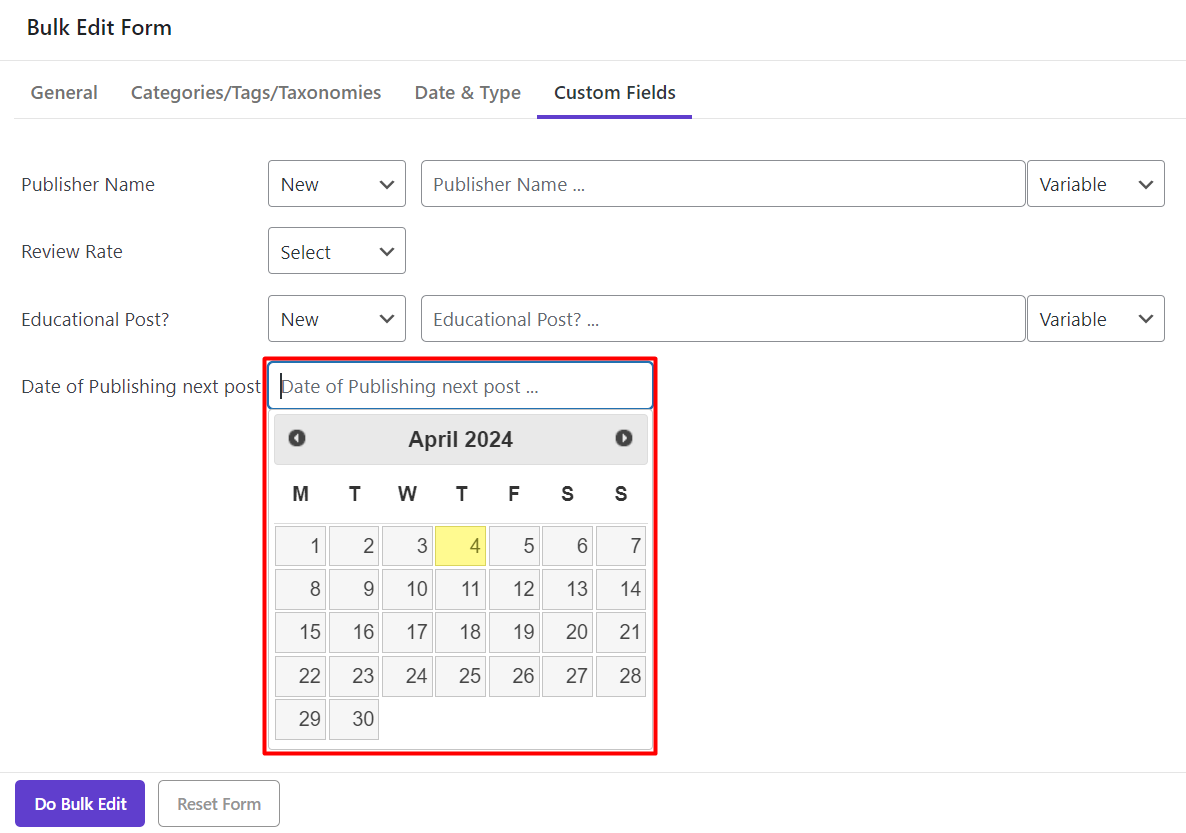
Calendar
If you assign “Calendar” type to your custom field values as we selected for “Date of publishing next post”, you can edit them as a date by a calendar in our plugin:
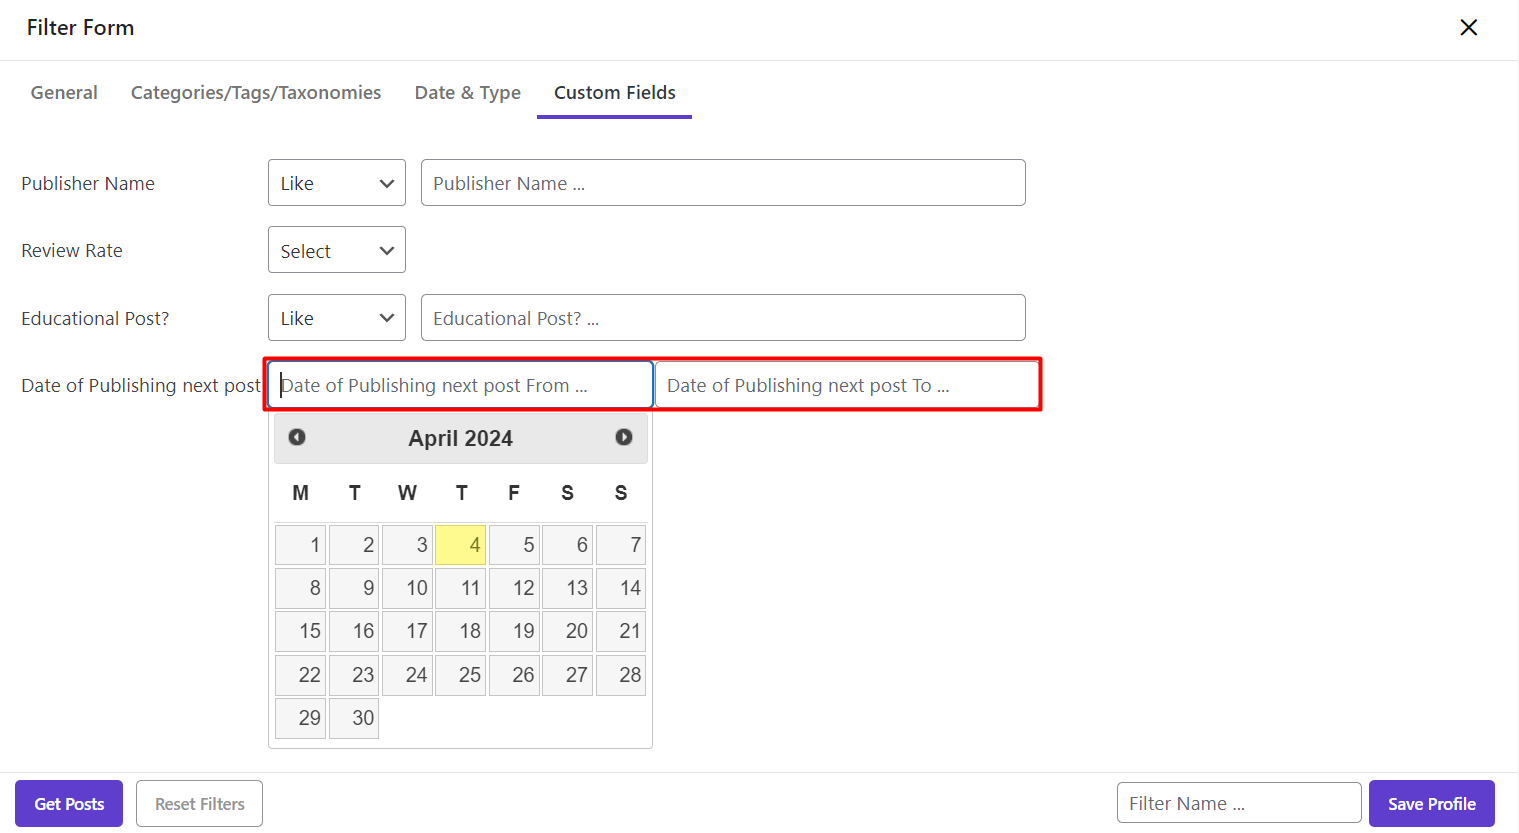
As shown below, when you need to bulk edit this custom field, a calendar will open and you can pick a date for it:
Now, you have completely learned how to assign the right condition to the custom field. It’s time to check how to use these custom fields in other parts of our plugin.
Use meta fields in column manager and column profile
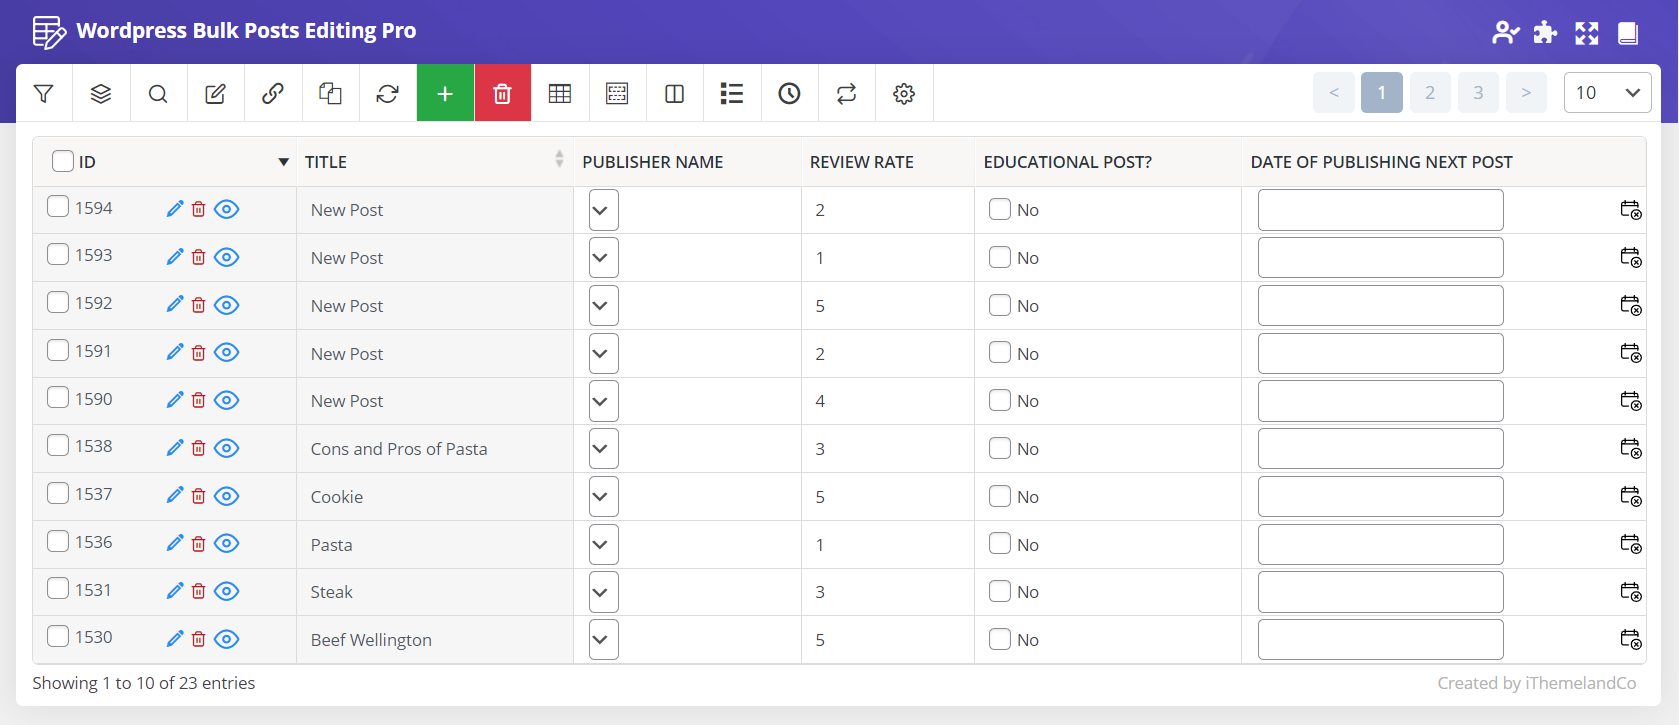
All of the added custom fields are available in “Column Profile” form, which enables you to add/remove each of them to / from the post table.
For example, by adding “Publisher Name”, “Review Rate” and other meta keys under the custom fields part in the “Column profile”, as we did below:

All of them were displayed in the post table:
Use meta fields in filter form
You have also access to the “Custom Fields” in the “Filter Form” to filter the posts according to their custom fields values and then bulk edit any other features.
The items available in “Filter Form” depend on the type that you have assigned to that custom field.
For example, as we assigned Textinput > String to the “Publisher”:
We are now able to select one the below option as the condition to filter our preferred posts, related to that custom field:
- Like
- Exact
- Not
- Begin
- End

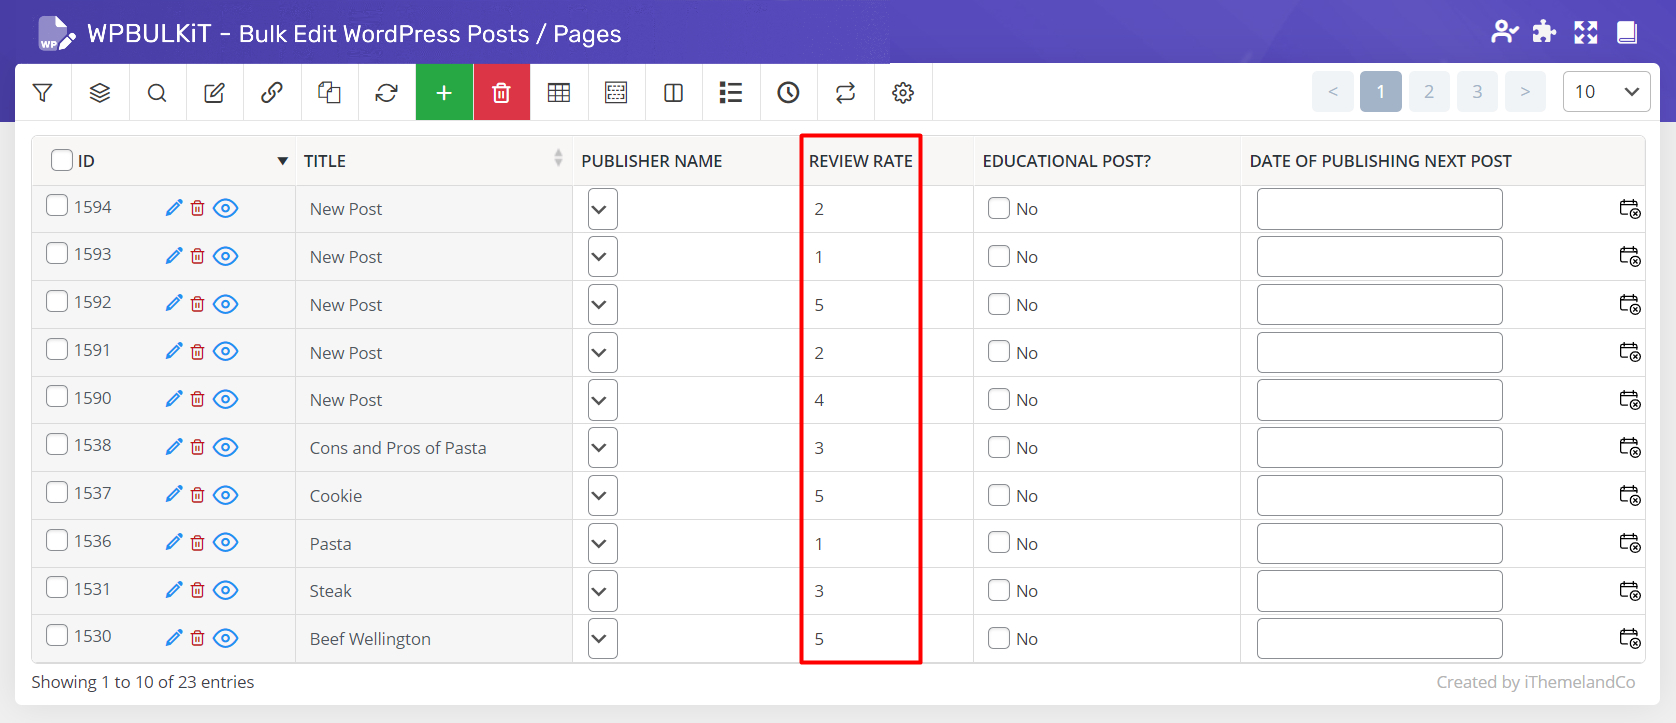
For “Review Rate” field, as we assigned Textinput > Number, we are able to filter the custom post by selecting a range of numbers for example from 2 to 5:
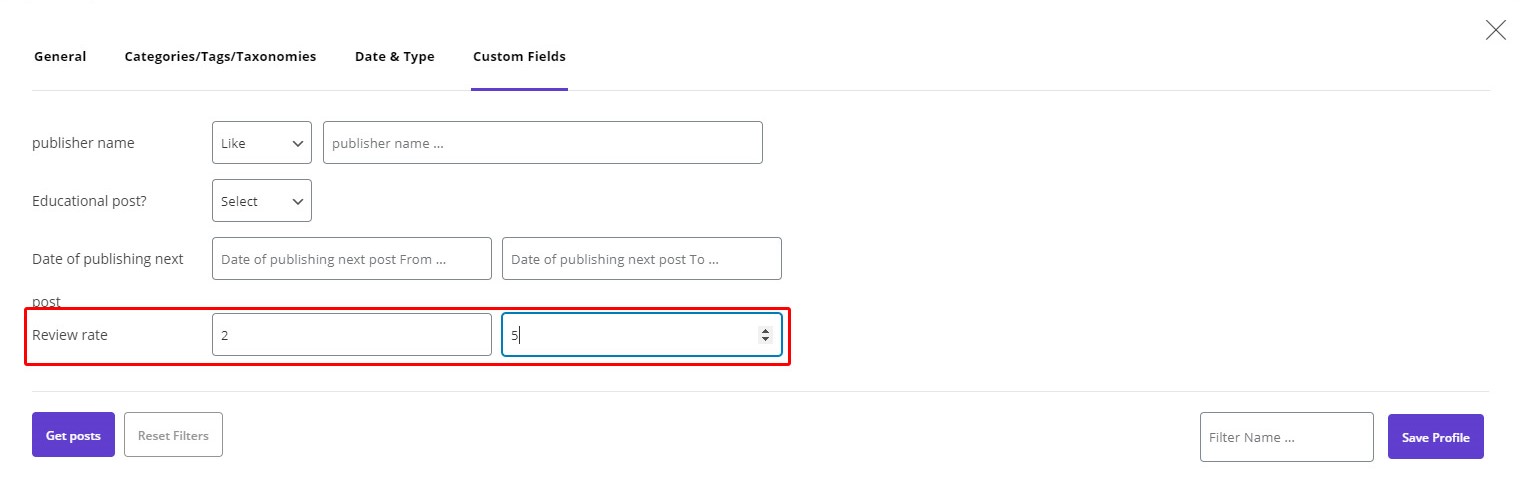
Now by clicking on “Get posts”, the WordPress custom posts will be displayed in the post table:
Bulk edit WordPress meta fields
We are also able to bulk edit these WordPress custom fields as we described earlier. For example, It is possible to delete “ID” from the publisher name as following:
- Click on “Bulk Edit” button
- Go to “Custom Field” tab
- Choose “Delete” from the condition box
- Select “ID” from the variable box
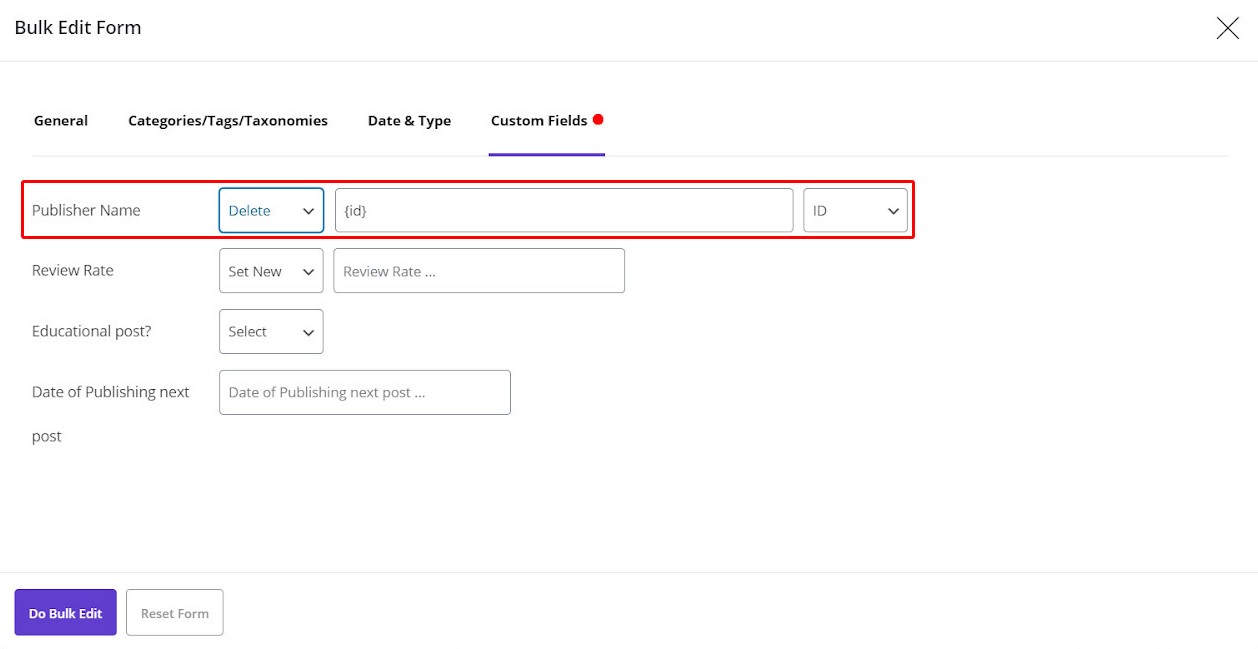
- Click on “Do bulk Edit”
We completely discussed before, you can simply edit the value of the columns displayed in the post table by a few clicks at the same time.
Read More: How to bulk edit multi WordPress post/custom post custom fields at the same time?
How to add custom meta fields in WordPress?
On the WPBULKiT, go to custom field meta box. Click on “add custom field” button. Enter the name and value of you custom field and update it.
Comments