Brand of products in an online store are one of the most important information for attracting customers. It is very common for the customers to look for the products with special brands in the online shopping store. WooCommerce product table support make product table with brand. If you use brand taxonomy for your online shop, our plugin is best choose to show it.
Most of the ecommerce websites are using some effective and useful plugins. It help to them display the brands of their products in an astonishing and attractive way.
If you have already installed WooCommerce product table plugin and decided to show the product brand as a extra column in the product table, we recommend you to install one on the below plugins to your WordPress website which are absolutely compatible with our plugin:
- iThemeland WooCommerce brand
- Woothemes WooCommerce brand
- YITH WooCommerce brand
- Porword WooCommerce brand
- Prefect brand
Adding brand of products as a column in product table
To add “Brand” as a column in the product table plugin, you have to go to the “Column” tab, after installing one of the above mentioned plugins.
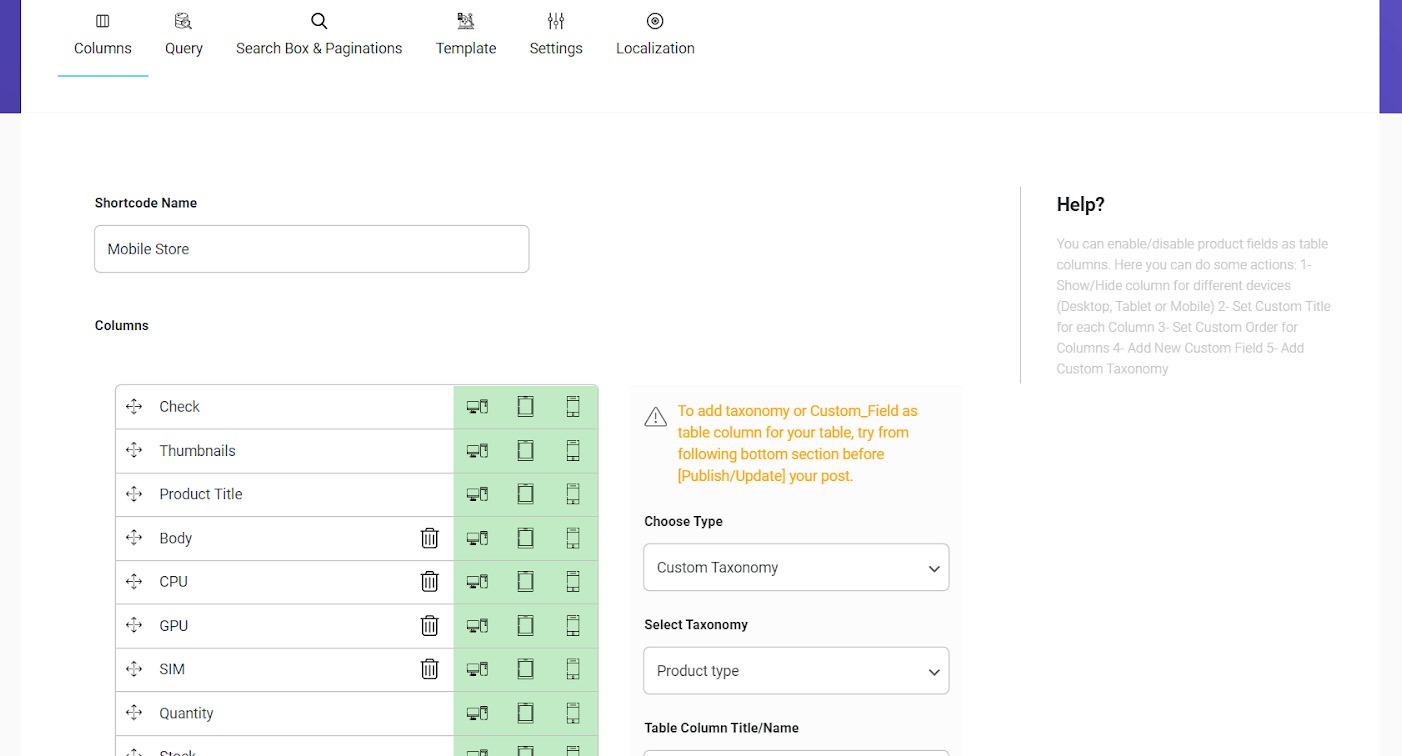
Next, on the right form we choose “Custom Taxonomy” from “Choose Type” and then from “Select Taxonomy” you can choose one of the added brand’s taxonomies related on each above plugins. After that, type a name for brand columns on the “Table Column Title/Name” field and finally click on the “Add Column” button.
As you can see “Brand” column added to table and you can edit brand column of products as below
Which device show brand column
By clicking on each device you can enable/disable showing the brand column on the desired device.
Change the name
By clicking on the text box of “Brand”, you can replace this name by something else. For example, if you type “Marks” the column will be displayed in the product table with this Title.
Change the order
If you want to display the “Brand” column before or after any other column, you can easily drag and drop it to the right position by holding the cursor icon next to the field name.
To see how this “Brand” column is displayed in the product table, you just need to update the table and open the table page in the browser.
As we expected, the “Brand column” has been added to the table. The brand of products is clearly displayed in front of each one exactly. It’s according to the information you have assigned before in the WooCommerce.
Comments