WordPress bulk edit custom fields is not a complicated task in WPBULKiT – Bulk Edit WordPress Posts / Pages Plugin as we have provided a specific tab for adding and editing the custom fields assigned to your posts in WordPress. You can quickly edit WordPress custom fields that are added by a third-party plugin or programmatically by your theme.
The important point that we have already discussed in the tutorial below is adding those custom posts to our plugin, which is absolutely straightforward for post managers.
Read More: How to save and load column profile on WPBULKiT – Bulk Edit WordPress Posts / Pages Plugin?
So, we are just trying to have a quick review and skip this step. If you need more information, do not hesitate to get more help from our previous tutorial.
Add a new custom field
As we described before, you can easily add a new custom field by going to:
WordPress Dashboard > iThemeland > WPBULKiT > Meta Fields tab
In this tab, you can type the name of each custom field and add them manually or enter an ID post and add its assigned custom fields automatically as shown below:
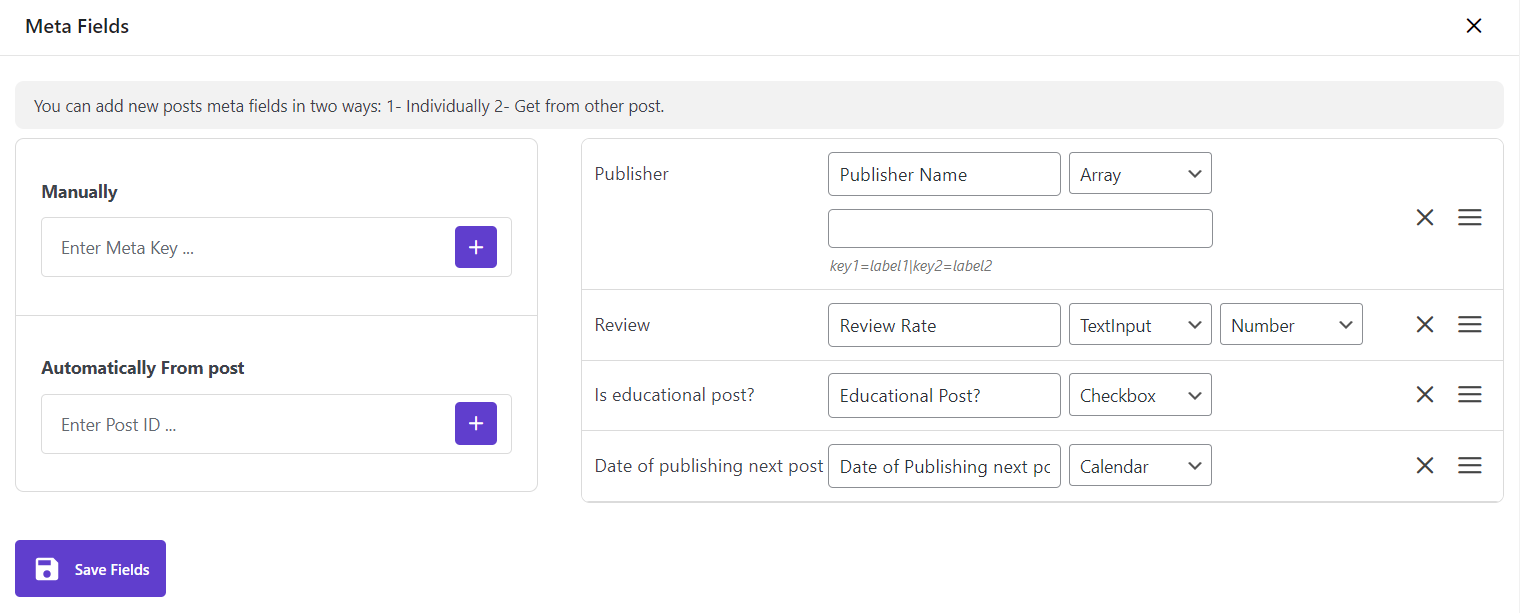
As soon as adding any custom field and clicking on “Save Fields” you have access to them in the bulk edit form to change or edit them easily.
Now let’s continue to see how we can change multi post custom fields in our plugin by three simple steps:
Step 1: Filter WordPress posts by custom field
If you need to bulk edit custom fields of specific posts, it is possible to filter them by using Filter Form or finding them by Quick Search.
Read More: How to filter WordPress posts / custom posts on WPBULKiT – Bulk Edit WordPress Posts / Pages Plugin?
Read More: How to use quick search in WPBULKiT – Bulk Edit WordPress Posts / Pages Plugin?
In this tutorial, we are going to edit custom fields of posts which are not in “Food” or “Sport” categories. So, we simply filtered them by using “Filter Form” as following:
- Open “Filter Form“.
- Click on Categories / Tags / Taxonomies tab.
- Select “Not in” from condition box.
- Choose “Food” and “Sport” from selecting box.
- Click on “Get Posts“.

Step 2: Add custom fields columns
Adding custom field columns is a great way to ensure you that all changes you have made applied perfectly to your post table.
To add new columns, follow the below actions:
- Click on “Column Profile” button
- Scroll down the form to see “Custom Fields“
- Mark the columns you need to be displayed in the post table
- Click on “Apply to Table”
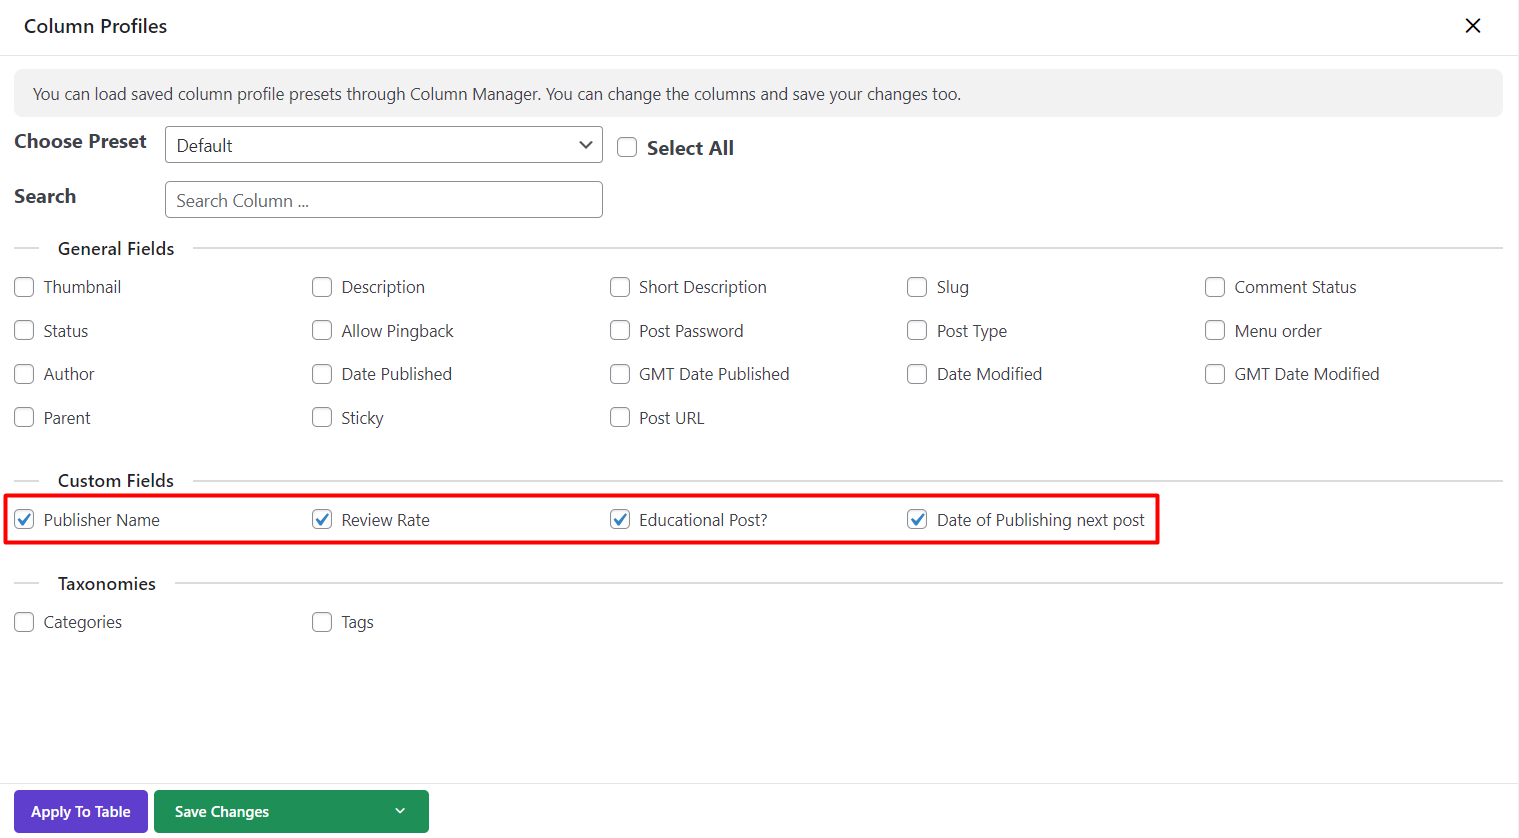
Now, you can see that the filtered posts with the assigned data related to the custom fields are listed in the post table.

Step 3: bulk edit WP custom fields
Using bulk edit form
As we mentioned before, for edit WordPress post custom fields, as soon as you add any custom field to the “Meta field” tab, they are available in the bulk edit form to make any changes on their data.
For example, as we have added some custom fields such as “publisher name”, “review rate” and “date of publishing” next post, we have access to them in the filter form by going to the “Custom Fields” tab as shown below:
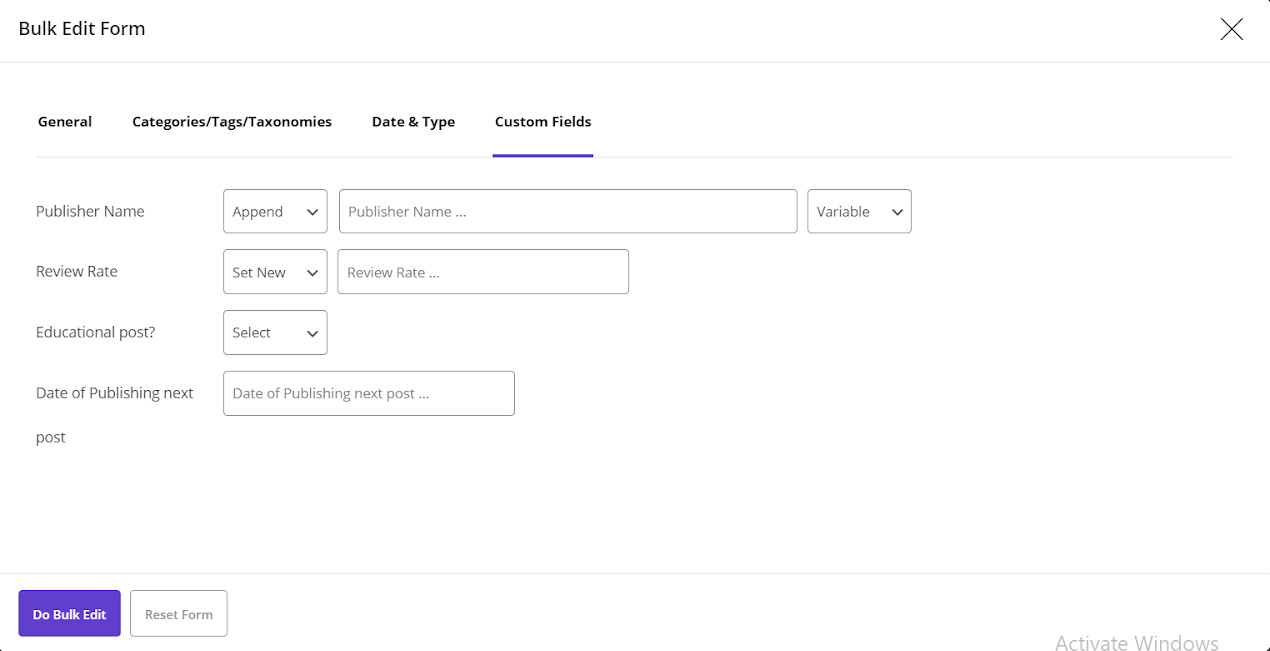
To change the data related to each custom field, we need to determine the condition and then set new data.
For example, we made below changes in our custom field:
- Increase the value of review rate by 1
- Change the status of educational post to No
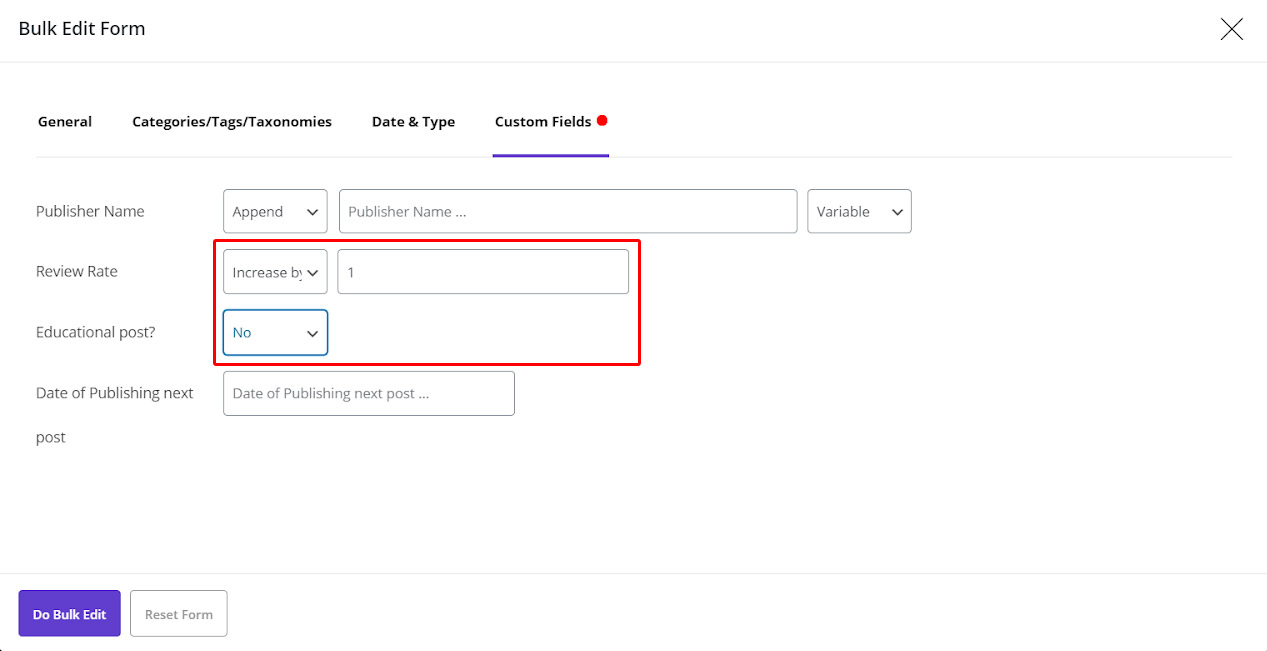
By clicking on “Do Bulk Edit”, we observed that all the data were changed according to our expectations:

Bind edit custom fields
Bind edit is the quickest way for bulk editing custom fields especially when you just need to change the values of one column in the post table.
To perform “Bind Edit” perfectly, it is necessary to follow the first and second steps to filter posts and add propper columns respectively.
Then, you need to:
- Mark “Bind Edit” icon
- Mark all filtered posts checkbox

- Click on the custom field column related to one of the posts
For example, we decided to “Bind Edit” the “Review Rate” column. So, we clicked on the calculator icon displayed in that column.

Then we chose “–” from the operation box and typed 1 in the text box. It means that we want to decrease the “Review Rate” of those selected posts by 1.
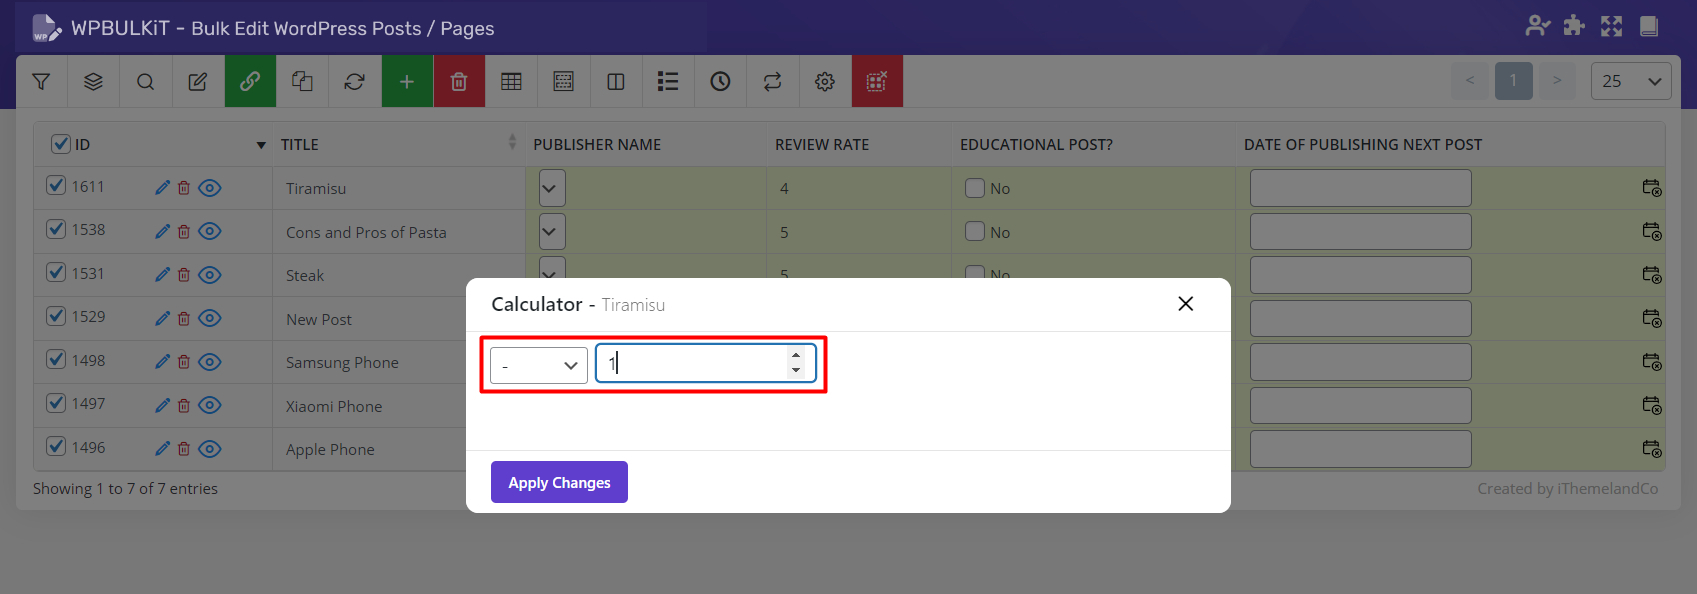
By clicking on “Apply Changes”, as it is obvious below, the “Review Rate” of all selected posts were changed as we expected:


Comments