Load the column profile that you have already saved in WPBULKiT – Bulk Edit WordPress Posts / Pages Plugin, is the easiest way to trace the changes you are making in the post table.
We have already described how to save a column profile in the previous tutorial. So, we are going to show you load it or add new columns to your post table. We do this without going to the column manager.
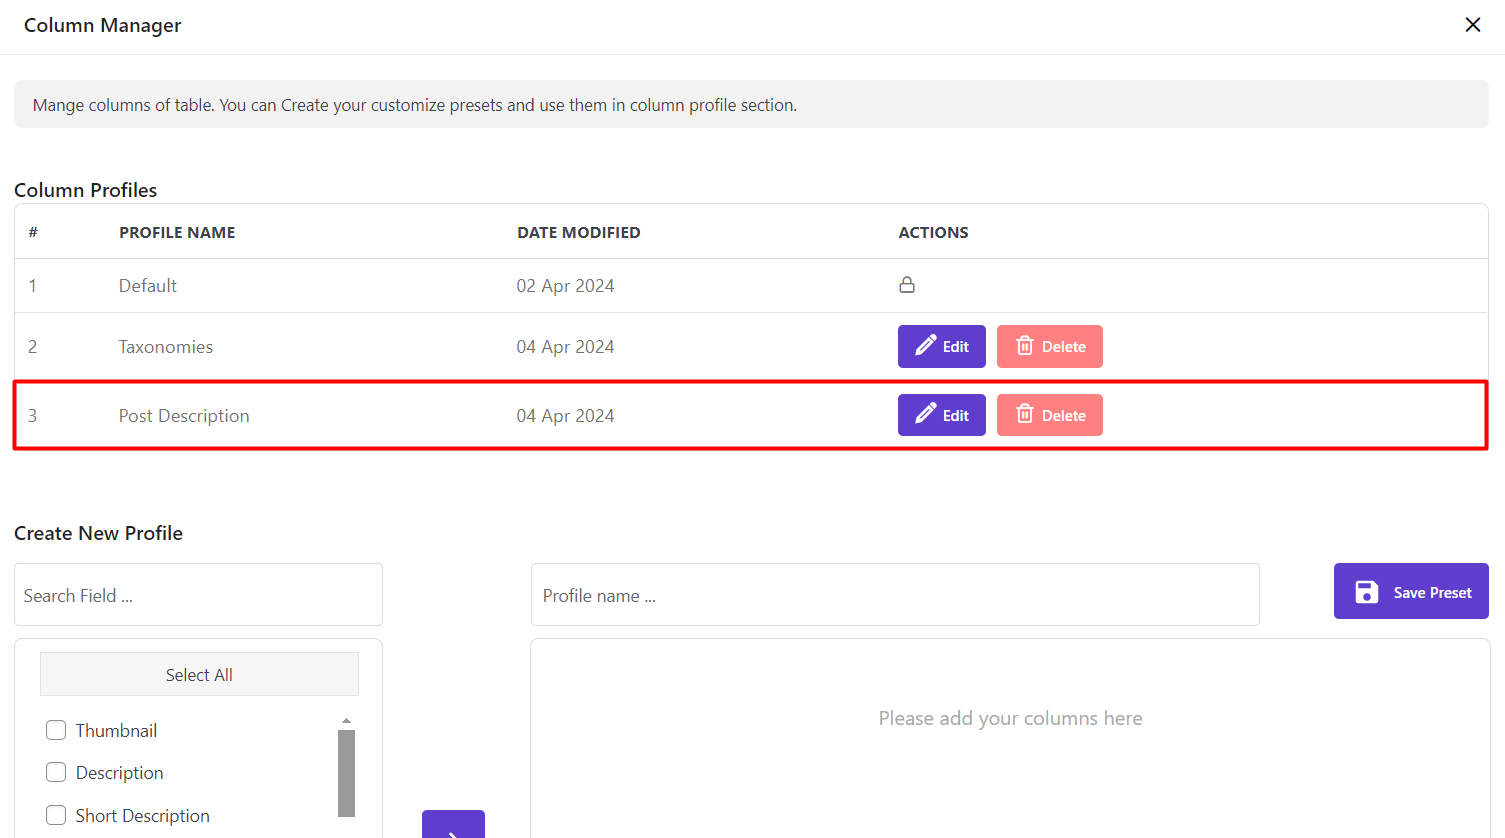
To see the profile you have already saved or save a new column profile, you can go to the “Column Manager” and read the article below for getting help.
Read More: How to save and load column profile on WordPress Bulk posts editing plugin
For example, as shown below, we have already saved some column profile in the plugin including “Post description” and we are going to load it in the next step:
Load column profile
To load column profile, we provide a icon in the toolbar of WordPress bulk post editing plugin as below:

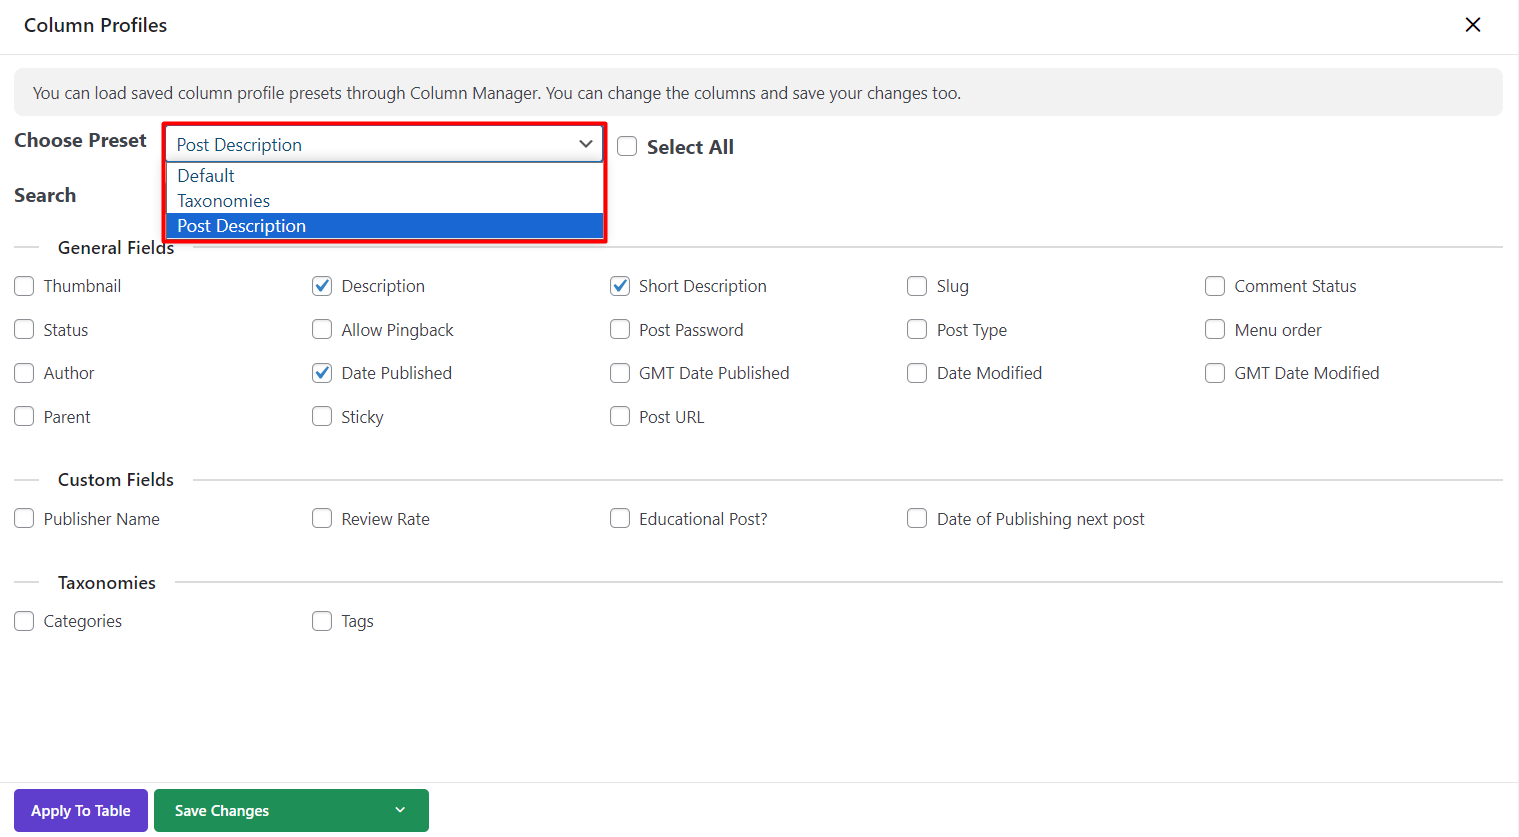
By clicking on “Column Profile”, the following form will be displayed including below parts:
Choose preset in column profile popup
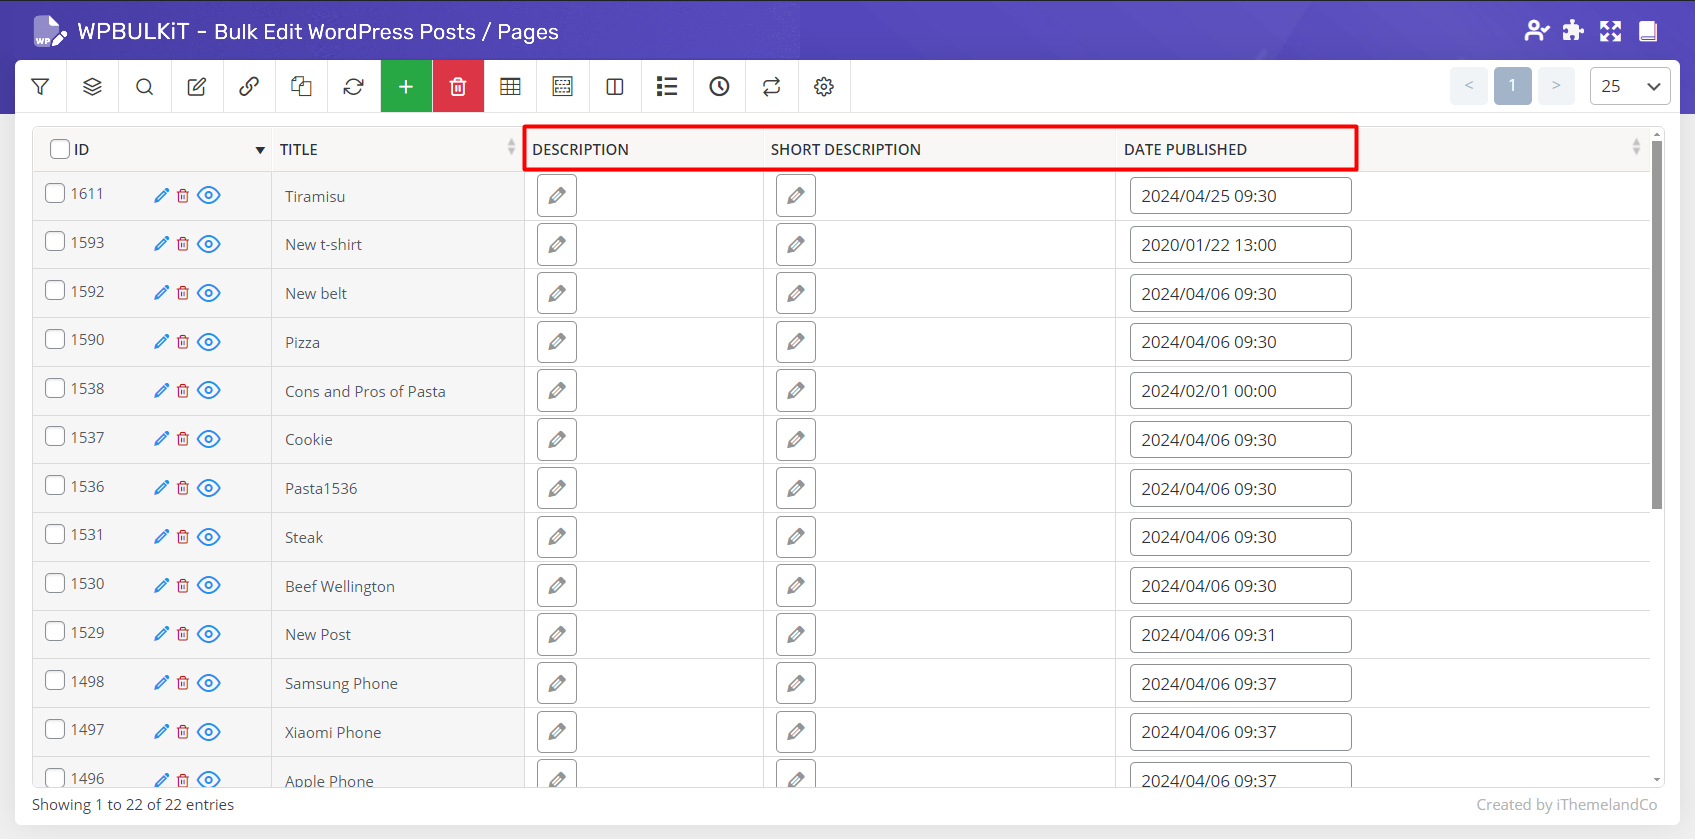
In this part, a combo box designed to enable you choose the proper profile. As shown below, all the saved column profiles are listed. As we decided to choose “Post Description” profile, the below columns were displayed in the post table:
Post fields
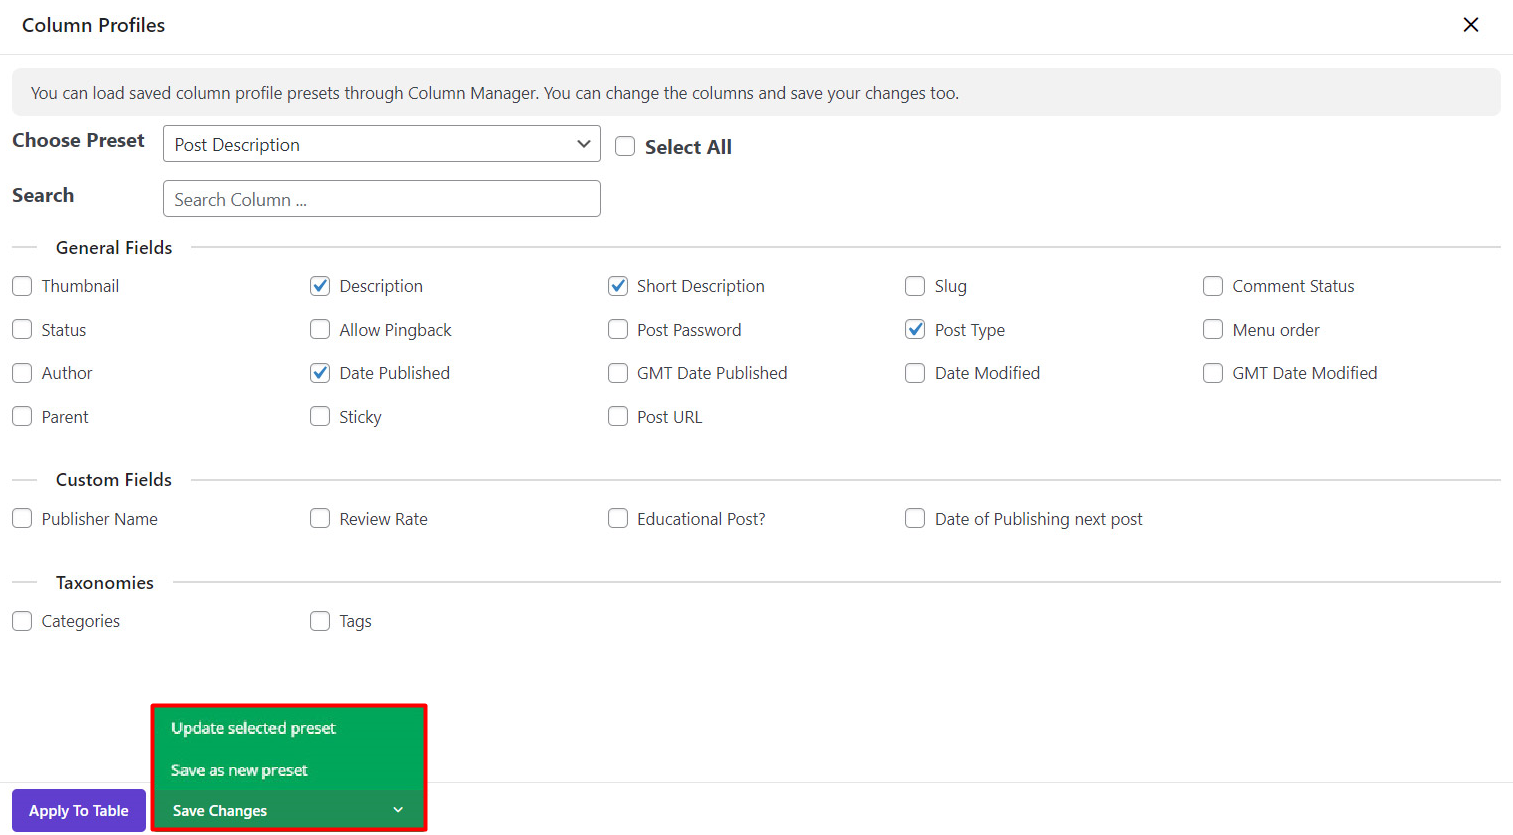
In the second part of the column profiles page, all of the post fields are listed. You can choose any of them to be displayed in the post table.
If you mark one or more fields in the form, a new option will appear at the bottom of this page. It enabling you to do below actions:
- Update selected preset: By selecting this action, all new columns you have already checked will be added to the same profile.
- Save as new preset: By applying this action, the plugin will create a new preset automatically including the checked columns.
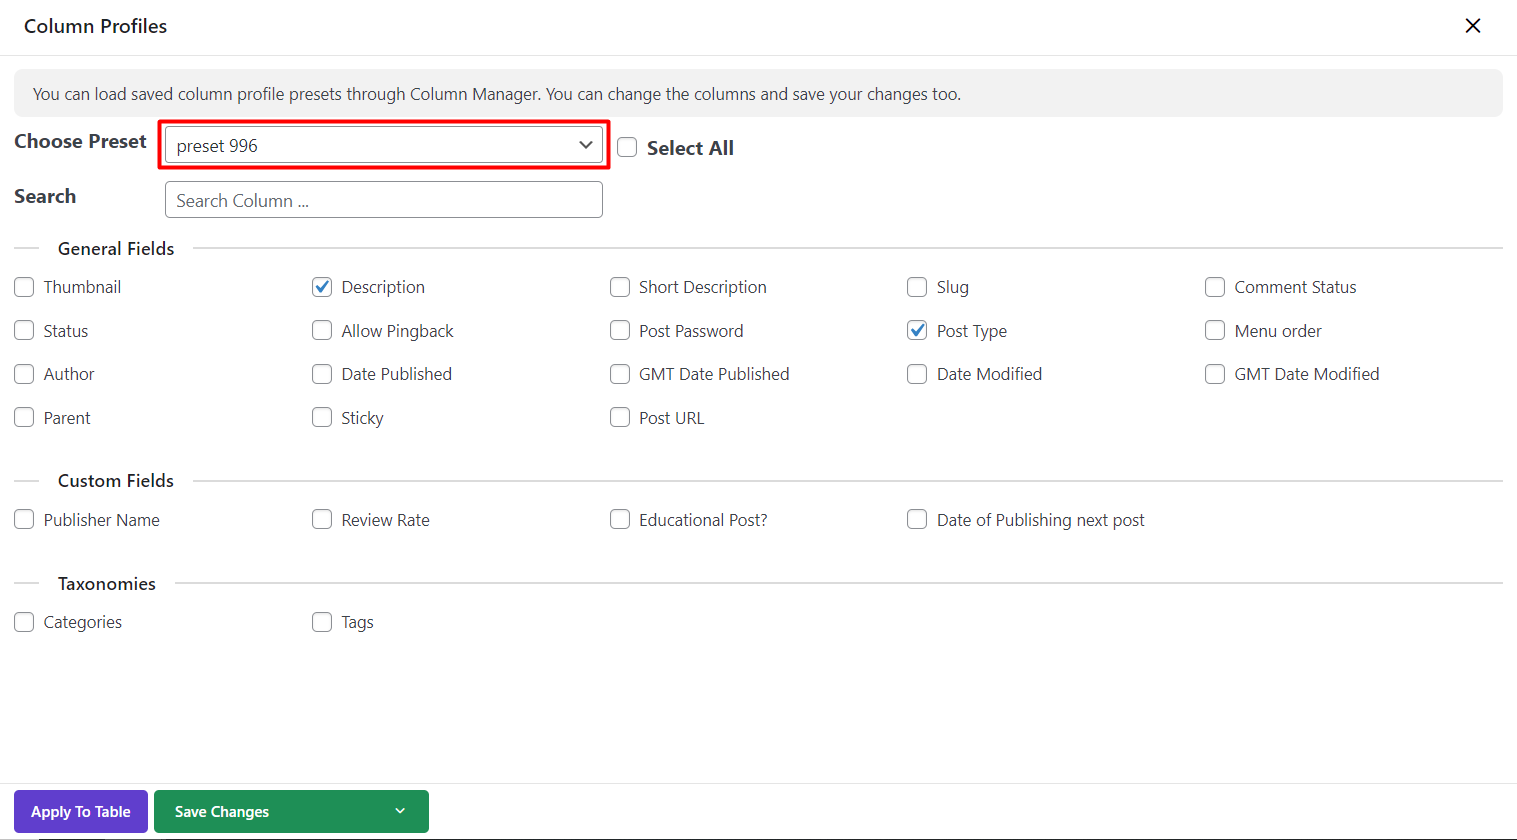
For example, we mark “Post Type“ to be displayed in the post table in addition to the columns involved in “Post description” profile.
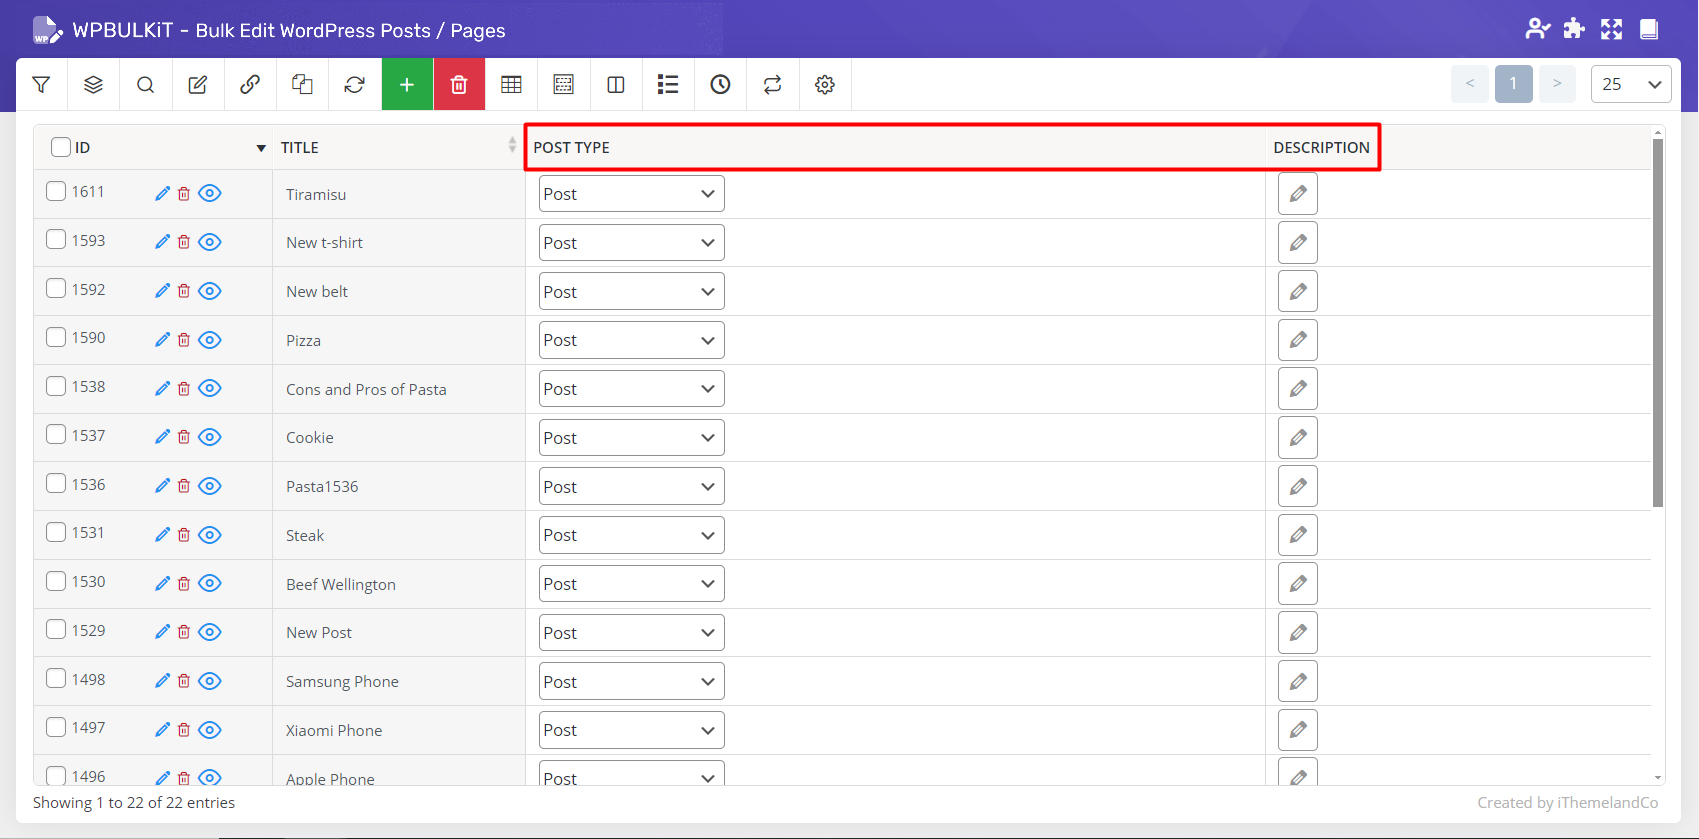
Then we clicked on, “Save as New Preset”, and as you can see below, a new preset named “preset 996” was created including these selected columns. The columns of our post table was changed as well:
Search box in column profile popup
A search box is designed at the bottom right of the column profile page. It help you to find your required columns quickly.
If you type the name of any column in the search box, it will be filtered. Then you can mark it easily.
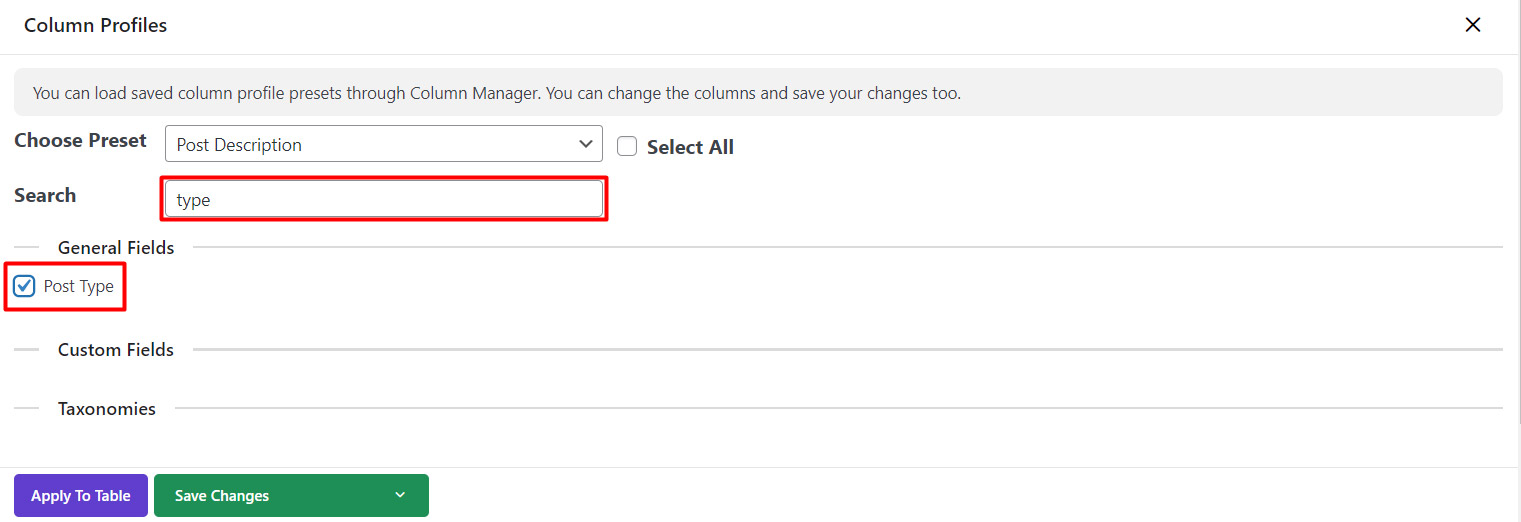
For example, we searched “Type” and the plugin filtered “Post Type” for us. Then, we marked it to be shown in the post table:
Apply to table
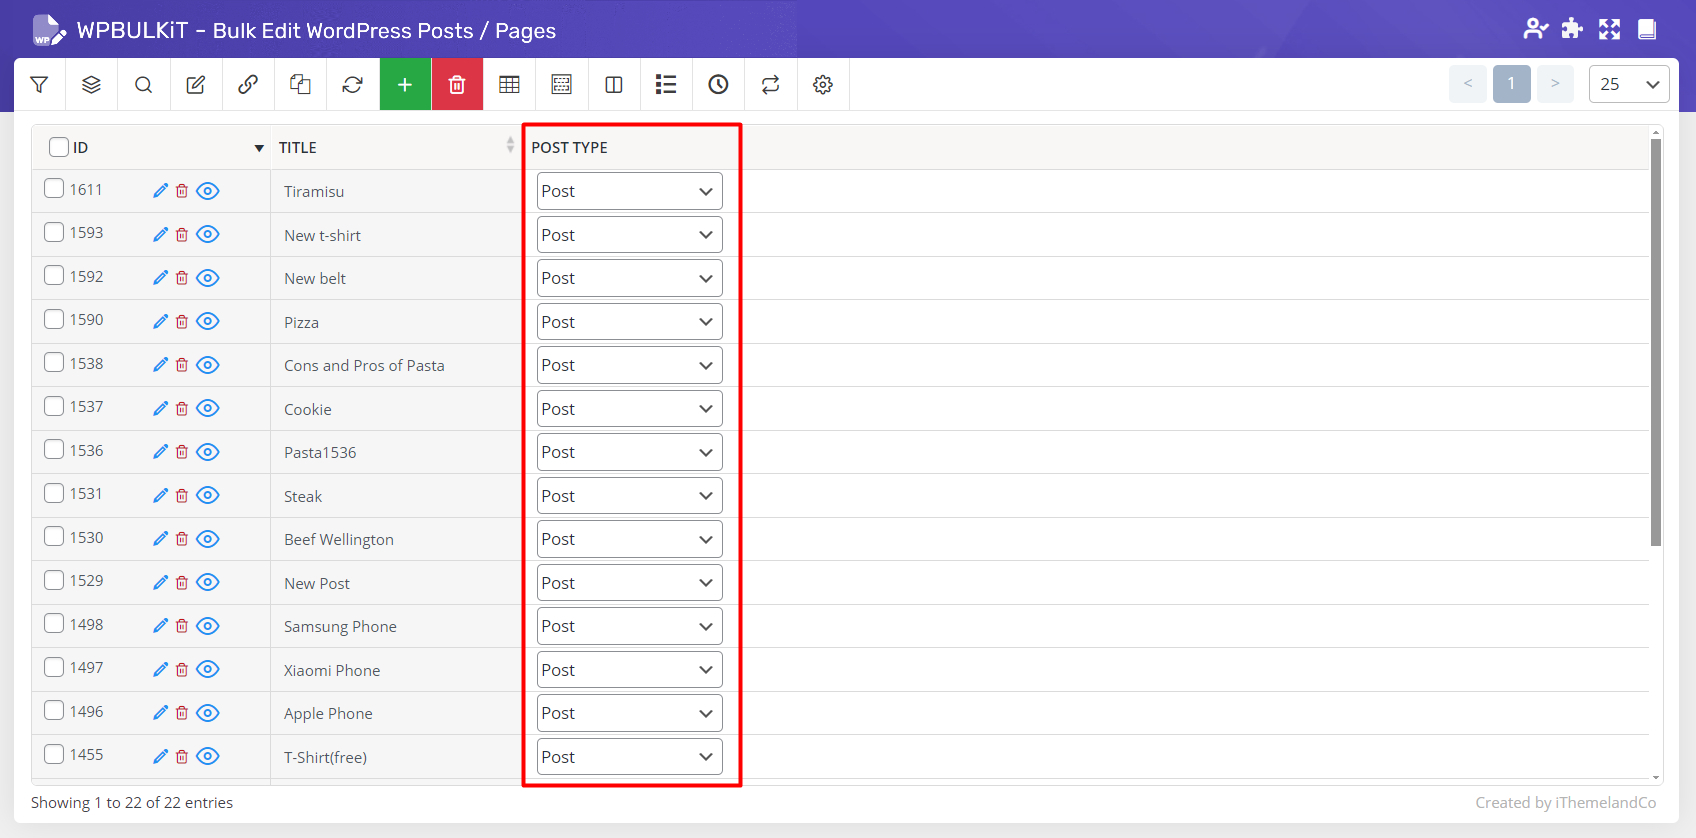
After marking the columns you need, you can easily click on “Apply to Table” without any need to save them. Then you can see that the post table will be changed accordingly.
For example, after marking “Post Type”, we clicked on “Apply to Table”, and our post table was changed as below:
Note: All of these options are available in other Custom Posts too, you can easily switch them by “Select Post Type” field.
Comments