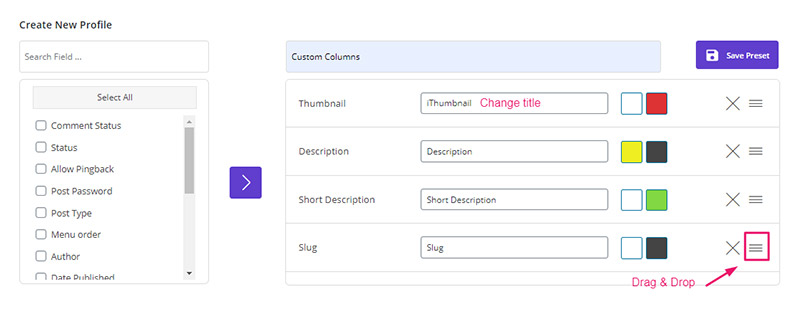
An important feature of the WPBULKiT – Bulk Edit WordPress Posts / Pages Plugin is that you can create and manage a separate column for all the fields in WordPress and customize order and title too.
To manage the columns, enter the ‘Column Manager’ section. In this section, there is a list of pre-created presets.

You can also create the desired preset. To do this, you must do the following steps
1- Select the columns from the left side
2- Add the selected columns to the right side
3- Relocate the columns using the hamburger icon(mentioned in above image)
4- Change the background color and text color of each column
5- Change the title of each column
6- Save
After saving the form, the created preset is displayed in the list at the top of the screen.
You can also select the created preset from the ‘Column Profile’ section and apply it to the table.
Do you need more information about that? If so, please read the article below:
Read More: How to manage post columns on WPBULKiT – Bulk Edit WordPress Posts / Pages Plugin?

Comments