Save / load filter profile on OBULKiT – Bulk Edit WooCommerce Orders plugin can help you to bulk edit the orders you need frequently, much faster. Continue reading to find out how you can save some filtering options in a profile and load it every time you need just by one click in our plugin.
Save filter profile
To save a “Filter Profile”, you have to open the “Filter Form” by navigating to the address below:
WordPress dashboard > iThemeland > OBULKiT > Filter Form button

and set some conditions to filter those orders you need, frequently.
We have divided all fields related to the orders into seven categories, including:
- General
- Billing
- Shipping
- Pricing
- Items
- Other fields
- Custom fields
You can use one or more fields in any tab to filter your order.
Read More: How to filter orders on OBULKiT – Bulk Edit WooCommerce Orders plugin?
Then, to save the profile you need to:
- Type a name in the textbox next to “Save Profile”
- Press “Save Profile” button
For example, in the below picture, we chose “US $” as the “Order Currency” and try to filter those orders that their “Cart Discount” is in the range of “$20 to $30”. To save this “Filter Profile”,

- Typed “Cart Discount” in the Textbox at the bottom right of “Filter Form”
- Clicked on “Save Profile” button
By performing this action, we are able to load this filter whenever need just by one click without any need to open “Filter Form” again.
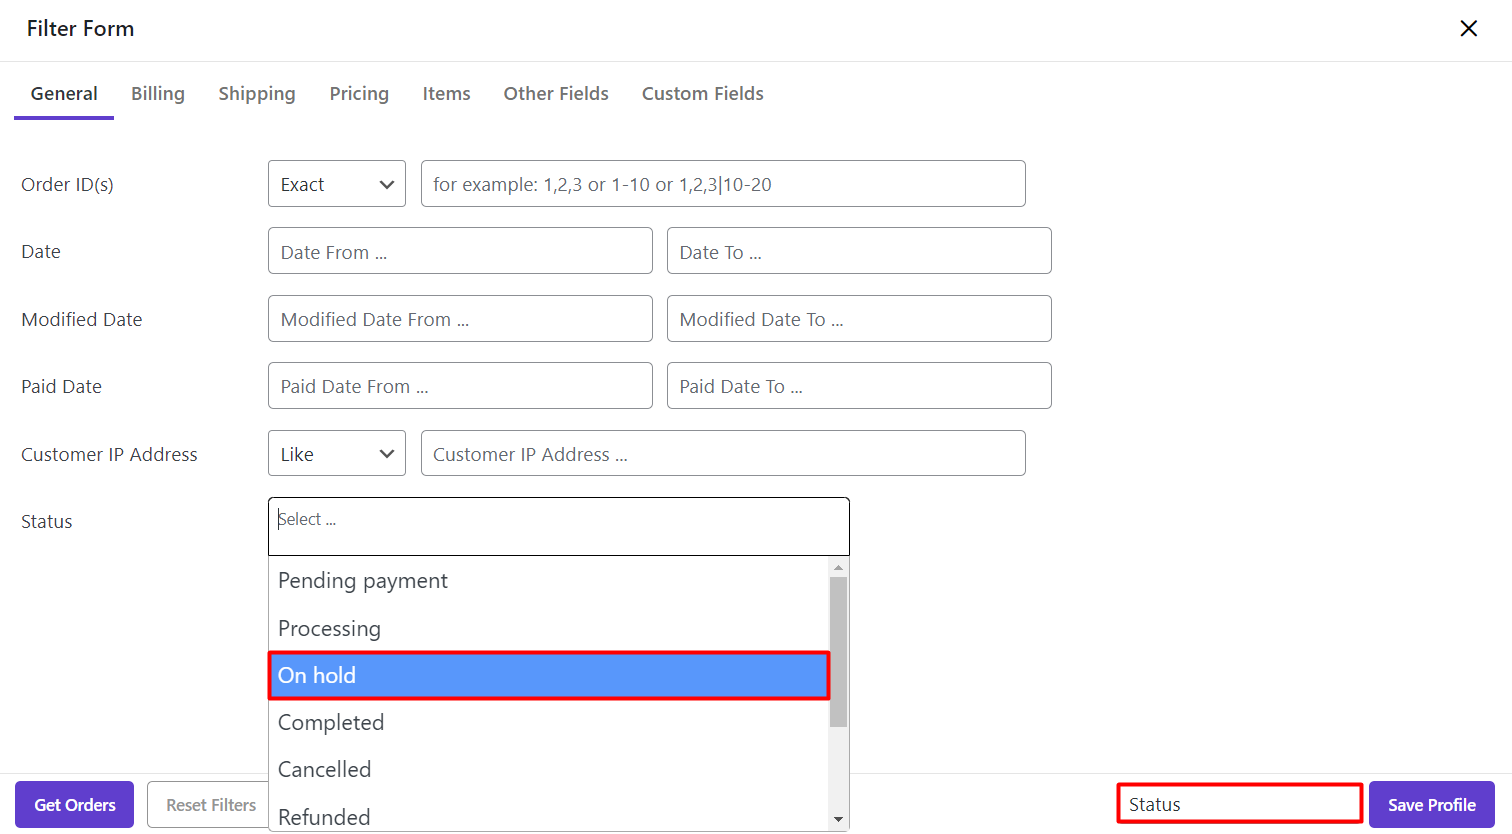
Now, let’s try to save another “Filter Profile” to better trace the options available for you in our plugin:
- Go to General tab in the “Filter Form”
- Click on the textbox next to Status
- Choose “On hold” and “Canceled” from the list
- Type Status on the textbox next to “Save Profile”
- Press “Save Profile” button

Stay with us to show you how we can load these Filter Profiles.
Load Filter profile
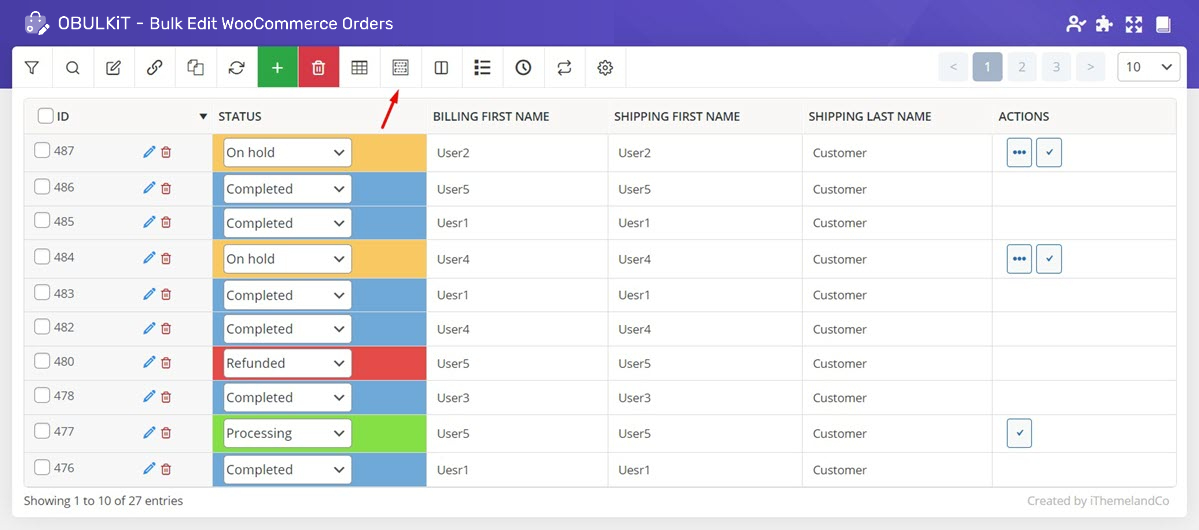
Loading a “Filter Profile”, that you have saved before, is simply possible by pressing “Filter Profiles” button at the main page of our plugin.
As shown below, by pressing this button, as many “Filter Profiles” as you saved before, will be displayed in a list.

In this list, you are able to do one of the below actions:
Use Always
By assigning this option to one of the “Filter Profiles”, every time you open the OBULKiT – Bulk Edit WooCommerce Orders plugin, the orders will be filtered according to the conditions of that “Filter Profile”.
For example, we marked “Use Always” of Status profile as illustrated below, so, when we open the plugin next time, this filtering condition will be applied to our order table and just those orders with “on hold” and “Canceled” status will be displayed in the table.

Load profile
By clicking on the Load button in front of each “Filter Profile”, all orders will be filtered according to the set conditions and display in the table.
For example, we pressed the “load” button of Status profile, so, the orders were filtered as shown below:

Delete profile
To remove those “Filter Profiles” that you don’t need anymore, you can just simply click on the “Delete” button in front of them.
For example, we clicked on “Delete” button of “Cart Discount Filter Profile”, so, as it is illustrated below, this “Filter Profile” is removed from the “Filter Profiles” list:

Note: “All orders Filter profile” is the default profile of our plugin, so you can not delete it.


Comments