Adding custom fields and meta key to OBULKiT – Bulk Edit WooCommerce Orders plugin is not a complicated task, thanks to the options we have provided in the “Meta Fields” tab, which can enable you to add them manually or automatically from orders.
The most amazing thing about adding “Custom Fields” and meta key to Order Table is that you also have access to them on the “Bulk Edit” form, “Filter Form”, and “Column Profile” form, just like other fields.
Adding custom fields via the meta fields tab
As shown below, there are two ways to add custom fields to our plugin:
Manually
Adding new fields manually is possible by following the steps below:
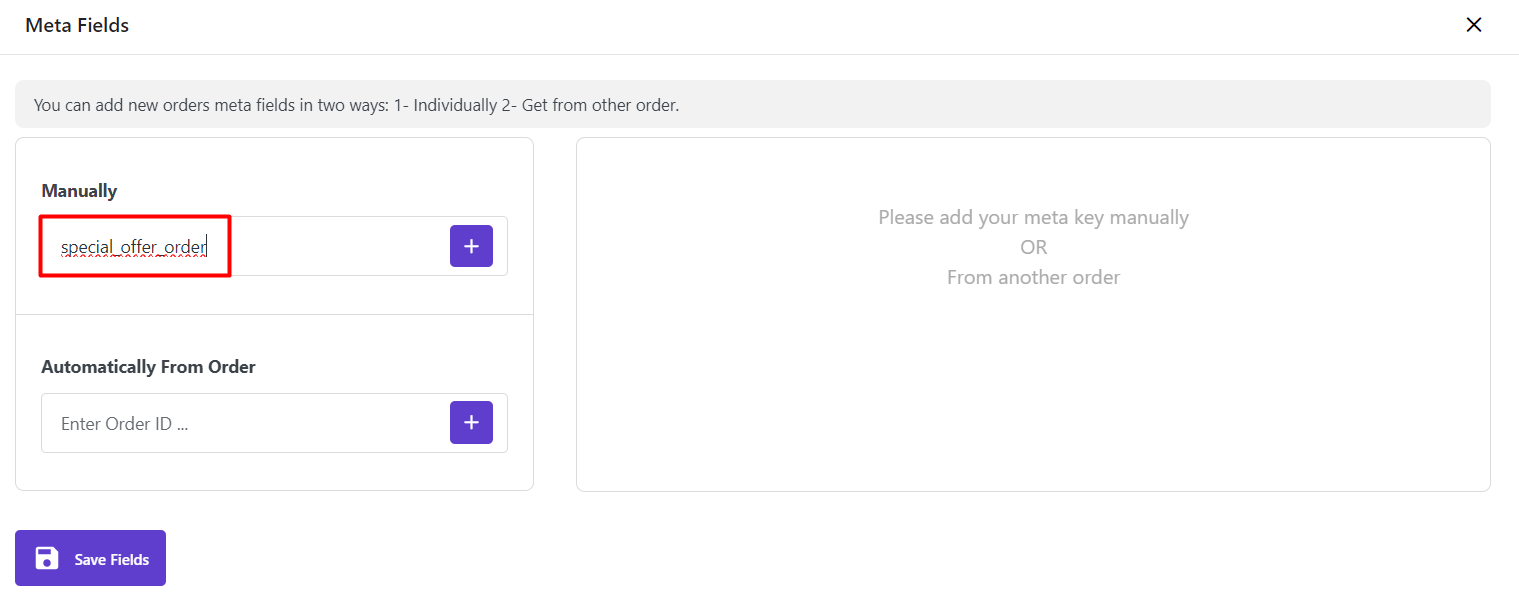
- Type the name of the custom field in the Textbox under Manually
- Click on “+” sign
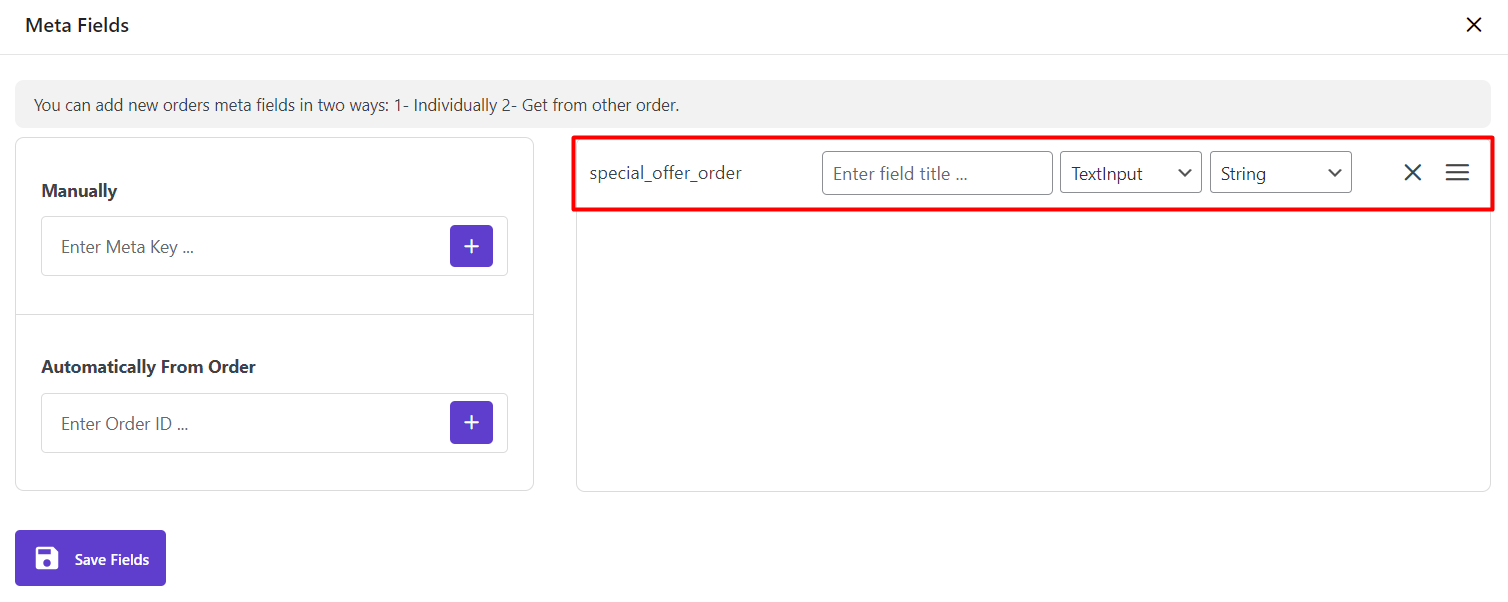
- Customize the custom fields in the opposite box
- Click on “Save Fields”
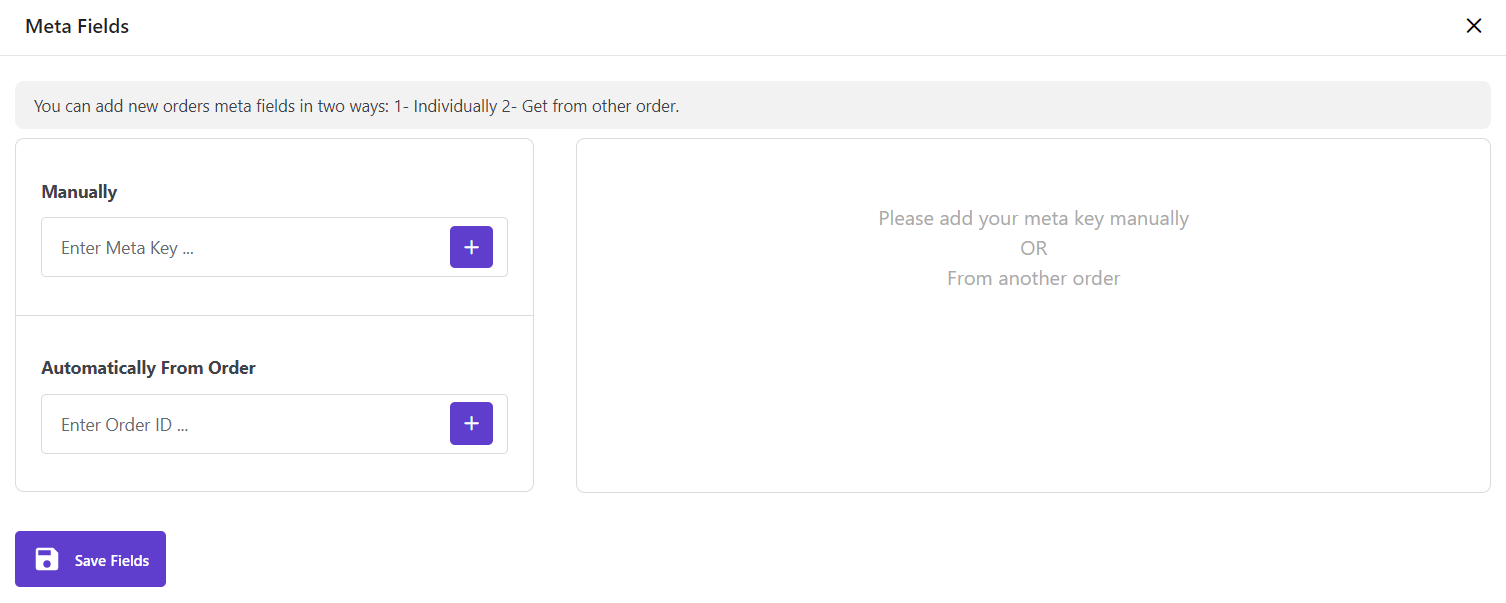
Automatically from orders
By using this option, you can add all custom fields assigned to one of the orders to our plugin very fast and easy.
The process is the same as the manual method, except that you have to type the ID no. Of your preferred order instead of the name of “Custom Field” in the Textbox.
As soon as clicking on the “+” sign after typing the ID no. Of the order, all custom fields related to that order will be added to the opposite box automatically, and you can customize and save them accordingly.
Let’s review some examples to make it clearer for you.
Example 1: Add custom fields to the plugin
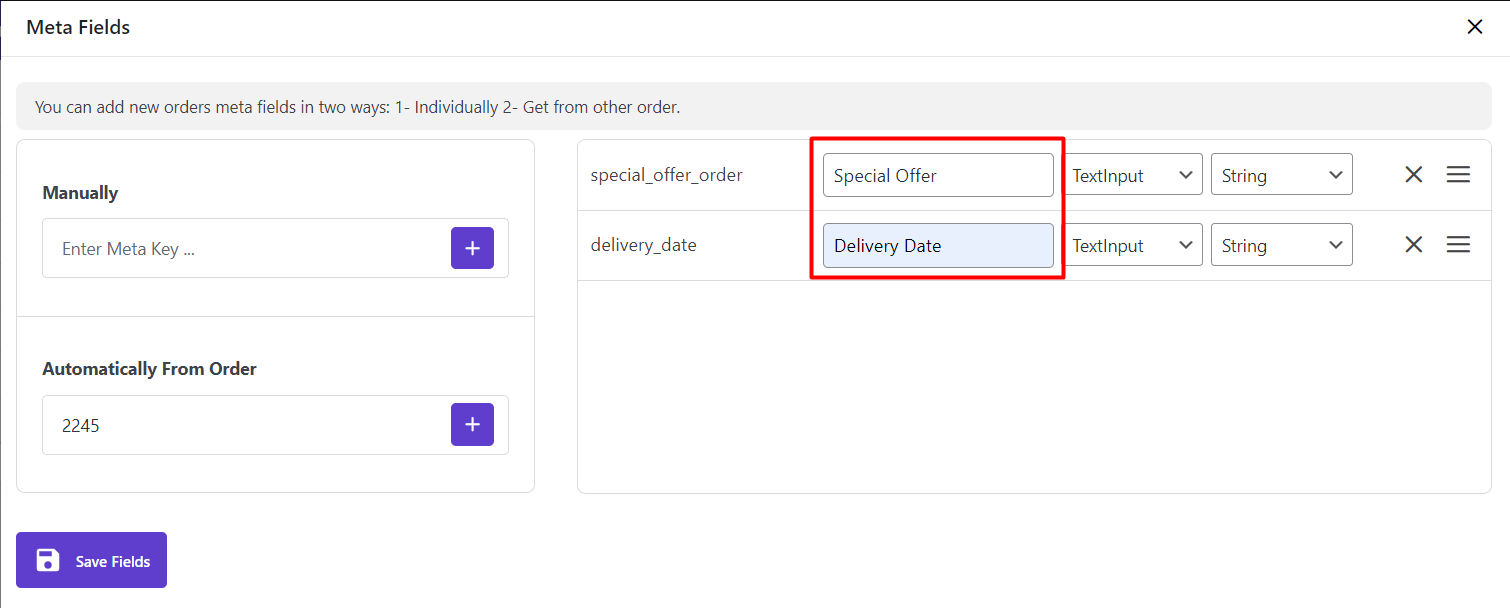
In this example, we want to add “Special Offer Order” to the plugin. It’s worth mentioning that you can just add those custom fields to the plugin that have already been added to the WooCommerce order page.
So, pay attention to the attention you are typing in the Textbox box as it must be exactly as the custom field name assigned to the WooCommerce order.
Example 2: Adding a custom field from Order automatically
To add custom fields automatically from the order no. 2245, we typed this No. In the textbox:
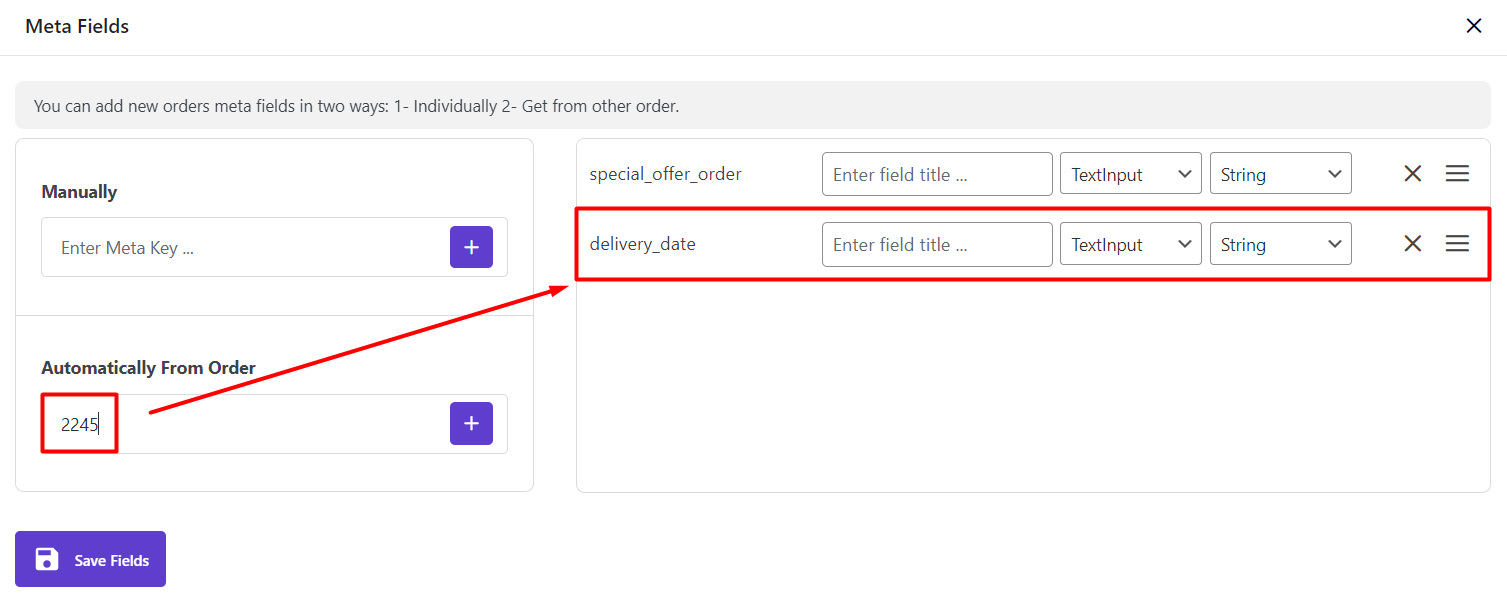
As shown below, all custom fields are assigned to that order No. were added to the opposite box.
As we mentioned above, by clicking on “+”, you can see the custom fields in the opposite box, and now we are able to customize them by using below options:
Change the name
If you want our plugin to display this meta field with different names on the other forms, you can type a new name in the Textbox in front of it.
For instance, we typed “Special Offer” in that box:
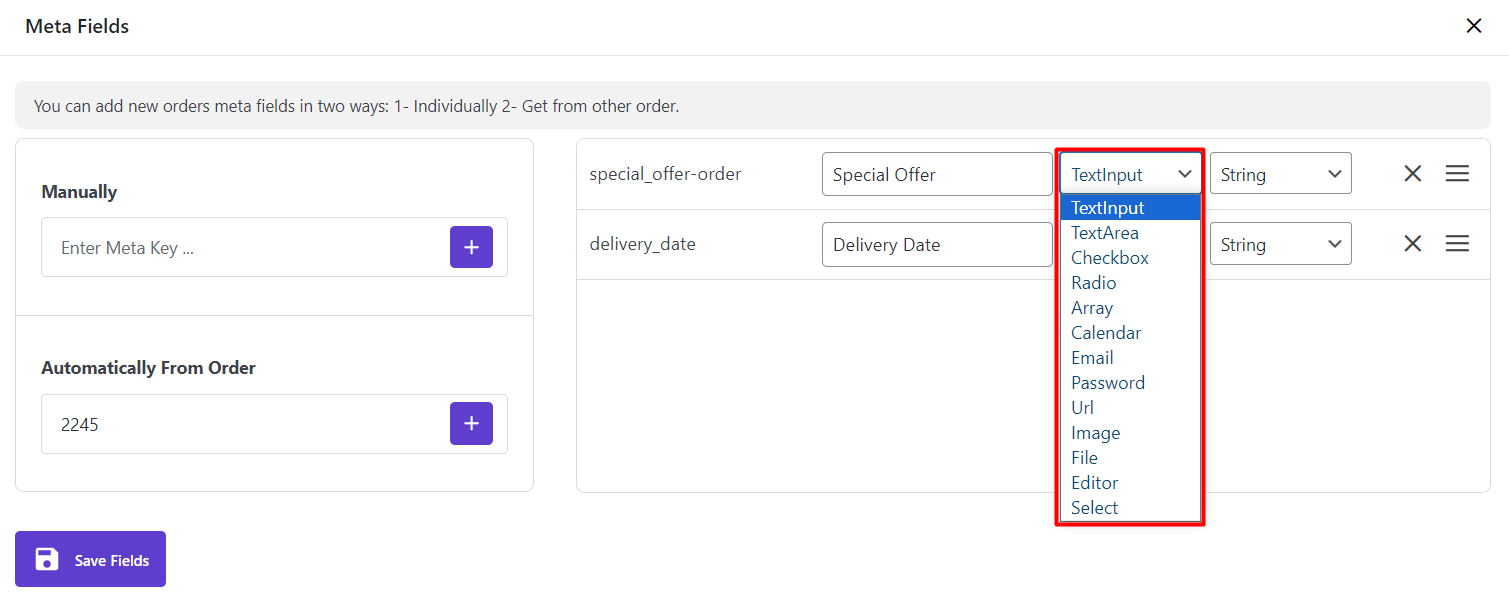
Change the type of custom fields
In the next box, you can choose a type for displaying the fields in the “Bulk Edit” form and “Filter Form”.
We have listed some default types that you can choose one of them to be assigned to the new fields, including:
- Textbox
- TextArea
- Checkbox
- Radio
- Array
- Calendar
- Password
- Url
- Image
- File
- Editor
- Select
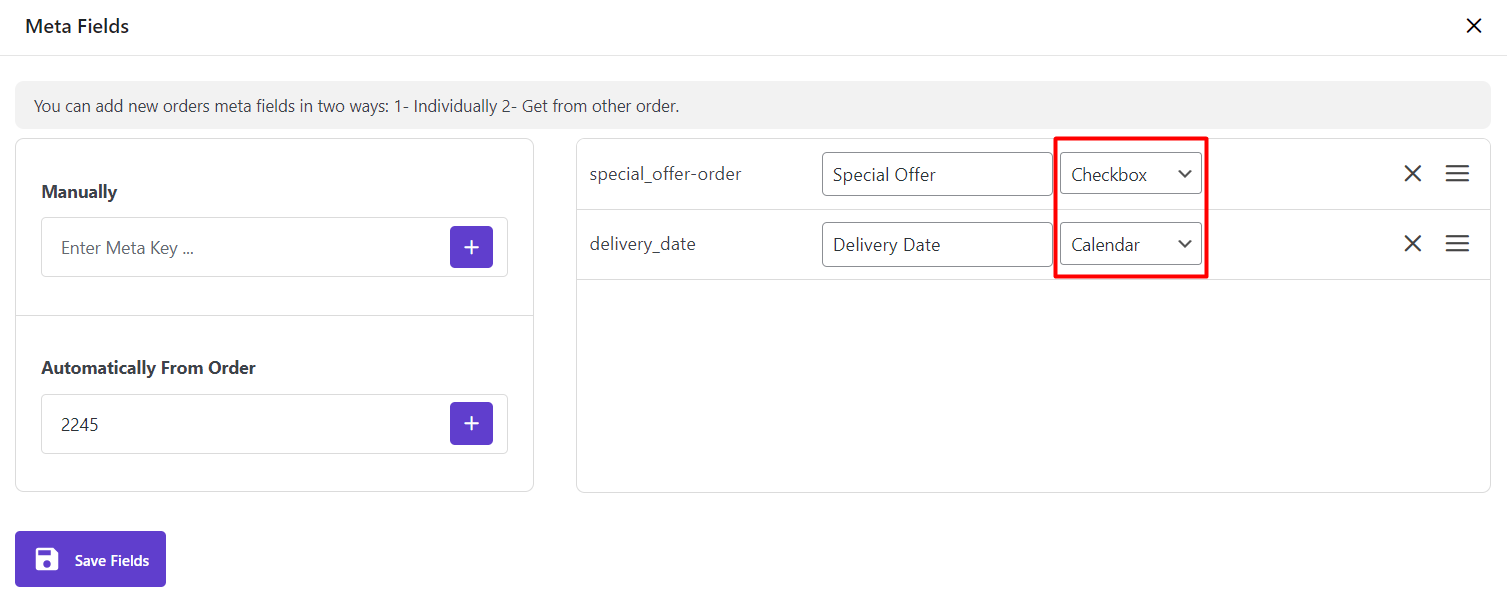
For example, we chose a Checkbox for “Special order” custom field as the data must be specified as a “Yes/ No” option. We also selected the Calendar type for “Delivery Date” to edit or filter the data of this custom field as a date.
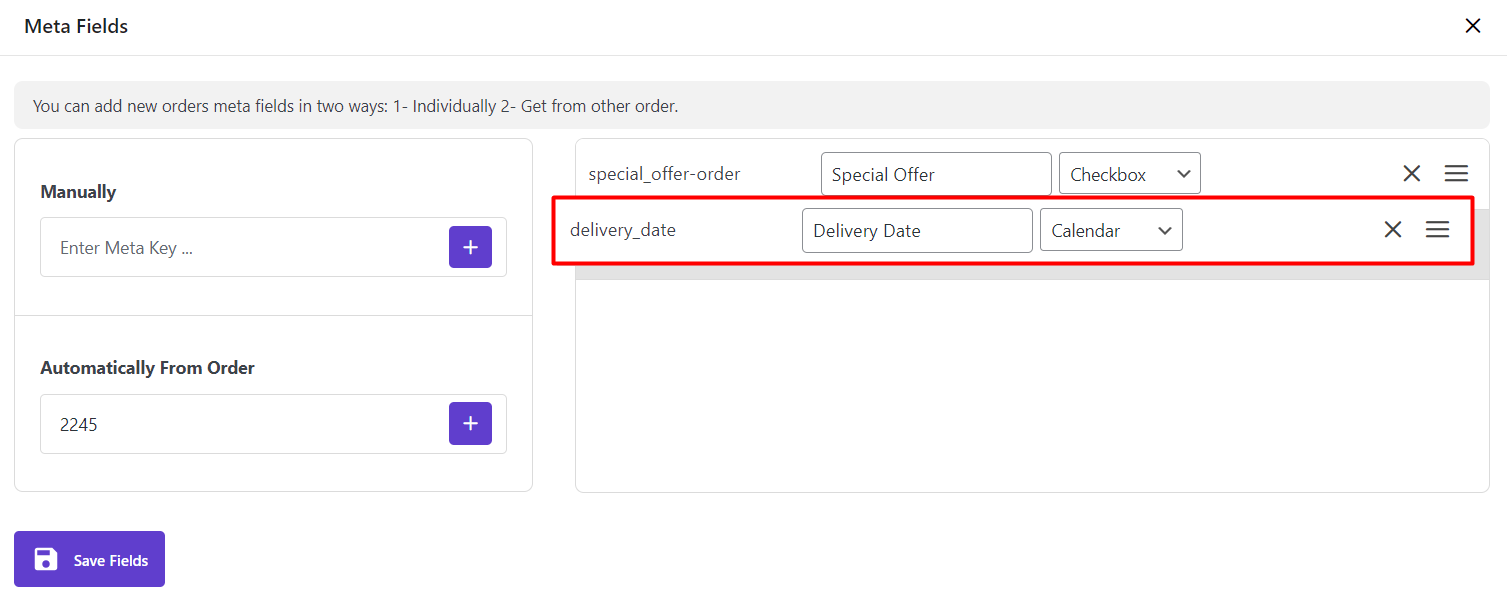
Change the order of custom fields/meta key
To change the order of custom fields columns, you can easily hold the click on the “” icon at the right and drag & drop it anywhere you want.
Delete custom fields
It is also possible to delete each custom field by clicking on the “X” icon. So, the removed meta field won’t be displayed in the plugin for editing or filtering.
Save custom fields/meta key
To make our plugin display the custom fields added in the “Meta Field” tab, you need to click on “Save Fields”.
Now, let’s see how these fields are available for editing and filtering in “Bulk Edit” form and “Filter Form”.
Using custom fields in Filter Form
As soon as saving the custom fields in the “Meta Fields” tab, all of them will be added to the “Filter Form” under “Custom Field” tab.

For example, we tried to filter orders with Delivery Date from 2012/03/07 to 17 by following below steps:
- Open “Filter Form”
- Go to “Custom Fields”
- Pick the first and second date from in-built calendar
- Click on “Get orders”
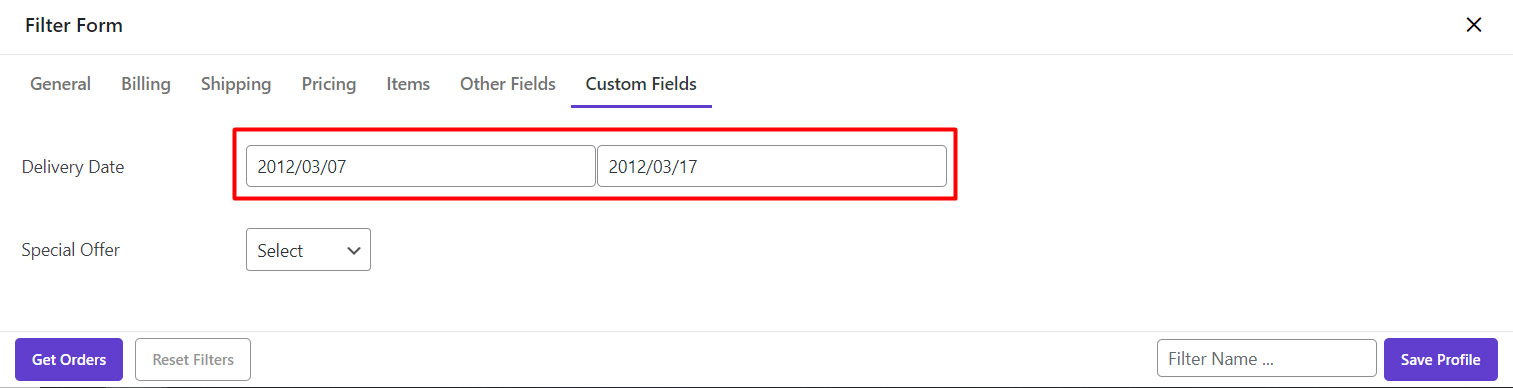
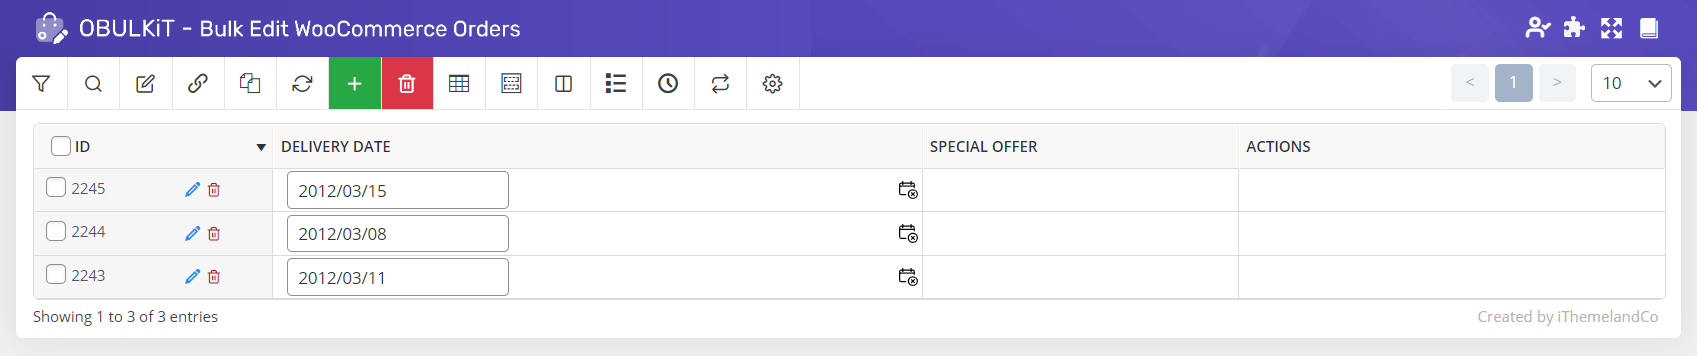
As illustrated below, those orders were filtered successfully:
Add custom fields and meta keys columns to the order table
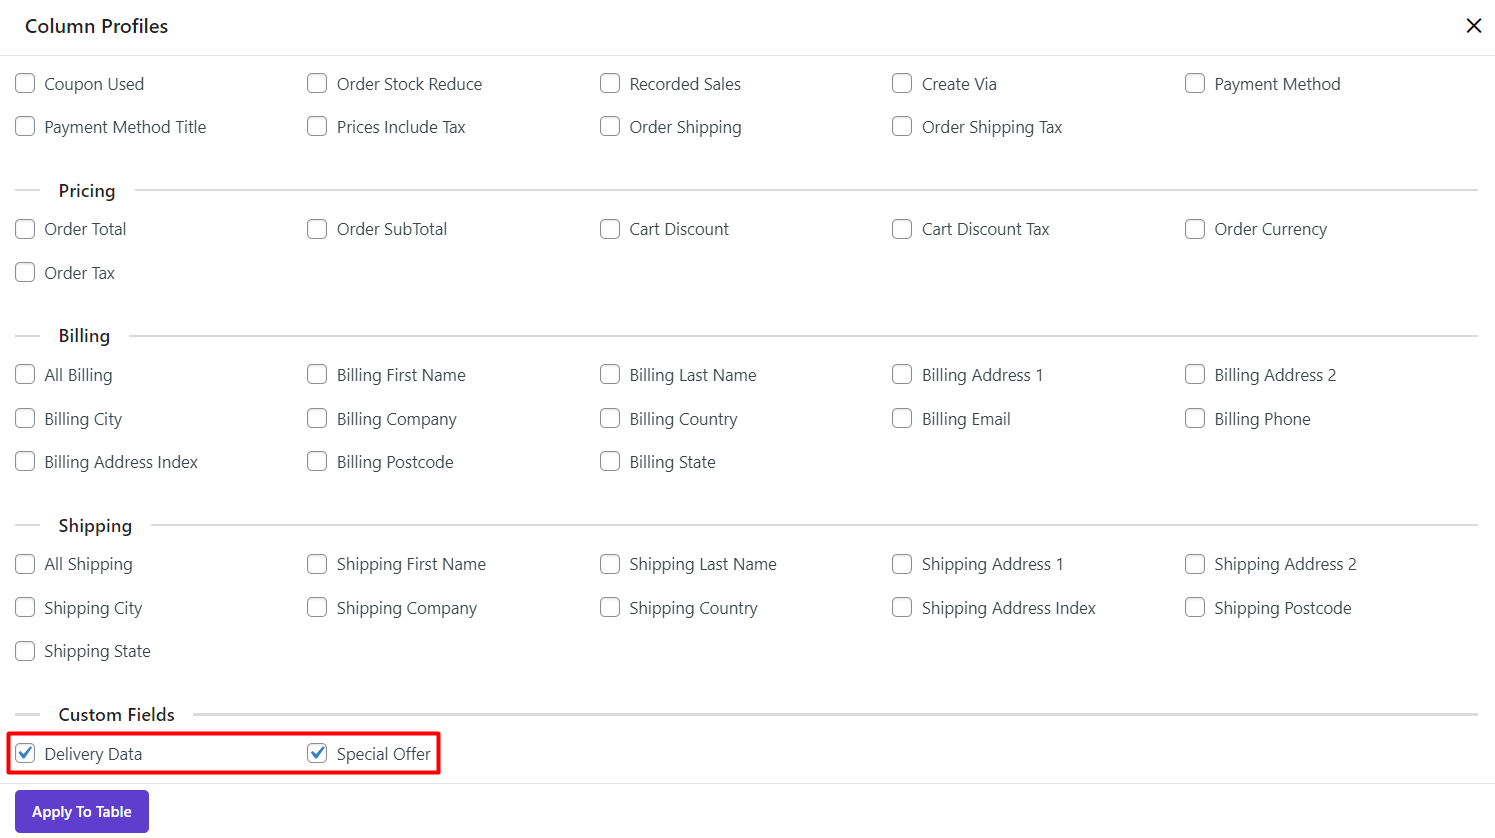
Adding custom fields to the order table is easily possible via “Column Profiles” form.
To manage the columns displayed in the order table you can:
- Press column profile button on the main page to open the “Column Profile” form
- Scroll down to see “Custom Fields” section
- Mark those fields that you need to be displayed in the table
- Click on “Apply to Table”
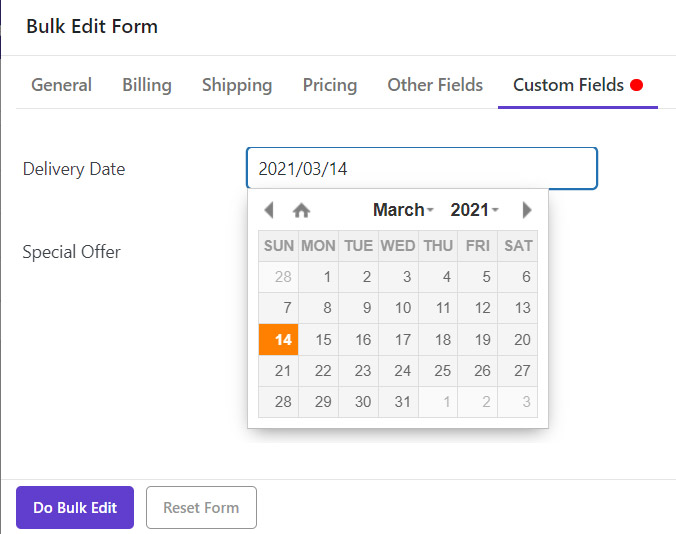
Bulk Edit Custom Fields
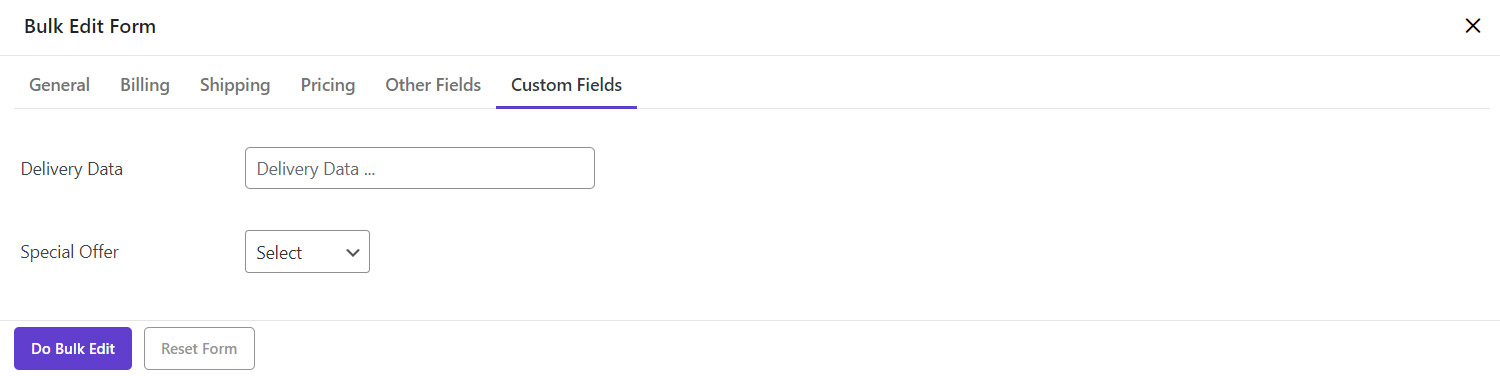
After saving the custom fields and meta key, you have access to them on the “Bulk Edit” form by pressing the “Bulk Edit” button on the main page and going to “Custom Fields” tab.
As shown below, both custom fields we added before displayed in the “Custom Fields” tab:
For example, we clicked on the box in front of “Delivery Date” and as you can see below, the built-in calendar was opened.
So, we picked a date to be assigned to this field for the filtered orders:
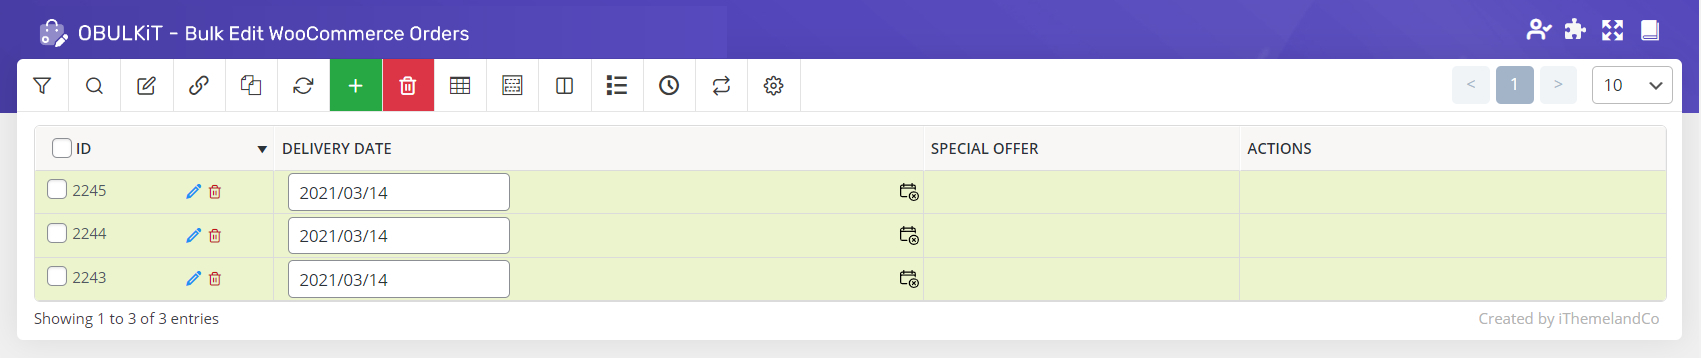
By clicking on “Do Bulk Edit”, the Delivery Date of all filtered orders has been changes as shown below:
Comments