WooCommerce report plugin comes with a user-friendly interface covering all tools and options you need to generate comprehensive reports for assessing the performance of your online store.
In this tutorial, we want to overview the plugin and get familiar with its practical options, generally.
Let’s get started from the dashboard.
WooCommerce report plugin dashboard
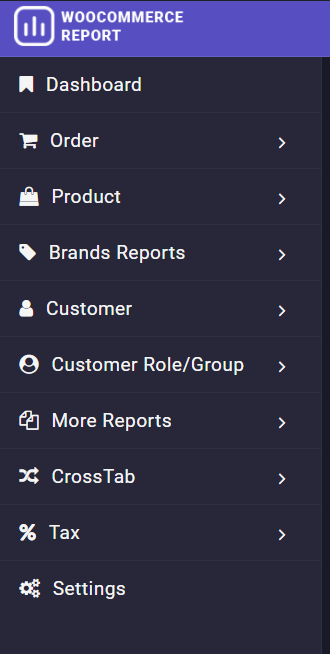
In the dashboard, you can find the most useful items for generating WooCommerce reports which are divided into 8 tabs, including :
- Order
- Product
- Brands Reports
- Customer
- Customer Role/Group
- More reports
- Cross tab
- Tax
At the end, there is also the setting menu enabling you to make some general changes to the plugin. You can find more information about it in “How to configure general settings in the WooCommerce report plugin?”.
Generate reports
To generate a report by using this plugin, you need to proceed with two simple steps:
- First: Choose the right item from the dashboard.
- Second: Set a date interval.
Here you can find how to do these steps in more detail:
First: Choose the right item from the dashboard menu
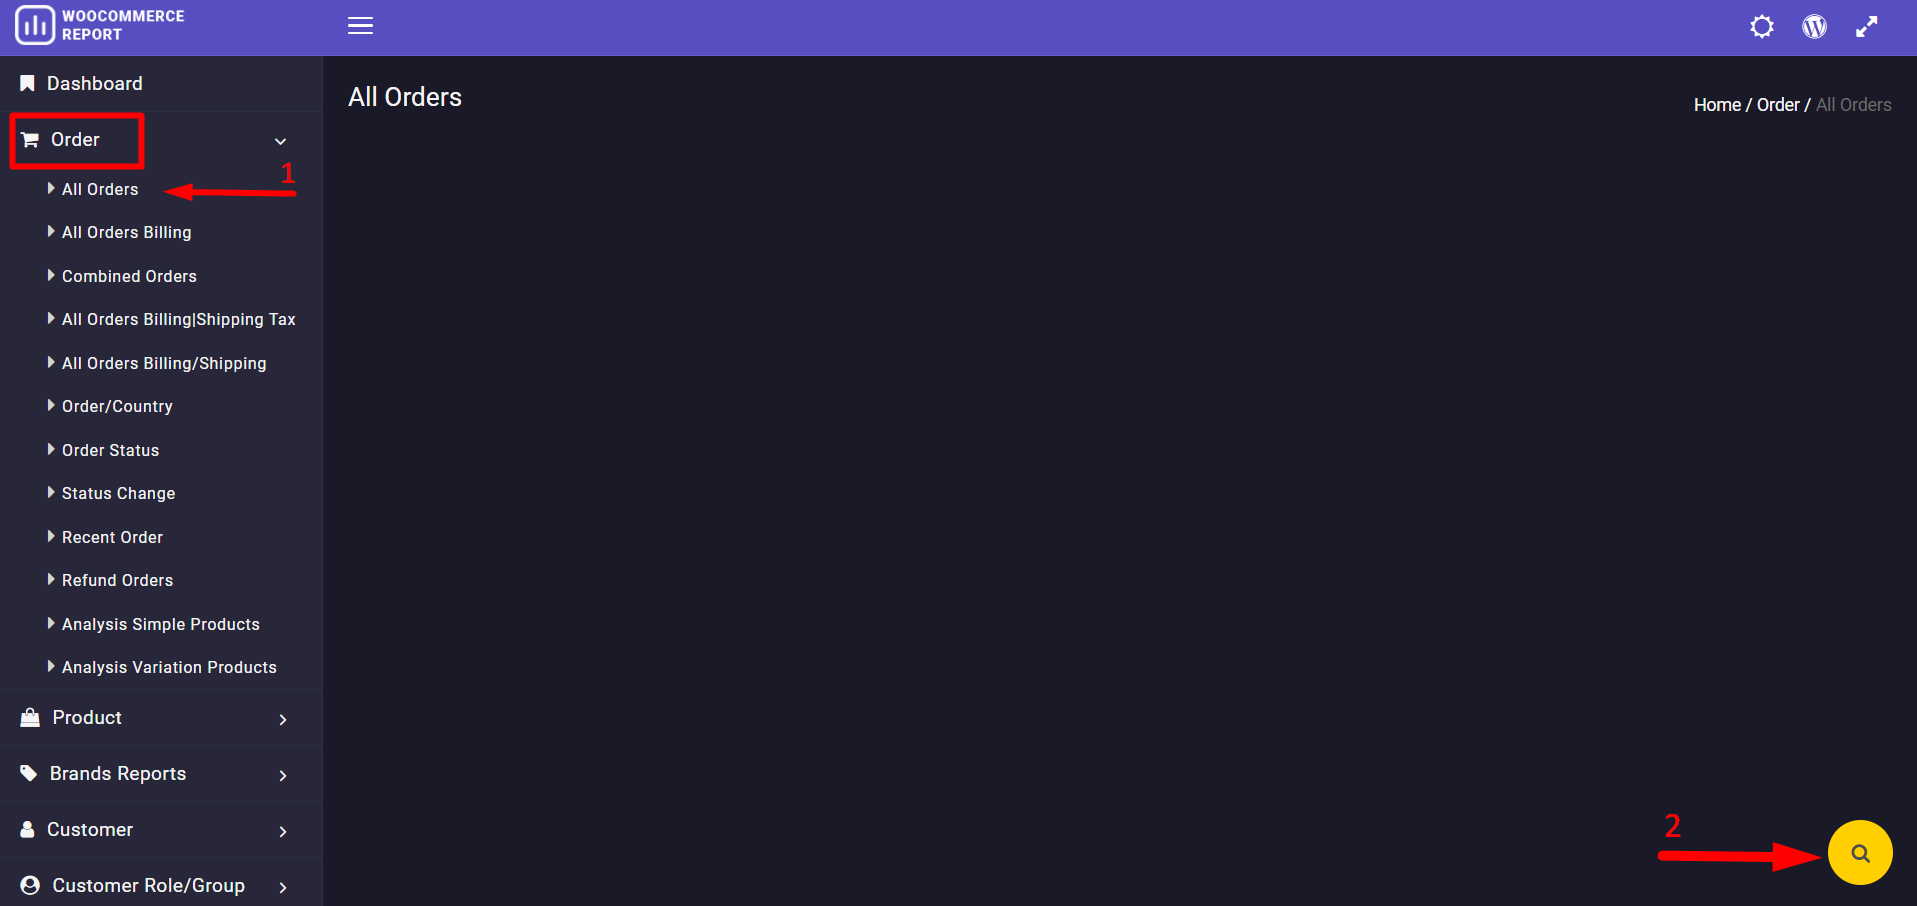
To choose the report type you need click on one of the plugin menu item and then choose one the its submenu items.
For example, if you want to generate a Sales Report, open the Order item dropdown list then choose All Orders.(1)
Second: Set a date interval
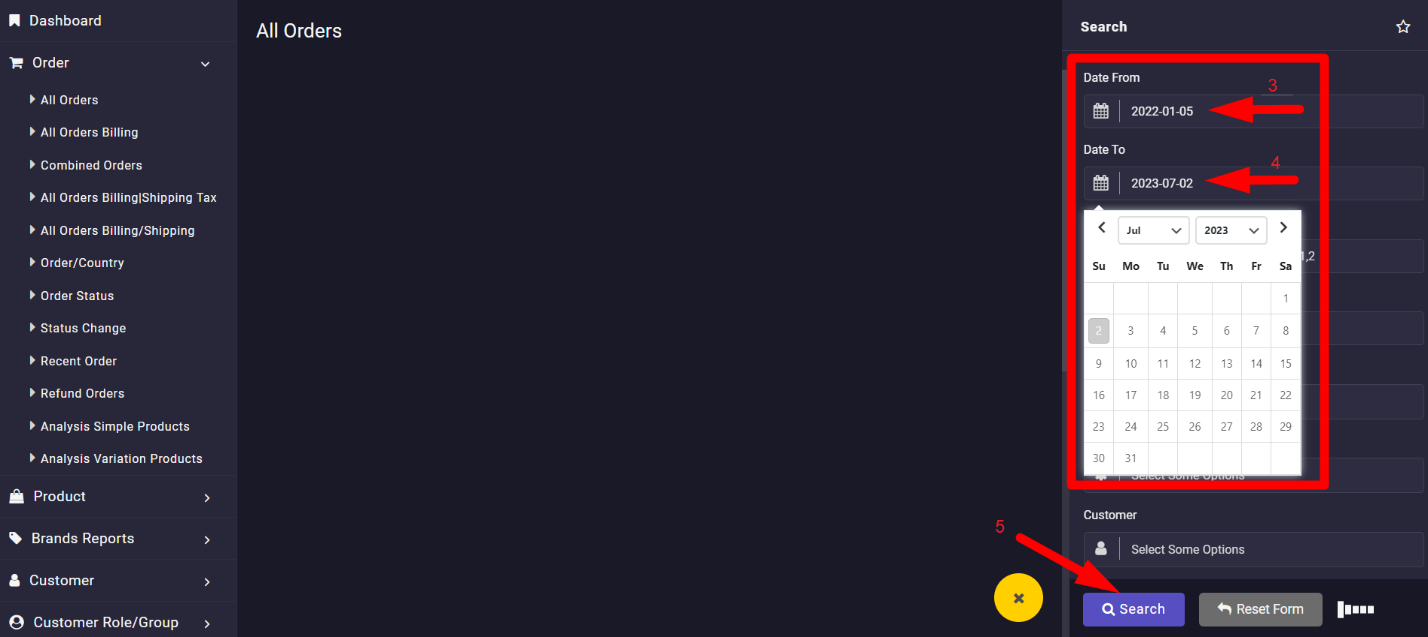
To see the report, it is necessary to set an date range as below:
- Click on the Search icon at the bottom of the page (2).
- Use the built-in calendar, to set dates for the Date from (3) and Date to (4) fields.
- Click on the Search button (5).
Now you can see a comprehensive report in a table.
Customize the report table
To customize the report table, some tools are designed in this plugin which are:
- Table rows No.
- Table columns
- Export report
- Search box
- Search form
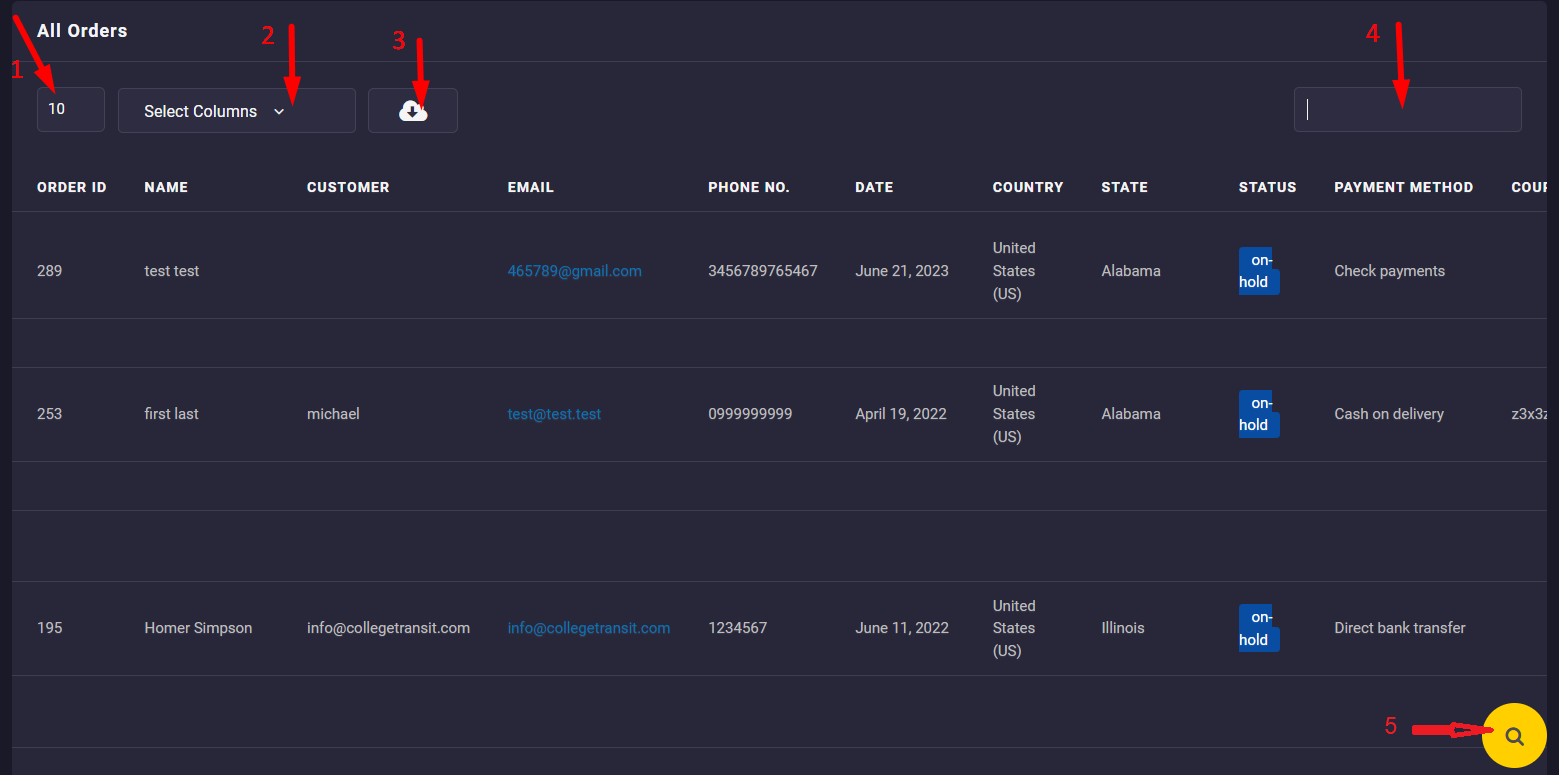
Let’s review them one by one:
Table rows number
The first item you can see on the top of the table is the table row number. You can set how many rows to be displayed in the report table by choosing one of the numbers in this drop-down list.
Table columns
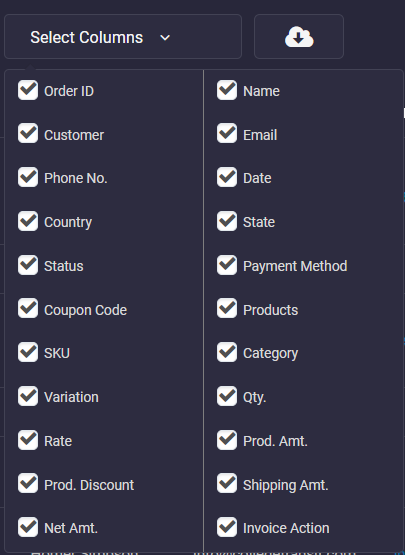
One of the amazing features of the WooCommerce report plugin is the ability to customize the table columns based on your needs by clicking on the Select Columns field.
In this field, you can find a list of all columns available to this report, then you can mark/unmark the columns you want to see their data in the table report.
Export report
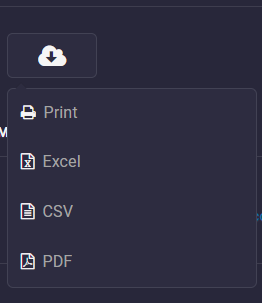
Exporting reports to PDF, CSV, and XLS format using the WooCommerce report plugin is simply possible by clicking on this icon.
You can print the report directly or save the report on your system as an Excel, CSV, or PDF file.
Search box
The search box is a handy tool for finding the information you want quickly in the table report. You can search for any name, number, or field in the search box to see the related data in the table.
Filter form
You have access to the search form by clicking on the Search icon at the bottom of the table.
In this form, you can add the report to your favorite list by pressing the Star icon on the top.
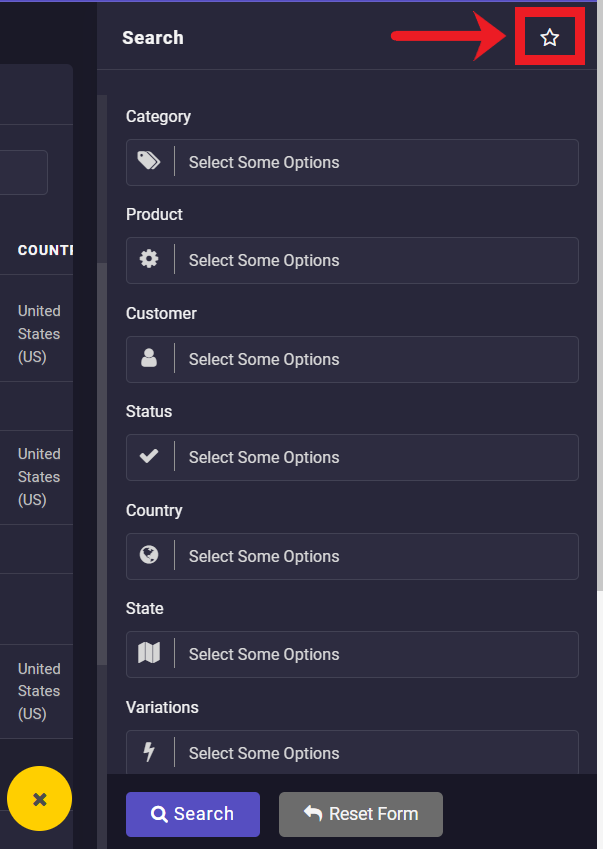
Some options are also available in this form which makes customizing the table report easier for you. For example, as illustrated above, you can filter your report by category, product, customer, status, etc.
Summary report
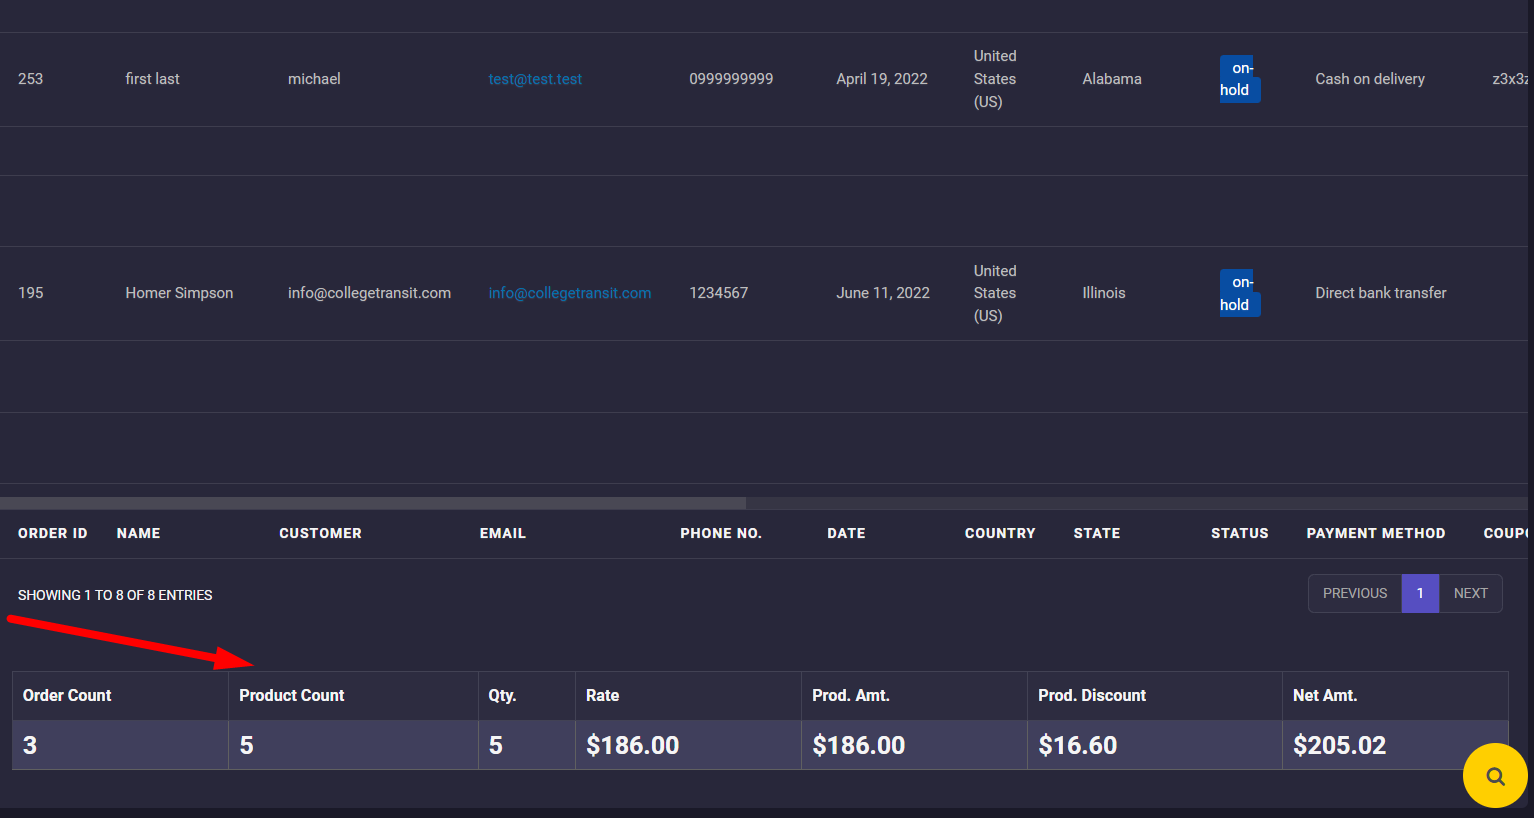
If you scroll down the report table, you can find a summary report at the bottom of the page which is generally a total count or total amount of the most important fields related to the report you have generated before. The columns reported in this summary are chosen by the plugin and you can not change them.

Comments