When the managers of big online stores sell many products in different categories, generating sales reports by product category is very important. However, generating this report in WooCommerce is not flexible. Follow this tutorial to see how the WooCommerce report plugin can help store managers solve this problem.
What is a sales report by product category?
Sales report by category provides comprehensive information about the orders placed in an online store related to product categories separately. Generally, this report lists the product categories in a table. It reports other information like the number of orders, the number of products, the total sales amount, and others related to those categories in different table columns.
Why do store managers need sales reports by category?
Store managers generate sales reports by product category to:
- Analyze which product categories had the most sales in a date range.
- Have an insight into the most favorable categories in their online store.
- Plan marketing strategies and promotions for the categories with less customer attention to boost their sales.
- Predict which product categories need to be supplied more in the future.
How to generate a sales report by product category?
In this tutorial, you can find out how to set up a custom sales report for the product categories in your WooCommerce store based on date range with a click.
For example, consider that you want to review the overall sales of all products in the Accessories and Clothing categories from 07.July.2017 to 04.July.2023.
Let’s generate this report in our plugin in 2 simple steps.
Step 1: Open all order report
To quickly create sales reports for smart decision-making and monitoring sales, you must go to Order > All Orders (1).Then to open the search form, click on the Search icon at the bottom of the page(2).
Step 2: Set date range and categories
In the Search form, set the date range by using a built-in calendar provided to help you easily find the date you want in the Date from and Date to fields.
In this example, we set the date range from 07.July.2017 to 04.July.2023.
There are also some other filter options in this form allowing you to generate the sales report exactly as you required like:
- Order ID
- Customer
- Category
- Product
- Etc.
As we aimed to generate the report based on Product categories in this tutorial, simply click on the Category box and choose our desired categories from the list which are Accessories and Clothing (3).
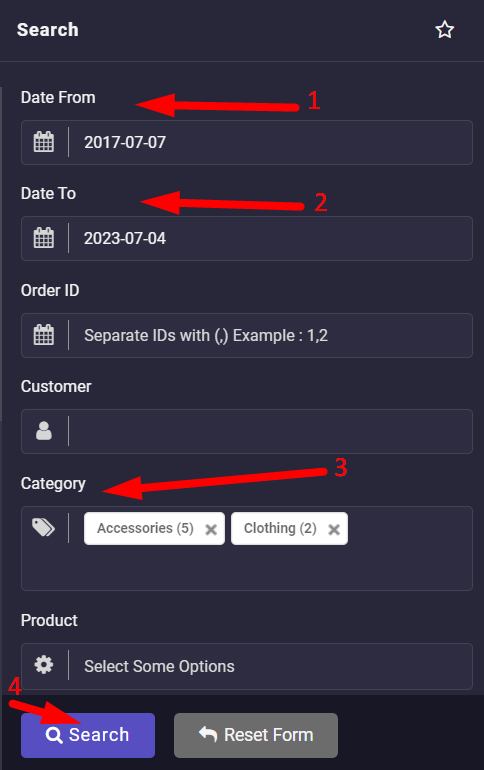
Finally, to see the report in the table, click on the Search button. (4)
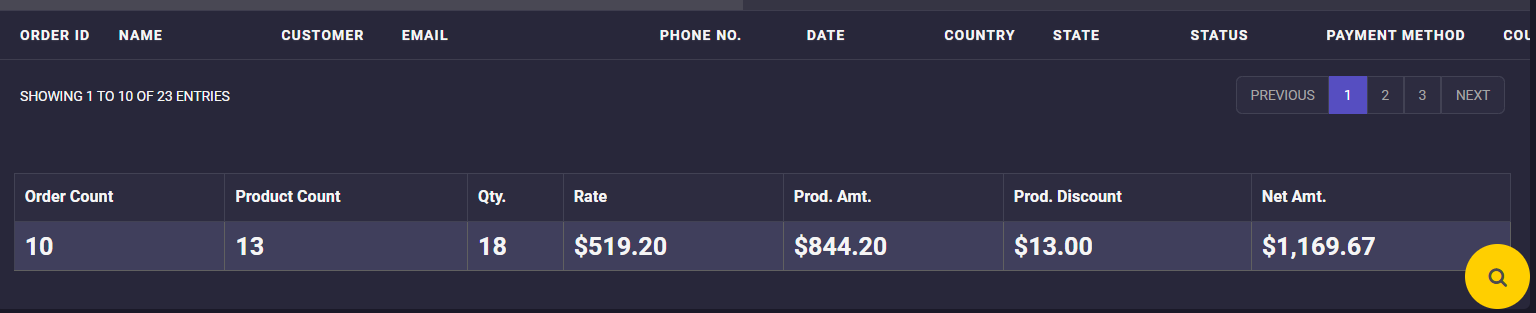
In this report, you can find out some practical information about such as:
- Customer name
- Customer email
- Customer phone number
- Order date
- Order country
- Payment method
- Etc.
The Sales report related to the Accessories and Clothing Categories is now displayed in the table and you can customize it more with the tools and options available on this page as we described in “General options of WooCommerce report plugin”.

You can also check a summary report at the bottom of the page which is the total amount of some useful fields in the report table such as Product Amount, Net. Amount, Etc.