


The eCommerce industry provides an amazing opportunity for wine sellers to launch an online wine shop and develop their business. With effective eCommerce tools like WooCommerce and WooCommerce product table plugin creating and designing a WooCommerce wine shop is a seamless task that anyone – even with no coding skills- can jump on.
In this guide, we want to show you how easily you can design a WooCommerce product table to sell wine online WooCommerce. Let’s go through the steps of running a WooCommerce beer online shop.
How to start creating a WooCommerce wine store?
When it comes to selling wine online WooCommerce store, there are a few things that you need to prepare for your WordPress website. Here, you can find the details about what you need to run a WooCommerce wine shop:
1. Install and configure WooCommerce plugin
First of all, Installing the WooCommerce plugin is necessary to convert a simple WordPress site into a lucrative online store. WooCommerce allows you to add wines as individual products and set your payment gateways to set up your online wine shop.
WooCommerce is available in the WordPress respiratory and you can simply install and activate it by following a guiding wizard.
Once you have followed the initial steps to set up your WooCommerce wine shop, you have access to all the necessary options for running your eCommerce business in the WooCommerce dashboard. However, before going through it, you need to choose a theme for your eCommerce platform.
2. Customize your store with an eCommerce theme
The WordPress theme you choose has a great influence on your website’s look and feel. Moreover, it can impact the shopping experience and make your customers satisfied with a professional design. Although WordPress has a wide range of excellent themes, you need to find a theme for your eCommerce platform that is compatible with WooCommerce.
If finding a WooCommerce theme that aligns with your brand and effectively displays your product is hard for you, try the below ones which are among the best visually appealing, easy to navigate, and well-organized WooCommerce themes:
- Astra ‒ This is a lightweight theme with amazing tweaking features for designing your online wine shop.
- OceanWP ‒ This is a fast WooCommerce theme useful for various e-commerce niches including WooCommerce wine shop.
- Zigcy Lite ‒ This is one of the best SEO-ready WooCommerce themes which is free to use.
- Storefront ‒ This is the most popular WooCommerce theme with a range of tools and options for customizing online store looks.
You can easily find and install these themes by navigating to Appearance > Themes from your WordPress dashboard and selecting Add New Theme.
3. Add Products to sell wine online WooCommerce
After activating your theme, it’s time to add your products to the WooCommerce online wine shop by following the below steps:
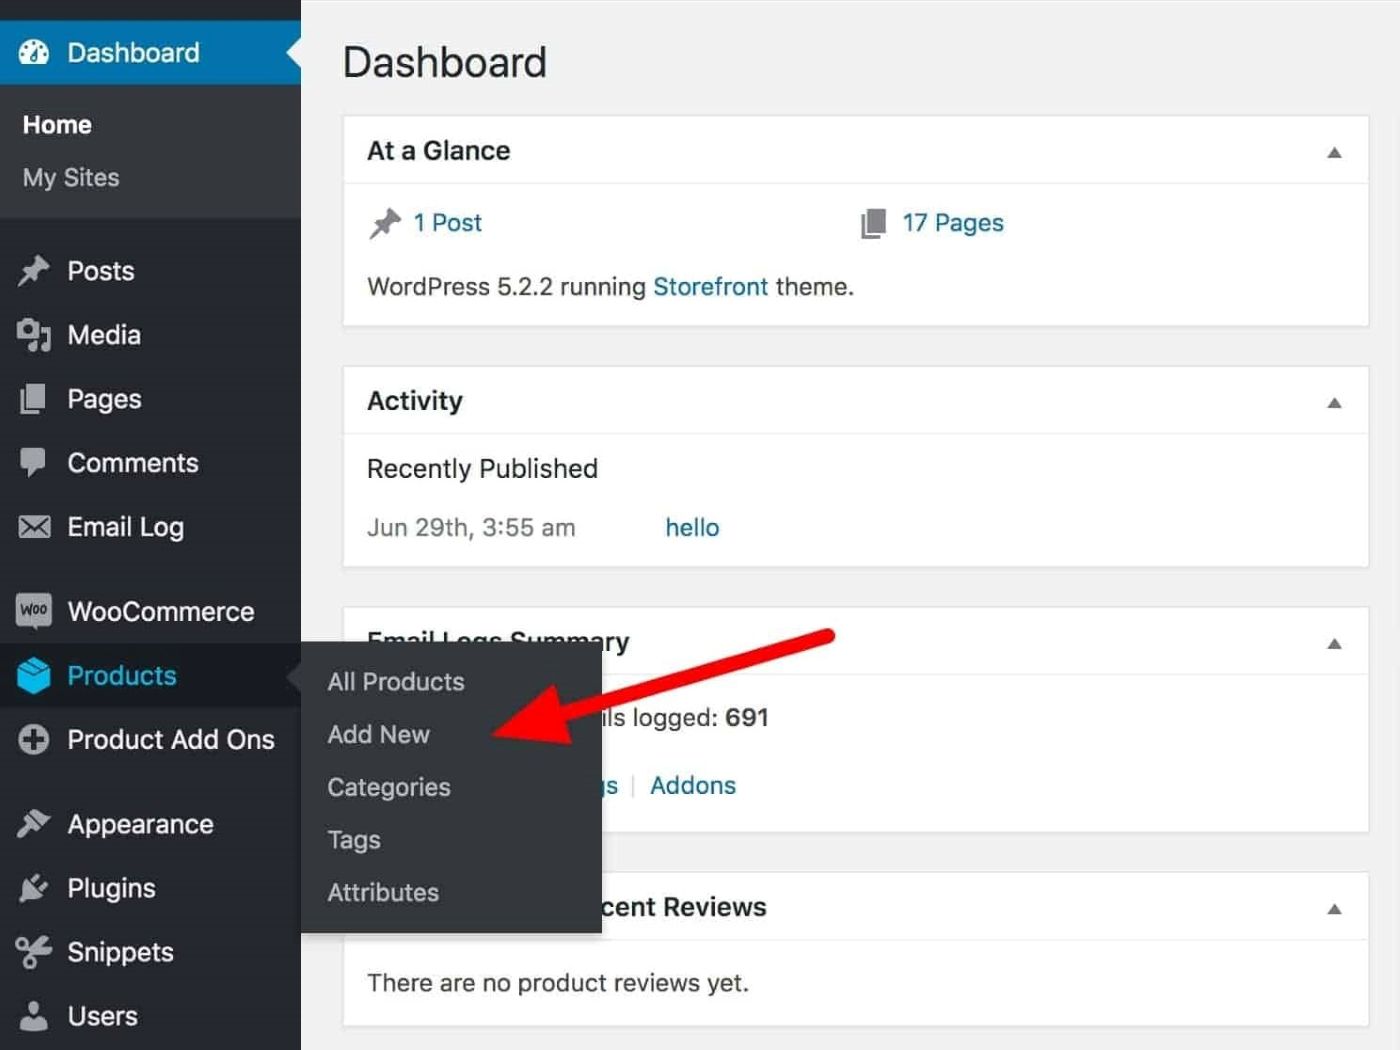
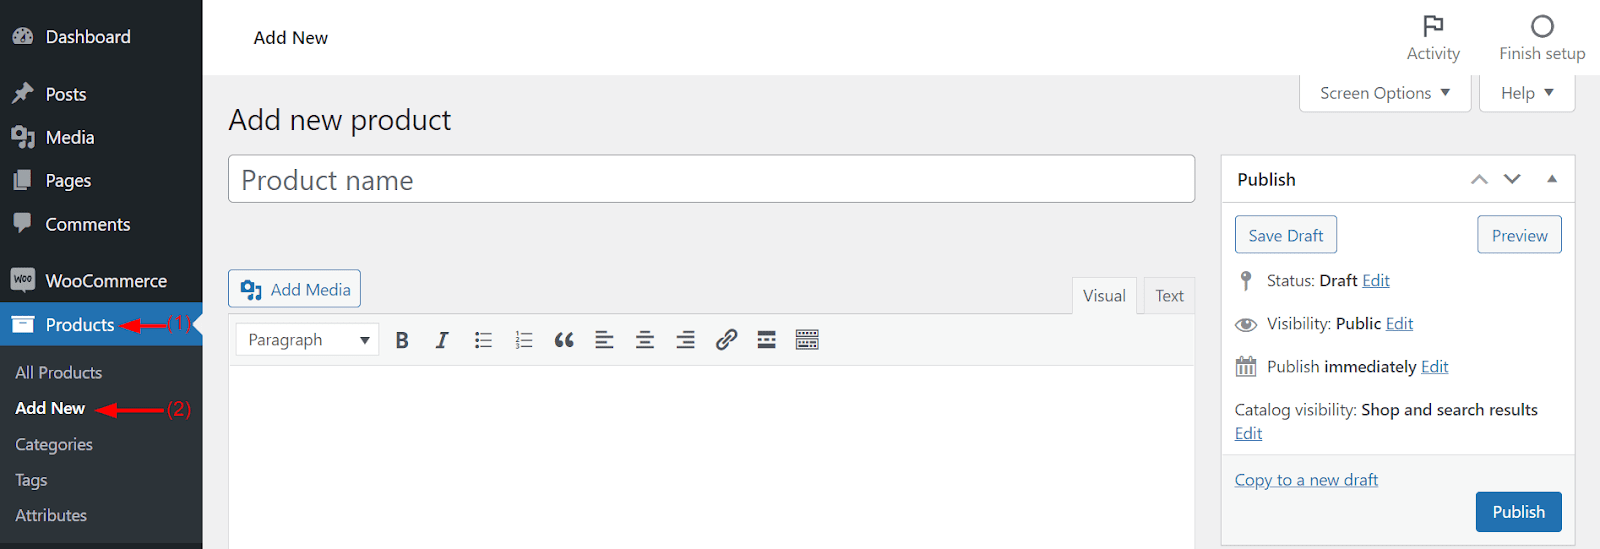
- Go to WooCommerce > Products > Add New.
- In the Add New Product page, first, you need to insert a Title and then a description in the textbox.
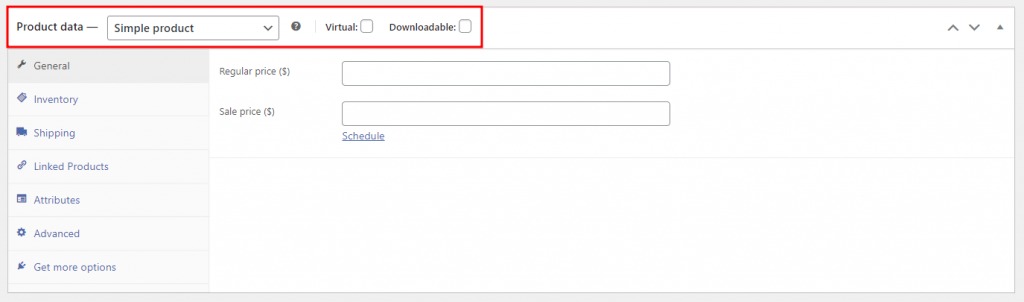
- In the next section, you have to choose your product type from the dropdown list of Product data. You can choose either a Simple product or Variable product. As you are selling physical goods, there is no need to mark Virtual or Downloadable options. But, you have to fill in other necessary information like Regular price, Shipping information, Attributes, Variations – if you have chosen the Variable products, and more.
- In the right panel, you can also find Product categories and Product tags in addition to Product image and Product gallery.
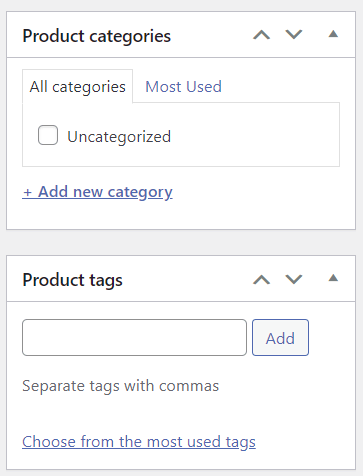
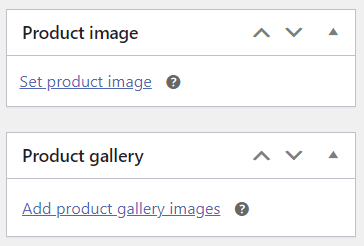
- Add proper information for these items and finally press the Publish button to add the product to your WooCommerce wine shop.
4. Add attributes to the WooCommerce wine store
All products have many features that customers need to review before ordering them. The best way to inform your customers about wine features like Brand, Taste, Bottle Size, etc. Is adding different attributes to WooCommerce and assigning proper values to them for each product.
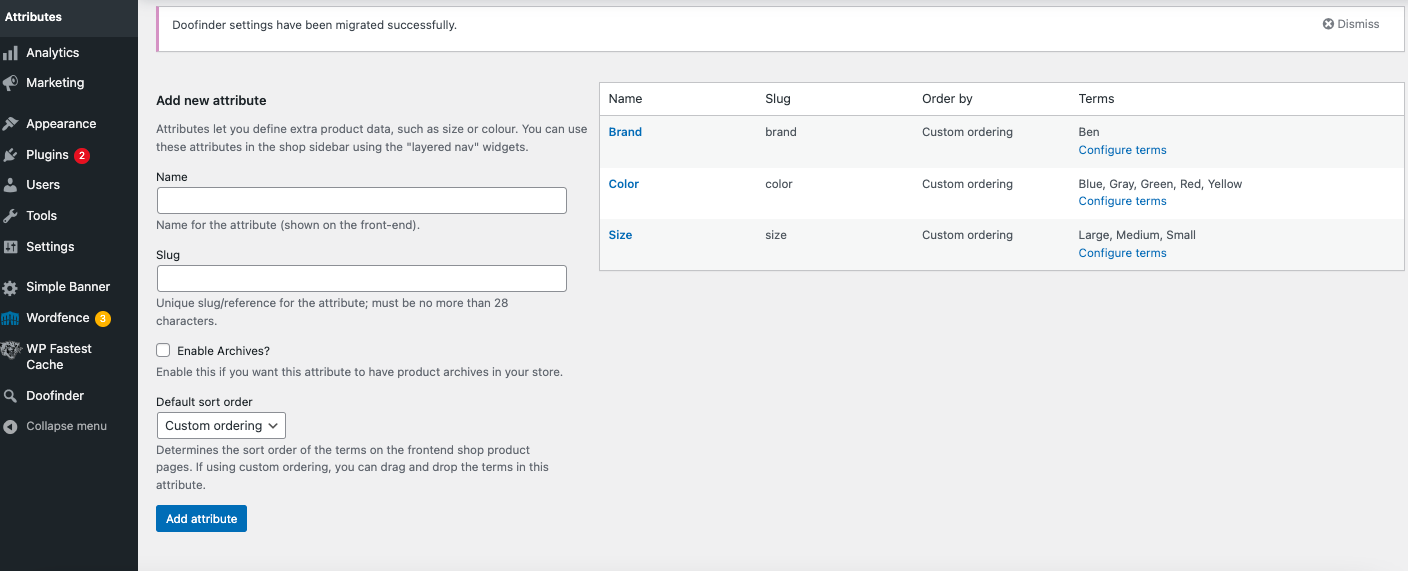
The Attributes option is under the Products tab in the WordPress Dashboard.

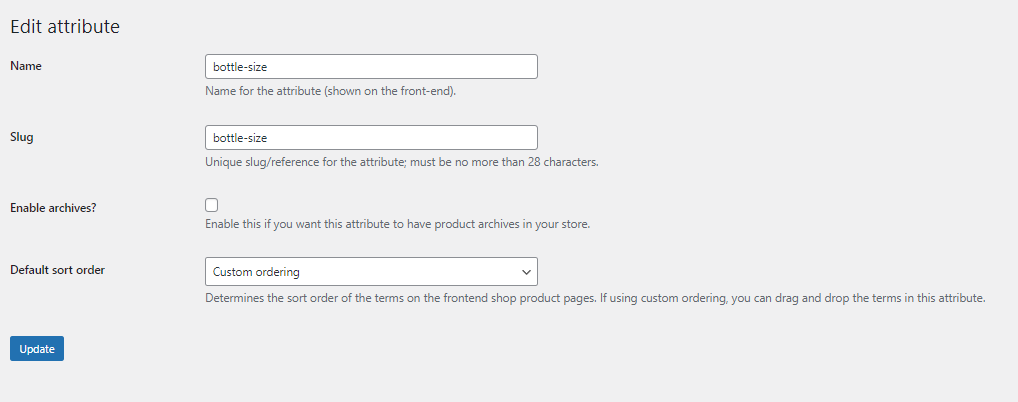
When you open the Attributes form, it is possible to add different attributes by inserting a Name and a Slug and then pressing the Add attribute button.

For example, we have added Bottle Size as an attribute for wines as illustrated below:
By repeating the above steps we added other attributes to WooCommerce including:
- Region
- Appellation
- Brand
- Type
- Taste
When you add the proper attributes, you need to add terms for each attribute. To do this, press Configure terms under each attribute and add your terms one by one.
At this point, all wines with their attributes will appear in the default WooCommerce layout. However, the default shop page of WooCommerce needs to be more appealing to grab the attention of customers and make an enjoyable experience for ordering wines. To solve this problem, you need to use the WooCommerce product table plugin to transform the WooCommerce wine store into a customer-friendly shop! Continue reading to tell you exactly how to do this.
5. Use the WooCommerce product table plugin to sell wine in a customer-friendly online WooCommerce store
To set up a successful online wine store you need to design it around the unique requirements of your niche. The WooCommerce product table plugin provides all the essential tools and features to run an eye-catching WooCommerce beer online shop which makes customers happy during purchase.
The advantage of displaying products – especially wines on your shop page is allowing customers to compare the different attributes of wines at one glance and order their favorite wines with one click. You can also simplify the purchase process for customers by letting them sort, filter, or search their favorites and order multiple wines directly on the shop page.
Let’s review how to sell wine online WooCommerce with this powerful plugin.
Step 1: Install WooCommerce product table plugin
The first step you’ll need to do is to install and activate the WooCommerce product table plugin.
Then, navigate to WordPress > iT Product table > Add New Table to start creating your online wine shop.
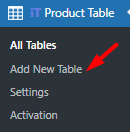
On this page, you can choose one of the preset templates or start from scratch by pressing the Get Started button.

All tools and options you need to design a fabulous WooCommerce wine shop are provided in five different tabs of the product table creator including:
- Query: To filter products for displaying on the table.
- Columns: To add product fields in columns and rows and let customers view them.
- Navigation: To add proper navigations like filter, sorting, multi add to cart option, pagination, mini cart, etc. To your product table.
- Setting: Configure the general settings of your product table.
- Style: To customize the appearance of your product table.
Let’s see how you can convert your online shop to a professional store for selling wine online WooCommerce successfully with these tools.
TABLEiT – Product Table for WooCommerce
The easy way to sell wine and beer online with the TABLEiT plugin
Step 2: Make a query to sell wine online WooCommerce store
As soon as activation of the WooCommerce product table plugin, all of your products with their features will be imported to the plugin automatically. So, if you have added different categories, it is simply possible to make a query from wines to set up your product table based on the products assigned to the wine category in the Query tab.
To make this happen, add the Wine category in the Include taxonomies field as illustrated below:
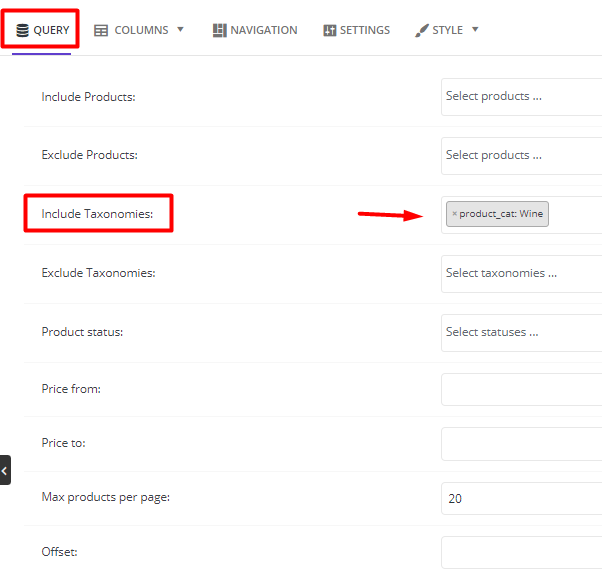
There are other useful items in the Query tab for adding and displaying the exact products that you need in the table, like:
- Include/exclude products: To add/remove one or more specific products to be displayed in the product table.
- Price from – Price to: To show the products in a specific price range to the table.
- Max products per page: To set how many wines displayed on each page of the table
- And many more
Step 3: Add columns to customize the WooCommerce beer online shop
After making the Wine query, it is time to show wine features in the table columns. To do this, you need to:
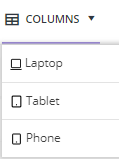
- Press the Column tab and choose the Laptop option.
- In the middle of the page, click on Add a Column button to create a new column box with two sections:
- Heading is the title of your column.
- Cell Content is the value you want to display in that column.
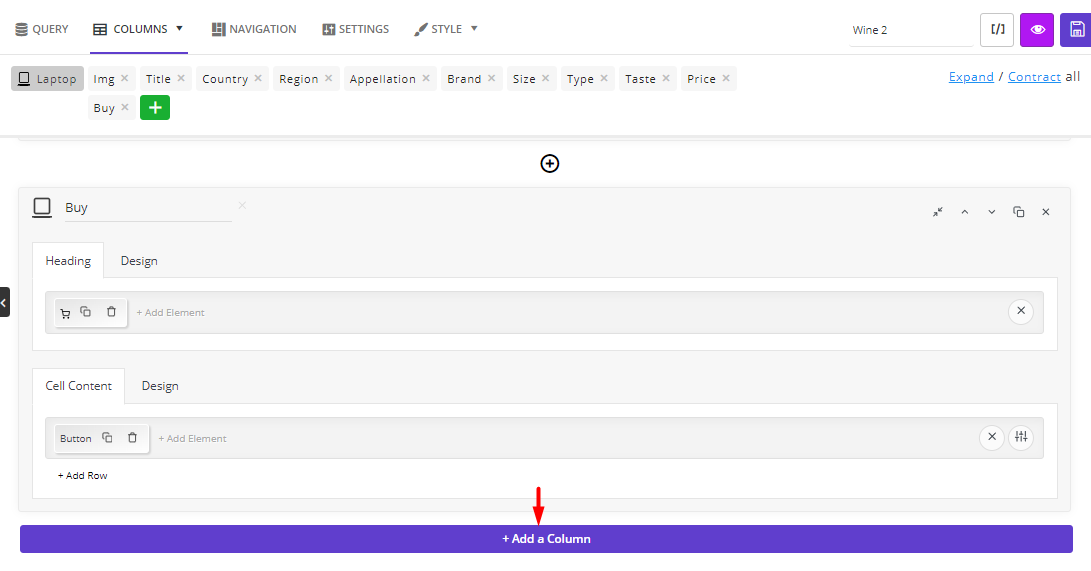
- Press Add Element in either the Heading or Cell Content sections to see a list of elements in the left panel.
- Choose one of the elements to add to the Heading or Cell Content.
- Customize the element by editing the items in the General and Style tab displayed in the left panel.
- Add a new row in each column if you need and add another element to be displayed in the same column under the previous element.

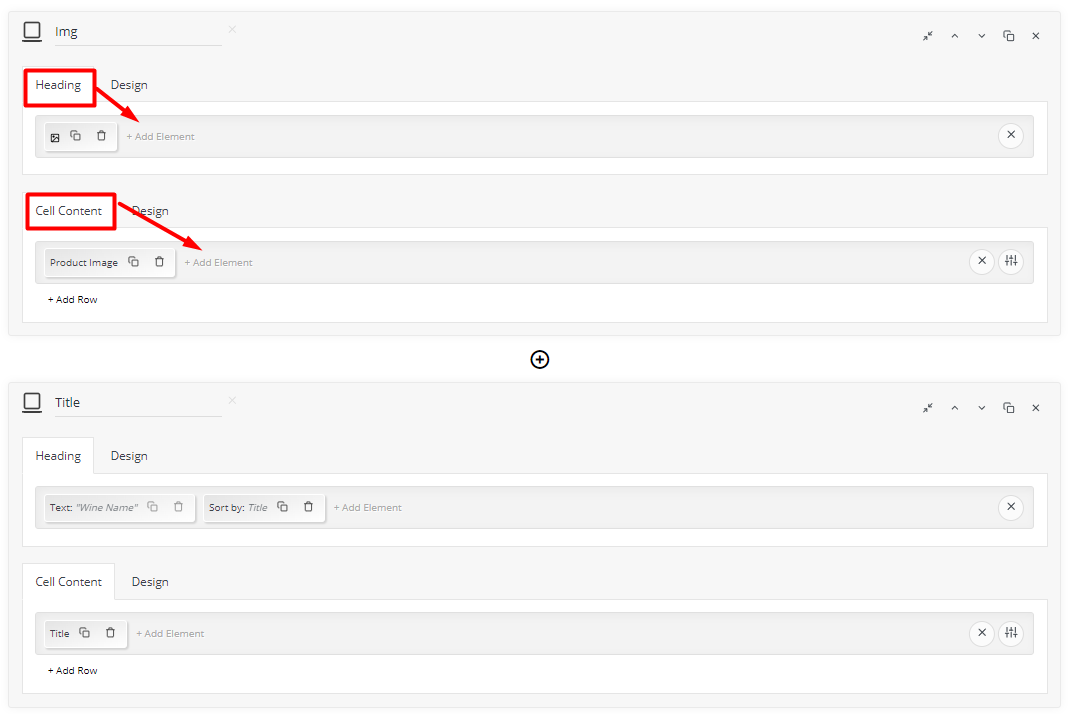
By repeating the above-mentioned steps, we have added the following columns to the table:
- Title: Display the name of wines in the table.
- Image: Add featured images of wines to help each brand of wine stand out and sell best by showing small thumbnail images.
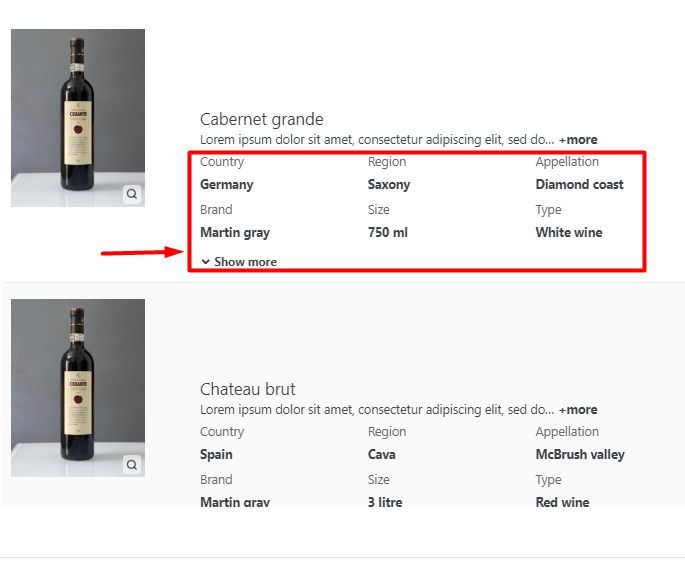
- Property list: Show a list of required attributes in an attractive way and let them see important information about your wines at a glance.
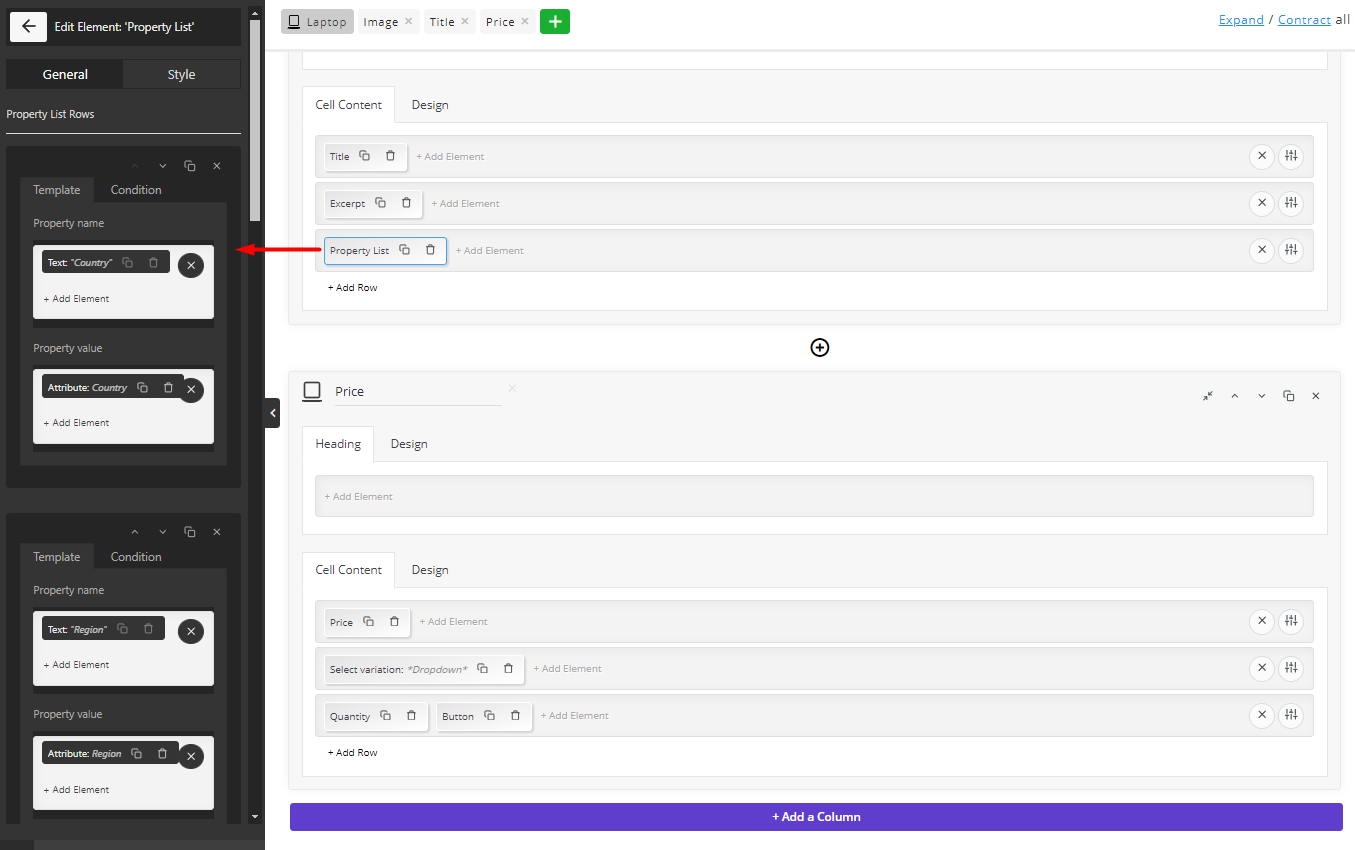
This is how the Property list will be displayed in your table:
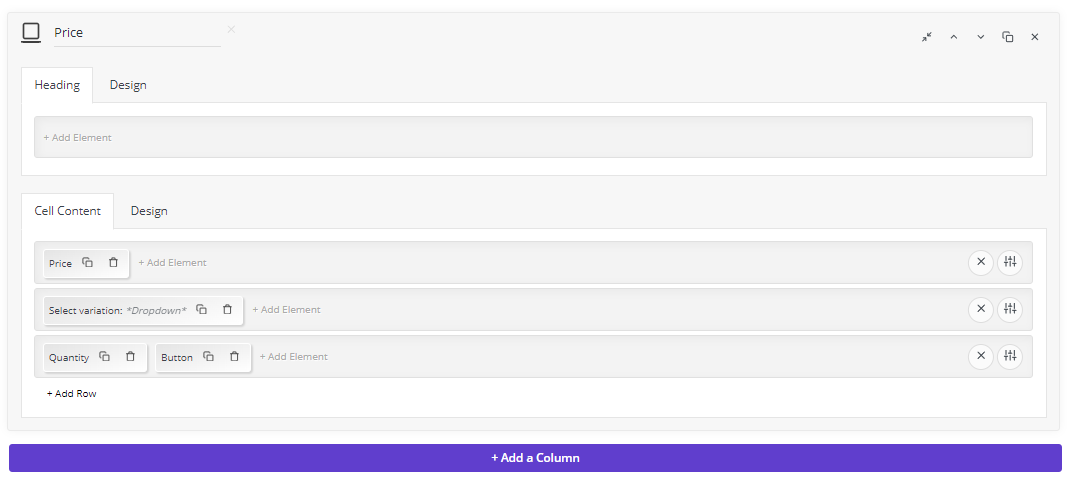
We also tried to add the following elements in different rows of a column:
- Quantity: Allow customers to buy multiple bottles and increase or decrease quantities.
- Price: Display wine prices on the table.
- Select Variation: Make your list of wines even more effective and let customers select variations in the table.
- Add to cart: Enable customers to check out right away using the convenient add-to-cart button after making their choices quickly.
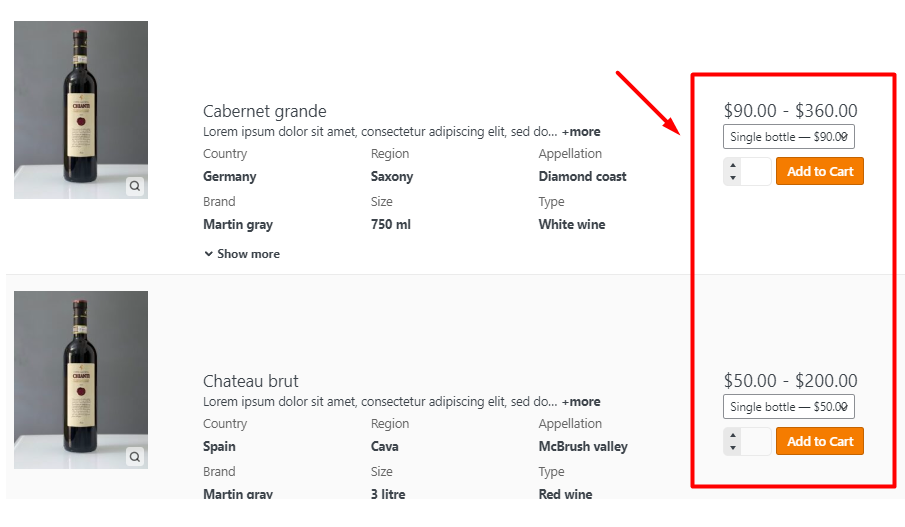
The result looks like this:
When finishing the WooCommerce product table design on Laptop device, you can switch to a Tablet and then a Phone, and make the necessary changes to set up a responsive WooCommerce wine store.
Step 4: Show navigations to improve customer experience
Navigations play a crucial role in helping customers feel happy in their purchasing journey. Fortunately, the WooCommerce product table plugin provides all you need to prepare a fantastic experience for your customers from sorting and filtering to multi add to cart.
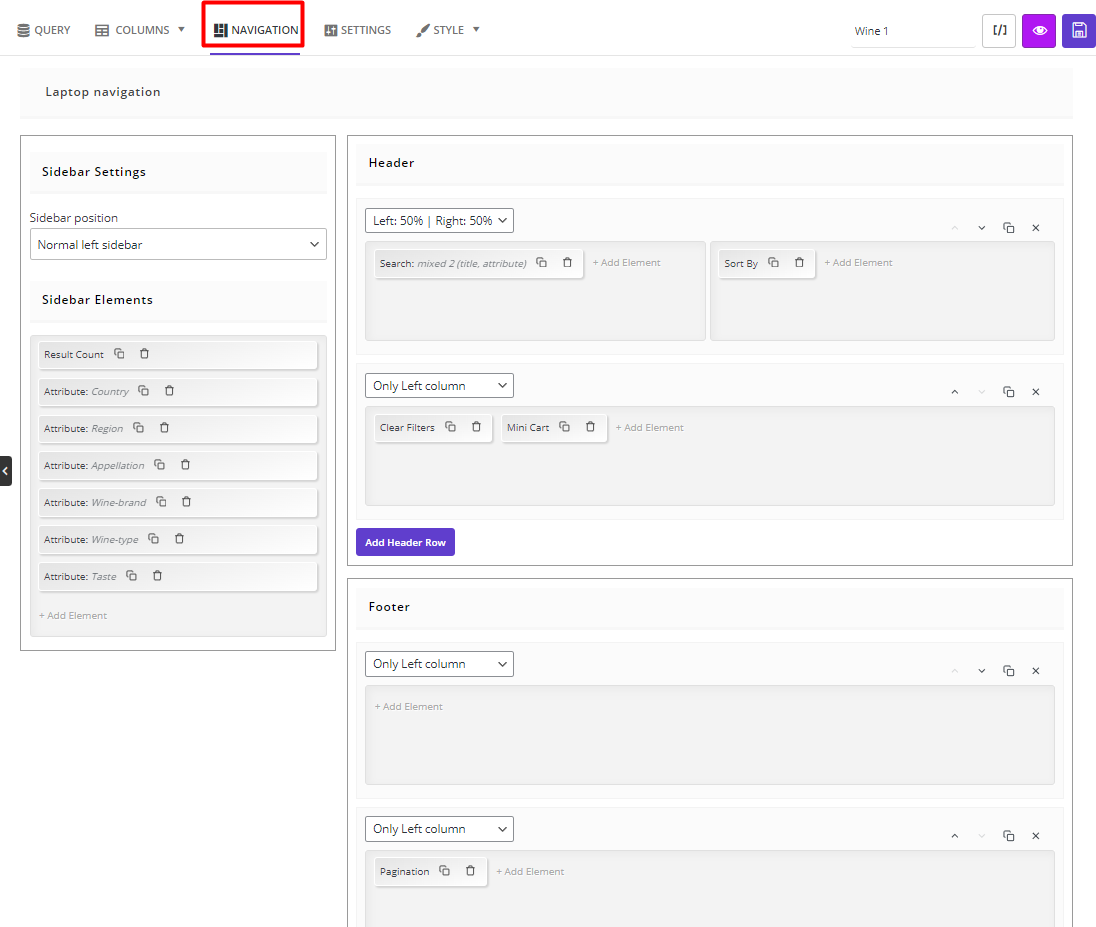
To distinguish your shop page from other competitors with awesome navigations that customers love, you just need to open the Navigation tab and add Elements to the navigation bars.
Three different areas are giving you enough space to add as many elements as you need to your WooCommerce beer online shop, including:
- Header: Top of the product table.
- Footer: Bottom of the product table.
- Sidebar: Left or right side of the product table.
To display elements in each area, you can simply click on Add Element and choose your favorite element from the list on the left panel.
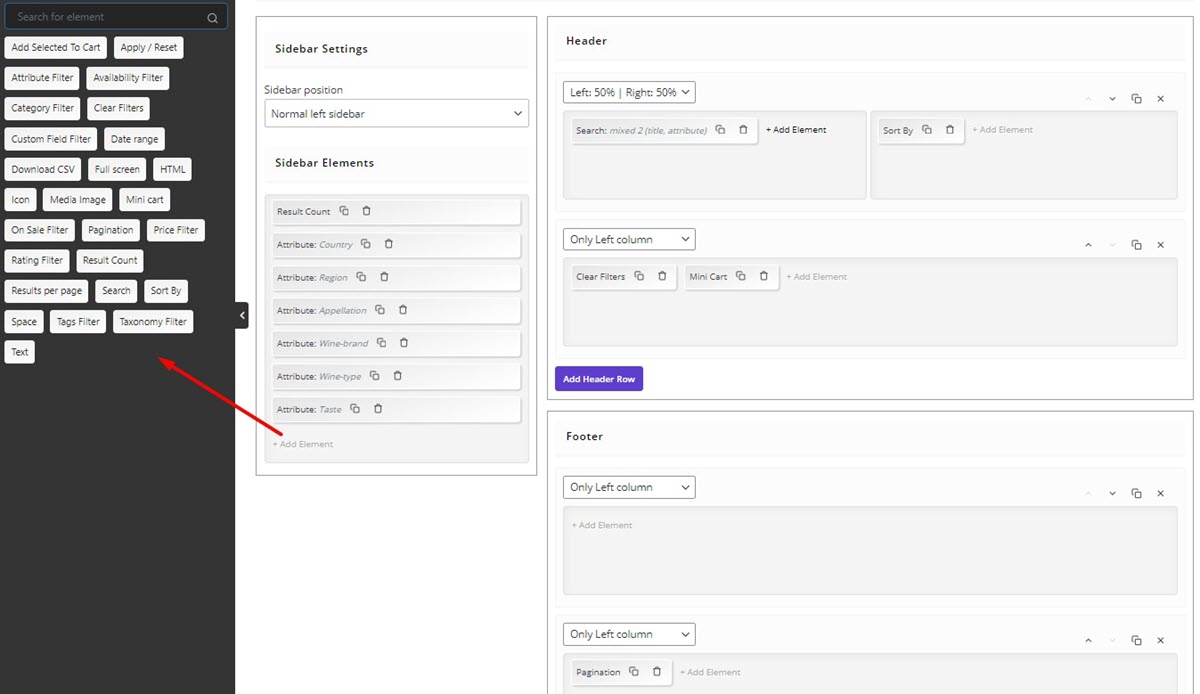
Just like the elements in the columns tab, you can customize each one by editing the items in the General and Style tab.
By repeating these steps, we have added the following to the navigation bars:
Sidebar:
- Result Count: To let customers see how many items are displayed in the product table.
- Attribute Filter: To filter products by Country, Region, Appellation, Wine brand, Wine type, and taste. These widgets help customers to find their favorite wines more easily.
Header:
- Search: To improve customer experience by allowing them to search wines by name or any attribute.
- Sort by: To help customers sort wines alphabetically.
- Clear Filter: To let customers remove previous filters and start over again.
- Mini Cart: To show a summary of what customers ordered on the shop page.
Footer:
- Pagination: To display the number of pages and let customers jump to the next page of the table quickly.
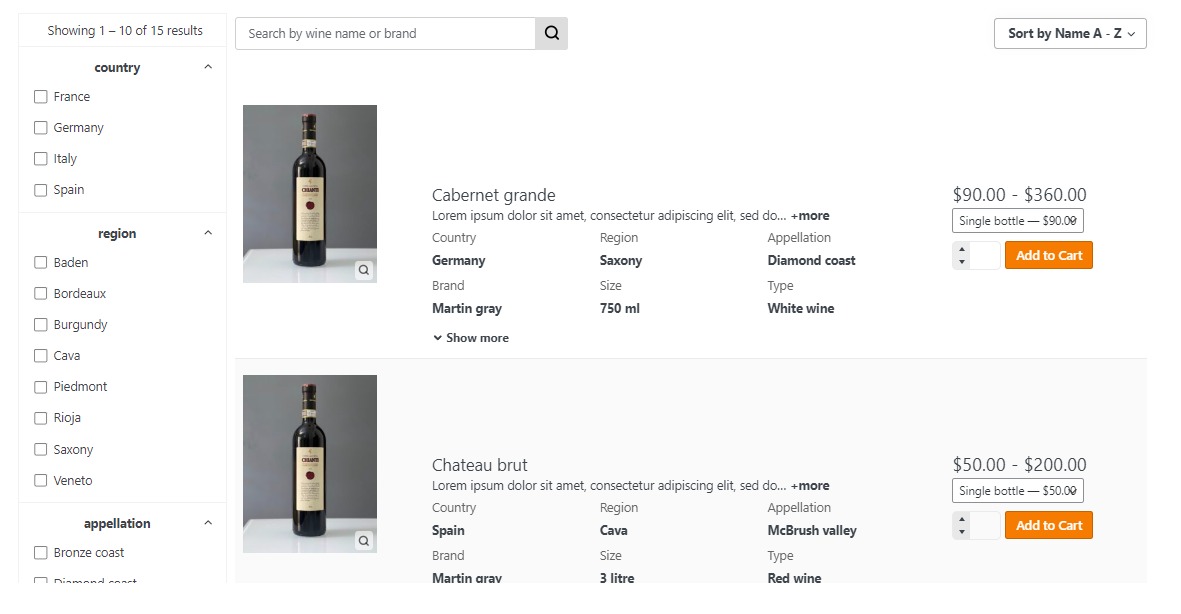
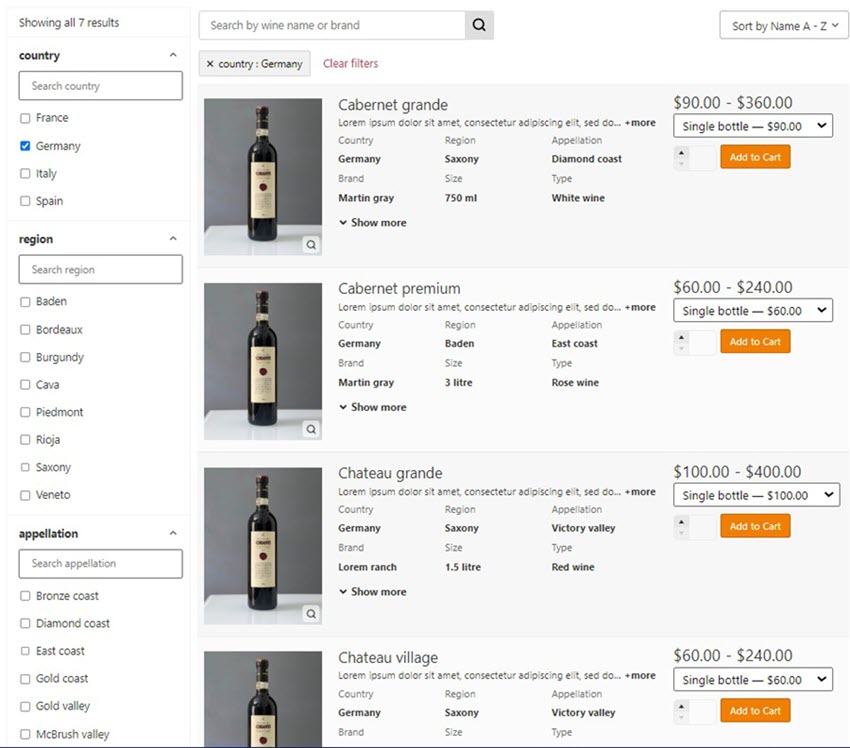
Here is the preview of the above-applied settings on your product table.
Step 5: Configure settings and style to design an eye-catching online wine shop
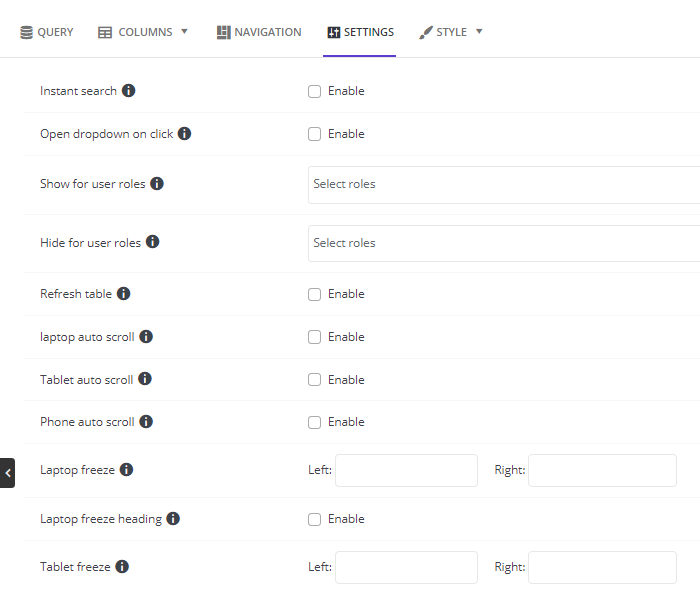
You have successfully added all required fields and navigations to your online wine shop. Now, it’s time to set some general configurations in the Settings tab and make your table look perfect by tweaking the options in the Style tab.
The items available in the Settings tab allow you to enable some configurations like Instant Search, Open dropdown on click, Refresh table, or even Hide the table for some specific user roles.
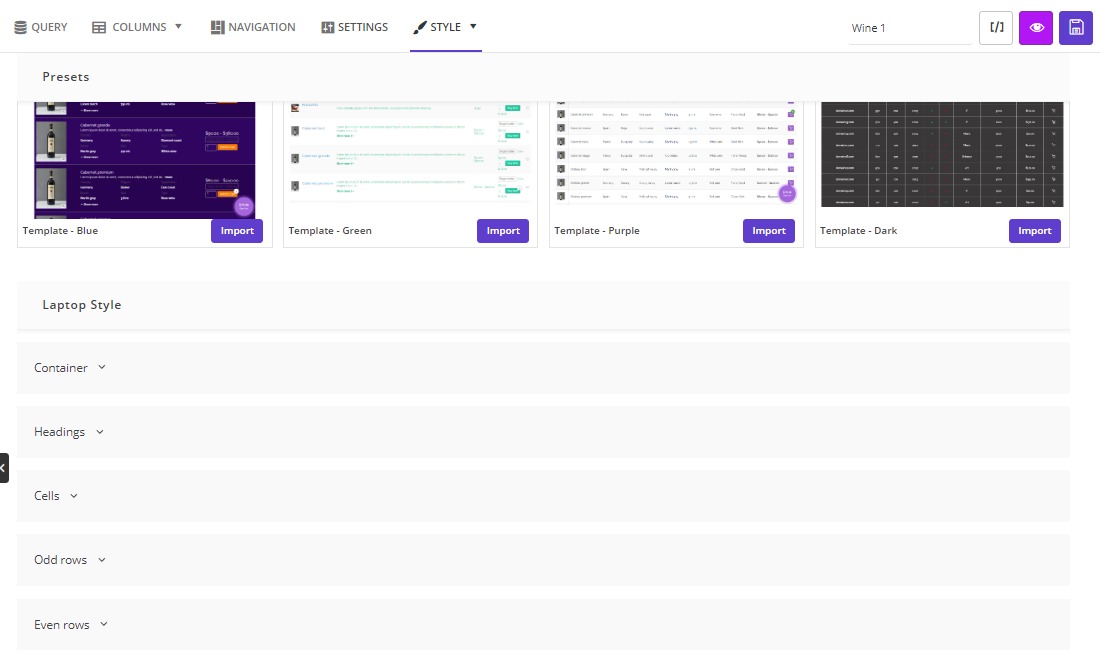
In the Style tab, you have the opportunity to choose a ready-to-use template and convert the appearance of your WooCommerce wine shop with one click. You have also access to a lot of options for making desired changes on Container, Heading, Cell, and Odd/Even rows in different layouts.
Step 6: Use Shortcode to show WooCommerce beer online shop on a special page
As the final step to selling wine online WooCommerce, you have to showcase your product table to your customers. The easiest way to display your WooCommerce wine store is to add the product table Shortcode to a new page on your website.
Let’s review the process step by step:
- Write a name for your product table and save it.
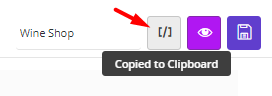
- Click on the Shortcode icon to copy the code.
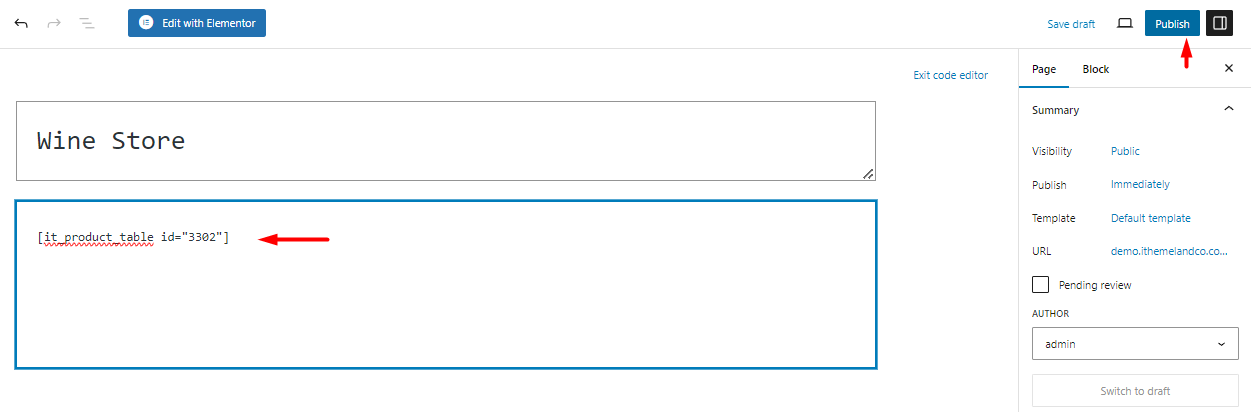
- Create a new page on WordPress and paste the copied code in the text box after inserting a page title.
- Publish the page and view your product table.
The final result is like below:
Extra features of the WooCommerce product table plugin
The WooCommerce product table plugin is a perfect tool for listing your products in the right way and starting to sell wine online WooCommerce store. In addition to creating a responsive effective wine table that is efficiently customizable based on your requirements, there are extra features for taking your WooCommerce beer online shop to the next level.
Here, we will review the most popular and practical ones.
override shop page, category, or attribute page with product table
With the WooCommerce product table plugin, it is easily possible to create unlimited product tables with personalized designs and override the default pages of WooCommerce with them one by one.
To use this feature, first, navigate to the below address:
WordPress Dashboard > It Product table > Settings
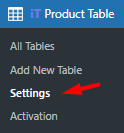
In the Settings page, go to the General tab and open the Archive Override section as shown below:
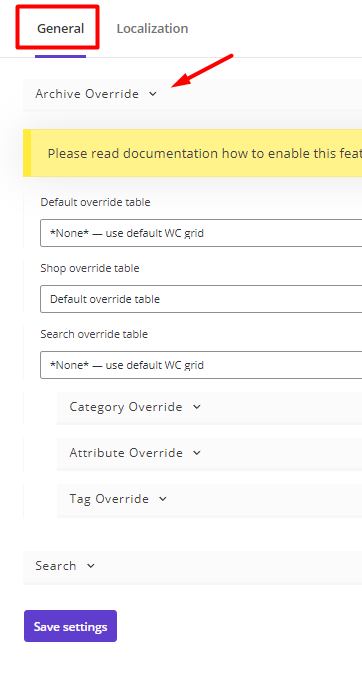
Now, you can replace any WooCommerce default page with one of the tables that you have created and saved in the plugin.
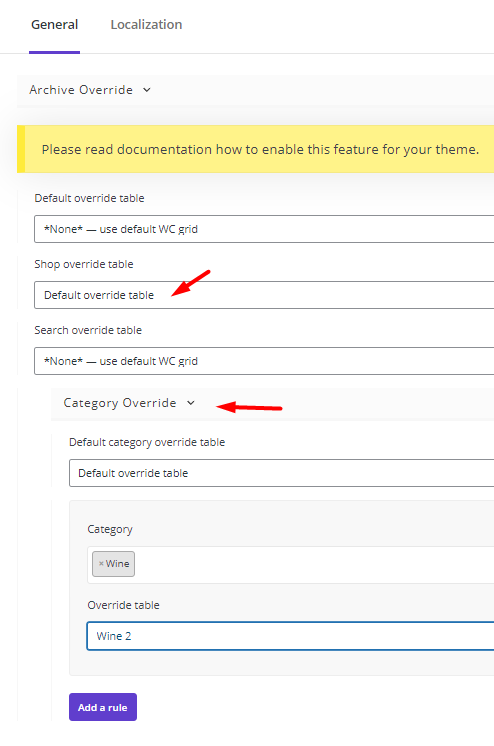
For example, you can open the Shop Override table and select one of the tables from the list to override the shop page.
It is also possible to open the Category Override tab, select one of the product categories like Wine then set one of the tables like Wine 2 to be displayed instead of the wine category archive page on your website.
Enable quick add-to-cart for online wine shop
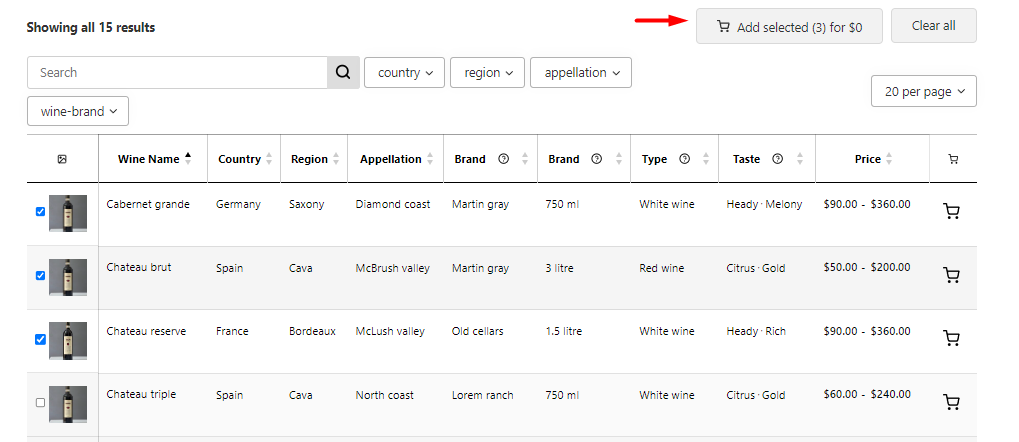
The quick add-to-cart feature in online wine shops allows customers to add multiple wines to their cart without leaving the shop page.
When you add this feature to your WooCommerce wine shop, customers can either purchase selected wines immediately or, if your wines have different variations, use the dropdown list to choose their favorite option, then add the selected wines to their cart with one click.
You can show quick add to cart in your WooCommerce wine store by adding two elements:
- Add a Checkbox element in a new column.
- Insert Add Selected to Cart element to one of the Navigation areas like Header.
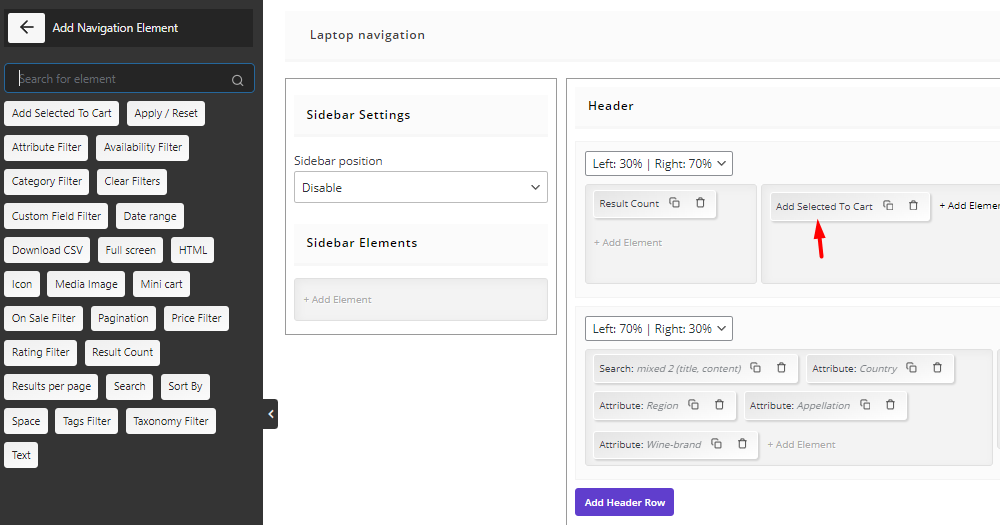
By following these simple steps, you can set up WooCommerce shop pages tailored to your business needs as illustrated below:
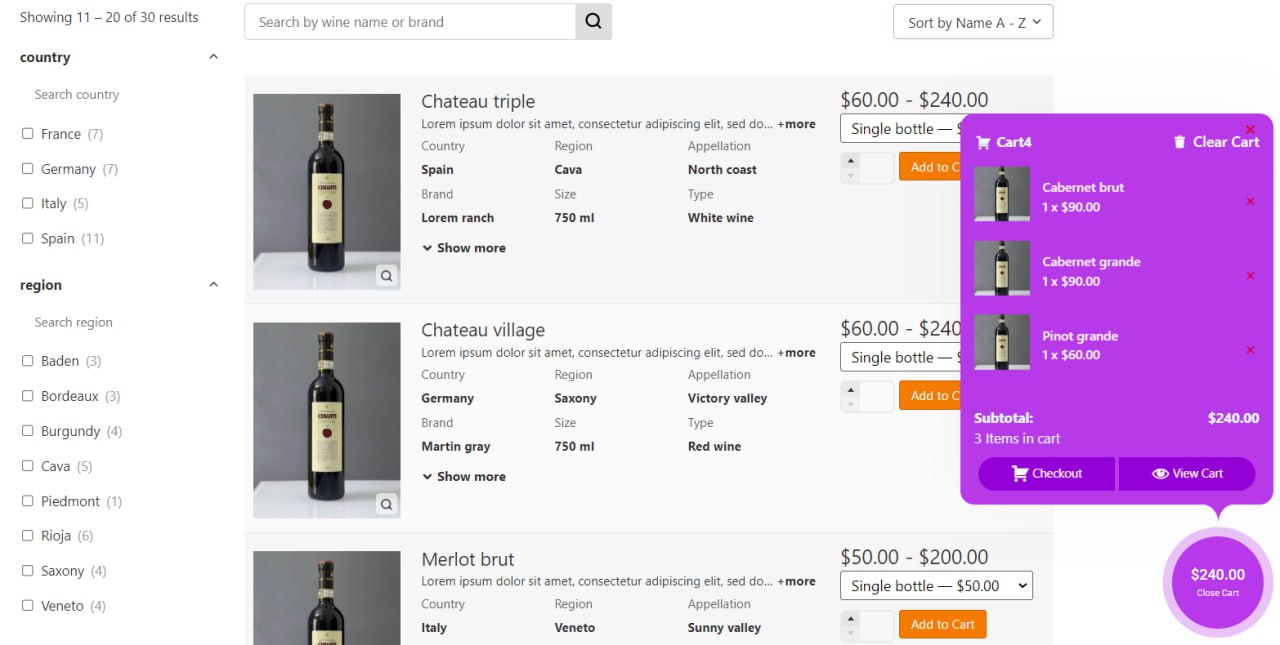
Add mini cart to WooCommerce beer online shop
The wooCommerce product table plugin lets you add a mini cart feature to the navigation area of your WooCommerce beer online shop. With the customization options of the Minicart element, you can display the cart in prominent positions to make it visible and usable for your customers. In addition to the sliding format, you can set the mini cart to be shown in the floating format.
TABLEiT – Product Table for WooCommerce
The easy way to sell wine and beer online with the TABLEiT plugin
Conclusion
If you want to sell wine online WooCommerce store, you need to find a way to show off your wines in the best light and make the purchasing process as simple as possible for your customers. The WooCommerce product table plugin comes with powerful and professional features that allow you to do both tasks and much more efficiently.


