As a result, the “Bind Edit” orders are a useful option for changing the values of multi-order fields at the same time, directly from the order table. By using “Bind Edit”, there is no need to open the “Bind Edit” form because you can simply change any data by editing the displayed columns in the table.
In simple words, “Bind Edit” orders could be done via 4 simple steps:
- Add proper columns to the order table
- Select the preferred orders
- Mark “Bind Edit” checkbox
- Change the value of one of the columns in the table
The point worth mentioning is the different methods that we have provided in the order table for each column to help you “Bind Edit” them perfectly.
As you know, orders in WooCommerce, you may notice that there are a lot of fields related to each order. It is also noticeable that the value you have to assign to each field contains different types.
That’s why in OBULKiT – Bulk Edit WooCommerce Orders plugin, we designed different methods for editing the values of different order fields.
Definitely, getting familiar with some of them would convince you why our plugin is known as one of the most user-friendly plugins designed for e-commerce websites.
Let’s try to “Bind Edit” some orders to see the advantages of using OBULKiT – Bulk Edit WooCommerce Orders plugin.
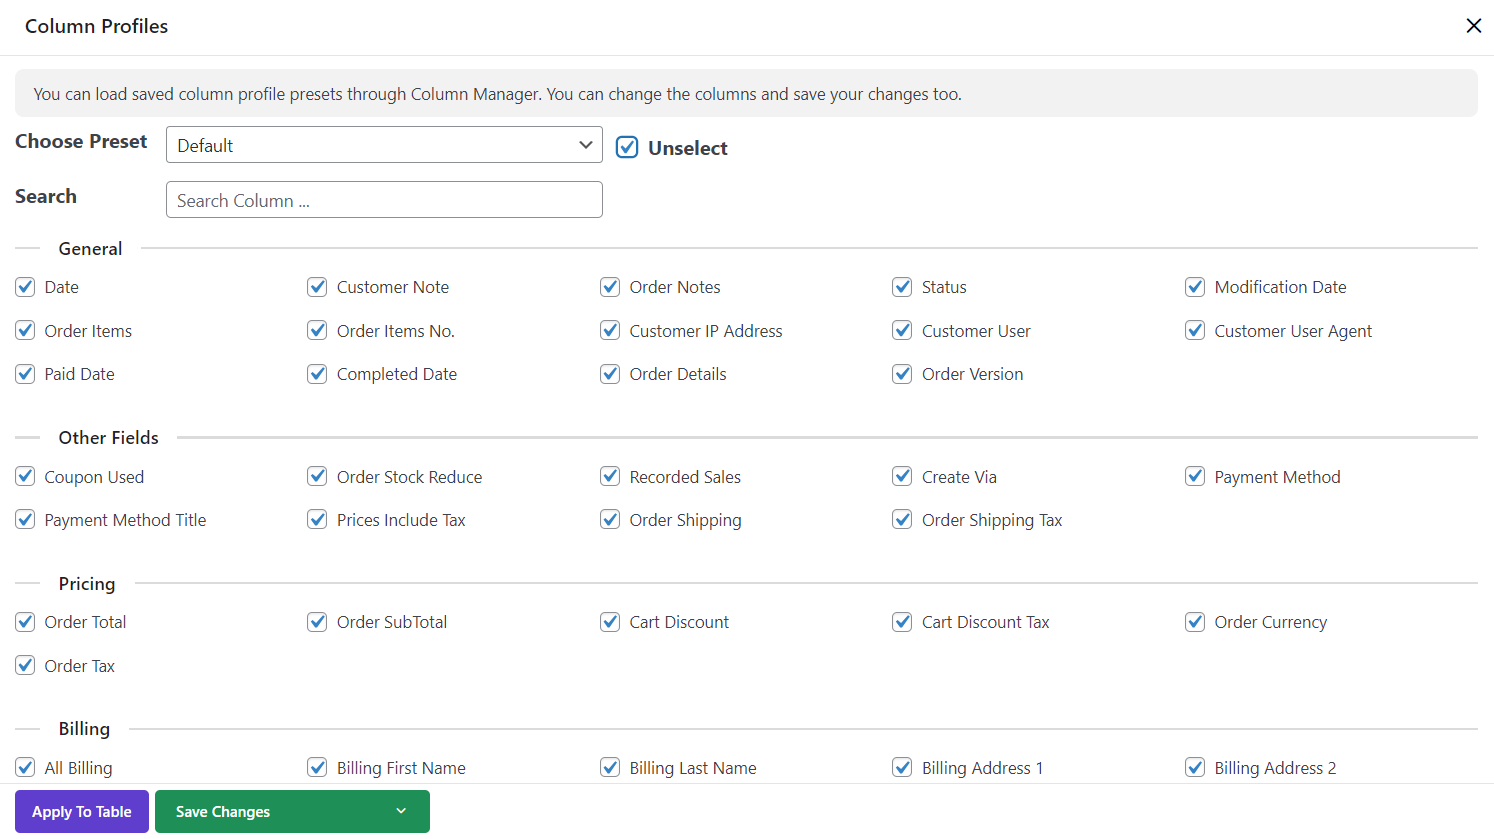
Add columns
For Bind Editing orders in our plugin are adding columns to the order table.
As we are going to show you the power of our plugin for Bind Editing all fields of orders in this tutorial, let’s add all columns to the table by marking the “Select All” checkbox in the “Column Profile” form and clicking on “Apply to table”.
Select order
To select your preferred orders in our plugin, you can use one of the following methods:
- Filter Form
- Quick Search
- Mark the checkbox next to the orders in the table
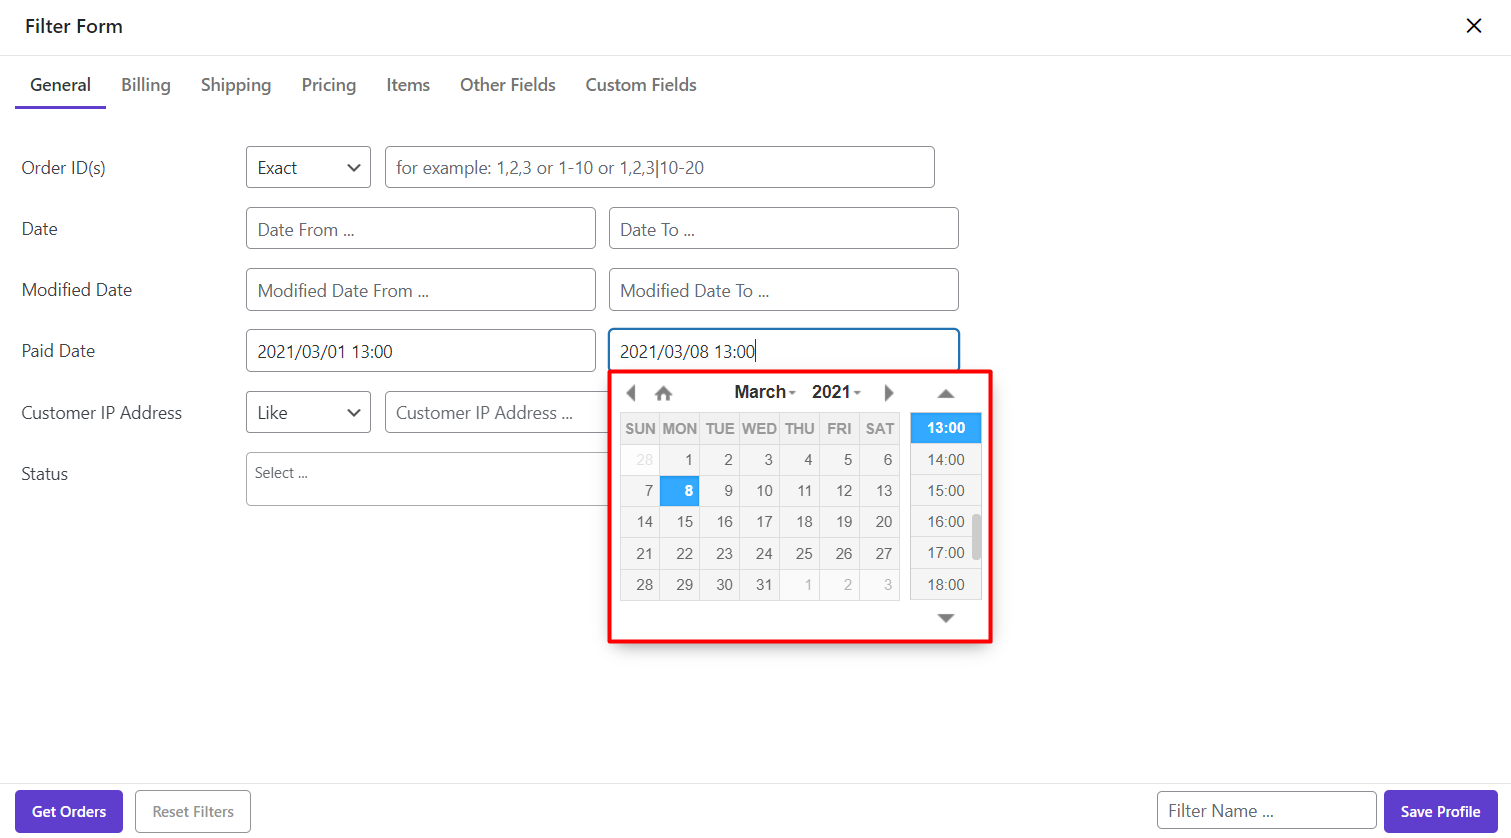
For example, we tried to filter those orders whose paid date is from “1. March 2021 to 8. March 2021”.
This is simply possible by using the default calendar in the “Filter form” designed in front of the “Paid Date” field, as shown below:
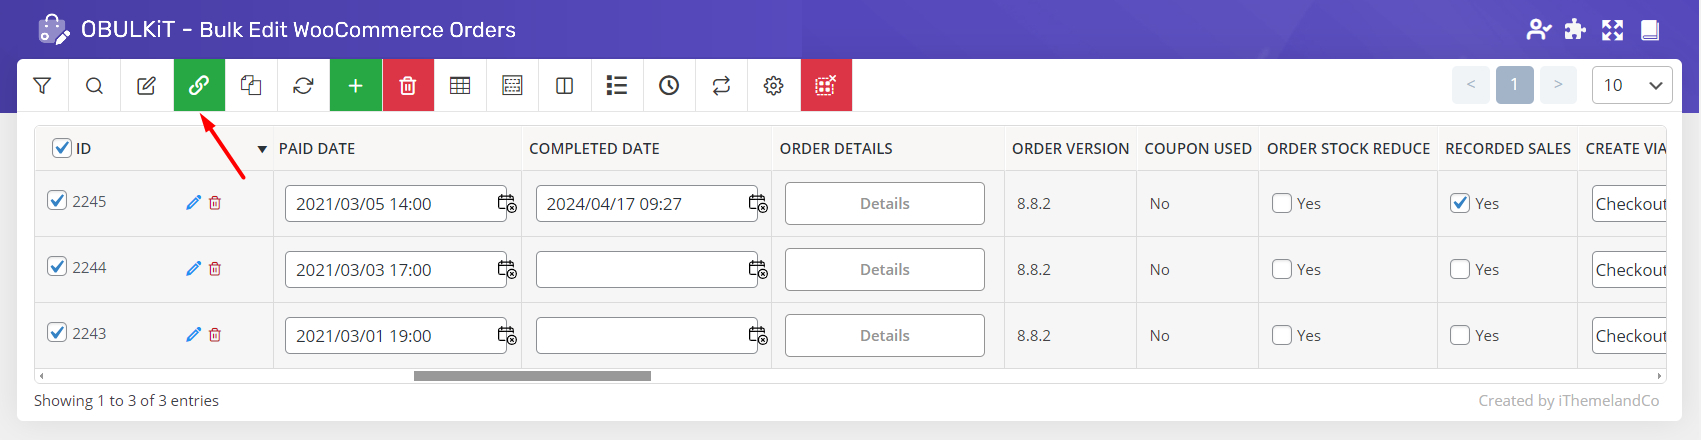
Mark Bind Edit checkbox
Check the box of “Bind Edit” designed at the top of the main page of our plugin. To “Bind Edit” orders, you need to mark this checkbox and also mark the check box of those orders you need to edit in the table.
Change the value of one of the columns
This is the most amazing part of Bind Editing orders in our plugin. As we designed a very precise format for each column in the data to help you change the value easily.
There are 5 different formats for editing values in the columns, including:
- Combo box: For those columns that you have to choose just one item from a list to be assigned to the selected orders

- Textbox: For those columns that you have to type a text to be assigned to the selected orders
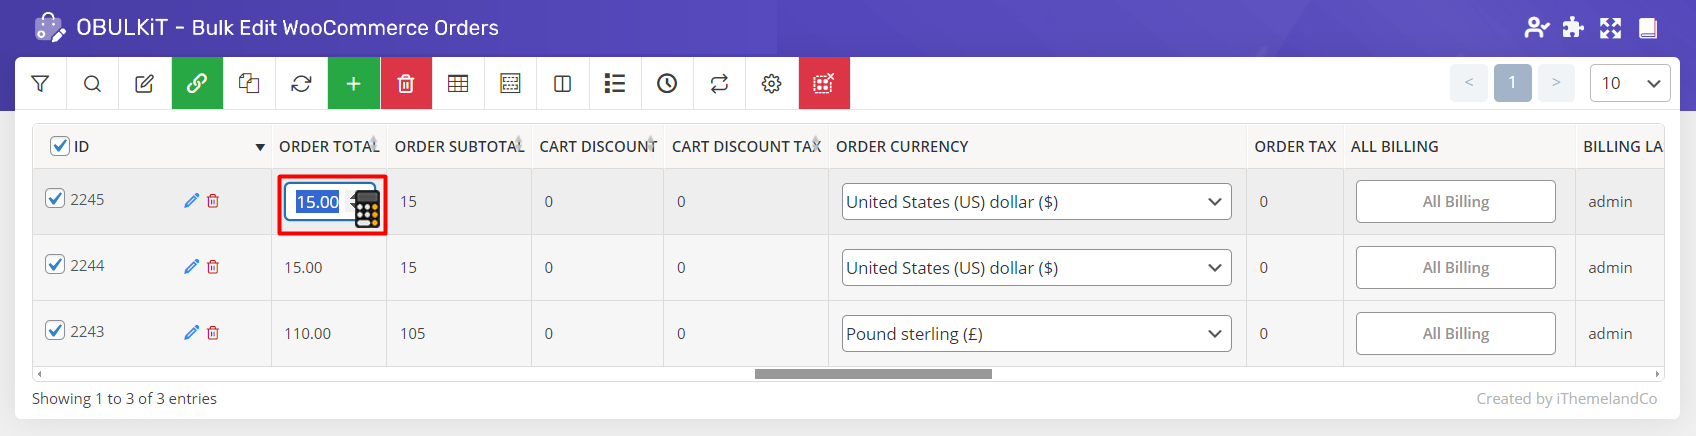
- Calculator: For those columns that you have to change a number or amounts
- Calendar: For those columns that you have to choose a date to be assigned to the selected orders
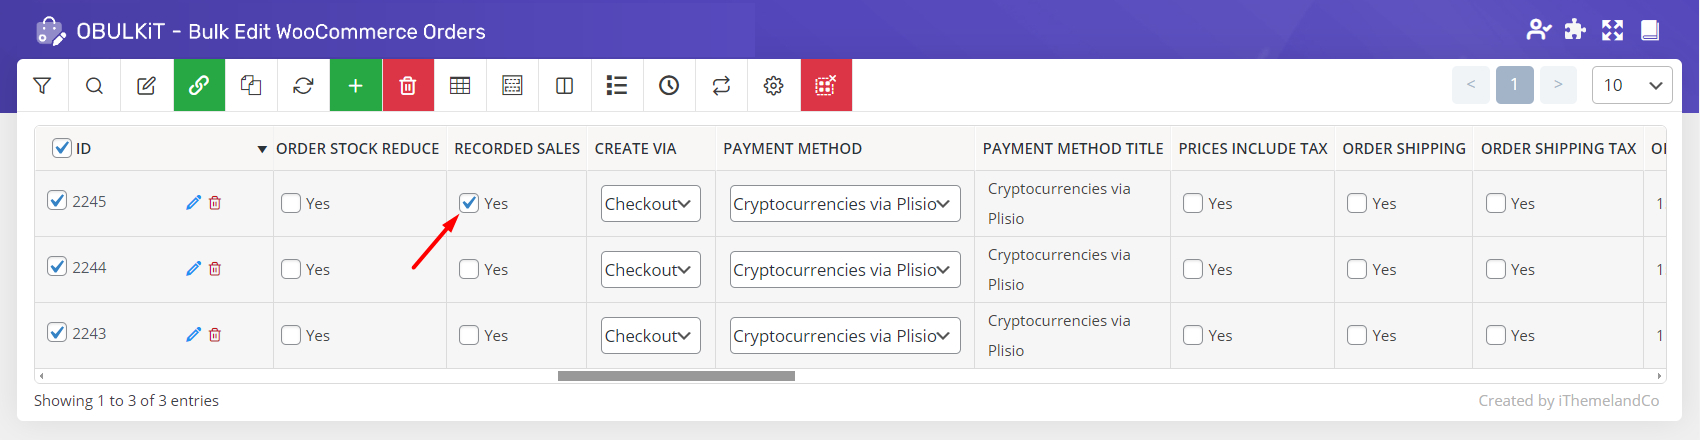
- Checkbox: For those columns that you have to confirm or refuse by marking Yes or No
- Button: Open a new pop-up page and you can set your desire values.
We completely described the method of using each format for changing the values of the columns.
Read More: How to inline edit WooCommerce orders in OBULKiT – Bulk Edit WooCommerce Orders plugin?
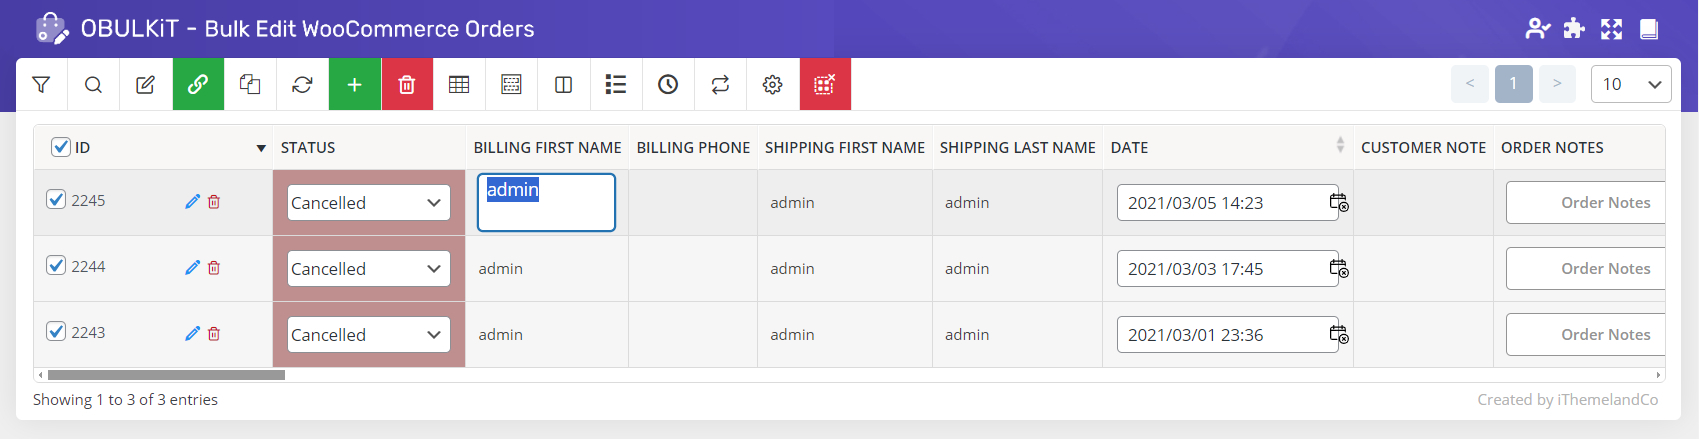
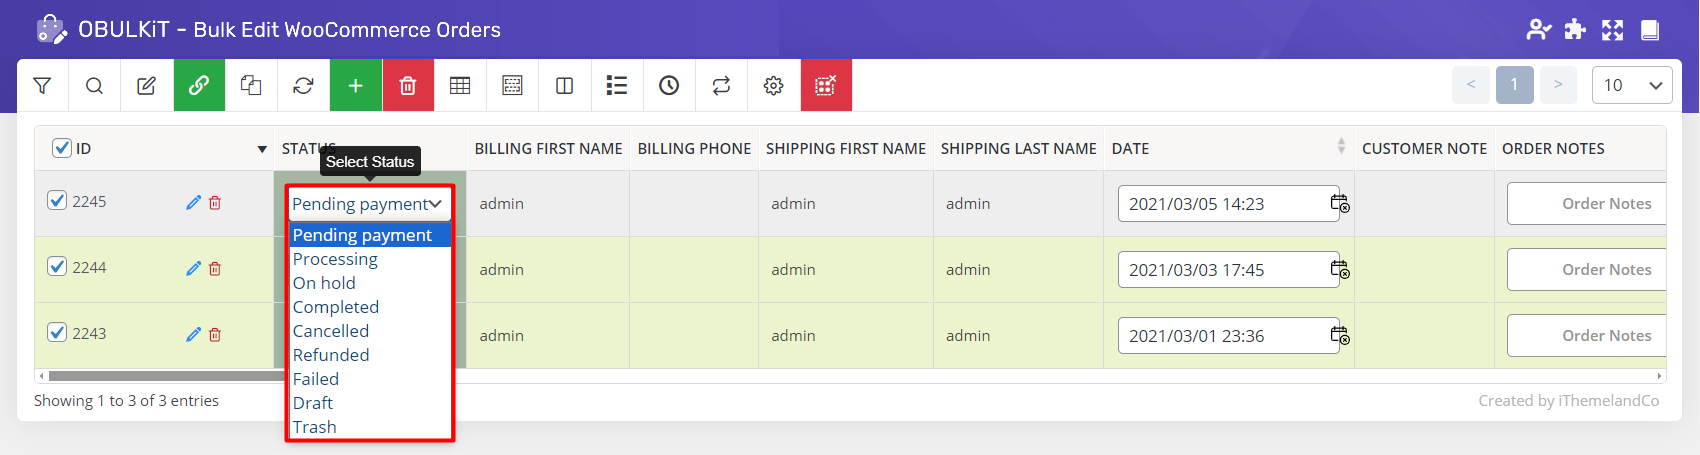
Example 1: Bind Edit order status by using Combobox
To “Bind Edit” Order Status of those orders we have filtered before, you need to:
- Mark “Bind Edit” and filter orders checkboxes
- Click on the combo box of one of the orders, as we did for order no.2245
- Choose one item from the list, for example “pending payment”
- Wait for the plugin to change the status of other selected orders
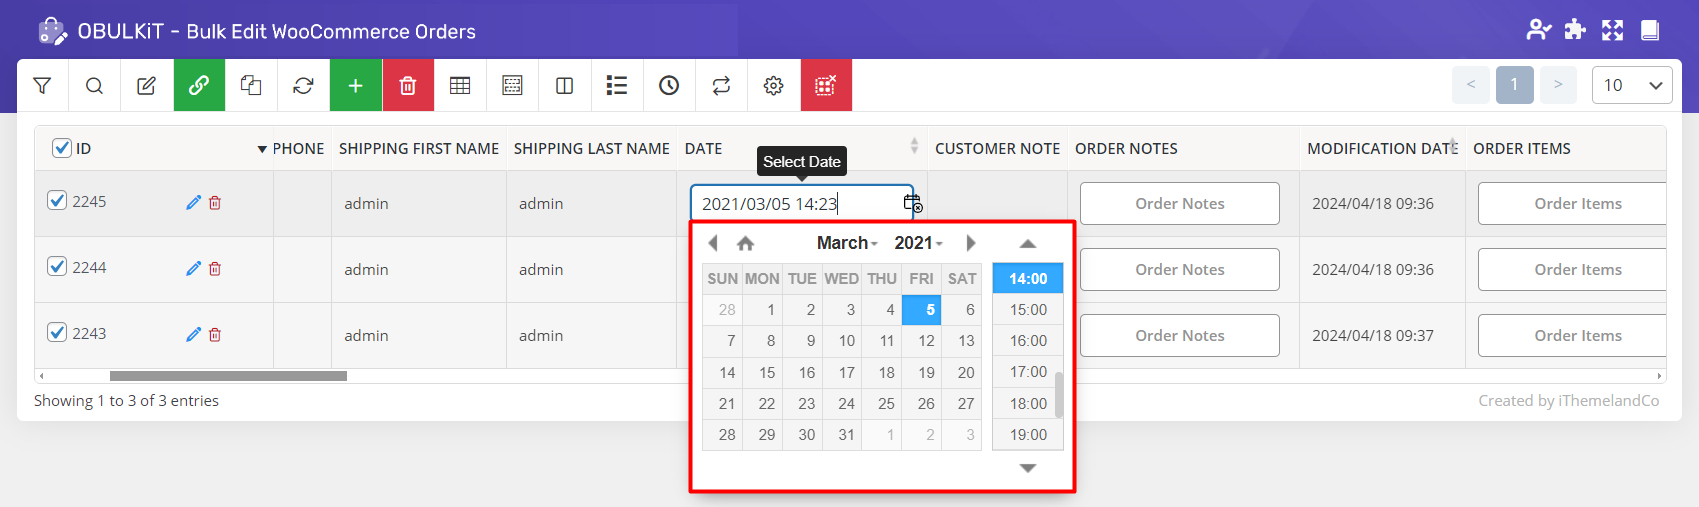
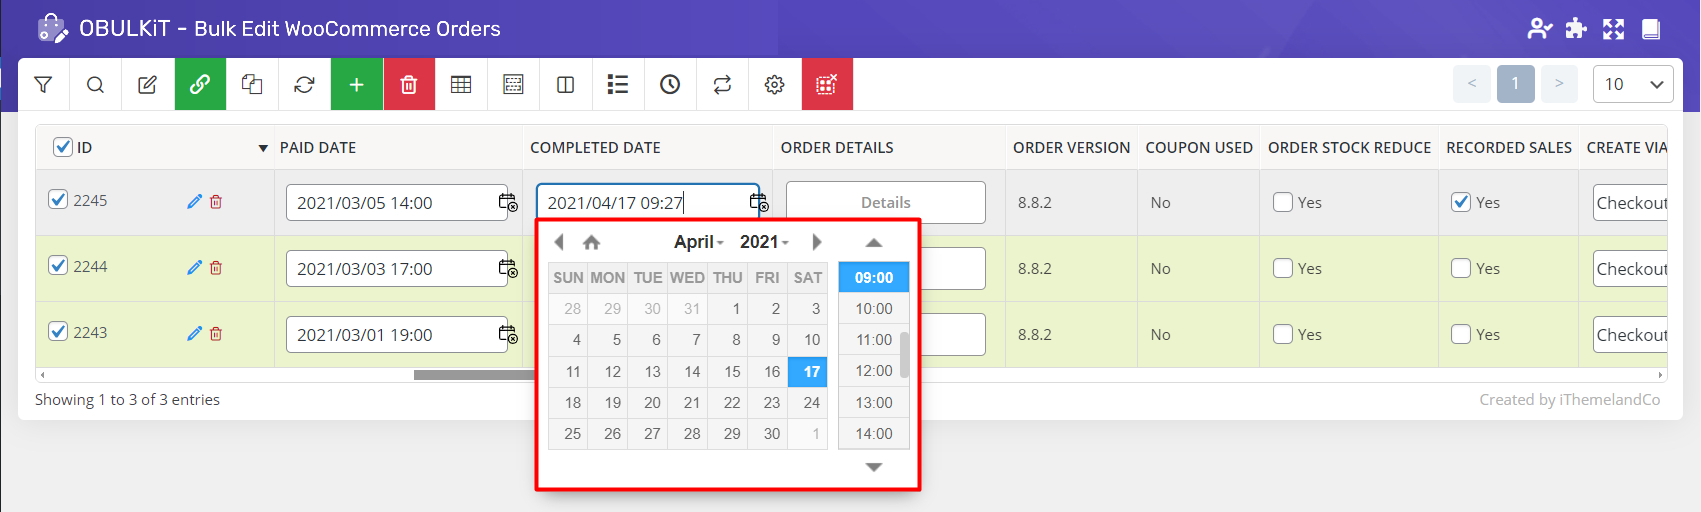
Example 2: Bind Edit order date by calendar
All steps for Bind Editing orders date are the same as the previous example, except using the default calendar for picking a proper date.
As illustrated below, we chose a date from the calendar, and the plugin assigned that date to all of the other selected orders.
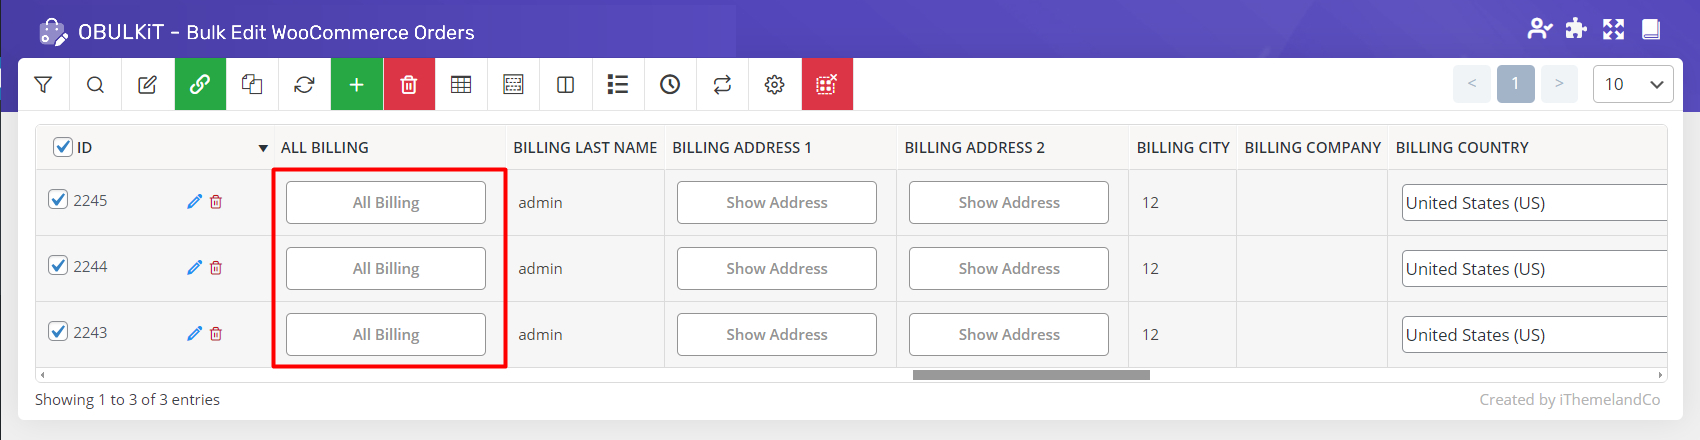
Example 3: Bind Edit values of All Billing column
Bind Edit “All Billing” column enables you to edit the values of some fields related to the Billing of multiple orders with just by one click.
As shown below, we designed an individual column called “All Billing” which is only available on the Order Table:
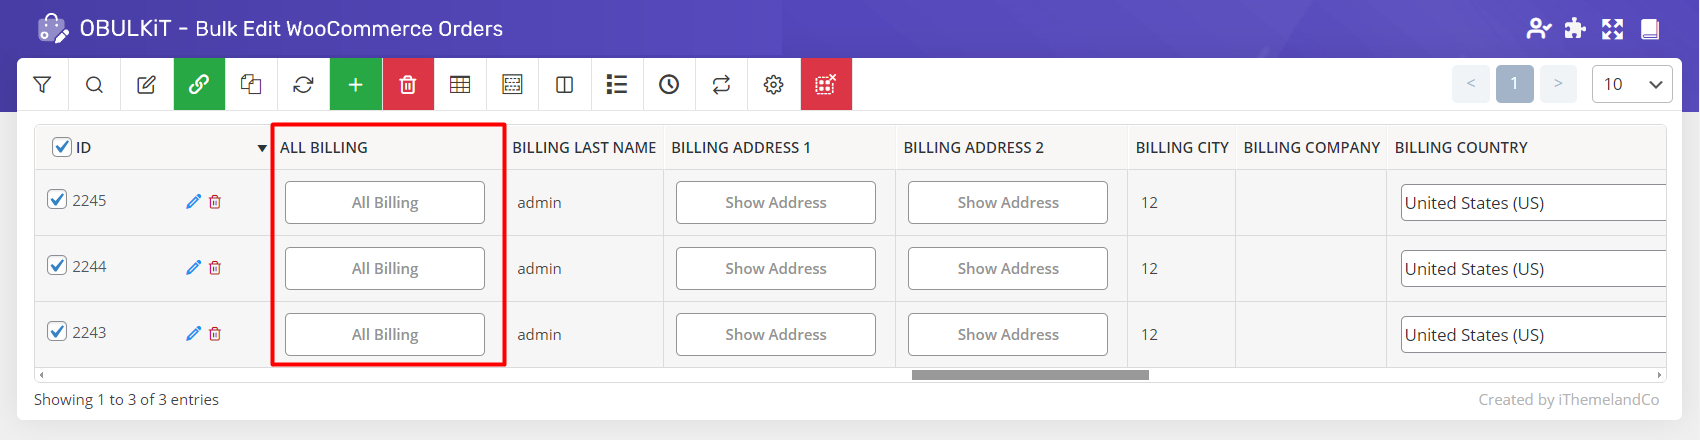
After marking the “Bind Edit” option and also those orders you need to change their billing information. You have access to all billing fields in a new page by clicking on the “All Billing” button of one of the selected orders.
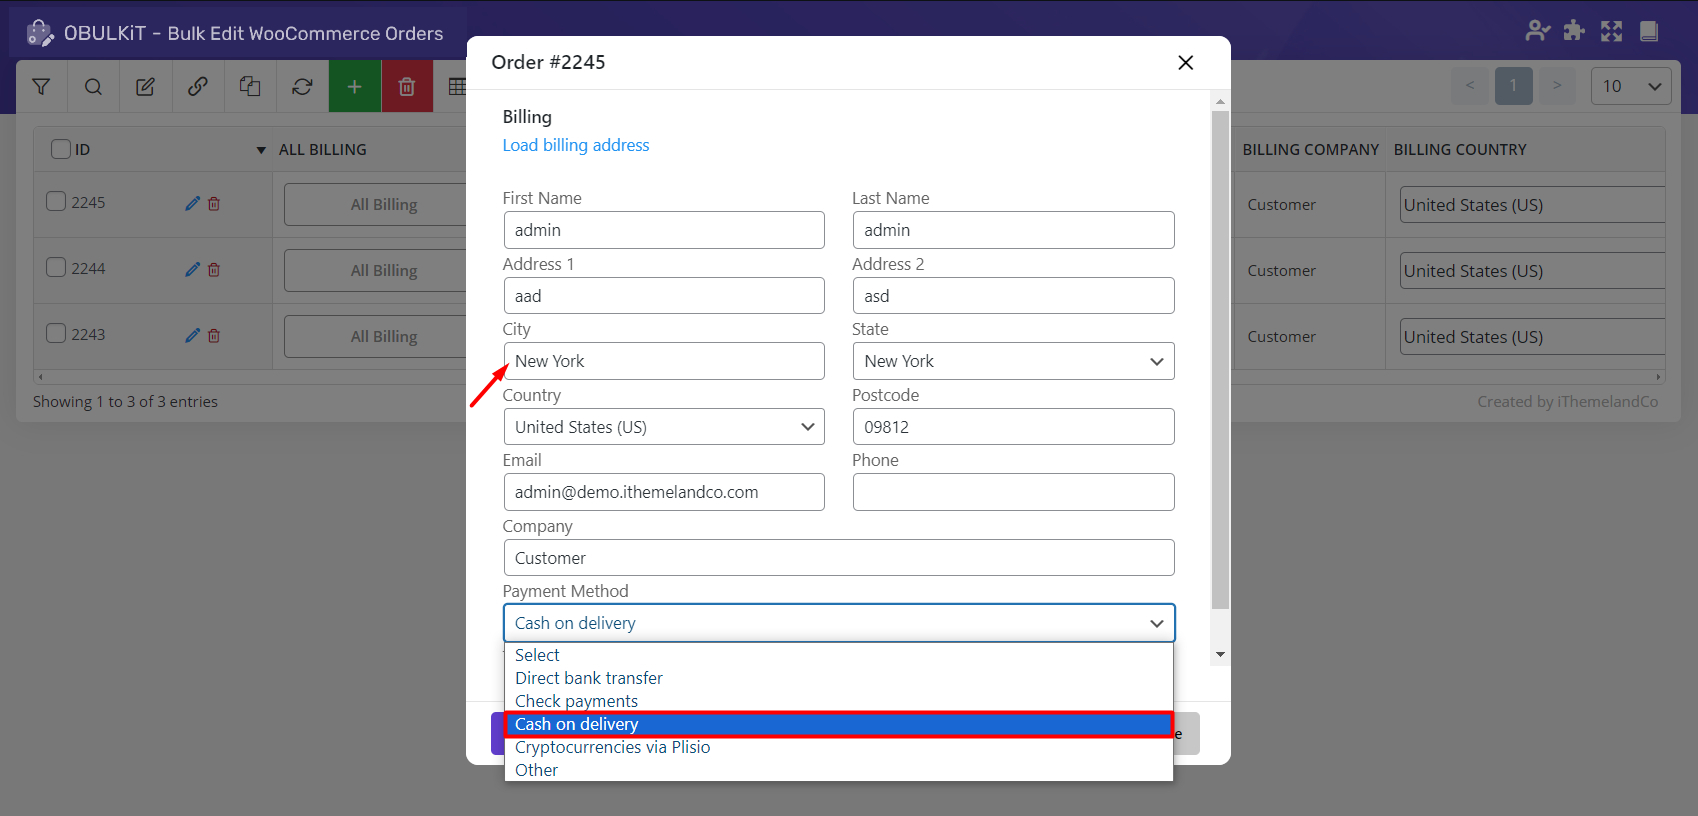
As shown below, you are able to change the values of those fields displayed in this new form.
For example, if you type “New York” in the text box under the City field and choose “Cash On Delivery” from the payment method combo box, all of that data is assigned to the selected orders by pressing “Save Changes”.
Example 4: Bind Edit values of All Shipping column
The values of shipping fields are edited exactly the same as billing fields by using the “All Shipping” form provided in our plugin.
To have access to the “All shipping” form, you just need to:
- Mark “Bind Edit” check box
- Select the proper orders in the table
- Click on the “All shipping” button in the table
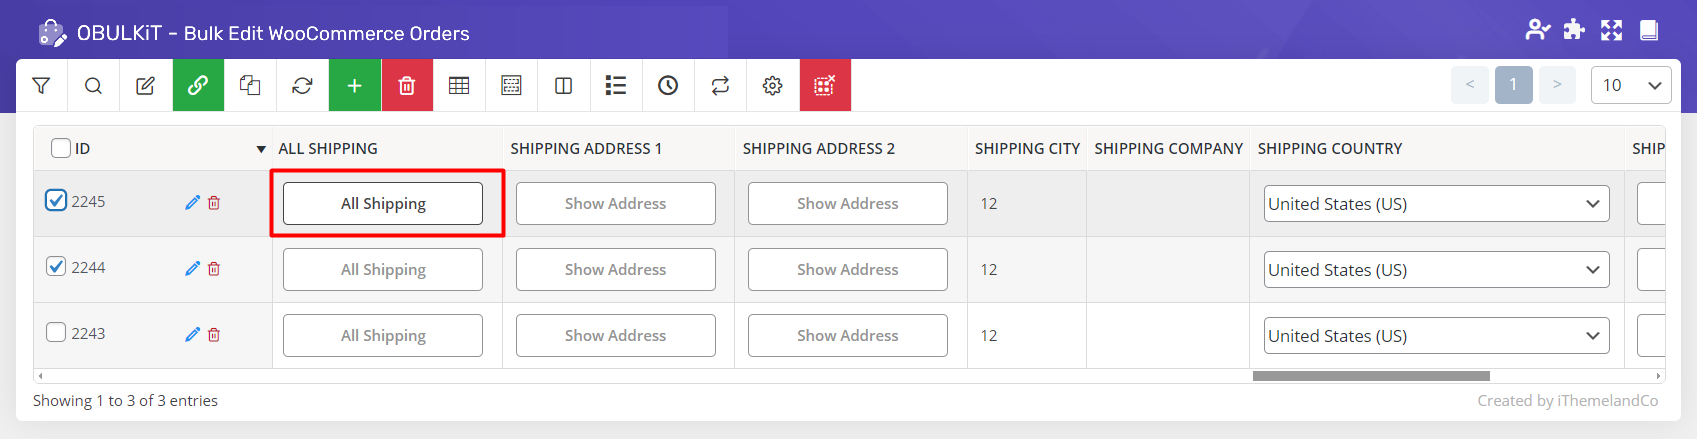
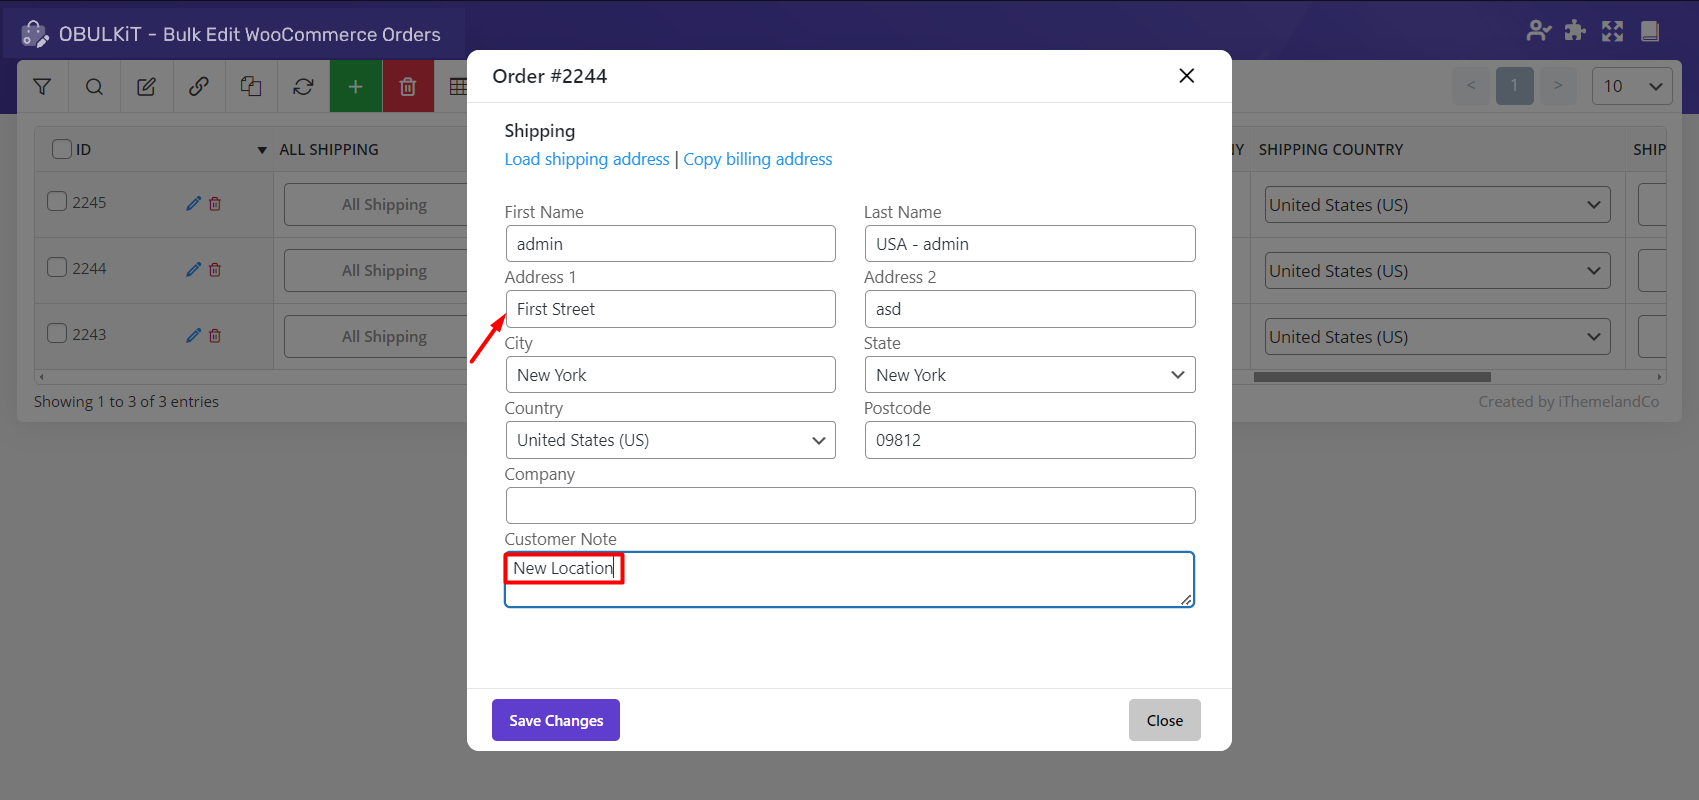
Then change any values in the appeared form as you wish.
For example, if you type “First Street” as the value of the Address1 field and enter “New Location” in the “Customer note” textbox, those values will be assigned to the selected orders after clicking on “Save Changes”.
Comments