WooCommerce custom fields/meta fields are the best way to add extra information about your WooCommerce products, as in most online stores, the default fields in the WooCommerce product page are not enough for describing the properties of the product.
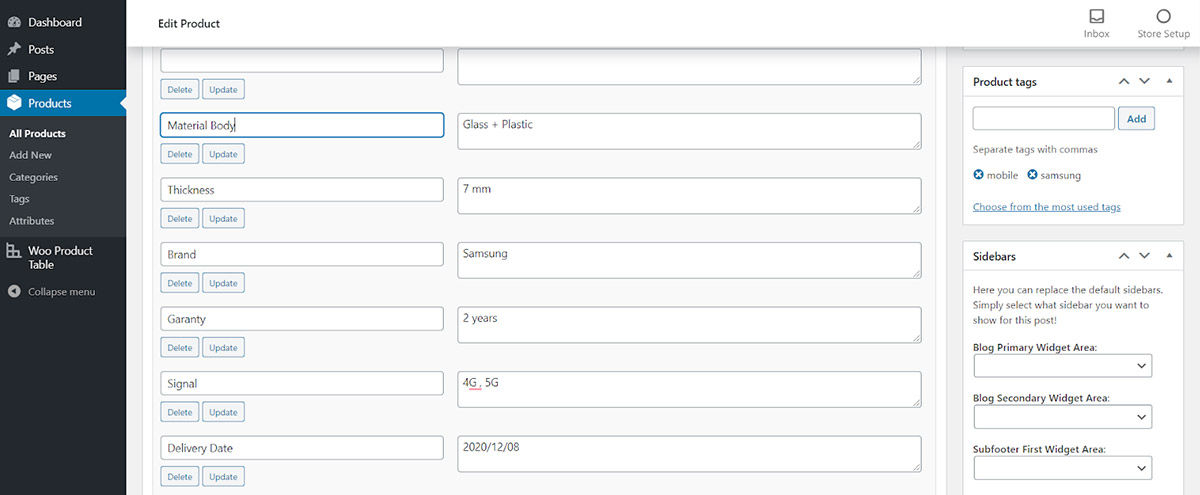
So, the store managers have to add some custom fields to add the details. For example, in a mobile store, you may need to give your customers some extra information about the Material body, thickness, Brand, etc.
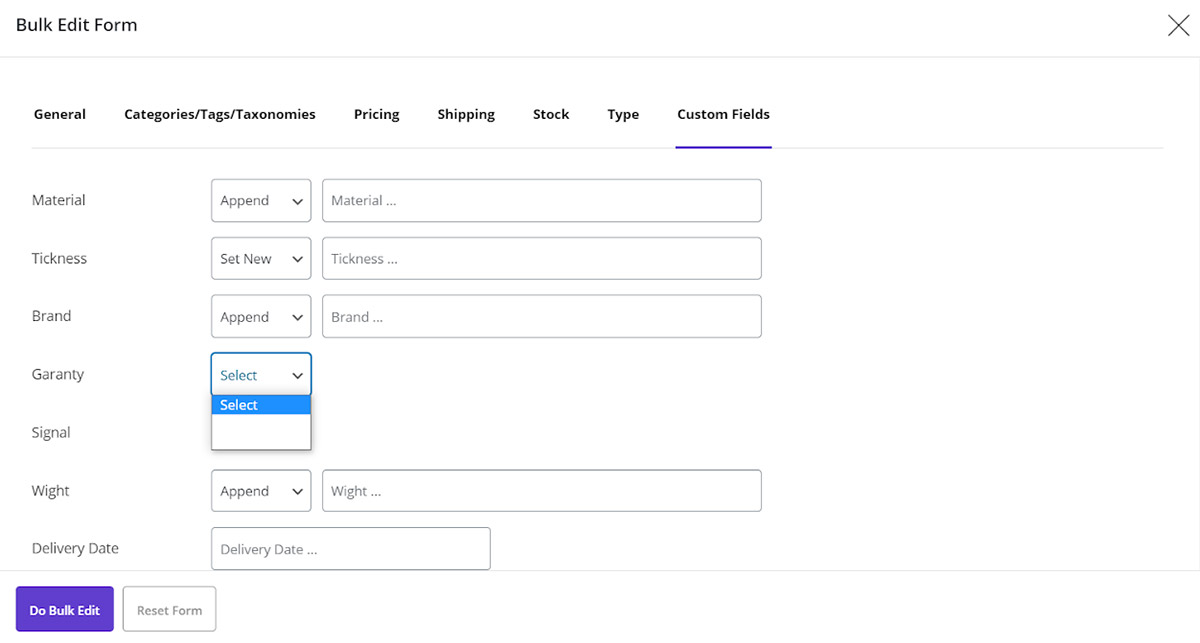
As you can see in the below picture, you can add some custom fields to add these information to the product page:
Obviously, you expect to be able to bulk edit these information or filter your product according to them by using VBULKiT – Bulk Edit WooCommerce Variations.
At the end of this tutorial, you will find out that bulk editing the custom fields / Meta fields has never been easier. So, stay with us.
Step 1: Adding custom fields / meta fields
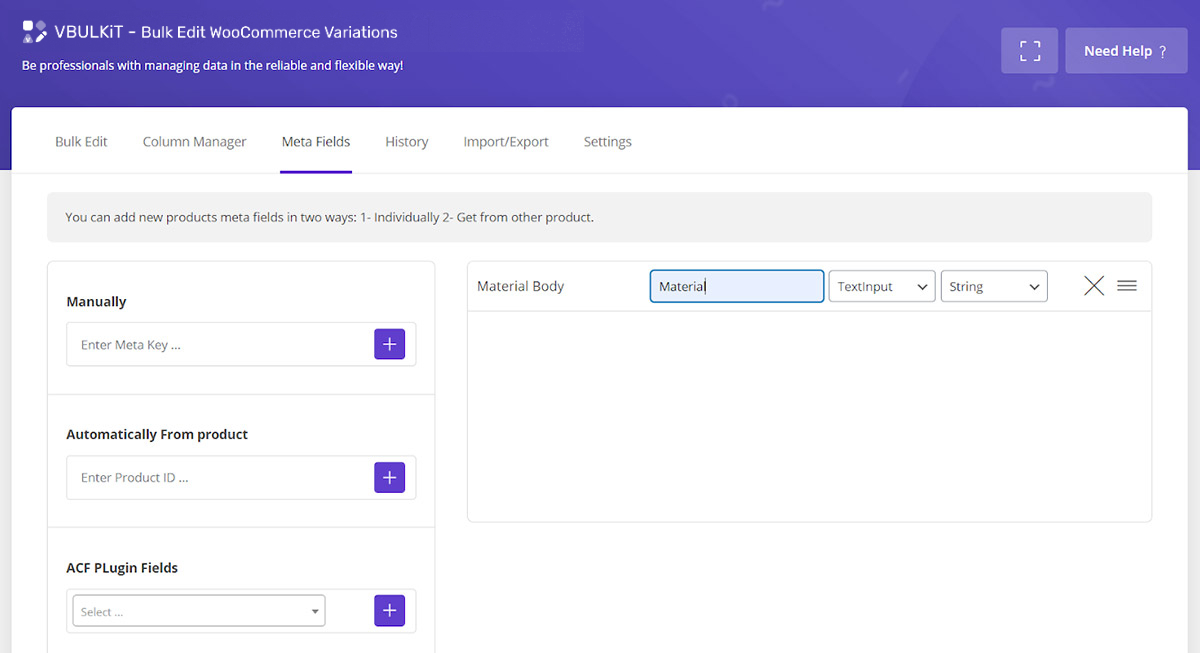
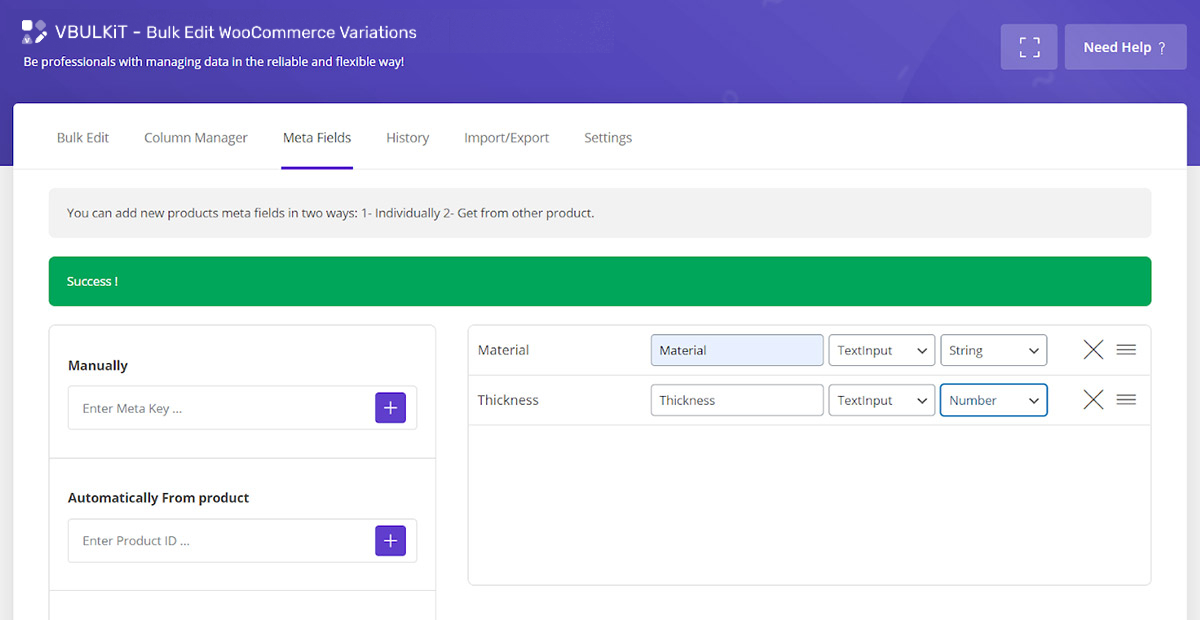
To add custom fields or custom product meta in the VBULKiT, you have to click “Meta Fields” button.
As you can see in the below picture, In this tab, you have 3 options for adding your custom fields to the plugin:
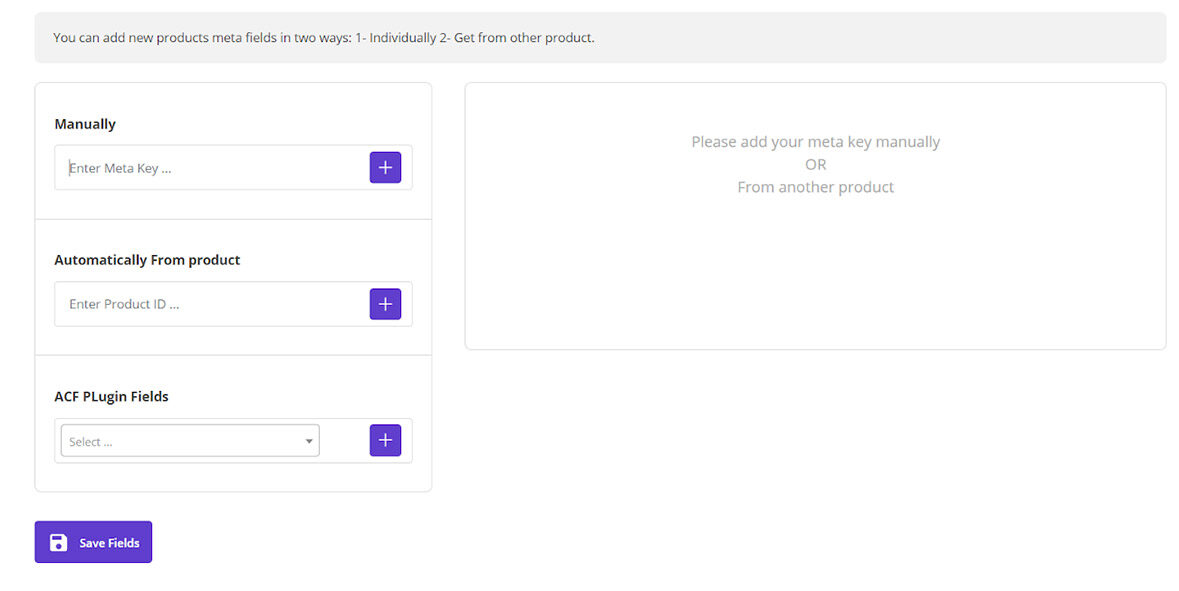
Add product meta key / custom field manually
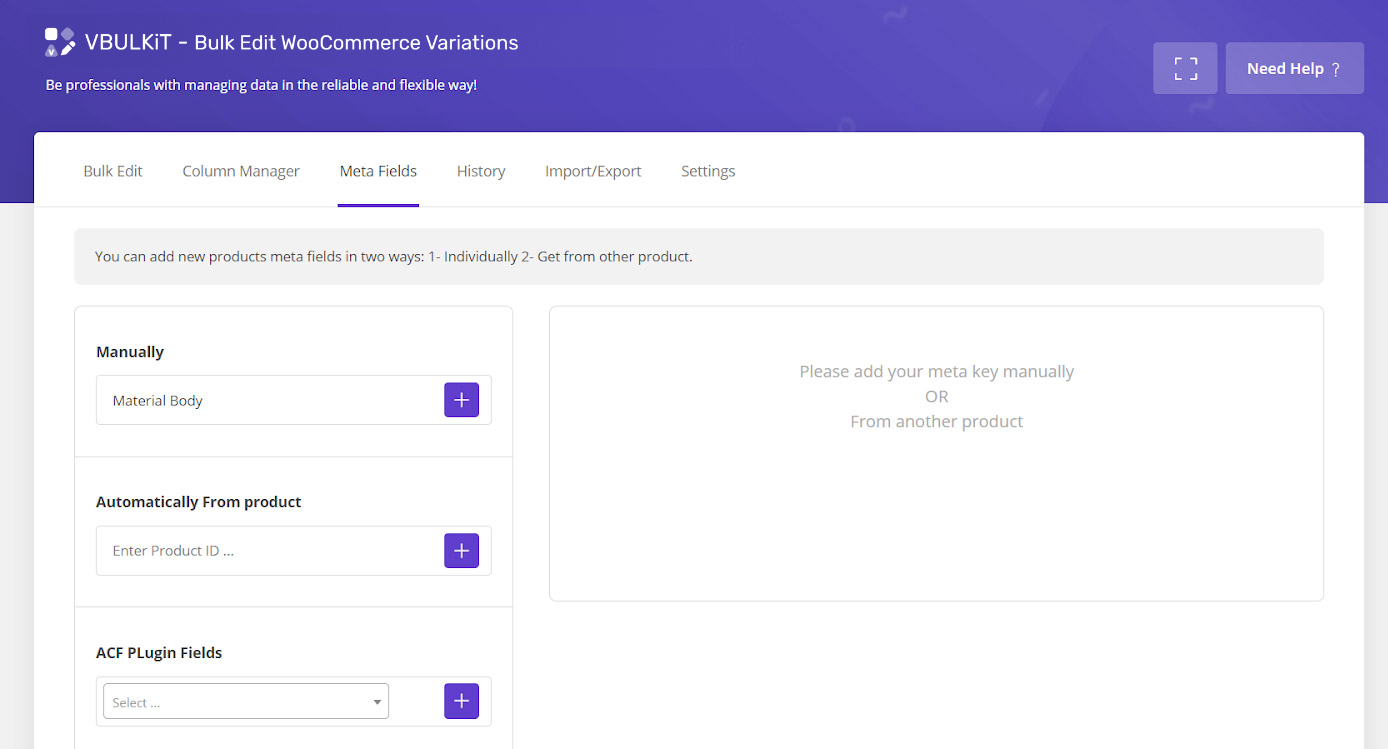
To add manually, you have to type the name of Meta field exactly the same as the name you had assigned to that custom field in the WooCommerce product page.
For example, the first custom field in our product page was “Material Body”, so, if we want to add this Meta Field, we can easily type “Material Body” in the text box and click on “+”:
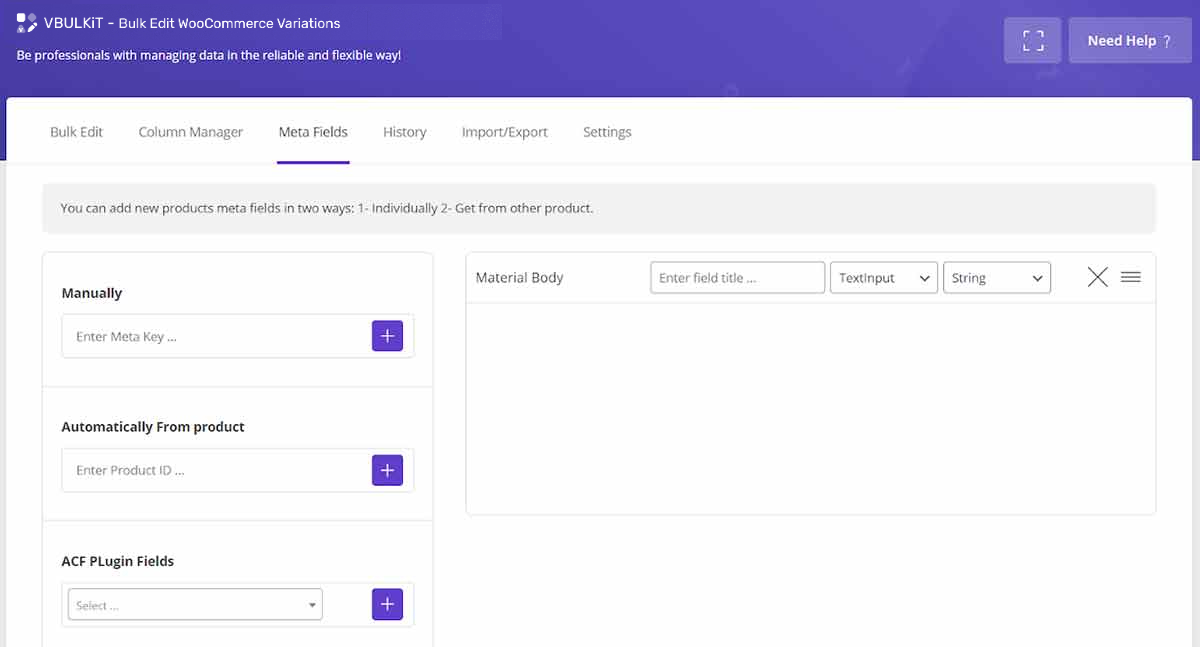
Then this meta field will be added to the next box which means this custom field has been added to the plugin and you can edit it as below:
Enter Field Title
If you want to see this field in the plugin with a different title, it is easily possible to assign any title to it.
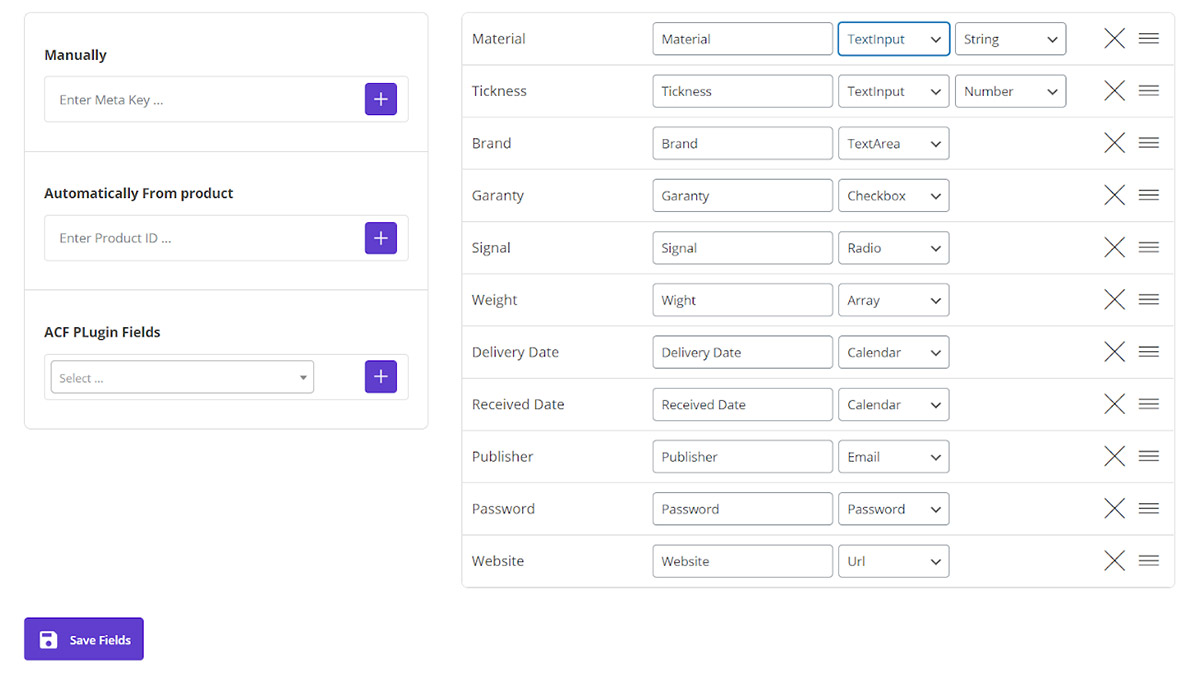
For example, we typed “Material” as the title of this custom Field:
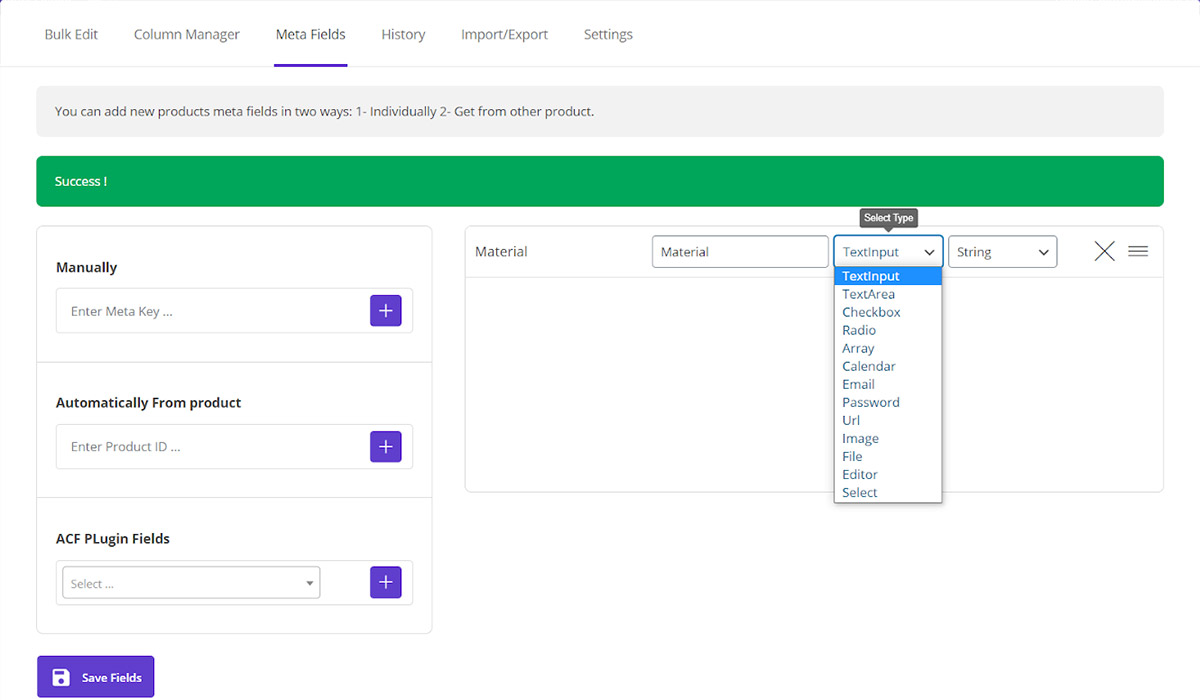
Select the Type
As these meta fields are the options that you have access to for Bulk Editing or Filtering, later, this is important to choose their types. In fact, you have to choose the best option which can display the values you have assigned to that meta field in the WooCommerce and let you edit them in the plugin accordingly.
In the “Select Type” combo box, there are so many items to be assigned to your custom Field values including:
- Text Input
- Text Area
- Checkbox
- Radio
- Array
- Calendar
- Password
- URL
- Image
- File
- Editor
- Select
Some of these items can be displayed in different conditions, for example, you can choose “Text Input” to be displayed either as a “String” field or “Number” field:
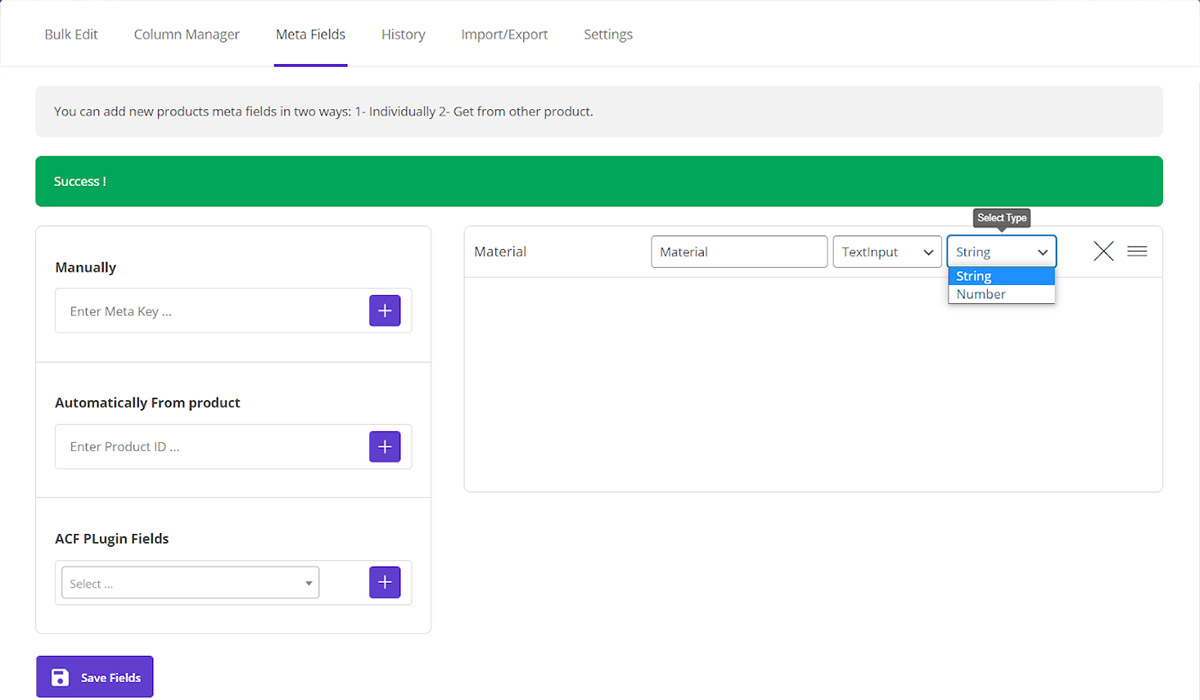
It may be confusing at the beginning; however by making some examples in the next step, you will learn how to choose the best option for your custom field.
Before going to the next step and see how these options can help you to better manage and control your product values, let’s get familiar with the other ways that you can add “Custom Fields” or “Meta Fields” to this plugin.
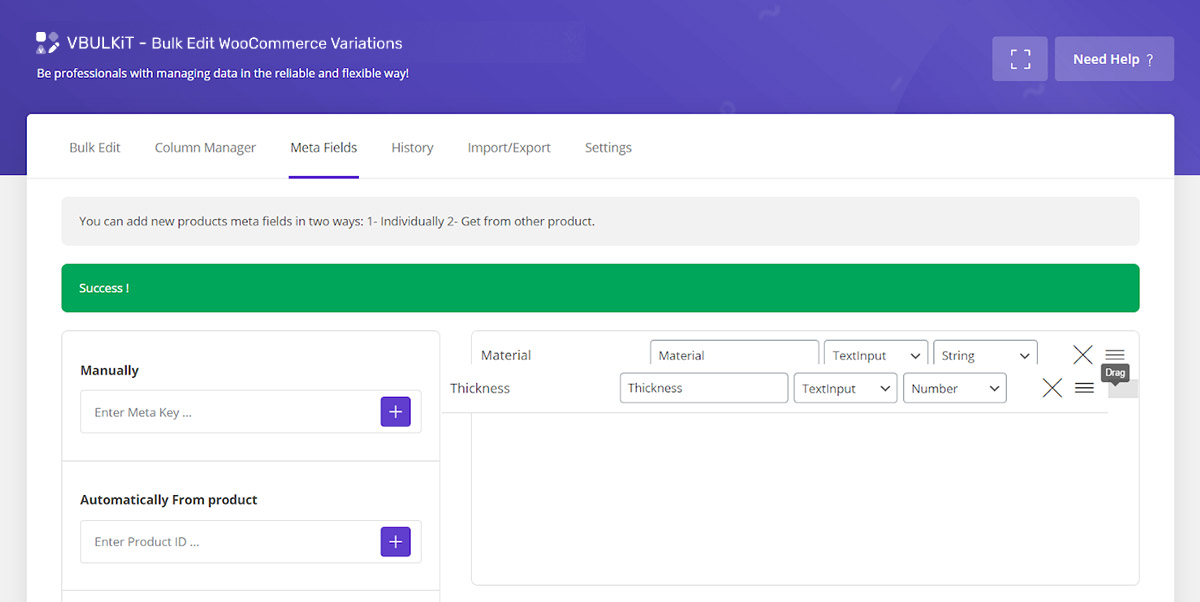
If you add more than one Custom field, you can easily “Change their Order” or “Delete” them by using the related Icon in each field.
Change order
For example, in the below picture we drag the “Thickness” field and tried to drop it above the “Material” field:
Add custom fields / meta key automatically from product
In this part, you can enter a product ID and let the plugin display the meta field related to that product.
Then you can add those custom fields to the Plugin by clicking on “Save Fields”.
You are able to edit “Title”, “Type” or “delete” and “Changing the order” of the custom fields in the opposite box as we described before:
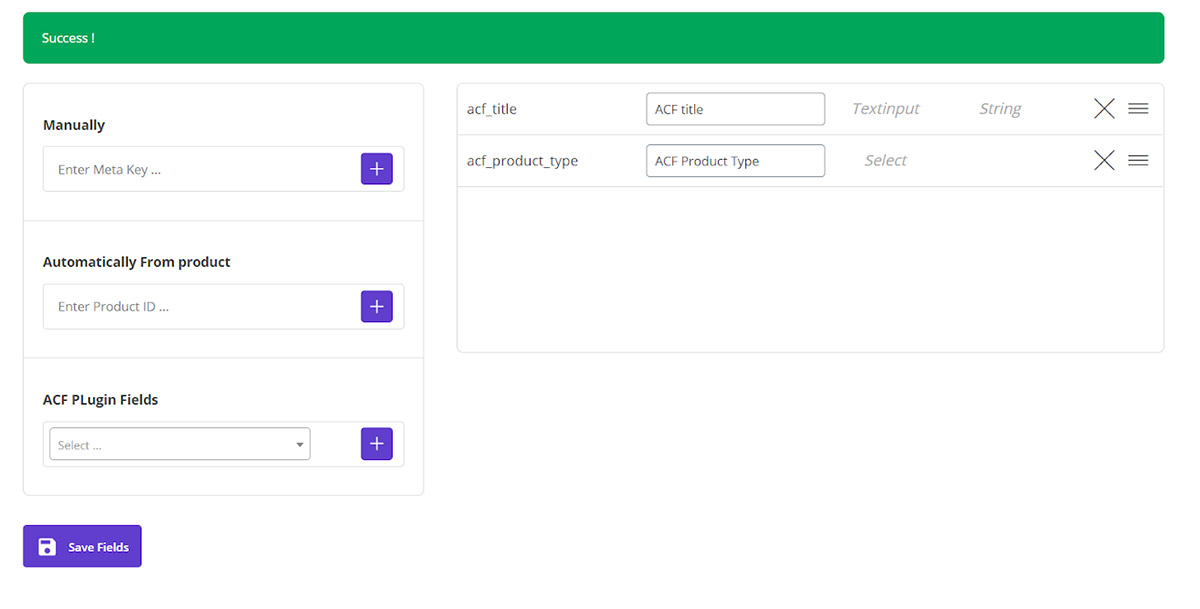
Add ACF plugin fields
If you have already installed the ACF Plugin to your website and assigned some custom fields to your products by using this plugin, it is also possible to add them to the VBULKiT – Bulk Edit WooCommerce Variations – plugin.
As shown below, you can ask plugin to show the custom fields of ACF Plugin by “ACF Title” or “ACF Product Type”:
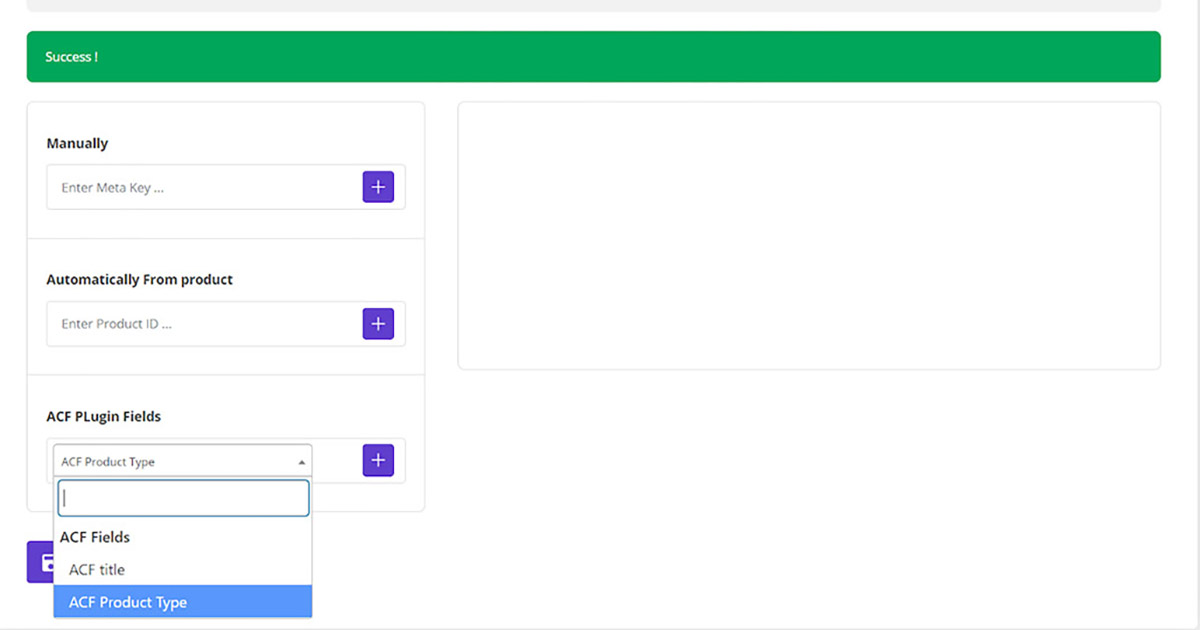
By clicking on “+”, the related custom fields will be displayed in the opposite box:

And you are able to edit titles, change the Order or delete them as you prefer. Then by clicking on “Save Fields”, you have access to those meta fields in the plugin as we will describe in the next step.
Step 2: Bulk edit custom fields in the plugin
To clear the effectiveness of these options, we are going to add some other custom fields to our plugin and assigned these options to them:
To use custom fields in the plugin, you have access to them in the “Bulk Edit”, “Filter Form” and “Column Manager” pages after clicking on “Save Fields”.
Using custom fields in bulk edit page
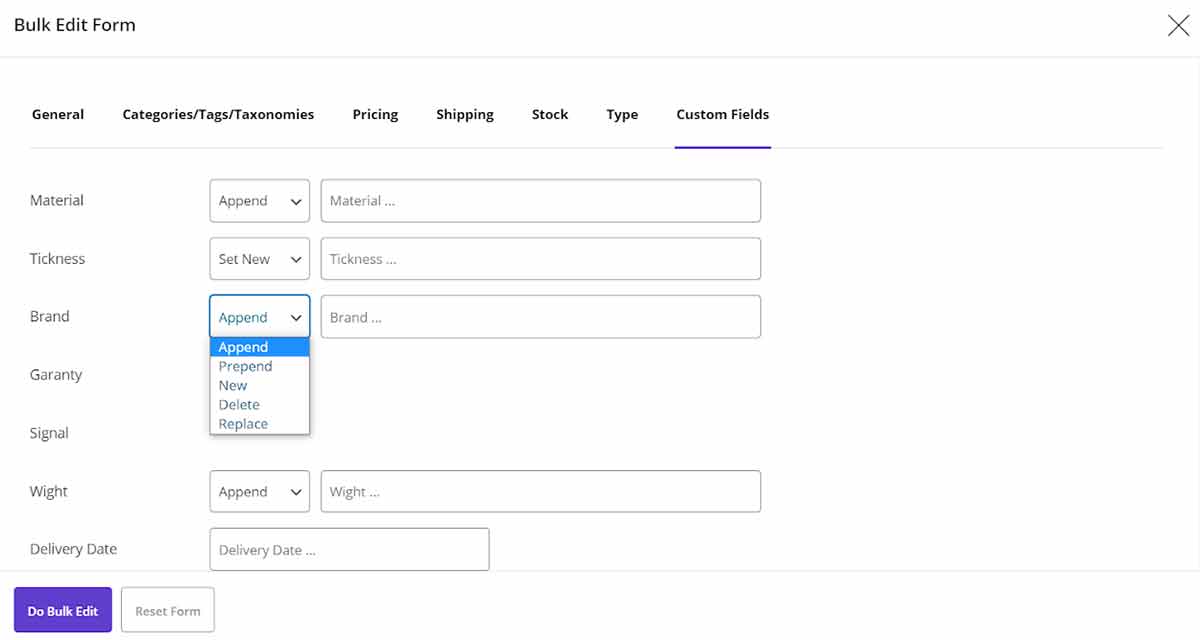
By clicking on “Bulk Edit” tab, you can see the “Custom Fields” tab as shown below:

As we expected, all the custom fields we added in the “Meta Fields” form, are displaying here. Now, let’s check how those Options are helping us to bulk edit these custom fields:
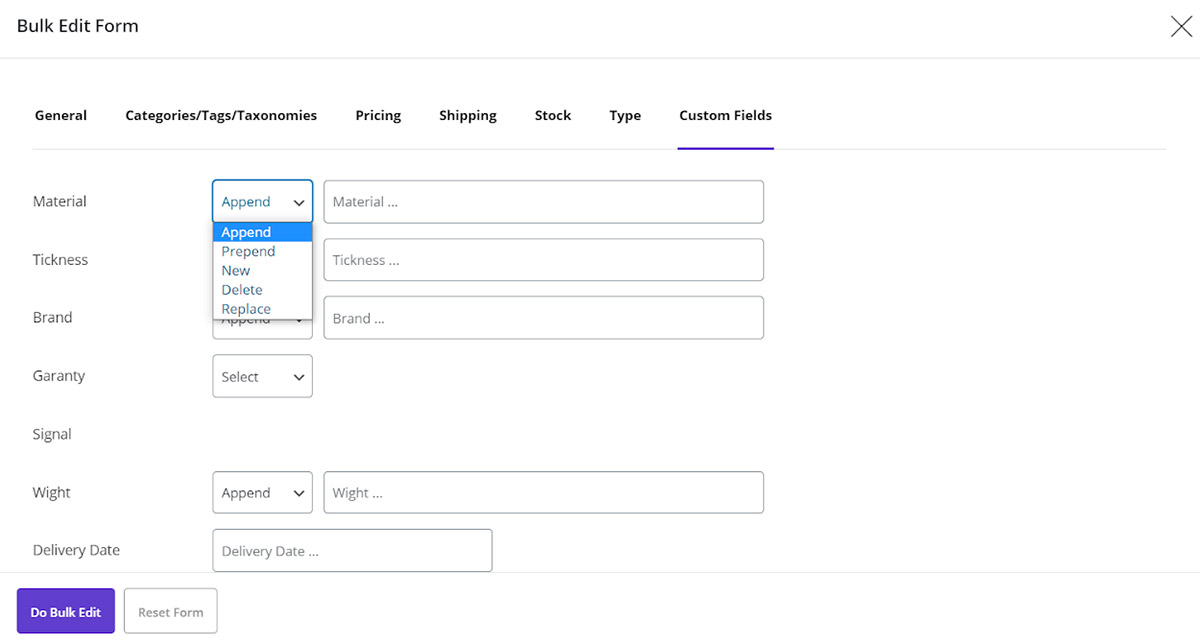
Text Input – String
As we assigned Text Input as a String option to the “Material”, we have now access to the condition box including:
- Append
- Prepend
- New
- Delete
- Replace
To bulk edit the values related to this custom field for our products.
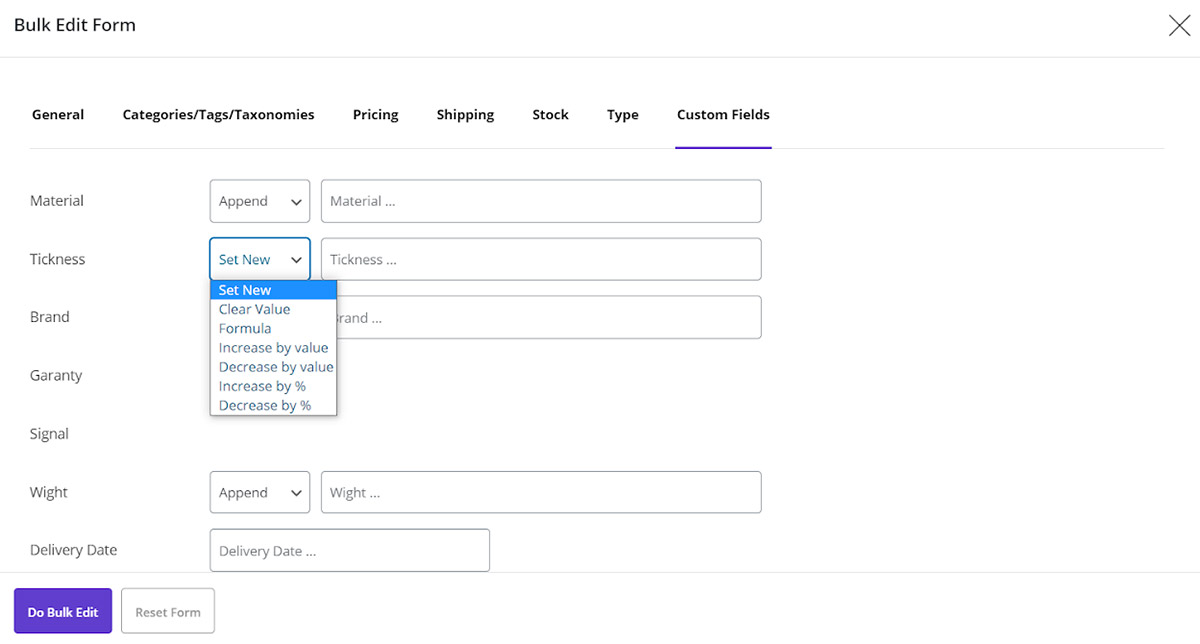
Text Input – Number
For the “Thickness”, as we assigned “TextInput” as a “Number” to it, we have access to the items in the condition box which are related to editing this meta field as a number including:
- Set New
- Clear Value
- Formula
- Increase by value
- Decrease by value
- Increase by %
- Decrease by %
As you can see in the below picture, you can bulk edit some other custom field values the same as “TextInput”, including:
Text Array:
Email:
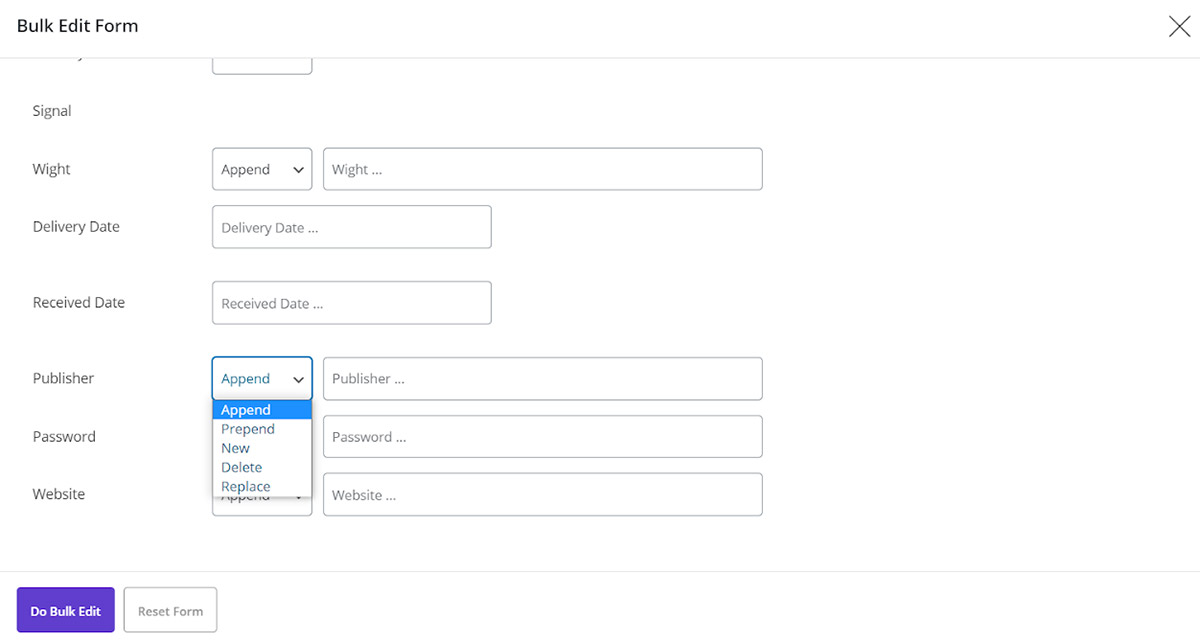
Password:
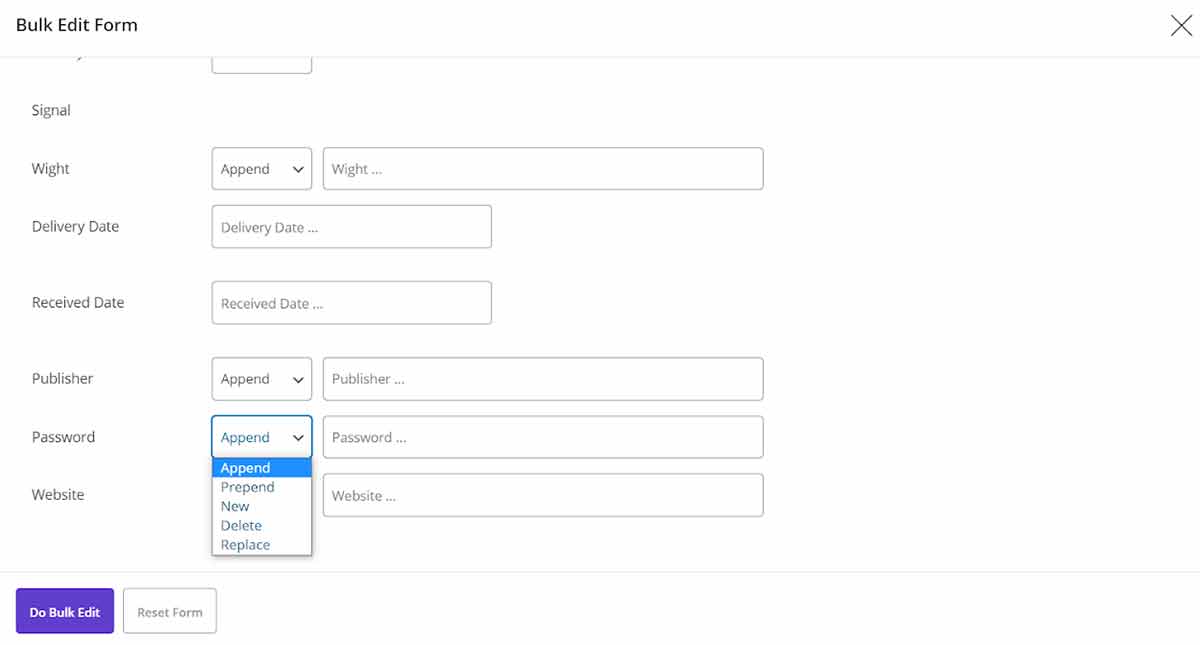
Website:
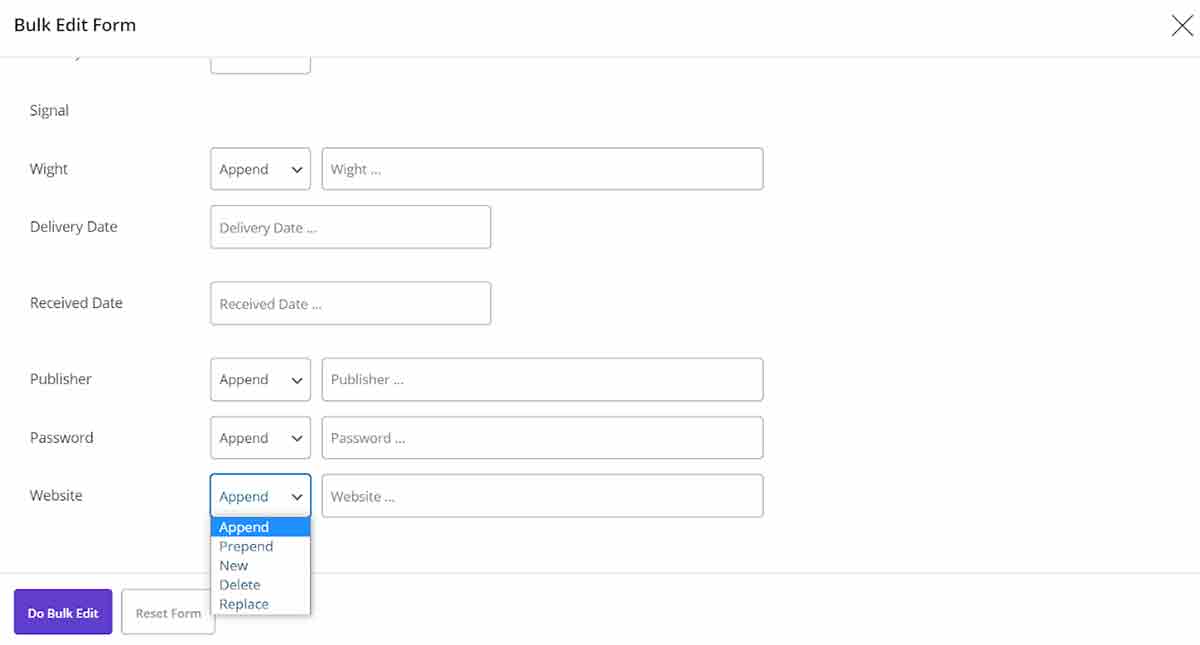
So, there is no need to explain them again. You can just choose the right option and enjoy editing the values related to them in an easy and effective way.
Checkbox
As we chose “CheckBox” as the custom field type for “Guaranty”, we can choose one of the values from the drop down list to bulk edit our products accordingly.
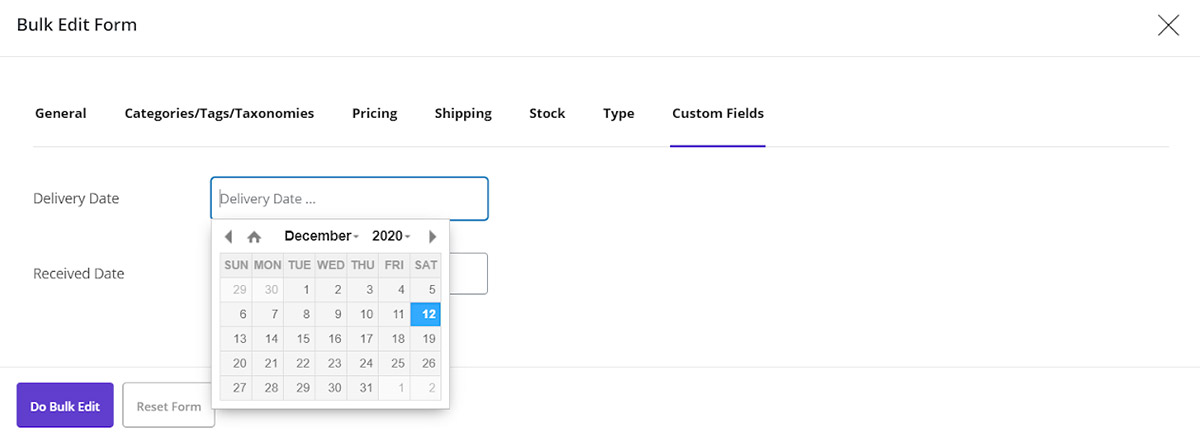
Calendar
If you assign “Calendar” type to your custom field values as we selected for “Delivery Date”, you can edit them as a date:
Using custom fields on column manager and column profile
In the column manager tab, you can choose the added custom fields to the plugin to see them as the columns of your product table.
For example, by adding “Material” and “Guaranty” as the custom fields:
We can add them as the product table columns as you can see in the below picture:
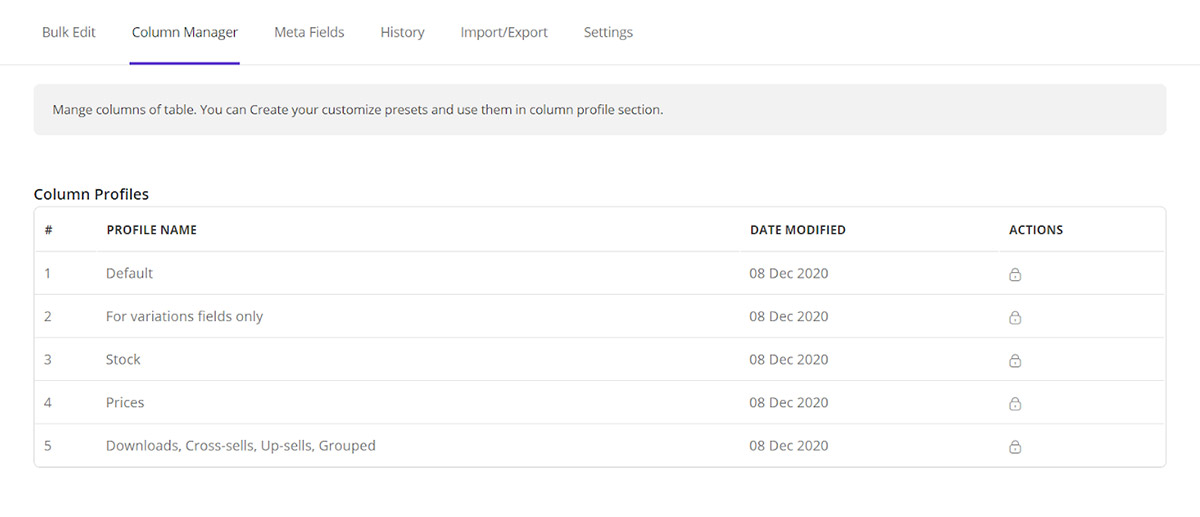
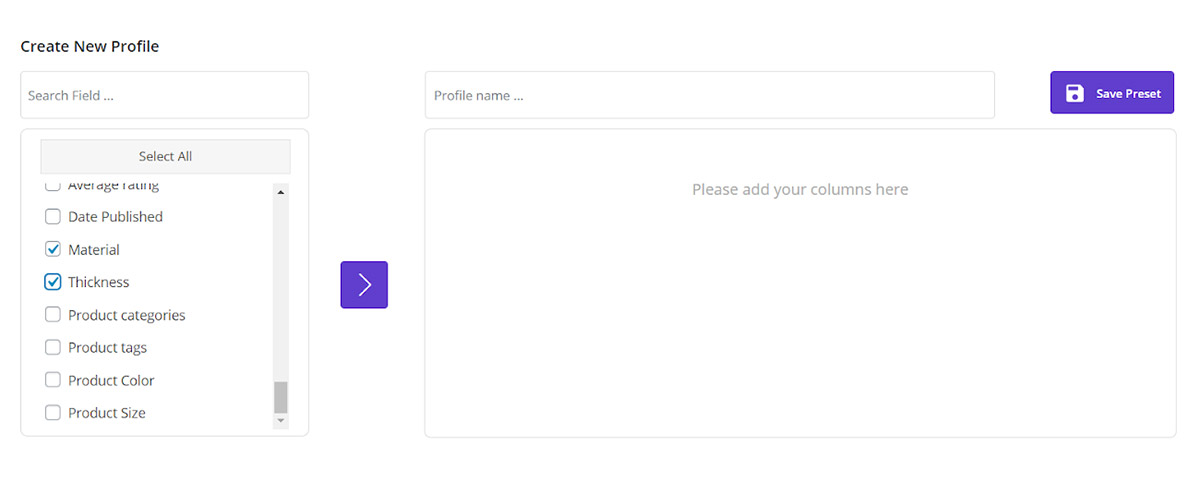
All of the added custom fields are available in column profile too, this means you can enable/disable each one of them.
Using custom fields on filter form
You have also access to the “Custom Fields” in the “Filter Form” to filter those products you need for bulk editing.
For example, let’s filter some of our products according to the “ACF Title” as we added them to this plugin as our meta fields in Step 1 – section 3.
As shown below, we opened the “Filter Form” in the main page of the plugin then clicked on “Custom Fields” to see the ACF fields there:
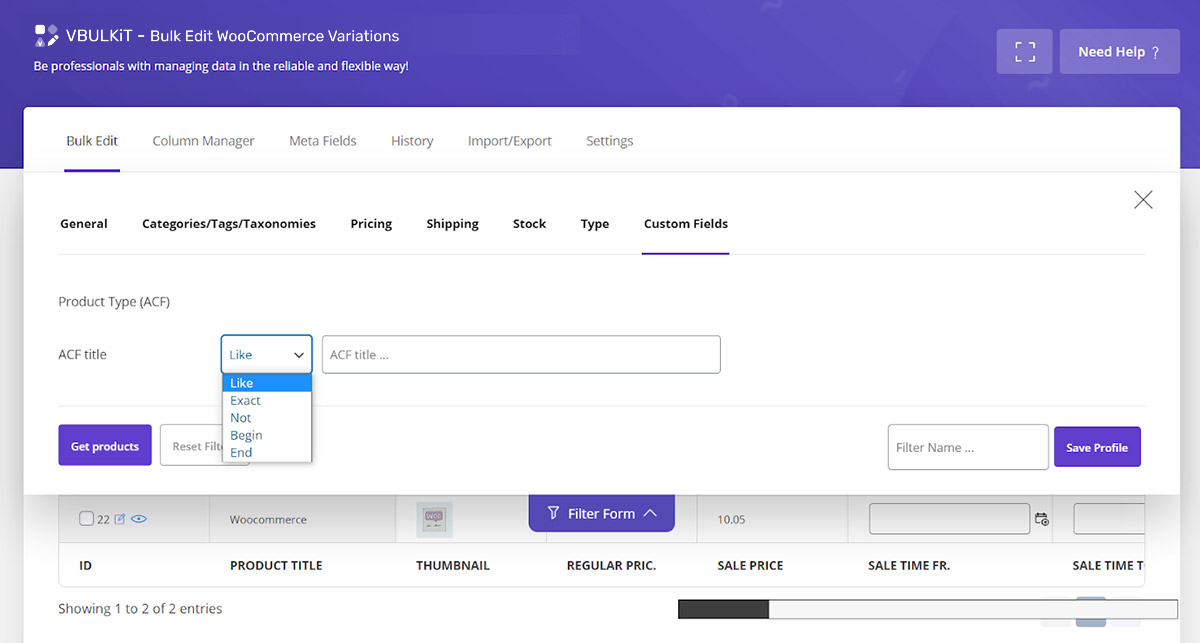
As “Select” options had been assigned to the “ACF Title” field:
We are now able to select one the below option as the condition to filter our prefered value:
- Like
- Exact
- Not
- Begin
- End
For example, If we choose “Begin” and type “Shirt” in the text box, all products that their ACF Title begin with “Shirt” will be filtered and we can Bulk Edit any features of them in the Plugin.
How can add custom field to WooCommerce product?
At the first edit the product. Then go to custom field meta box. Click on “add custom field” button and enter the name and value of the created meta field. Finally click on “update” button.
Comments