Scheduling a sale date is one of the most important tasks of store managers, especially when an occasion is near. In this tutorial we learn how to bulk edit and set schedule sale date for variable products by VBULKiT – Bulk Edit WooCommerce Variations – plugin.
For example, consider that as a marketing strategy, you decided to offer 25% off on Blue l large and Red large products in the Clothing category for Black Friday from 23 Nov. To 25. Nov.
To set a discount, first, you need to filter your required products then mark some or all products in the table to schedule a sale date for them in the bulk action form.
Here, we are going to follow these steps in our plugin.
Step 1: Filter products
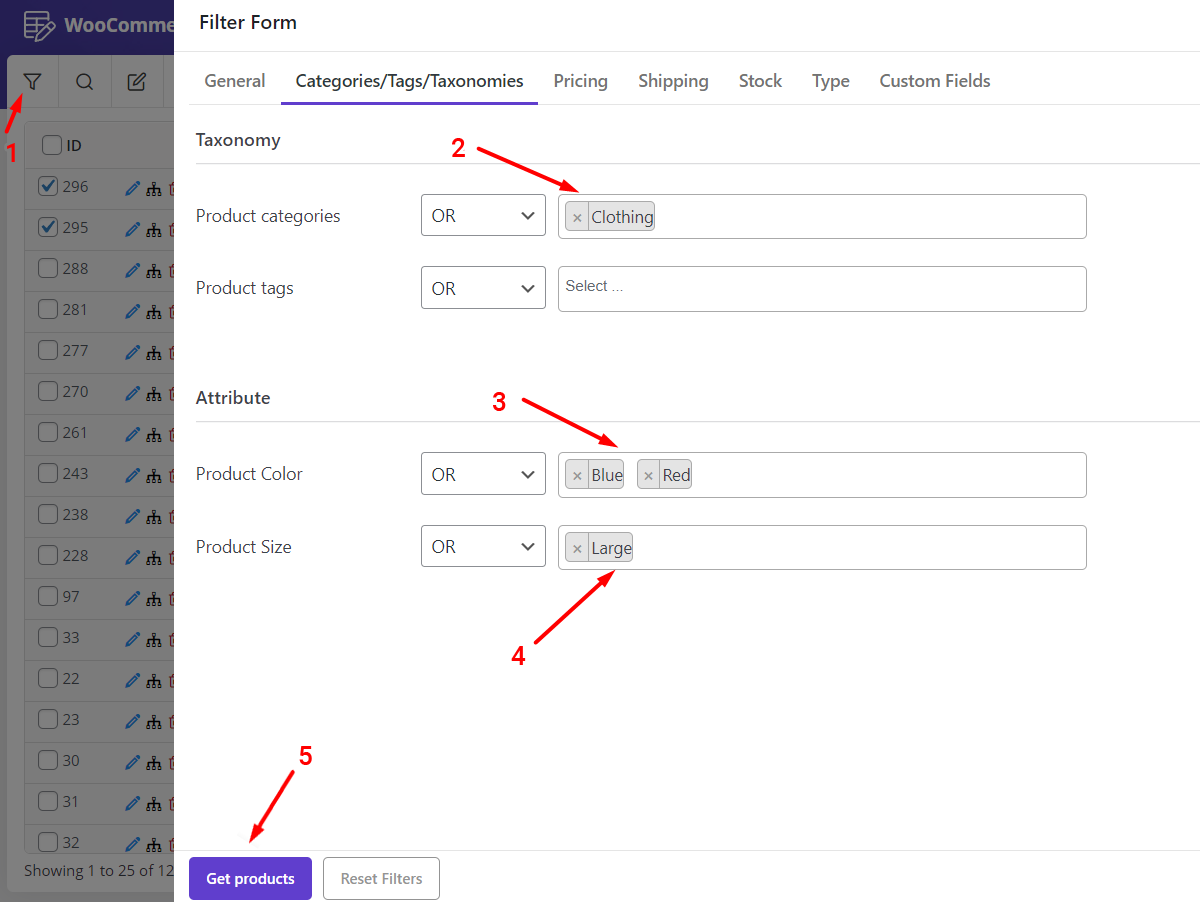
To filter products, open the Filter form by clicking on the filter icon of the toolbar (1).
Then go to Categories/Tags/ Taxonomies tab and follow the below:
- Choose Clothing (2) from the product categories.
- Select Blue and Red from the Product Color field.
- Choose Large from the Product Size field.
- Press Get Products button.
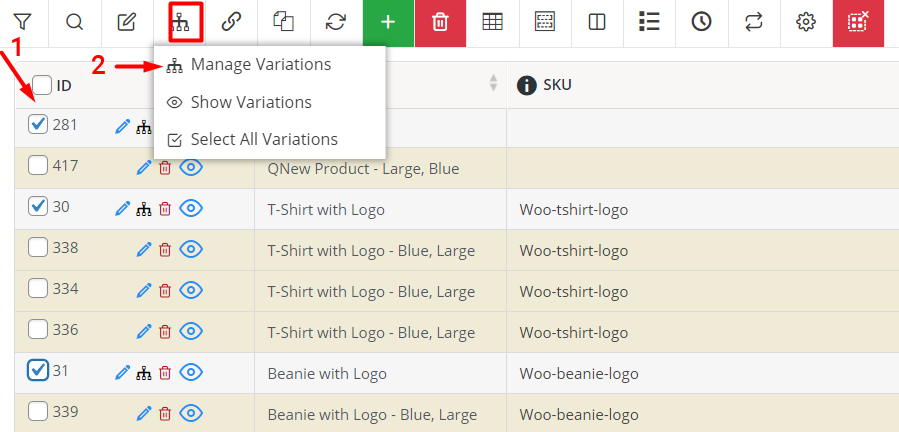
Step 2: Select products in the table for set schedule sale date
After filtering the required products, you need to mark some or all of them in the table. Then press the Manage Variations icon and choose the Manage Variations submenu to see the bulk actions form.
Step 3: Set sale date for selected products
To schedule the sale date, you can use one of the below methods:
- Schedule a sale date for one variation.
- Schedule sale dates for multiple variations.
- Schedule sale date for all selected product variations.
Here, you can find more details about each method.
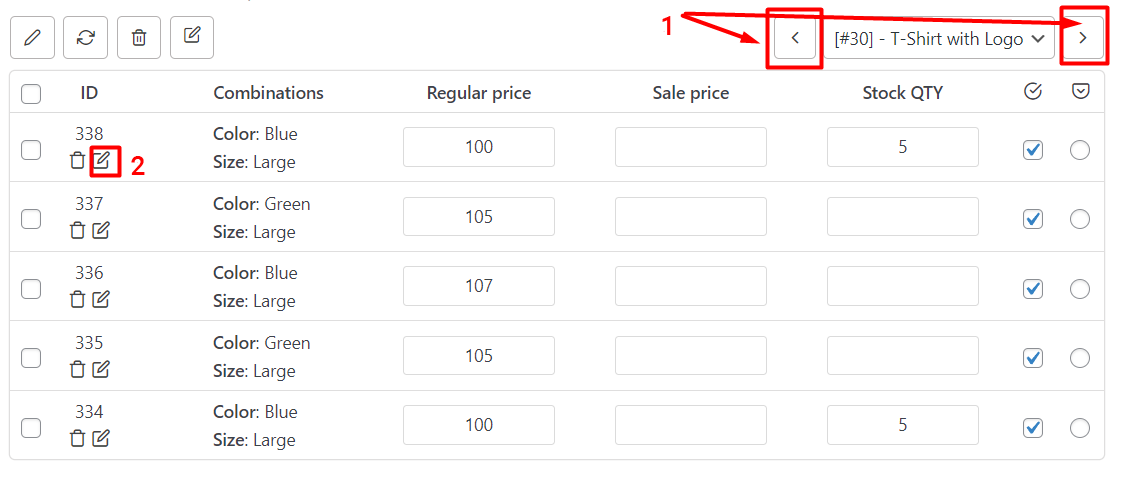
Set scheduled sale date for one variation
To schedule a sale date for one variation, you can quickly scroll over the products by using navigators at the top of the table (1) to find the right product and variation in the table. Then click on the Edit icon in the table under the ID of that variation.
The bulk actions form is now displayed and you can find the sale piece and sale date from /to fields in this form.
To fulfill the purpose of our example, we need to:
- Open the condition box in front of the Sale price and choose the “Decrease by % from regular” option and type 25 in the textbox.
- Click on the calendar box in front of the “Sale date from” field and choose 23. Nov. In the built-in calendar.
- Repeat this for the “Sale date to” field as well and choose 25.Nov.
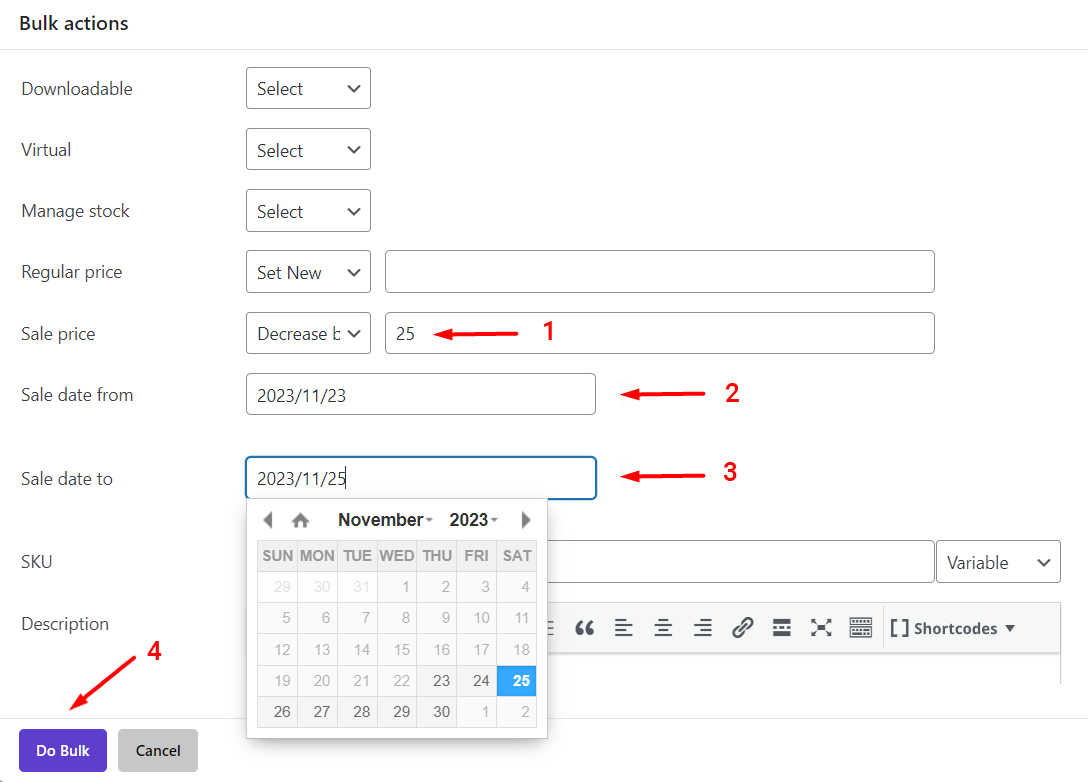
By pressing the Do Bulk button, the sale price will be applied to that variation as we scheduled.
Bulk edit multiple variations scheduled sale dates
The method for scheduling sale dates for multiple variations is much the same. The only difference is that you need to:
- Mark some variations in the table.
- Click on the Edit icon at the top of the table.
- Choose Selected variations.
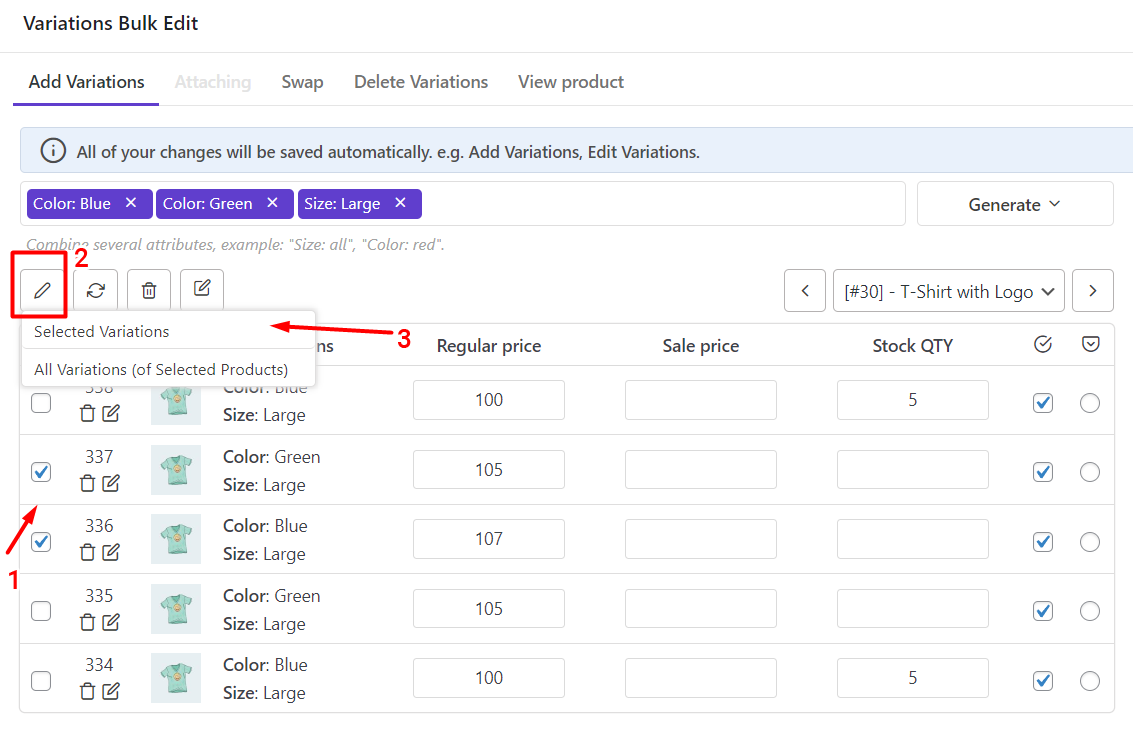
The variations bulk edit form is opened again, and you can repeat the above steps to schedule the sale date for the selected variations.
Bulk edit scheduled sale date for all selected products variations
If you need to schedule a sale date for all of the variations, you can easily choose All variations of selected products from the drop-down list of the Edit icon at the top of the table.
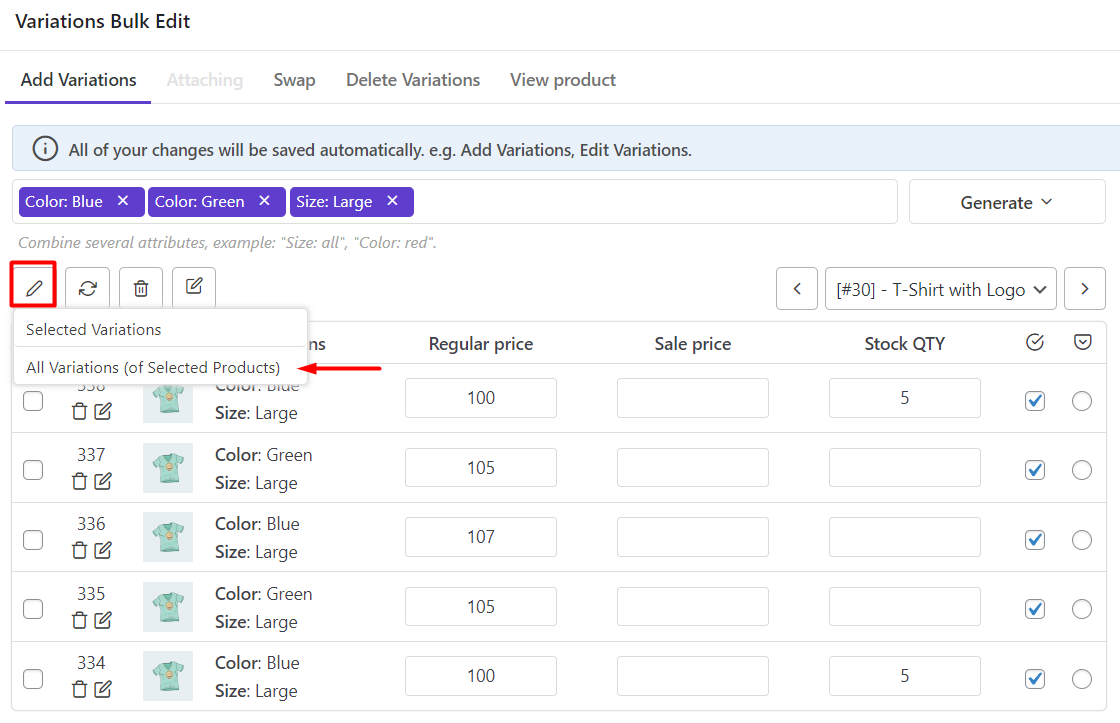
Then you can repeat the above steps in the variations bulk edit form to schedule a new sale date for all selected product variations.
Comments