In WooCommerce, you have to edit products individually and add the attributes to them one by one.
In this tutorial, we want to introduce the VBULKiT – Bulk Edit WooCommerce Variations – plugin as the ultimate solution for this problem. By following the simple steps provided in this post, you will find that the process of adding attributes to the product pages is as easy as drinking a cup of tea.
Now, let’s get through it by making a useful example.
Example 1: Add attributes to new simple products
Suppose that you have added some new simple products to your online store and you want to attach some attributes or even variations to them.
To make this happen in our plugin very fast and easily, you have to filter simple products then mark them in the table and finally attach attributes to them by using the Variations Bulk Edit form
Now, let’s see how simple is making any changes possible by using our plugin.
Step 1: Filter simple products
To filter products, you can use a comprehensive filter form designed in this plugin by clicking on the filter icon of the toolbar.
In the filer form, all WooCommerce fields are displayed in 7 different tabs to enable you easily access to your required field.
So, to quickly filter simple products, you just need to open the Type tab, then choose the Simple product option from the drop-down list of the Product type field.
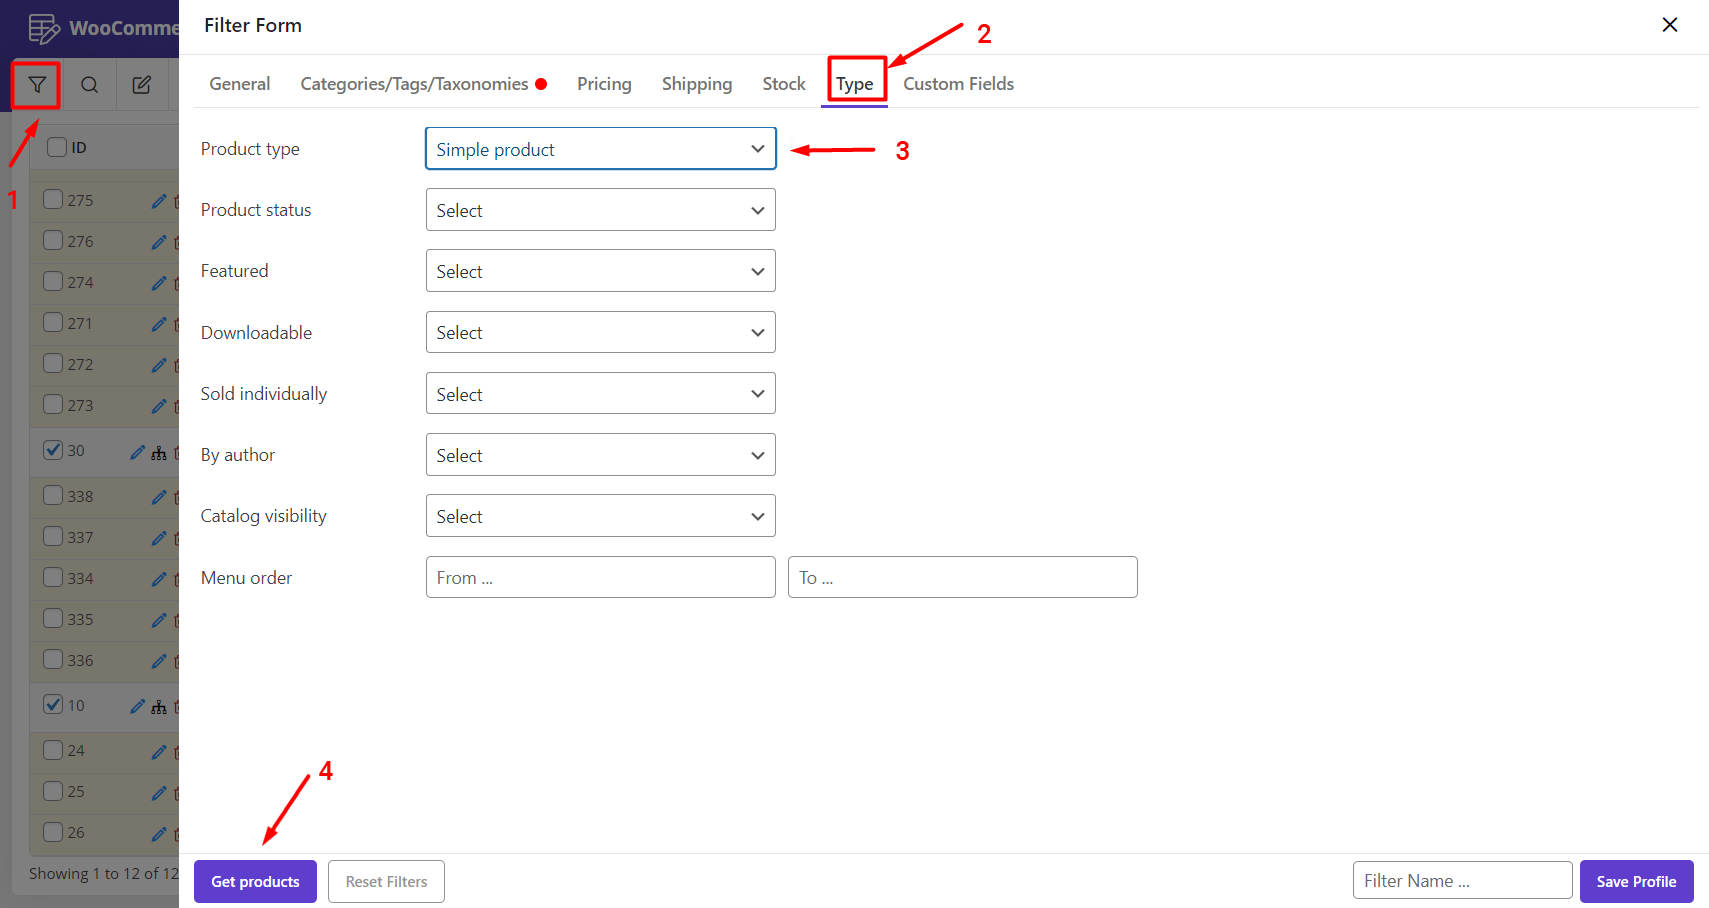
Then use the Get Products button to see the Simple products in the table.
Step 2: Mark simple products and use the manage variations option
When all simple products are listed in the table, you are ready to mark the checkbox next to some of them (1) or simply mark the check box next to the ID to select all of them in the table.
Then, click on the Manager variation icon on the toolbar and choose the Manage Variations option (2) to see the Variations bulk edit form.

Step 3: Add attributes to selected products
You are now ready to add attributes to the selected products very fast and easily.
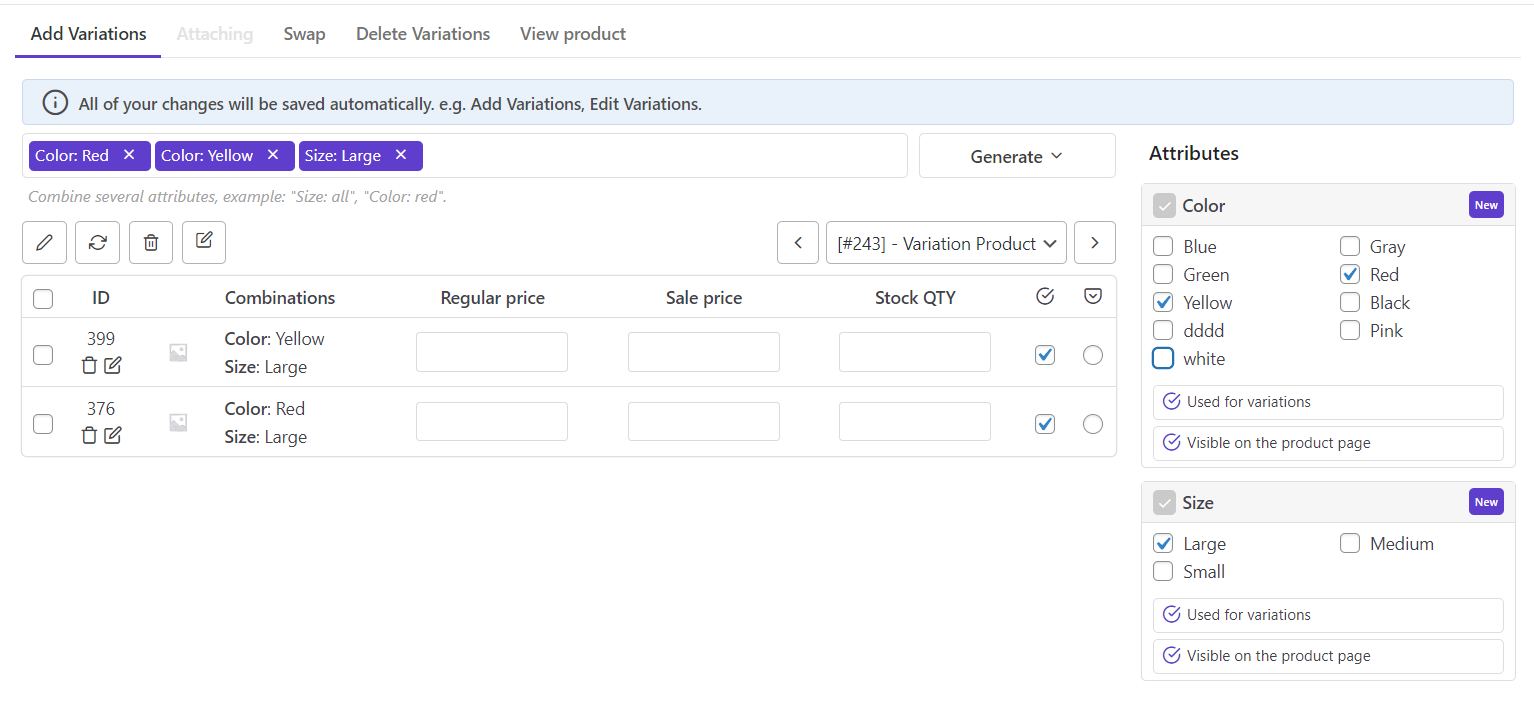
As you can see in the below picture, by opening the Variations Bulk Edit form, all attributes are displayed in separate boxes on the right.
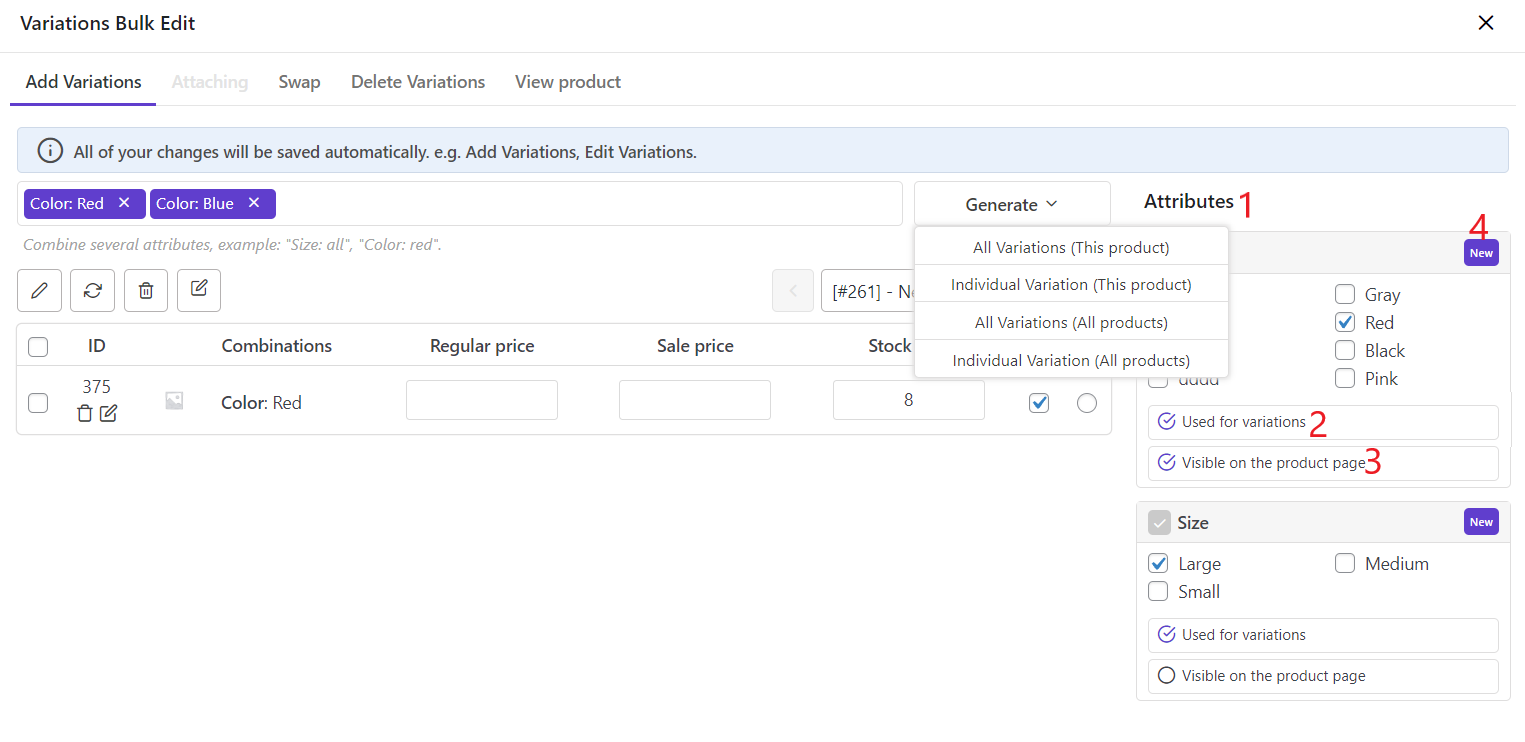
Some tools and options are designed in these boxes to help you attach the attributes to your products more efficiently. Let’s review them one by one:
Attribute terms (1)
In the middle of the box, you can find a list of all terms related to each Attribute. To add one or more of them to the selected products, you just need to mark the checkbox next to them.
There are two options available under the Attribute boxes:
Used for variations (2)
If you activate this option, you can use the selected terms for creating variations by clicking on the Generate button in the middle of the page.
Visible on the product page (3)
If you mark this option, the selected terms are displayed on the product page.
New button (4)
If you want to attach a variation term to the products which are not available in that Attribute list, it is simply possible to add your required term by clicking on the “New” button. In the next example, you can get more familiar with this option.
In this example, we tried to add Blue from the Color box and Large from the Size box to the selected products and we also marked both options to use selected attributes as variations and display them on the product page.
Note: All changes you make here, like marking the attributes or options are saved automatically and are visible in product page of your online store immediately.
Example 2: Add attribute to existing variable products
Sometimes, you have already created some variable products and you want to attach a new attribute to them.
The steps to do this task are almost the same. However, we make an example to describe it completely.
Suppose that you want to add White, Yellow, Red, and large as a new attribute to the variable products in the Hoodie category.

As we mentioned above, you need to go to the filter form then filter hoodies by opening the Categories/ tags/ Taxonomies tab, then mark some products in the table and choose the Manage variations option from the toolbar.
In the next step, you need to click on the “New” button on the Color attribute box. So, a new pop-up is displayed on the screen as below:
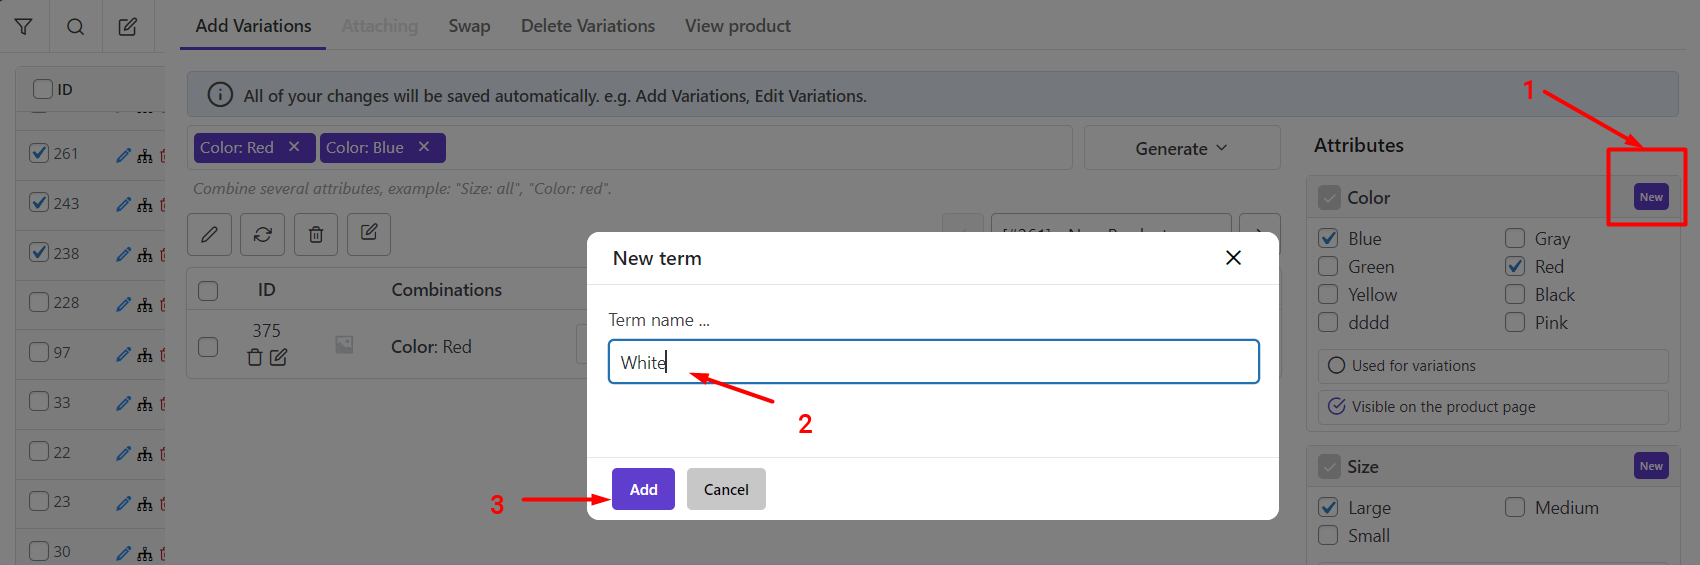
In this pop-up, you have to type the term of attributes in the textbox- White in this example, then click on Add button.
As illustrated below, you can see that White has been added to the attribute terms.
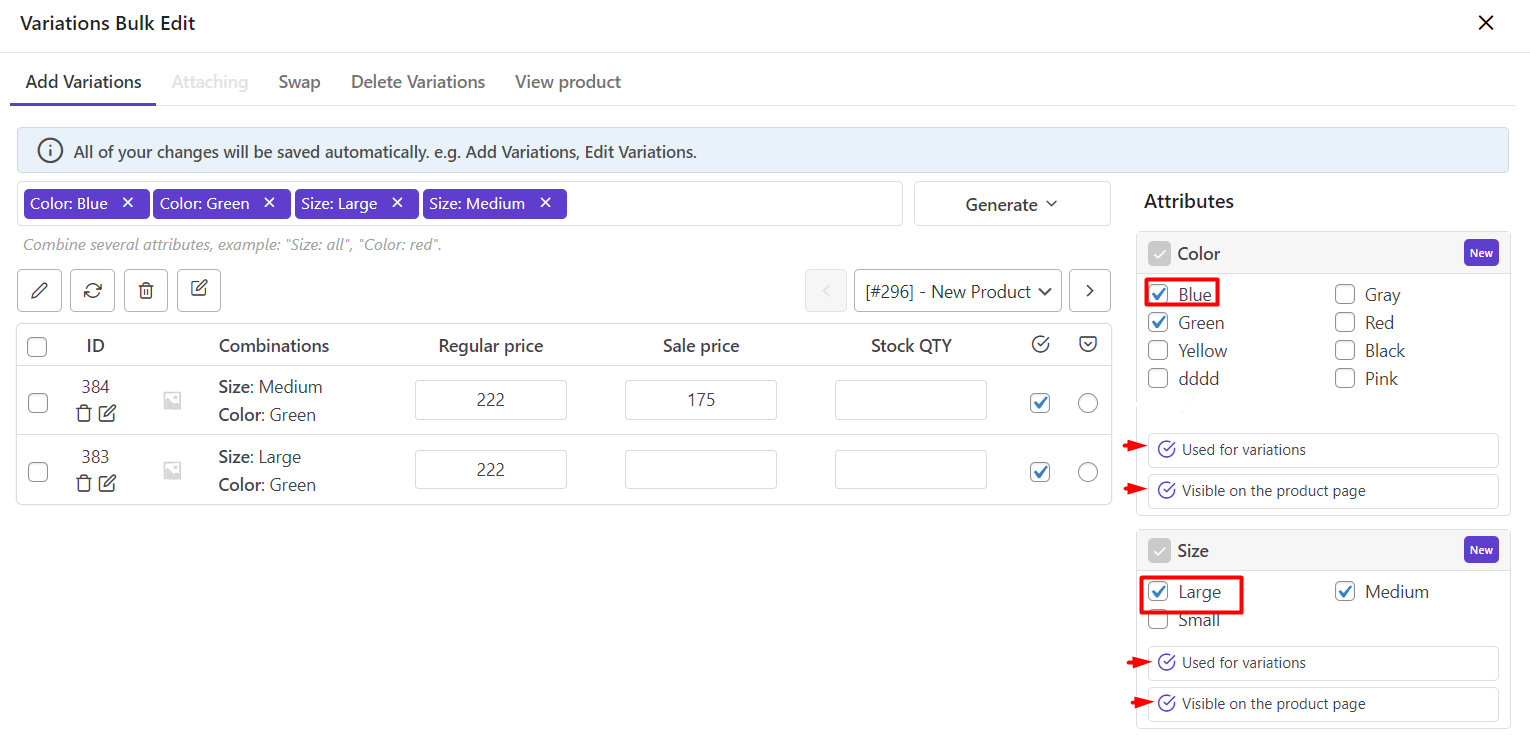
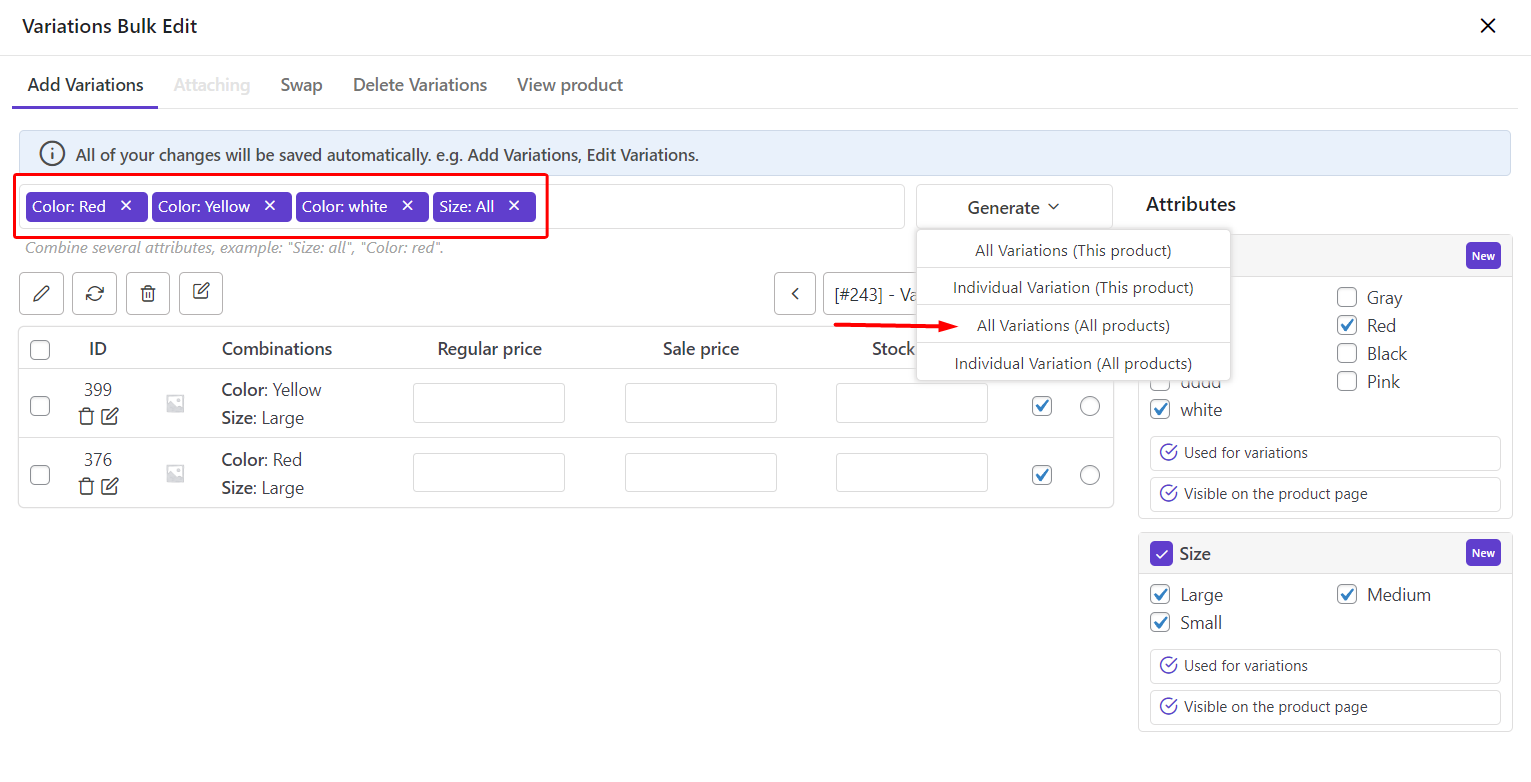
Now, you can mark yellow, white, and red in the color box and large in the Size box.
If you just need to display these attributes on the product page, check the “Visible on the product page” option under each box.
However, if you want to add the related variations to the products, you have to:
- Check the “Used for variations” option under each box to use the attributes as variations.
- Click on Generate button at the middle of the page.
- Choose all variations (all products) which means all variations will be added to all selected products.
It is also possible to use navigators on the top of the table to see the products and variations attached to them.

Read More: How to add product variations in VBULKiT – Bulk Edit WooCommerce Variations – plugin?
Comments