Bulk edit product prices is one of the most useful features of VBULKiT – Bulk Edit WooCommerce Variations – plugin which enables store managers to bulk edit regular price, sale price, tax status, sale date and etc.
Step 1: Filter products
Before starting to bulk edit product prices you have to filter your desire products.
For example, in this tutorial, we want to bulk edit the prices of downloadable and featured products.
we filtered those products by going to “Filter Form” and select them in the “Type” tab as below:
Read More: How to filter products in VBULKiT – Bulk Edit WooCommerce Variations – plugin?

Step 2: Customize the columns of product table
Customizing columns of the product table is not a necessary task for bulk editing product price, however, we recommend you to choose “Regular Price” and “Sale Price” columns in the column profile to better follow your changes.
Read More: How to save and load column profiles in VBULKiT – Bulk Edit WooCommerce Variations – plugin?
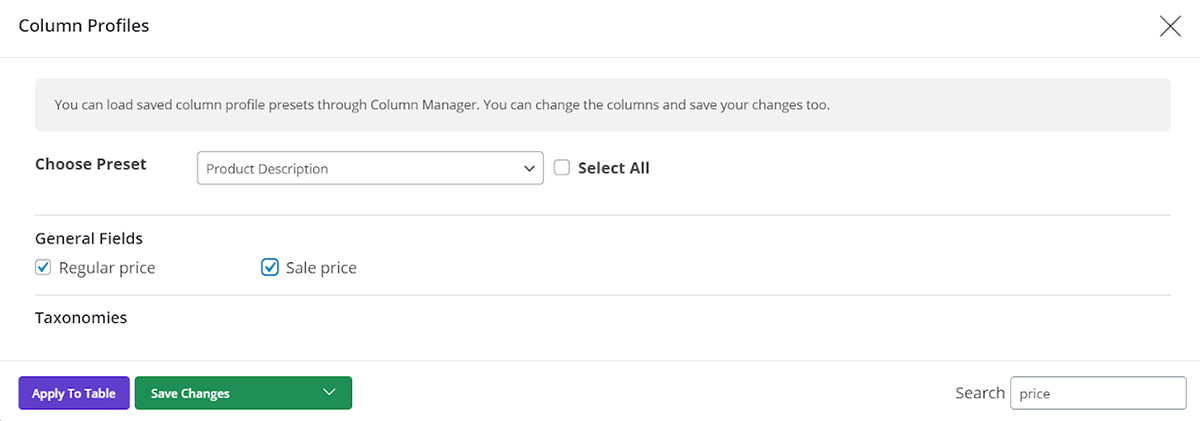
As we filtered “Downloadable” and “Featured” products, our product table with these columns displayed as below:
Step 3: bulk edit product prices
It is really easy to Bulk edit product price in our plugin as we described below just by one click:
- Click on bulk edit in the main page to open “Bulk Edit” form.
- Go to “Pricing” tab to see the below form:
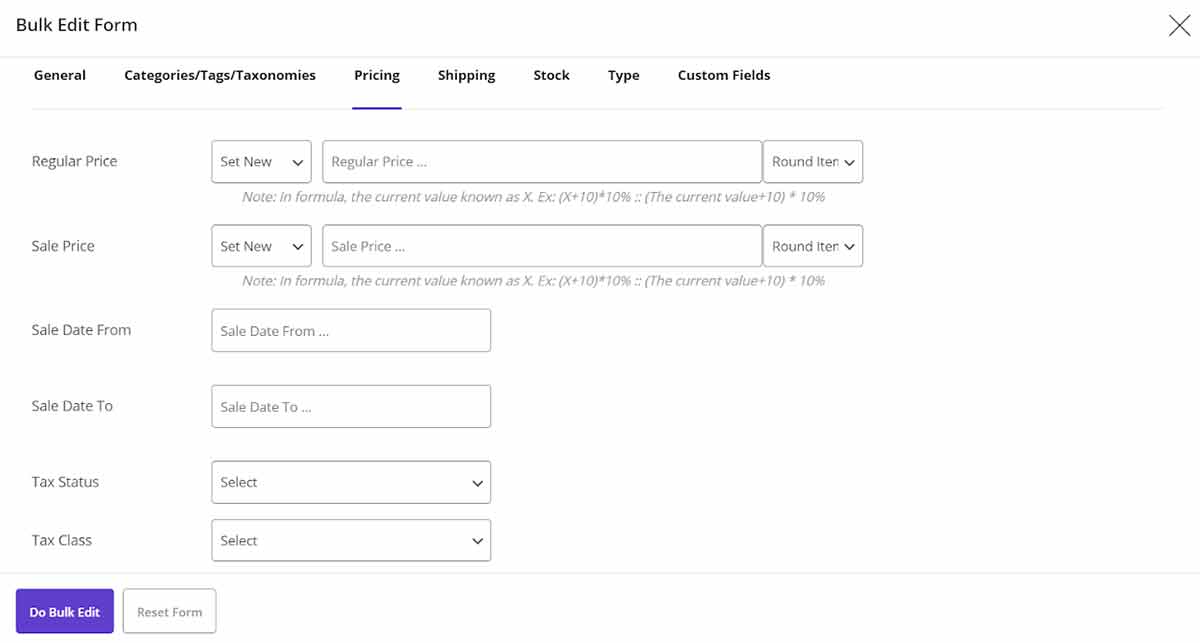
There is no difference if you have chosen ten, one hundred or even one thousand products for editing.
You can change values in the options below according to the conditions you prefer, and change their prices at the same time. It is like magic, isn’t it?
Now let’s take a look at what is waiting for you in the “Pricing” tab of “Bulk Edit” Form.
As you may notice to the above picture, you can change:
- Regular price
- Sale Price
- the Sale Date From
- Sale Date To
- Tax Status
- Tax Class
There are a lot more options related to each field. Therefore, follow this tutorial to see how to bulk edit product prices in the WooCommerce variations bulk edit plugin.
Regular price
As you can see in the below picture, there are three boxes next to the regular price field.
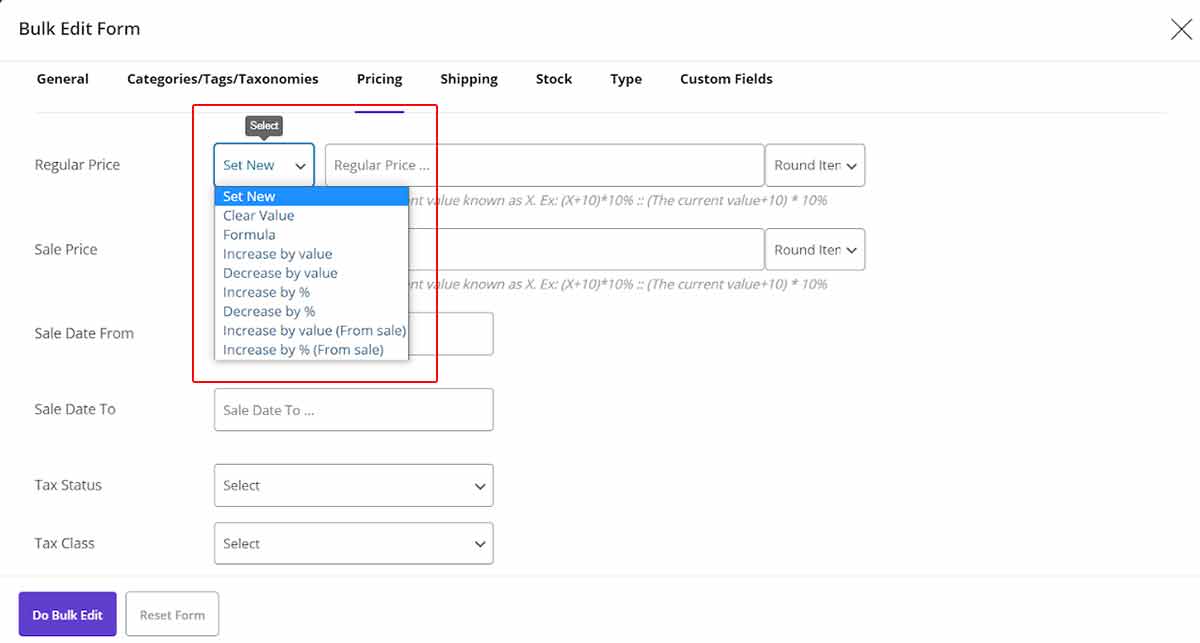
We designed some default conditions in the first box and you can choose one of them from the dropdown list to bulk edit regular prices of your filtered products according to them, including:
- Set New: A new value will be replaced by the current value.
- Clear Value: The current value will be totally cleared.
- Formula: you can use (+)plus, (-)minus, (*)times or (/)division sign to make a formula for editing the current value.
- Increased by value: Increase the current value by the value you entered.
- Decreased by value: Decrease the current value by the value you entered.
- Increased by %: Increase the current value by the percent you have entered.
- Decreased by %: The current value will be decreased by the percent you have entered.
- Increase by value (From Sale): The value will be sale price added up entered value.
- Increase by value % (From Sale): The value will be sale price added up the percent of sale price, for example if you set 10 for value, the result will be (sale price + (sale price*10%)).
Note: In the formula type, (the current value = X). For example (X+10)*10% mean (The current value+10) * 10%. if X=20: (20+10)*10% = 3
At the second box, you can type the value which must be a number without any special limit.
In the third box, you can set how the calculated prices according to our specified conditions and value for rounding and displaying in the product table.
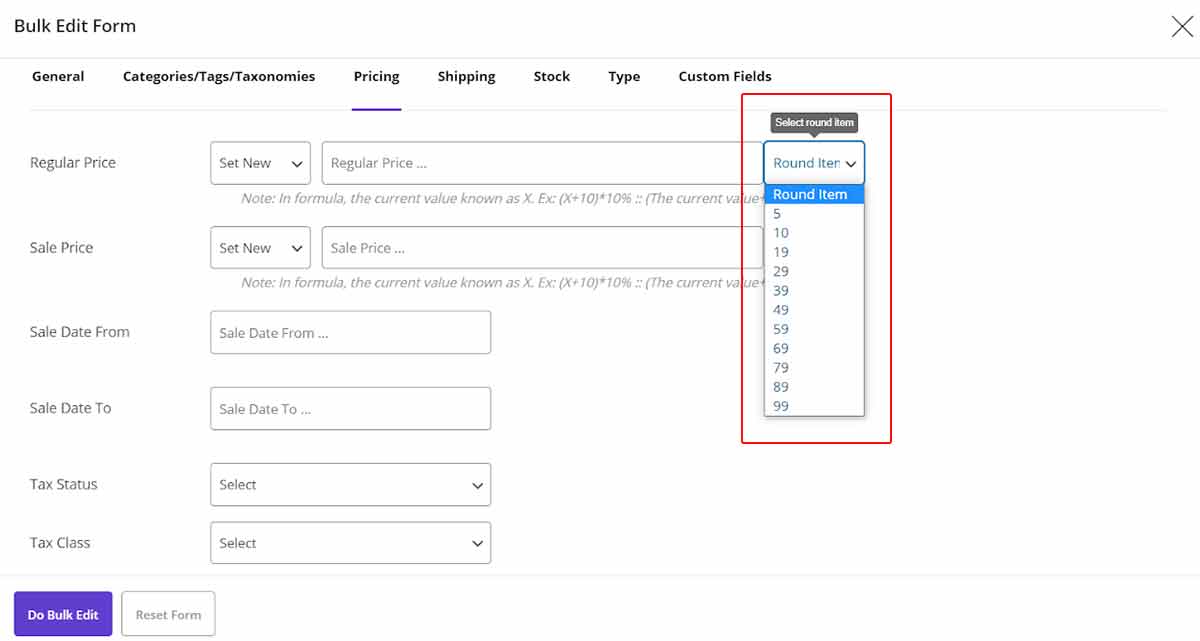
The options available for the “Sale Price” are mostly the same as “Regular Price”. The difference is for the last two items of conditions which we will explain in the following.
Sale price
- Decrease by value (From regular): The value will be regular price minus entered value
- Decrease by value % (From regular): The value will be regular price minus the percent of regular price, for Example if you set 10 for value, the result will be (Regular Price – (Regular Price*10%))
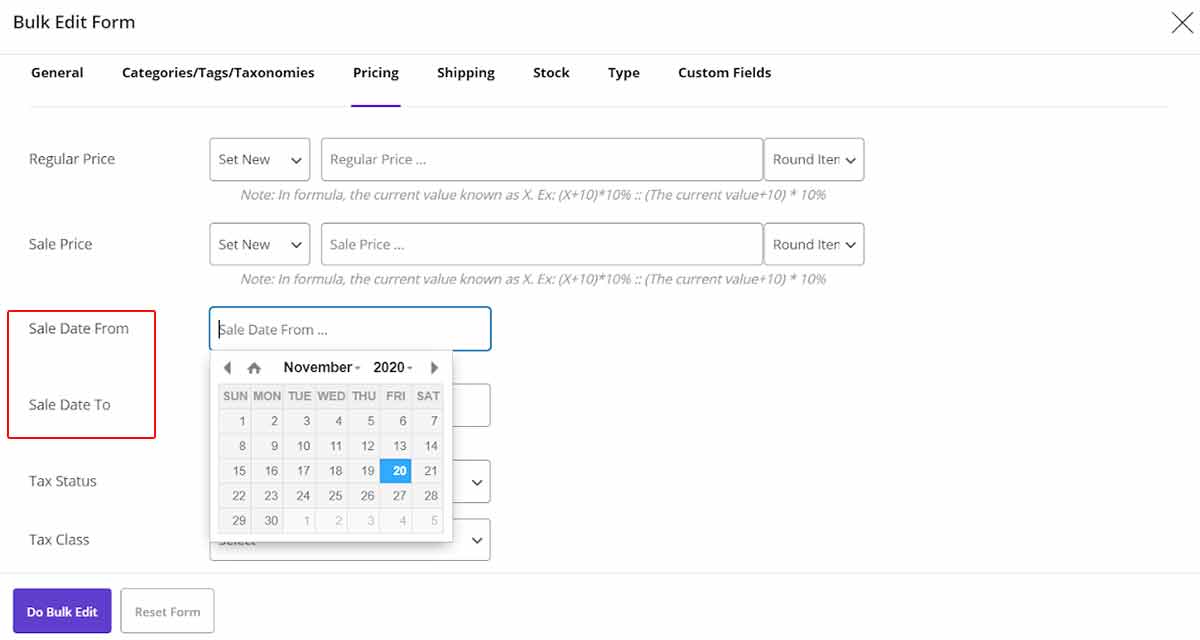
Sale date from and sale date to
The next two fields named “Sale Date From” and “Sale Date To”, can help you to set a schedule for starting and ending the sale date for selling your products on sale.
By choosing this date from the calendar, the sale price will automatically displayed in your online store from the start date to the end date.
Tax status and tax class
All the tax status you have already assigned to your product in WooCommerce is available here to make controlling and managing selling the product easier for you.
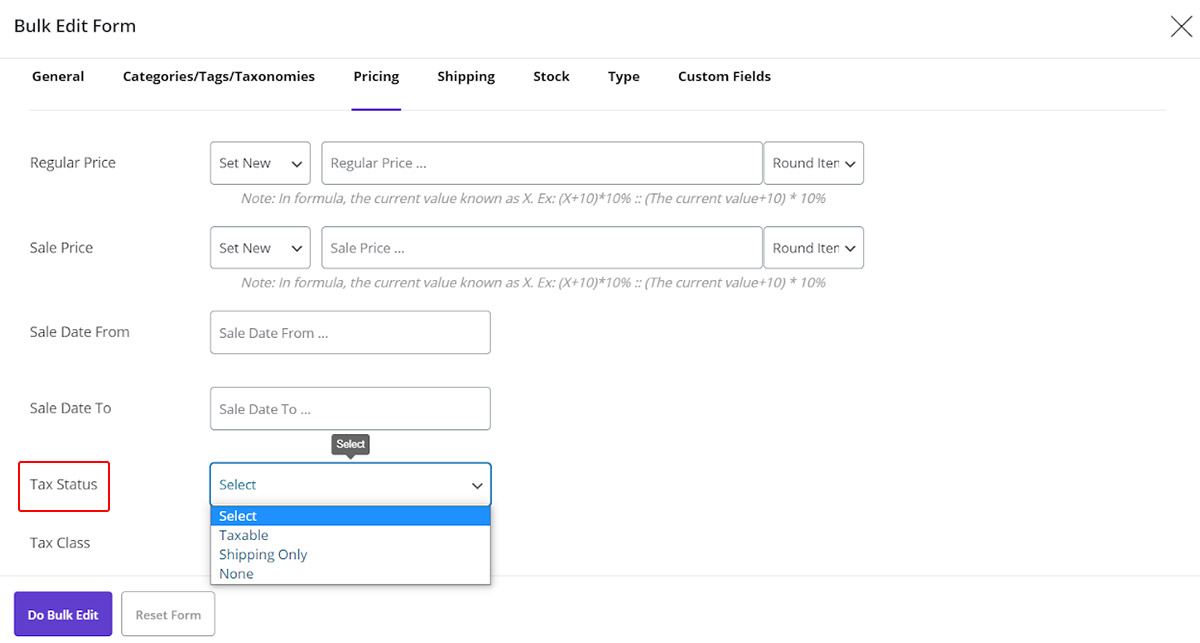
You can also choose the Tax Class to be assigned to the filtered product by choosing one of the items in the dropdown list next to this field.

Read More: How to bulk edit product tax settings in VBULKiT – Bulk Edit WooCommerce Variations – plugin?
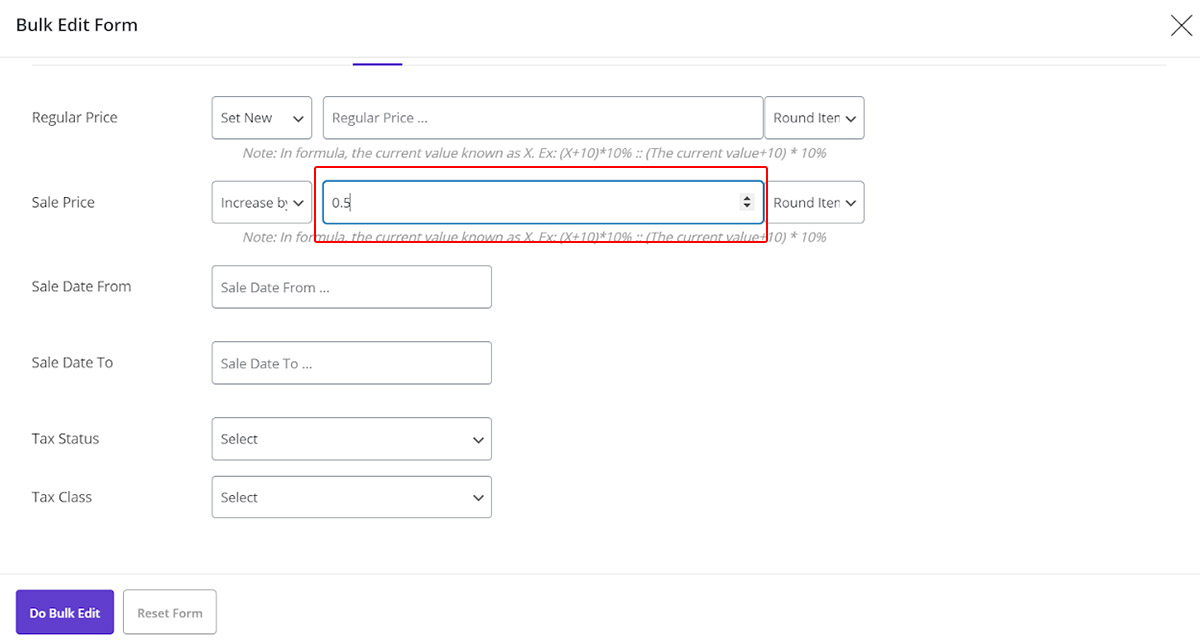
For example, we want to increase sale prices of our filtered product by 0.5 unit.
To bulk edit product sale prices we followed below steps:
- Select Increase by value from the condition box of Sale Price field.
- Type 0.5 as the value in the text box.
- Click on “Do Bulk Edit”.
Now, you can see that the sale price of our filtered products has been changes as below:


Comments