In the VBULKiT – Bulk Edit WooCommerce Variations – plugin, you can change multi WooCommerce product SKU at the same time. This helps to manage products faster and easier.
In VBULKiT – Bulk Edit WooCommerce Variations – plugin, the store manager is able to filter the products regarding their priorities then bulk edit their values such as SKU value.
Read More: How to filter products in VBULKiT – Bulk Edit WooCommerce Variations – plugin?
Displaying SKU column in the product table
To display SKU column in the product table and better obverse how this field is going to be changed in the next step, we add SKU column to our preset:
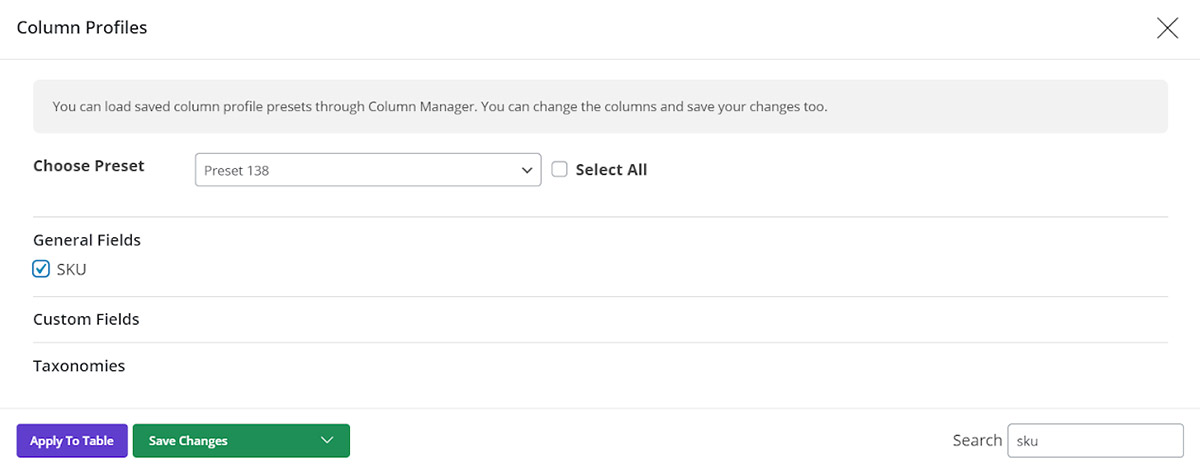
Read More: How to manage product table columns in VBULKiT – Bulk Edit WooCommerce Variations – plugin?
As you can see the SKU of our products includes the word “Woo” and we are doing to replace it with product “ID”.
Let’s show how to change SKU in WooCommerce.
Bulk edit product SKU
Before bulk edit the multi SKU label in WooCommerce, you should select your products in question. otherwise all of the products will be changed and then click on “Bulk Edit” button from the toolbar.
Bulk editing of product SKU is available in the “General” Tab of this plugin.
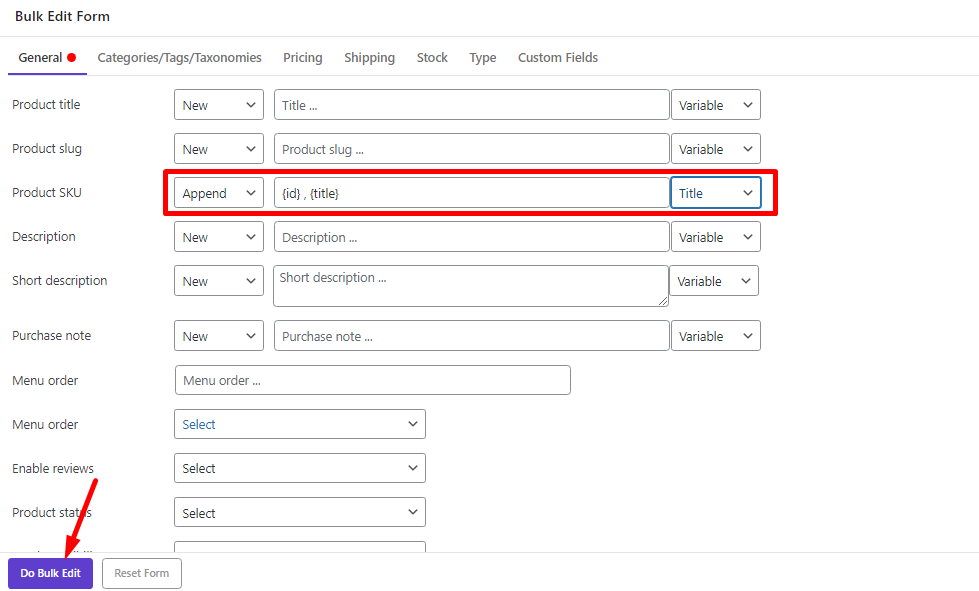
As you can see in the below picture, there are 3 different boxes in front of product SKU:
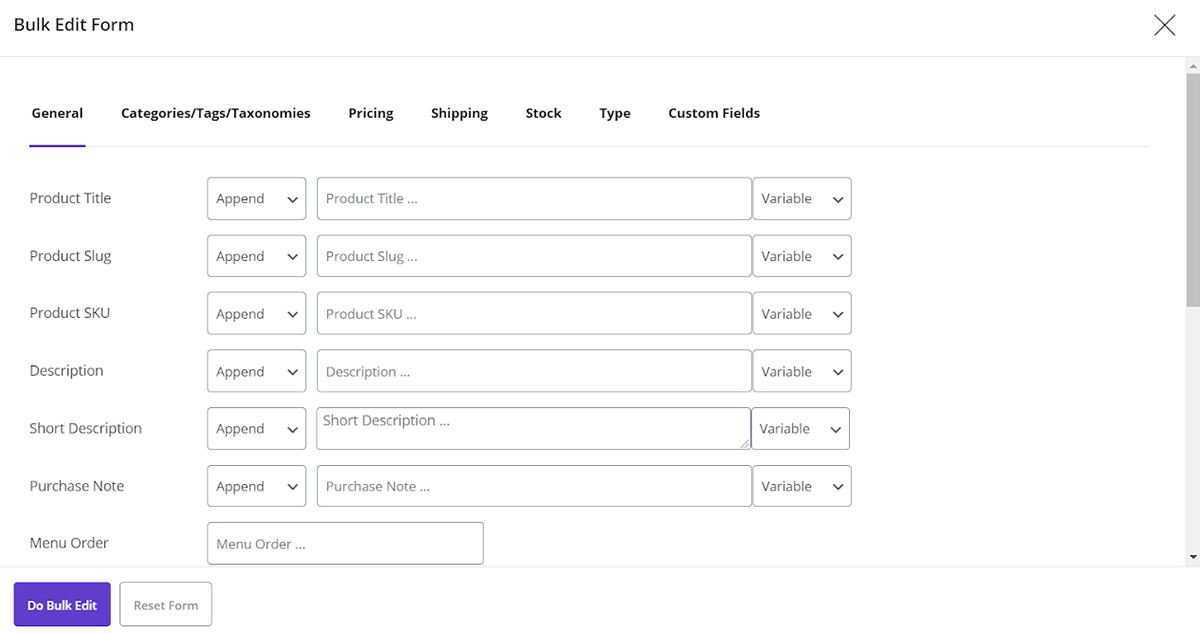
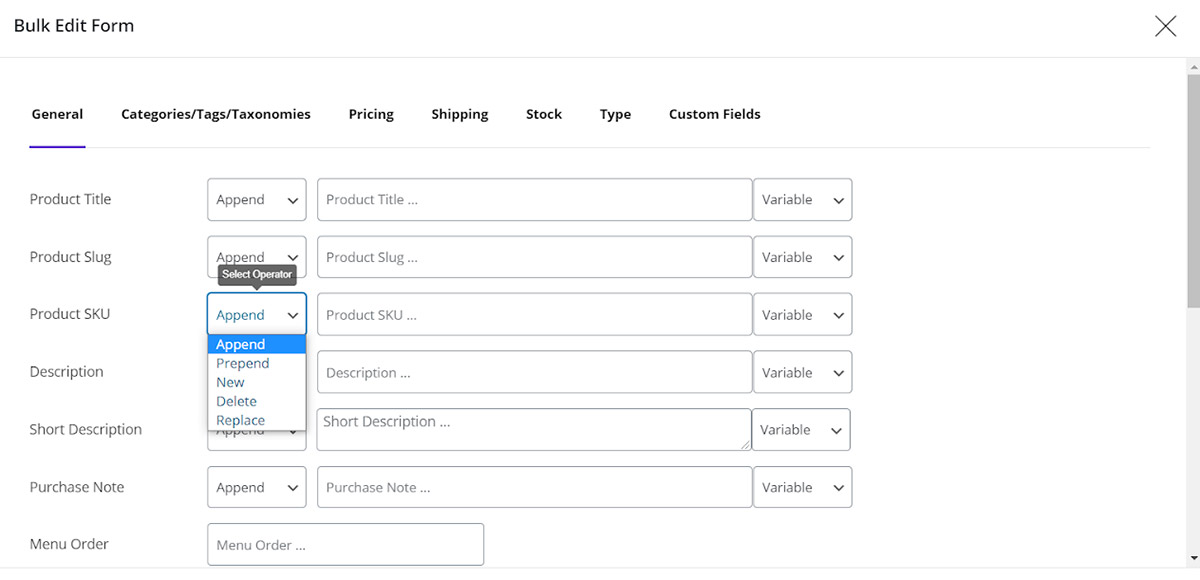
In the first box you can set below conditions:
- Append: Your value will be added at the end of SKU.
- Prepend: Your value will be added at the beginning of SKU.
- New: A new value will be set for all SKU of the filtered product.
- Delete: SKU of all filtered products will be deleted.
- Replace: Your selected value will be replaced by a new value you entered.
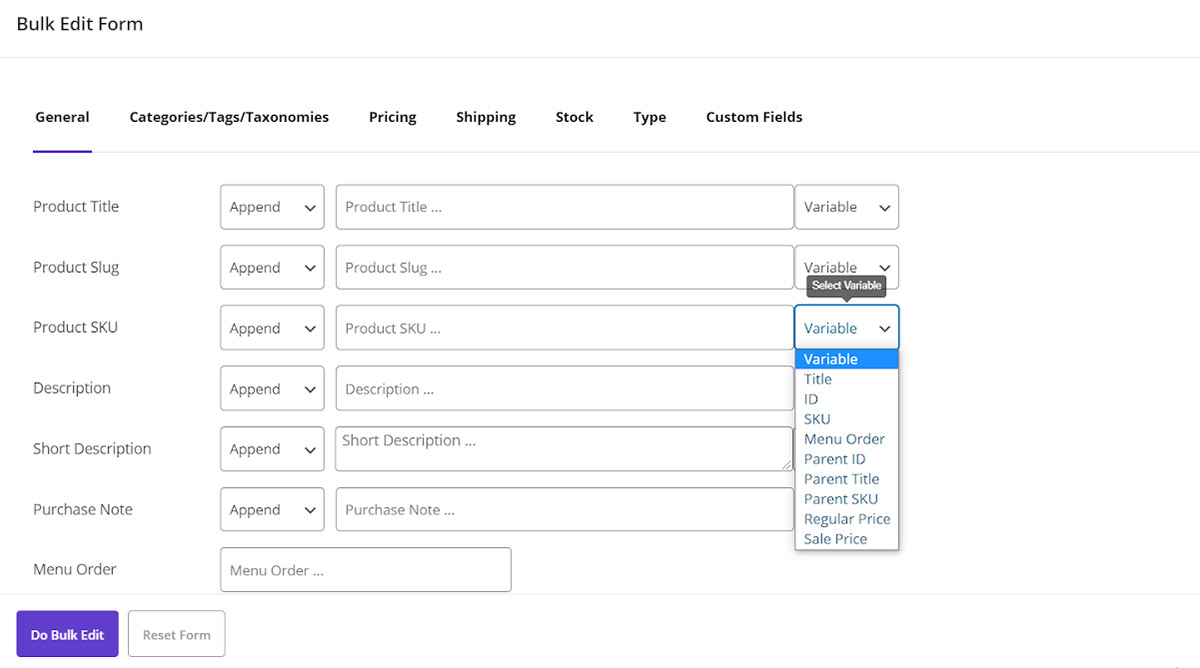
At the second box, you have to type the new value for changing SKU of filtered products. You can either select a variable from the opposite dropdown list(including the WooCommerce fields) or enter a new value.
The Dropdown list includes below Items to make it easier for you to bulk edit multi-product SKU:
- Title
- ID
- SKU
- Menu Order
- Parent ID
- The Parent Title
- Parent SKU
- Regular Price
- Sale Price
It is possible to add one or more items from the list to the box.
Append value to product SKU
In this example, we want to Append “ID” and “Title” to the SKU of selected products. To make our changes more readable, we also add some space between those values and separate them by “,” as below. So, you can see that the SKU of our products has been changed accordingly:

Prepend value to product SKU
Now, let’s repeat the previous changes by prepending theme to the SKU:

We expect to see the “ID” and “Title” are added to the beginning of SKU:

Set a new value for product SKU
If we select “New” from the condition box, all of the current values will be replaced by the value added to the text box. So, if we apply “New” for the same values selected in the previous step:

The SKU of selected products will be replaced by “ID” , “Title”:

Delete or remove product SKU
You can choose which part of SKU you prefer to be removed from this field. For example, we want to remove “ID”, so, the conditions set as below:

By clicking on Do Bulk Edit, the changes are made as we expected:

Replace product SKU
In this part of the tutorial, we are going to bulk edit the SKU of products and replace “Woo” in their SKU with “ID”.
So, at first we choose the “Replace” condition from the first box. As you can see below a new line will be shown to help you exactly specify what you want to be replaced.
In the below Line, you can see another box to set conditions including:

- Same Case: The value you entered in the Product SKU box matter if is in lower or upper case.
- Ignore Case: The value you entered in the Product SKU box no matter if is in lower or upper case.
As it is obvious in the below picture, in the opposite dropdown list, some values have been set as default to help you select them to be replaced by.
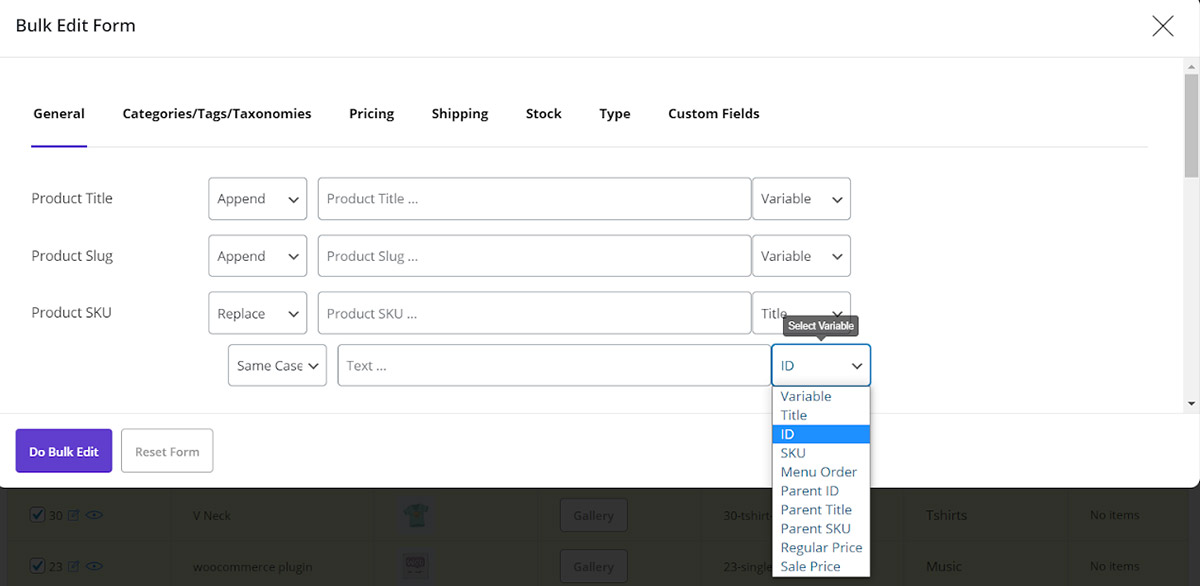
As we mentioned above, we want to replace “Woo” in the SKU of Products with “ID”.
To change multi-product SKU in this tutotrail and reach our goal, we follow below steps:
- Enter “Woo” in the Product SKU Box.
- Set the first condition of the line below to “Same Case”.
- Choose “ID” from the opposite dropdown list.
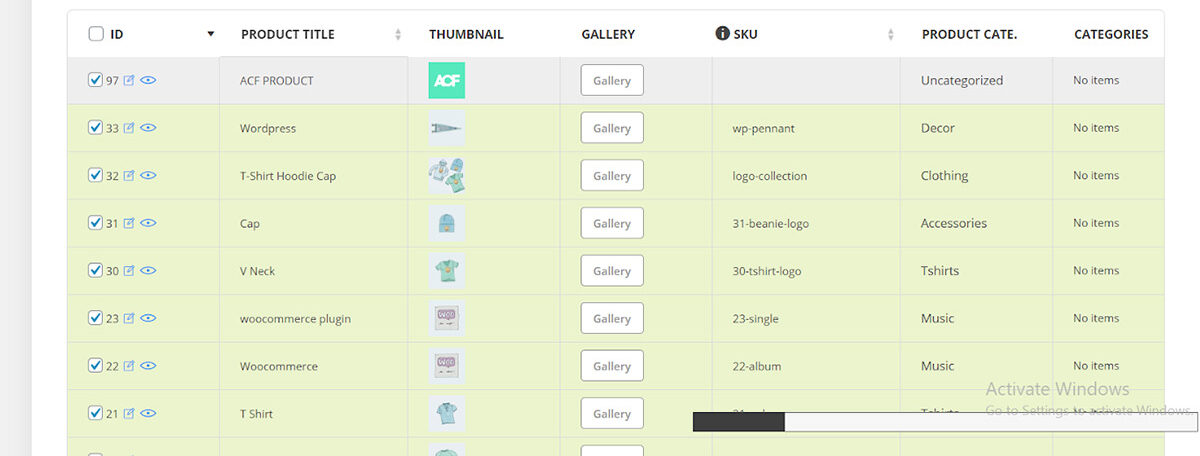
By clicking on “Do Bulk Edit”, our preferred changes are conducted and we can see the final result in our product table:

Comments