Add to cart for a product table is one of the main parts of an eCommerce website. Since no product table in an online store is complete without a cart, the WooCommerce product table plugin comes with a default WooCommerce shopping cart option. In this tutorial, we are going to show you the different options to create or change the default settings of a cart in your product table.
What is a shopping cart?
WooCommerce comes with an online shopping cart option. It provides the necessary features for customers to make a retail purchase from your website.
Some WooCommerce cart option designs are quite simplistic and only add the bare essentials, like products and a checkout page.
Other WooCommerce shopping carts go the extra mile and include features for you to provide your customers with an improved shopping experience.
The WooCommerce product table is one of the plugins that gives you the ability to make a professional WooCommerce shopping cart. This option is simple steps and with just a few clicks.
Add to cart and set cart option for a product table in the WooCommerce product table plugin
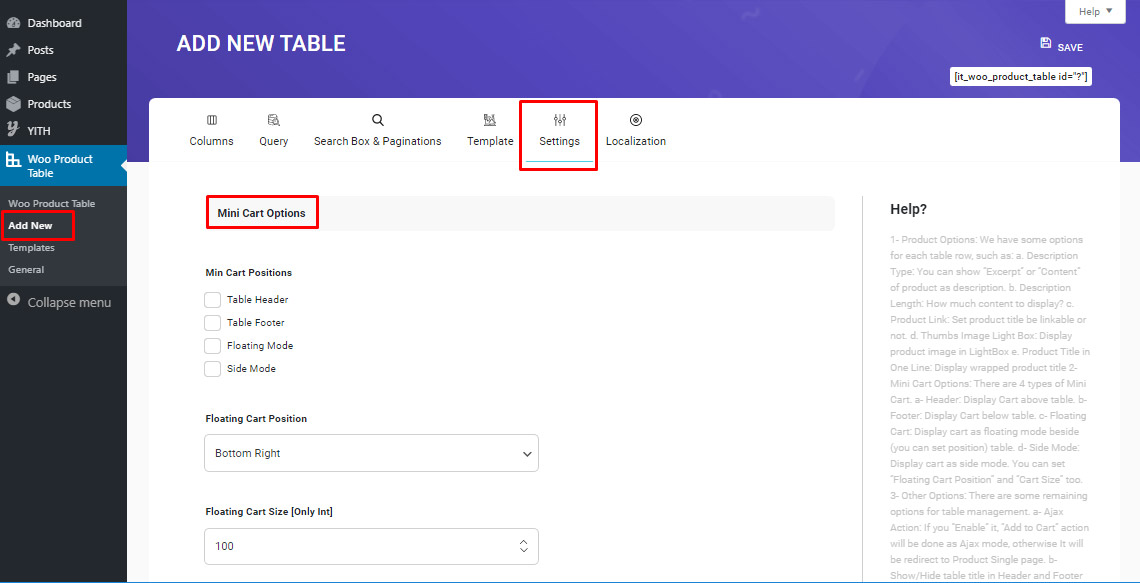
To create or change the Add to cart option for a product table in our plugin, you need to navigate to the “settings” tab in the “add new table“.
Then under the “mini cart options” tab, you can set your preferences. Mini cart shows the content of the customers’ added products on the same page as the product table. This allows the customer to check their added products while shopping.
Mini cart option
Here you can set the position of the cart.
Header/ footer cart option
You can choose the position of the mini cart to be at the table header or footer.
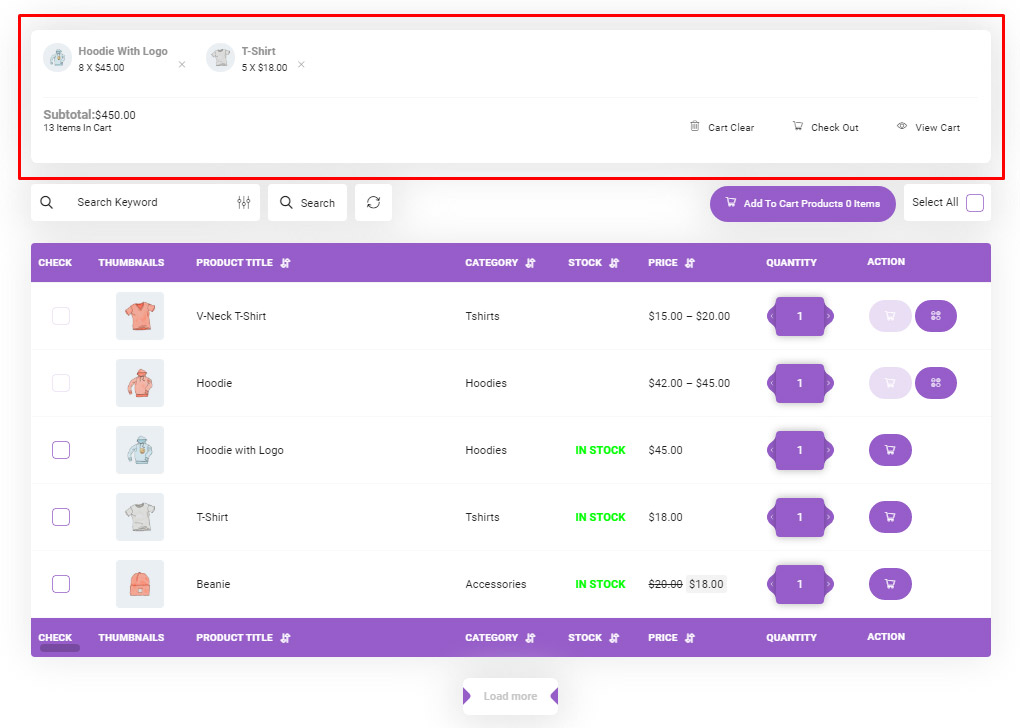
This means that your mini cart will be shown as a sticky box on top or bottom of the product table.
Floating mode cart option
This means that the mini cart will be shown on the page while the user scrolls through the page and is always in sight.
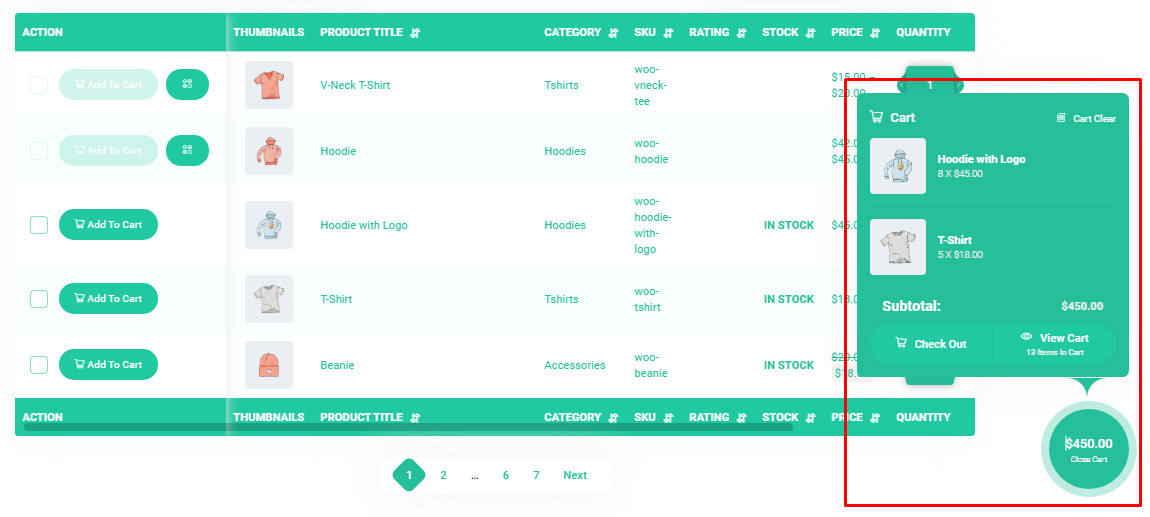
You can also set the maximum floating size as an integer.
You need to remember that you can choose both floating mode and table header/ footer or sliding mode.
This means that the floating cart will be shown and also, the customer can see it above or below the table. Also can access it using the cart icon on the website.
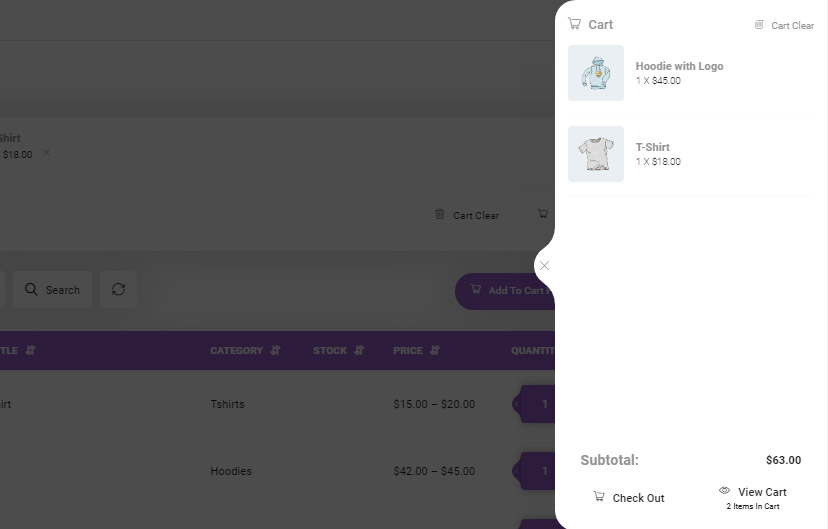
Sliding mode cart option
This way, whenever the customer clicks on the cart icon on the website, a sliding window will show them the contents of their added products.
Which action are existing on the WooCommerce product table cart section
Clear cart action
Allows the customer to remove all the products from their cart.

Checkout action
Guides the customer to a page that asks them for example to enter their address, their billing information and etc.

You need to create this checkout page in the WooCommerce ‘Pages’ section according to your needs and your store’s settings.
View cart action
Will take the customer to a page that shows them the contents of their cart and the total price of their purchase.

You also need to create and design this page using WooCommerce ‘Pages’. Usually this page needs to include a ‘proceed to checkout’ button that takes the customer to the checkout page as explained above.
Localization
To set some other options for the mini cart, you can navigate to the ‘Localization’ tab. If you scroll down, you will be able to see some options related to it.
In the options shown in the figure below, you can choose the text shown in the add to cart button for a product table and etc.
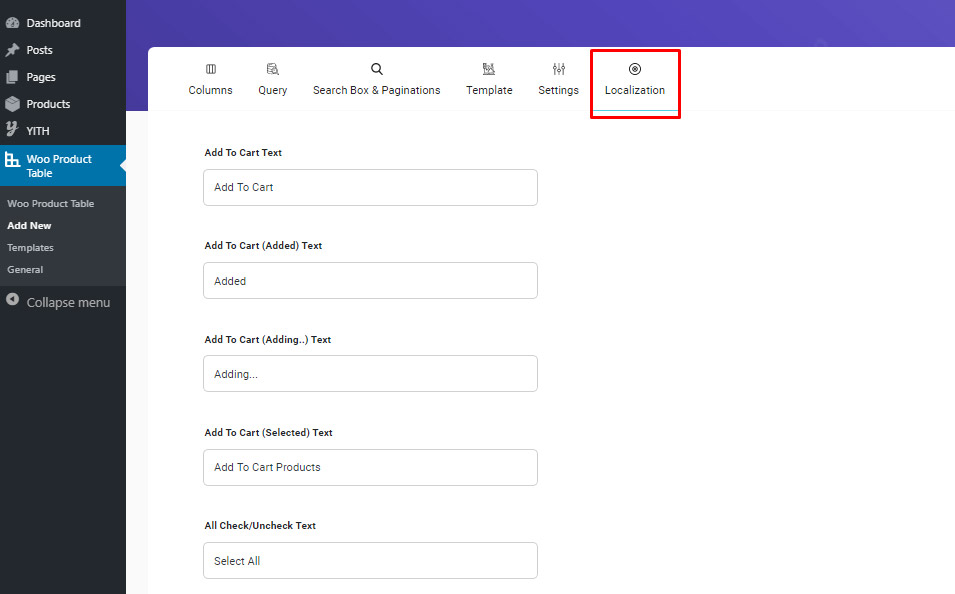
In the options shown in the figure above, you can choose the text shown in
- The Floating Cart,
- The Clear Cart Button,
- The Checkout Button
- And Etc.
Keep in mind that to change the appearance of these buttons, you can refer to the template tutorial.
Conclusion
This is almost all the things you need to know about the Add to cart option in WooCommerce product table plugin.
You need to remember that the most important thing in an e-shop, is its user-friendly interface. You have to make sure that your website meets all of your customers’ needs and gives them a great shopping experience that will make them want to come back to your website for later purchases.
Comments