Adding products in WooCommerce is the most important task of a store manager after installing and finishing the process of set up wizard of WooCommerce.
it’s obvious that the only way you can make the money from your online store is to add your product and start selling them to your potential customers. If you have already worked with WordPress and WooCommerce dashboard panel you may convince that they are designed with a user-friendly interface to enable you easily work with tools and options for creating an astonishing E-commerce website.
So, it’s not hard to guess that adding products in WooCommerce is not so complicated however like any other platform you need to learn the basic features to add your products properly to your online store.
This is exactly what we are going to share with you in this post.
WooCommerce products types
Before starting to use tools and options that is provided in WooCommerce for adding new product, it’s a great idea to get familiar with the types of product supported in this e-commerce platform.
Fortunately, there is no limitation for adding any types of product in WooCommerce but to make the process more convenient for a store manager, all types of product have been divided into 6 different categories including:
Simple products
You can add any kind of product in the simple product category of WordPress by choosing this type of product. No special items are available and you can offer a single product like a T-shirt in a single page to your customer and managed to ship them to a specified address.
Grouped products
When you want to sell a collection of some related products individually, it’s better to define them as a grouped product on WooCommerce. Grouped product can be a set consist of some simple products like a set of 6 spoons.
Virtual products
Virtual products are those ones that you want to sell them online without any need for shipment. It can be a membership service, permission for subscribers, licences, etc.
Downloadable products
Downloadable products as their name revealed are those products that customer need to download them trough a link after purchase. It can be a magazine, music, electronic books etc.
External or affiliate products
Sometimes you need to introduce a product on your website. But instruct your customers to fulfill the purchase process on another site. In this situation, the best option is to choose this product as an external or affiliate one.
Variable products
If your single product has different attribute and variations that influence its price, you can define it as a variable product. Then add different variations with different prices in the product page.
For example, if you are selling the same T-shirt with different sizes, you can define this T-shirt as a variable product then add different sizes as variations for it. You are also able to set different prices for different variations of this single product.
Methods to Create products in WooCommerce
There are some different methods for adding new products in WooCommerce:
- The easiest way to add the product in WooCommerce is to open “products” tab under WooCommerce option in WordPress dashboard.
- However, there are some plugins that can help you to add product in a more convenient way.
- If you prefer to use a code, it is also possible to add products in WooCommerce, programmatically.
Stay with us to describe all of these methods to help you add your products in WooCommerce very fast and easy.
Adding a WooCommerce product programmatically
You can get help from a lot of shortcodes to add extra functionality on your online store if it is powered by WooCommerce. For example, by inserting the below code, you are able to add the products programmatically to your website:
$aProduct = new WC_Product();
$aProduct->set_name("Product Title");
$aProduct->set_status("publish");
$aProduct->set_catalog_visibility('visible');
$aProduct->set_description("Product Description");
$aProduct->set_sku("Product Sku");
$aProduct->set_price("Product price");
$aProduct->set_regular_price("Product regular price");
$aProduct->set_manage_stock(true);
$aProduct->set_stock_quantity("Product stock");
$aProduct->set_stock_status('instock');
//image upload
$mediaID = wpsuploadMedia("Image url");
if($mediaID > 0)
{
        $aProduct->set_image_id($mediaID);
}
$product_id = $aProduct->save();


function wpsuploadMedia($aImage)
{
    require_once('wp-admin/includes/image.php');
    require_once('wp-admin/includes/file.php');
    require_once('wp-admin/includes/media.php');
    $media = media_sideload_image($aImage,0);
    $attachments = get_posts(array(
        'post_type' => 'attachment',
        'post_status' => null,
        'post_parent' => 0,
        'orderby' => 'post_date',
        'order' => 'DESC'
    ));
    return $attachments[0]->ID;
}
If you don’t know how and where you can add this shortcode on WordPress, we recommend you to use the following step-by-step guide for adding product via WordPress dashboard.
Adding a product in WooCommerce by admin panel
The process of adding products from admin panel of WordPress is the simplest task of a store manager. If you have any problem in using tools and options available in WordPress dashboard, follow our guide to help you creating product pages and adding details to them to be proposed on your online store and start selling them to your customers, easily.
Step 1: Add a new product
As soon as installing and activating WooCommerce on your online store, you can see the “products” item on the admin panel of WordPress. By pressing this item, a new page will be displayed as below:

To add a new product, you just need to press the “create product” button on the middle of the page. Also click on the “Add new” from the WordPress dashboard.
Step 2: Add product information and data
By pressing on “create product” you will see the product page with the following sections. These should be completed before publishing the page on your website:
- Product Title.
- Product Description.
- The products data.
- Product short description.
- Product category.
- The product gallery.
- Product tags.
A lot of details are designed in each section to help store managers add the necessary information about the product and proposed them to customers for sale.
If you get confused, stay with us! We have prepared a full description about adding this information to the product page later on this tutorial.
Step 3: Publish the product
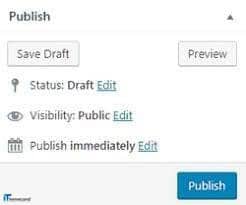
After adding your preferred information and product data it’s time to publish your product to be visible for your customer on your online store.
In the default view of WooCommerce, the publish button is displayed on the top right of the screen.
By pressing the publish button, your customers will see the product with all of the information and data related to it on the shop page.
How to add a simple product in WooCommerce?
The most common product type with the easiest settings in WooCommerce is Simple product. To add a simple product, you just need to open a new product page by clicking on Add product the choose Simple Product item from the combo box in front of Product Data field:
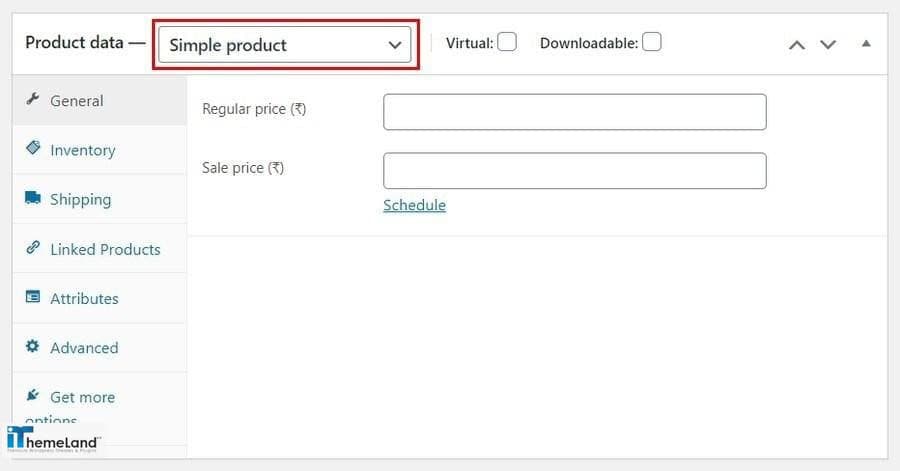
Adding a physical product as a simple product
If you want to sell a physical product, all of the other configurations of a simple product in WooCommerce are exactly the same as what we have described earlier in this post.
By completing the data in other tabs including:
- General.
- Inventory.
- Shipping.
- Linked Product.
- Attributes.
- Advanced.
- Get more options.
Your job is done and you can successfully publish your Simple products and start selling them on your store.
However, if you want to sell a virtual or downloadable product, some extra configuration is needed. Let’s review them.
How to add extra information to the products in WooCommerce?
Adding the details and product data on WooCommerce may be confusing for the beginners. This is a very common problem for the most of store managers due to the lack of knowledge about the options provided in this E-commerce platform.
Follow this tutorial to find out how easily you can add your preferred information about a product in various fields designed on WooCommerce product page.
Product title & description
By default, Title and description are the first fields designed in the product page of WooCommerce. This is very important to add them precisely as they are what your customer see about your product at the first glance.
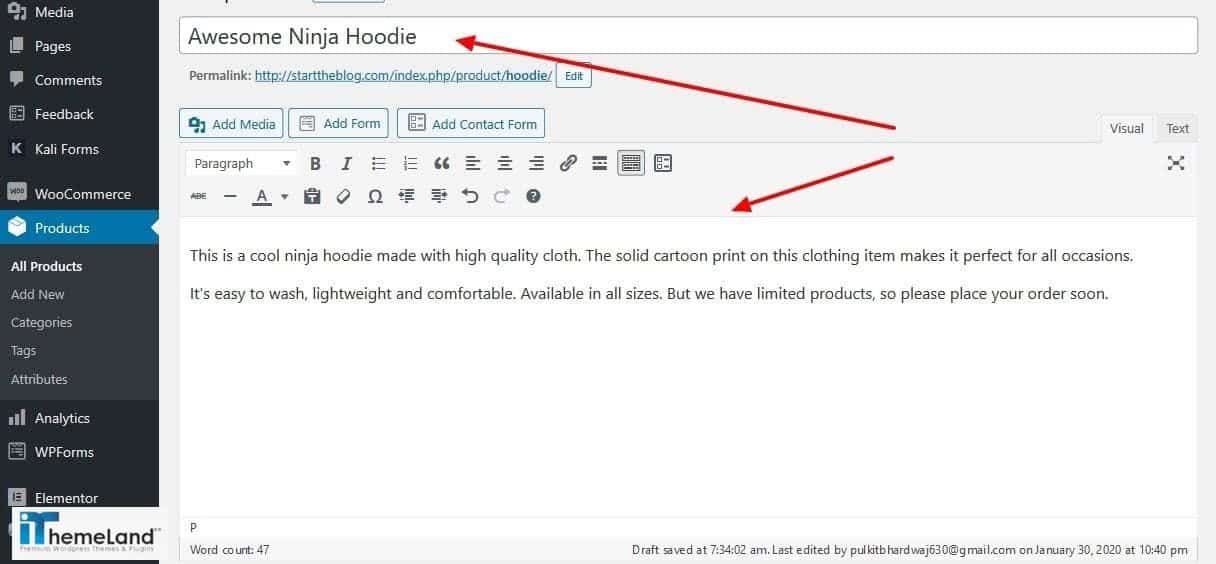
After adding this information and publishing this product, your customer will see the product page as below:

Product data
The next box called “product data” is the most important part of WooCommerce product page. There are various tabs available in this box to help you assign your product data, perfectly.
Let’s review these tabs.
Product type
In the combobox of product types, all types of products we have mentioned earlier in this tutorial, are listed and you need to choose one of them which is the best match with your product, including:
- Simple product.
- Grouped product.
- External / Affiliate product.
- Variable product.
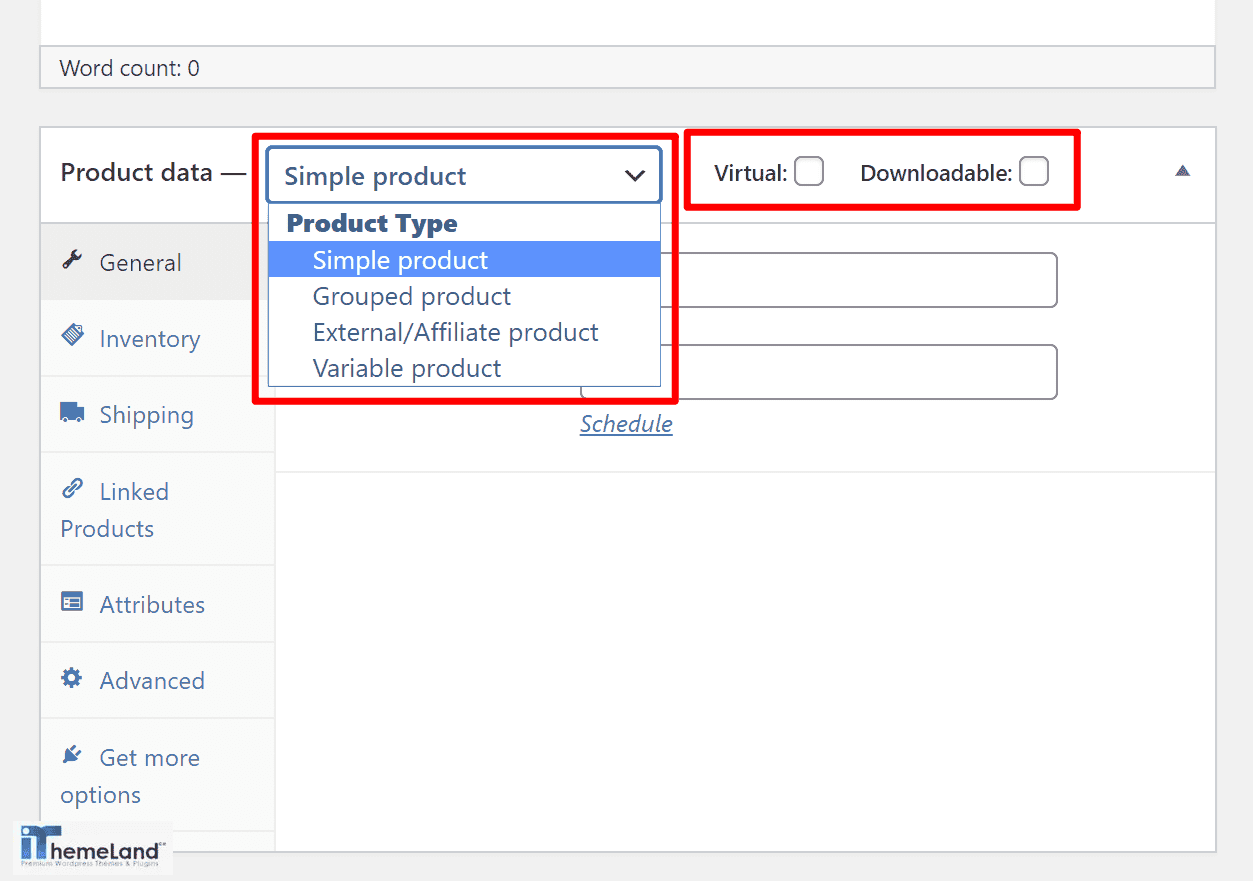
You can also define if a product is virtual or downloadable. It’s possible marking the related fields in front of “Product type” combo box.
General tab
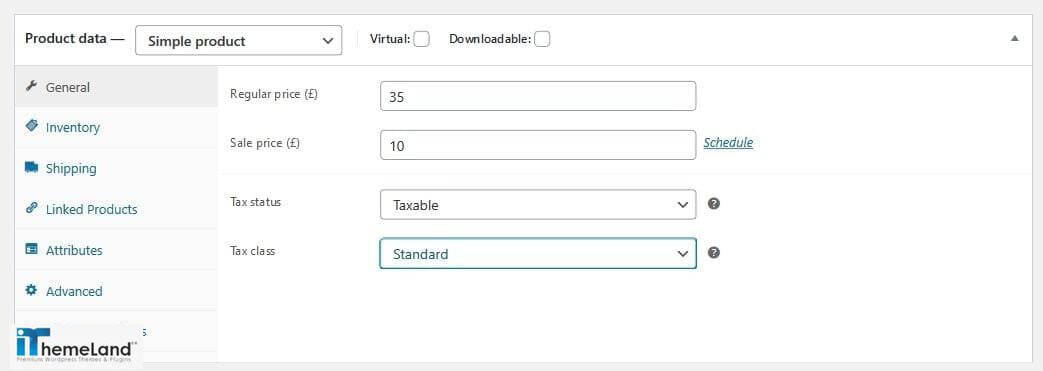
As illustrated below, you can add information about the price and tax in the General tab. The available fields include:
- Regular price: The price of selling that product.
- Sale price: The price of that product if it is on sale.
- Tax status: Specify if the product is taxable or not.
- Tax class: When you define the product as taxable, you need to choose the tax class.
Inventory tab
The items and fields in the inventory tab can help you to manage stock. These items include:
- SKU: SKU is a unique identification code assigned to every single product for simplifying stock management.
- Manage stock: if you mark the item in front of this field, WooCommerce will automatically manage the number of products in the stock. Otherwise you need to revise them manually.
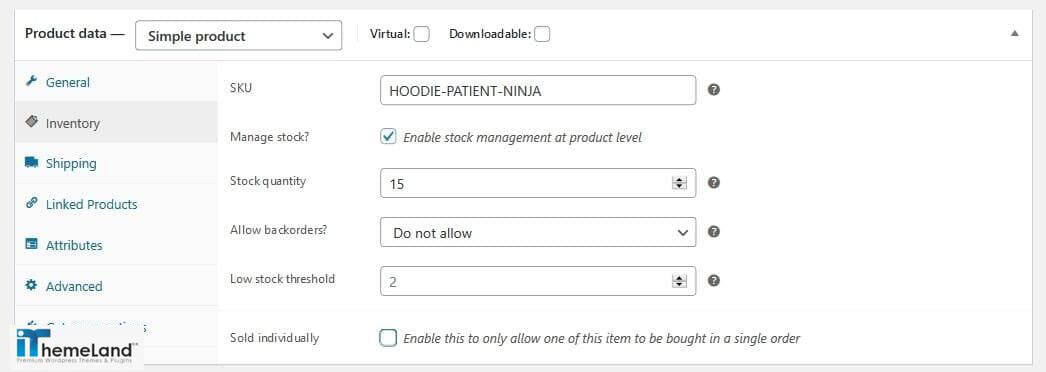
- Stock quantity: In this field, you can enter the number of products available in the stock. By marking the previous item, this field will be updated automatically.
- Allow back orders: If you allow back orders, it means customers can place an order for it, even if it is out of stock because you can provide or manufacture the ordered products very soon.
- Low stock threshold: You need to set a number in this field to instruct WooCommerce alert you if the number of remained products in the stock is less than that.
- Sold individually: If you want to let customer purchase one of this product in a single order, mark the item.
Shipping tab
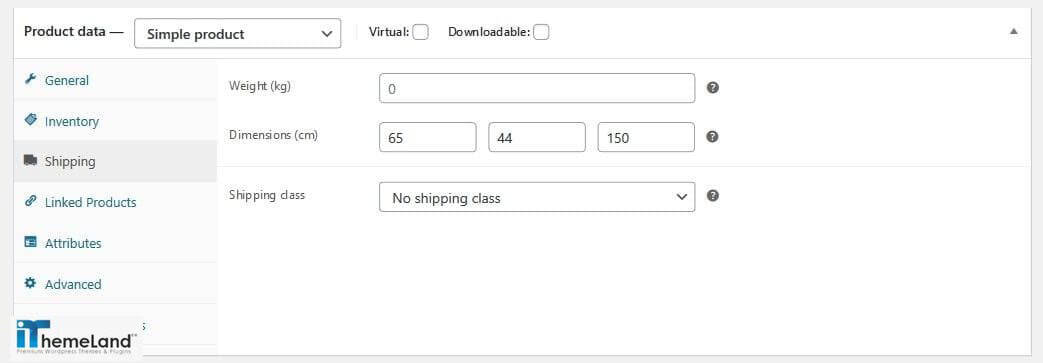
In the Shipping tab, you can add all information necessary for shipping including:
- Weight: The weight of package for shipment.
- Dimensions: Width, height and depth of package for shipment.
- Shipping class: If the shipping rate of your products are not the same, you can group the products based on their weight and assign a shipping services to them.
Linked products tab
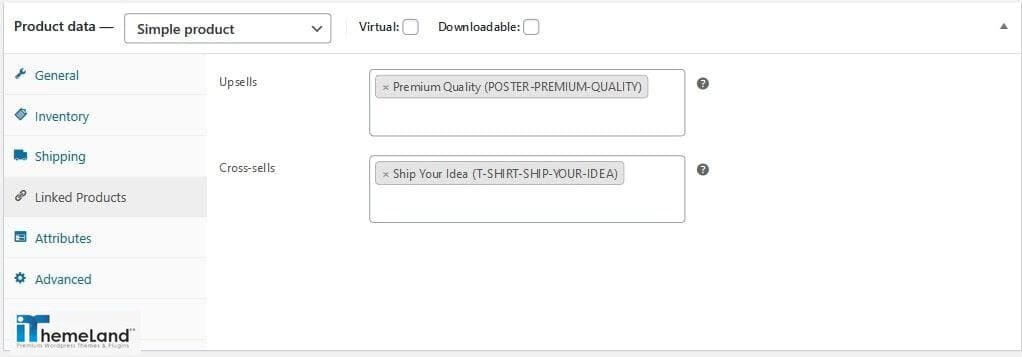
To Create linked products, you have two options:
Upsells

The products you select in this field, will be offered to the customers when they open one of the product pages. In This way, you can encourage customers to buy a more expensive product with more features than they have selected to buy.
Cross sells
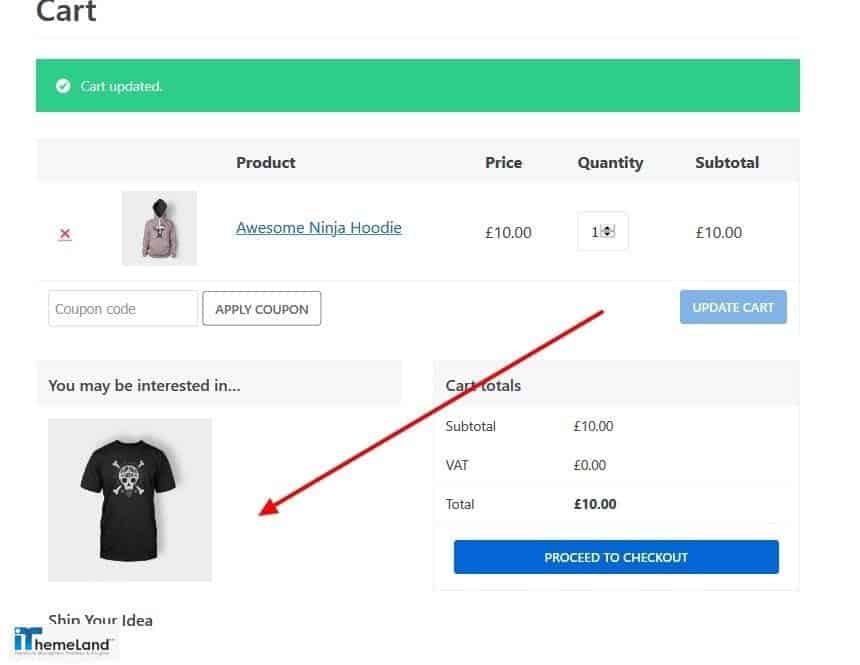
Cross sells are the products that the customers may need to buy when they are purchasing a specific product. These products will be shown in the cart page so customers can add them directly to their carts if needed.
Grouping
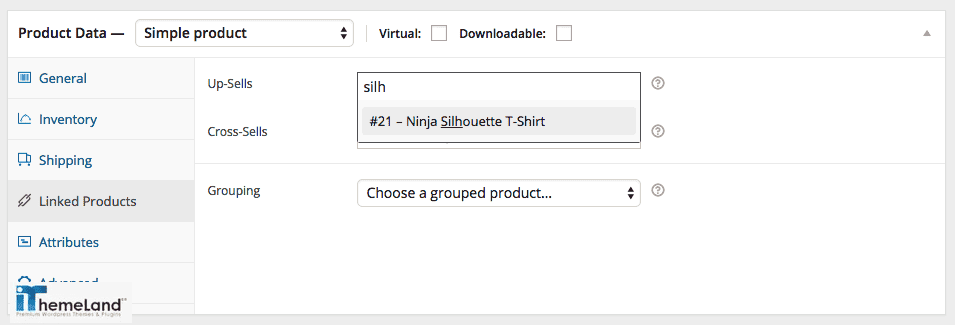
If you have already created one or more grouped product, the grouping item will be shown here and you can choose a grouped product from the list to add this product to that group.
How to add a grouped product?
To add a grouped product, you just need to choose grouped product item from the list of product types. When you choose this item, a lot of product data tabs will be disappeared because to offer a grouped product you need to assign some single products to one group so you cannot consider different information for a grouped product, individually.
For example, the price of a grouped product will be automatically calculated buy sum up the price of the child product added to this group so you are not able to assign a new price to a grouped product.

Attributes
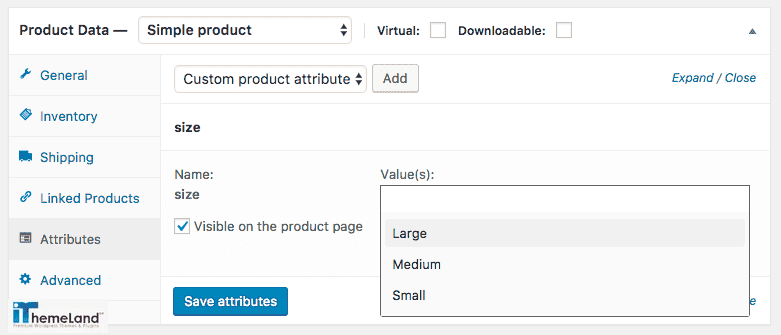
In the attributes section, you can add as many details as you need for a product. For example, if you are running a clothing store, you may need to add a lot of features like size, color, brand, etc. as the product attributes and assign different values to them on this section.
Advanced section
In the advanced section, you can change some settings including:
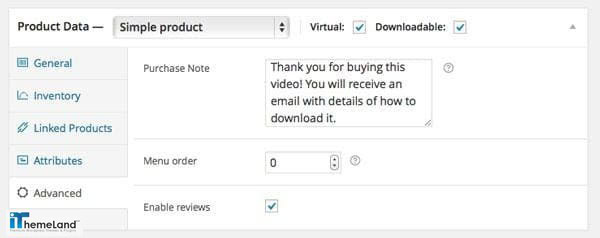
- Purchase note: The text you enter here will be send to the customer after purchase. This is an optional field.
- Menu order: You can customize deposition order of products by adding a menu order here.
- Enable Reviews: You can Enable/Disable customer reviews for this product.
Product short description
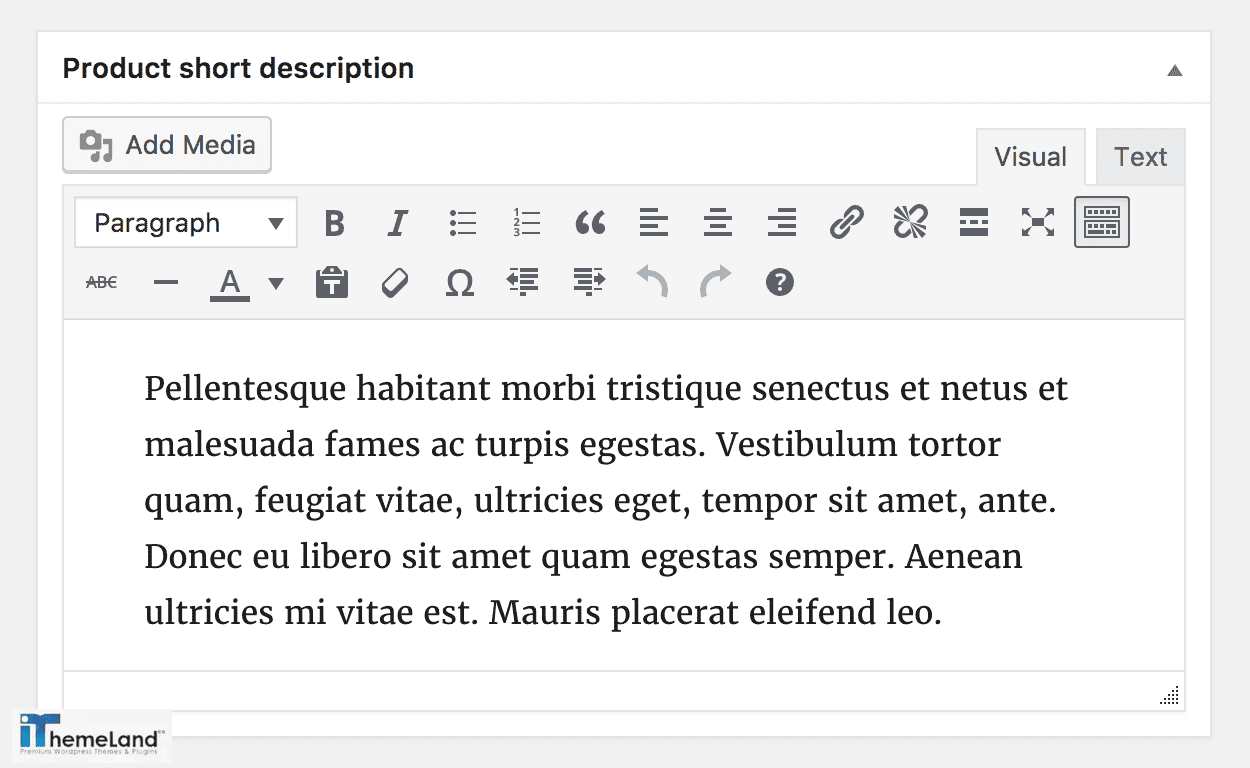
Short description is displayed next to the product image on the shop page. So, this is the first text that the customer can see related to your product. Also it is so important to write a professional text here to attract your customer.

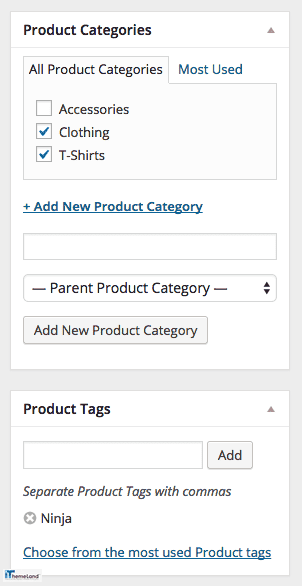
Product categories / tags
The product categories / tags section is designed to be displayed on the right side of add new product page in WooCommerce by default. In this section, you can choose one or more suitable categories / tags for your product. It is also possible to add a new category / tag then assign it to your product.
Product images and gallery
Product images play a crucial role on motivating customers to purchase a product from your online store.
It’s very important to add a good quality picture in the “main product image” section. You can also add extra images in the product gallery to be displayed in the product page to your customers.
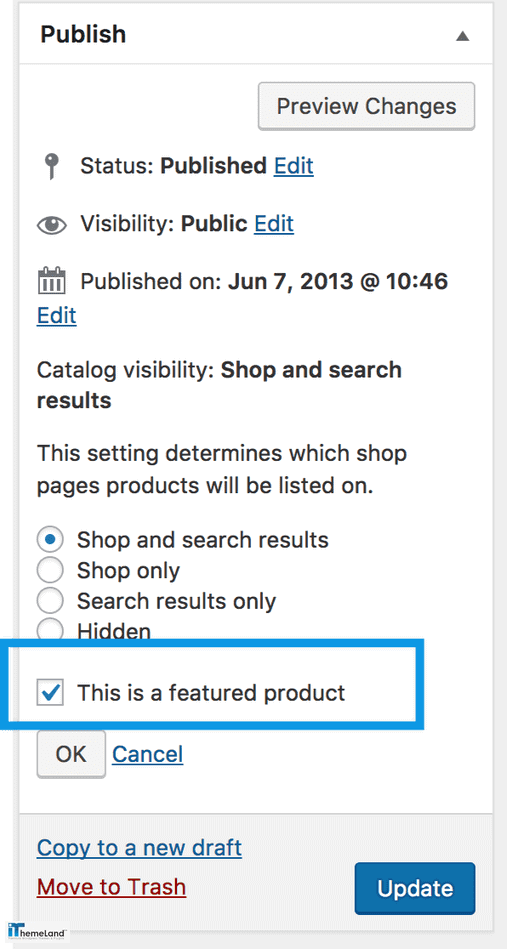
Publish settings
In the Publish section, you can immediately put your product on your website for sale. By hitting Publish button. There are also some other items that you can edit, including:
- Status.
- Visibility.
- Publish date.
- Catalog visibility.
- Featured Product.
- Copy.
- Delete.
How to add and edit WooCommerce products in bulk?
Although the process of adding new product is not complicated in WooCommerce product page, when you need to add a huge number of products and edit their data regularly it seems frustrating. The good news is that there are some useful plugins that can help you add new products simultaneously or bulk edit their data at the same time.
By using the below WooCommerce plugins, you are able to manage all of your products easily and quickly:
WooCommerce product table plugin
WooCommerce product table plugin comes with a lot of useful and effective tools and option. It help to make adding and managing and displaying the products in WooCommerce an easy task for you.
The most amazing feature of installing this plugin in your E-commerce website is turning the appearance of the default shop page of your online store into a table view.
This is an ideal solution for all kinds of E-commerce website with a huge number of products such as music store, book store, mobile store, clothing shop, food store, etc. to list their products in a table with various options such as quick search bar, sticky add to cart, order button directly in the product table and so on.
The incredible features of this plugin is not limited to the customer view, on the backend of this plugin, store managers can see a list of all products and manage which one to be displayed on their stores by creating custom queries.
By installing WooCommerce product table plugin, adding too many new products at the same time is not a nightmare, on the contrary, store managers can duplicate as many products as they want in the table and edit their features directly in this plugin.
WooCommerce bulk product editing plugin
If you are looking for a plugin enable you to bulk edit the features of multiproduct simultaneously, WooCommerce bulk product editing plugin is exactly what you need.
After installation of this plugin, you are able to bulk edit every single detail of your products via a user-friendly interface.
The powerful bulk edit form provided in this plugin enables you to bulk edit a variety of all product fields including:
- Product name.
- Product description.
- Regular or sale price.
- Tax status / tax class.
- Stock quantity / status.
- Categories / tags / taxonomies.
- Published dates.
- Even the custom fields.
There are also extra options for adding, duplicating, or bulk deleting as many products as you need in WooCommerce bulk product editing plugin.
Conclusion
There is no difference If you want to run a huge E-commerce business or a small one, the first step after installation of WooCommerce is the same: adding your products.
In this ultimate guide, we helped you to add your products to your online store and start selling them to your customer.
Forget banging on about easy money – there is no such thing. You need to put a lot of effort to have successful business. We are just about to make the way of making money shorter for you.