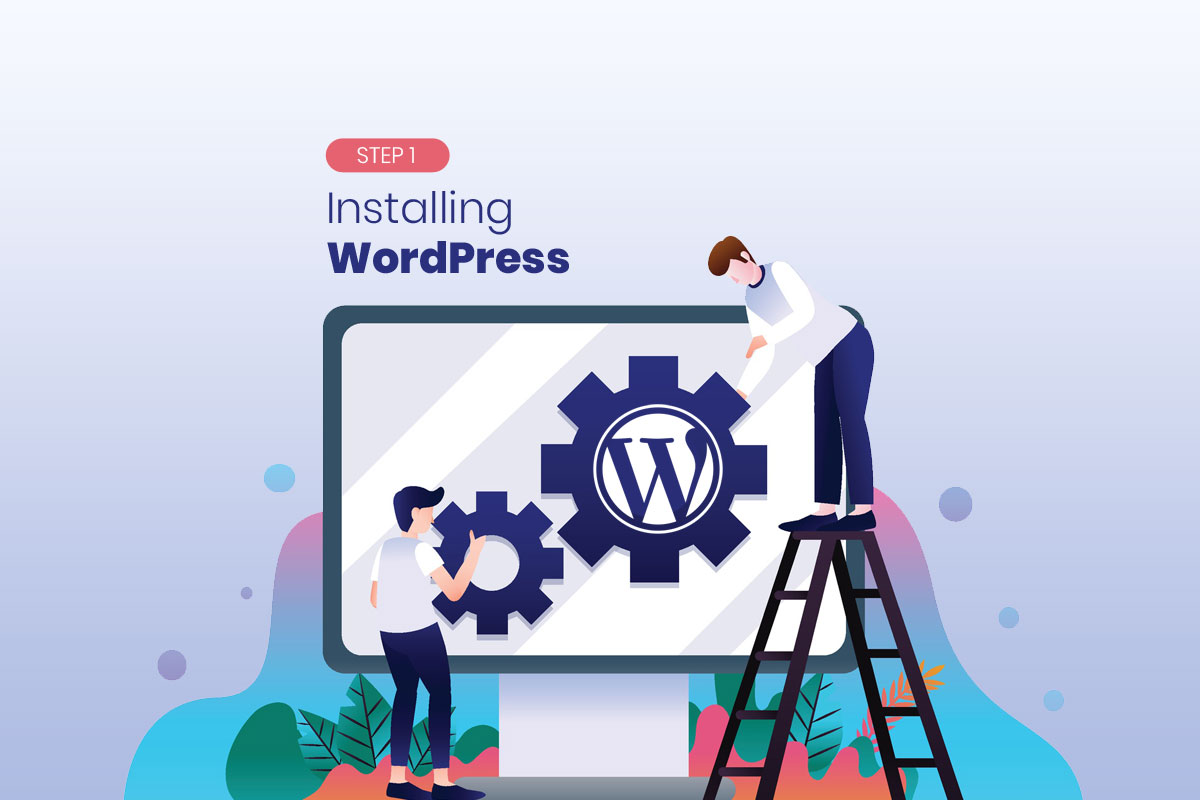
Whats is WordPress and why install WordPress?
WordPress is one of the most powerful website creation software with an open source content management system (CSM). This feature after installing WordPress helps everyone to learn its code and write special and customized plugins.
Designing all kind of websites in WordPress is simple and easy even for the beginners. Performance and security are the most important features of websites designed by WordPress . PHP is the program and script language of WordPress with a MySQL database.
WordPress used for
- Building dynamic websites
- Managing all kind of websites specially e-commerce stores, online shops, business and portfolio websites
- Optimizing websites fast and secure
What is needed to build a website in WordPress?
At the beginning, you need to choose a domain name for your website. Then you have to buy a host to install WordPress and start designing. If you are confused and even if you are not familiar with any of these subjects, DON’T BE DISSAPPOITED, We are here to help you. So, let’s go…
-
Register a domain name
With hundreds of thousands websites all over the world using different names, choosing a name for your domain seems so difficult and complicated. However, the below guide can help you to choose the best name for your domain:
- Think about 3 or 4 short keywords that reflect your website
- Choose the words that are easy to type and pronounce
- Put the words together in different orders without using numbers or hyphen
- Use the best domain extensions. (.com, .org, .net)
Now, you are ready to Sign up for a new domain.
To register your domain name, you can easily use Domain.com as the most popular websites. However, we recommend you to try Bluehost.com because:
- In Bluehost you can register the domain name and buy the host in one step.
- After registration in Bluehost and log in into your Bluehost cPanel, your host is automatically shared with WordPress and you can choose a theme and start designing your website without any further steps.
The registration for new domain is almost the same, but to make everything easy for you, we prepare a guide for registration on Bluehost:
First Step: Choose your plan
In the Bluehost website, there is 3 plans including basic, plus and choice plus. As a beginner, it is better for you to choose BASIC PLAN.
Second Step: Create a new domain
Enter your chosen words and select the domain extension as you can see in the below picture:
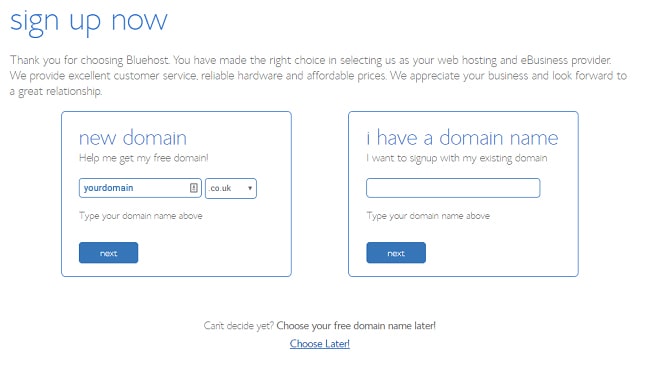
If your words have been used before, Bluehost will offer you some available domains to pick one of them.
If not, you can fill in the form or sign in with Google account.
Third step: Pay the cost
After paying the cost of basic plan, your domain is registered and you also own a host which is ready for installing WordPress.
Note: Please note that if you just register your domain in other websites without buying a host, you have to buy a host in Bluehost or other hosting websites to install WordPress.
NOW, everything is ready to log in and work with WordPress
How to Install WordPress on Bluehost?
To install and use WordPress, at first you have to create an account on the below website:
You can easily sign in with your google account and continue. When you log in successfully to the WordPress, follow the below steps.
- Installing WordPress on Bluehost
If you have already purchased a host and registered domain on Bluehost, you can easily log in to this website from below link and follow the instruction.
- Click on My sites
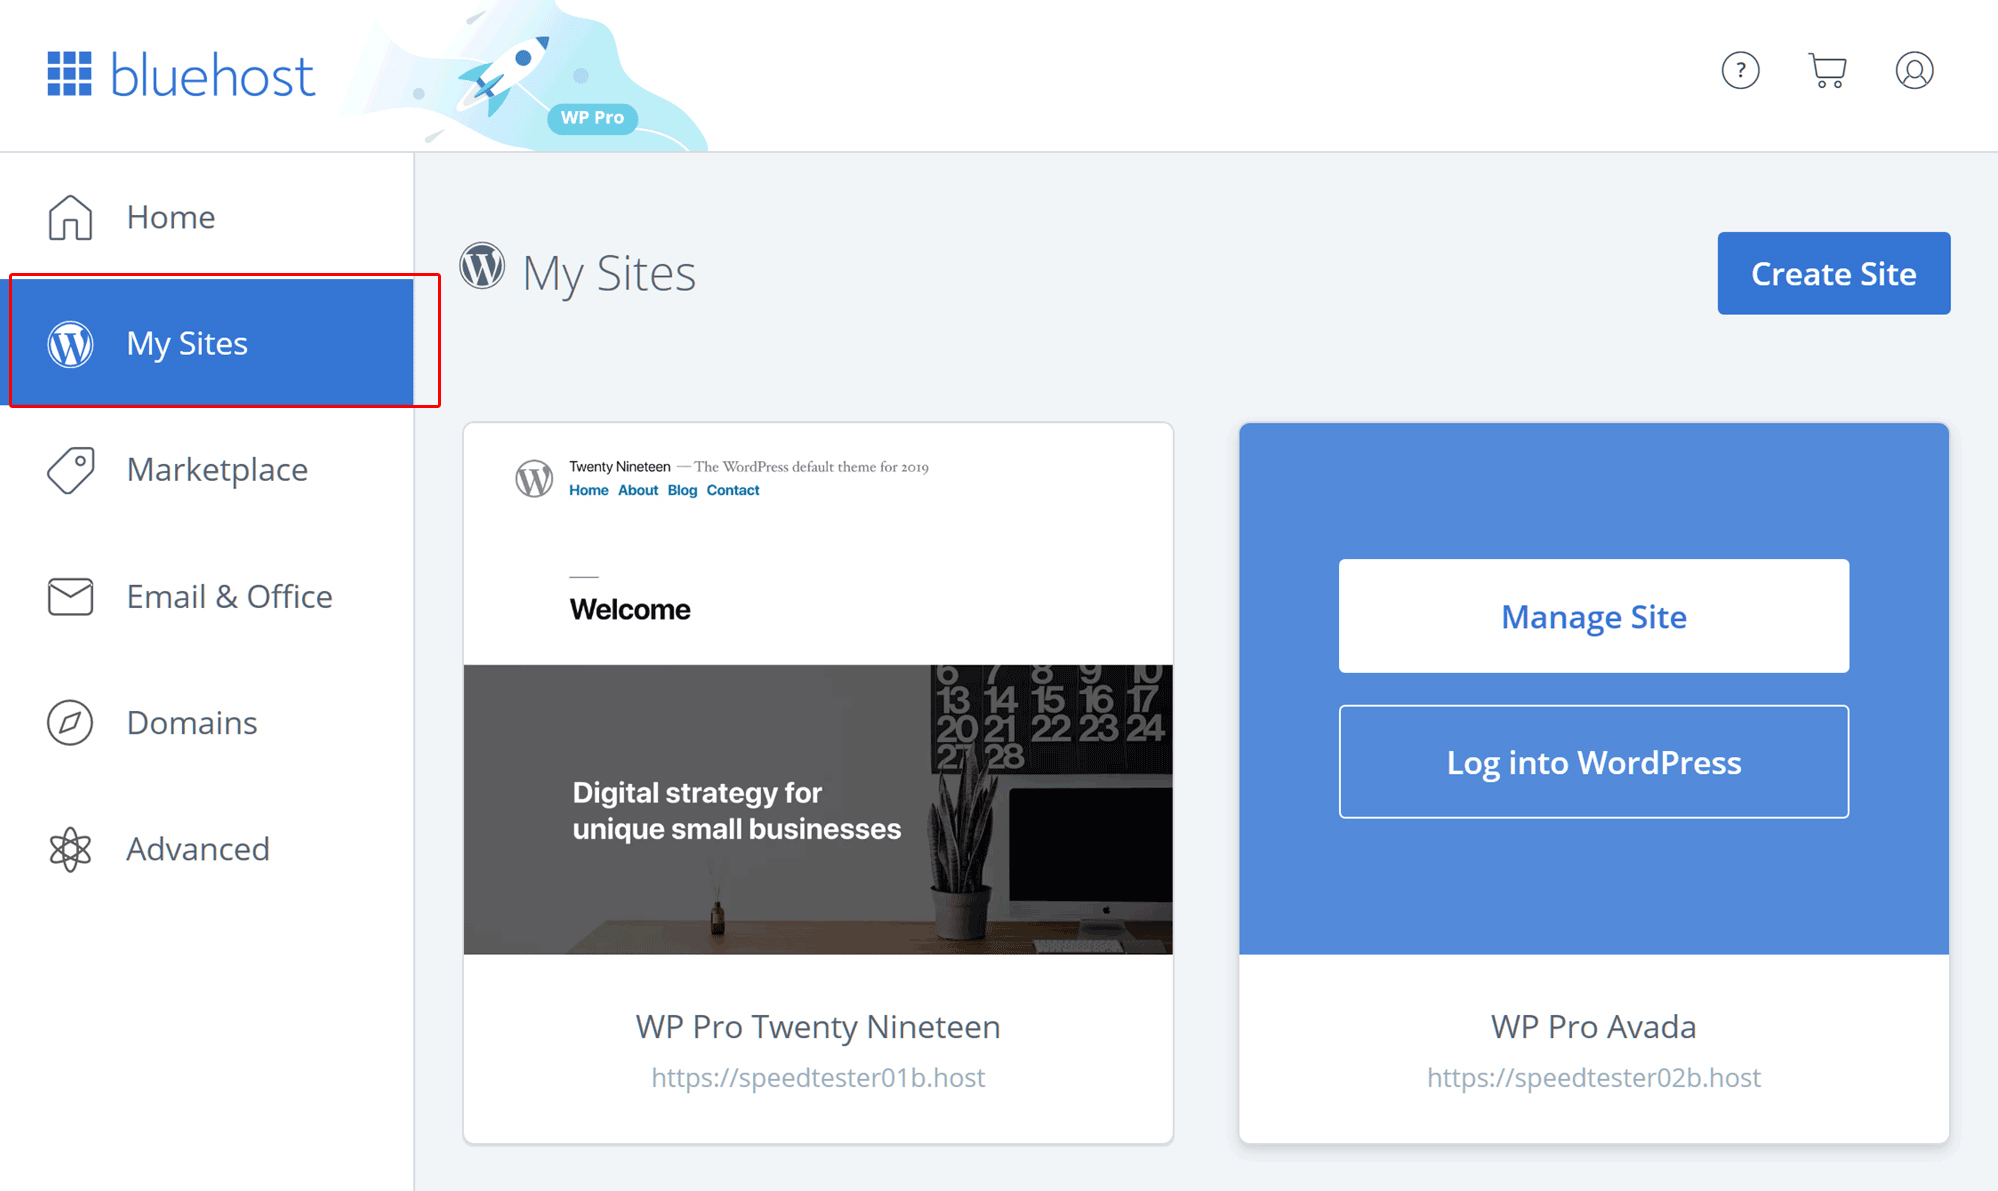
- Then On the left, click on Create Site

- Enter some information about your site, DON’T WORRY, you can change them anytime.
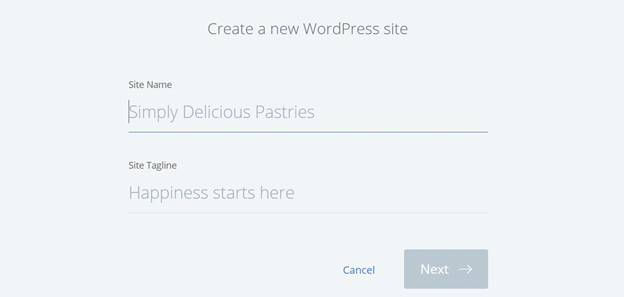
- Choose the domain name you purchased
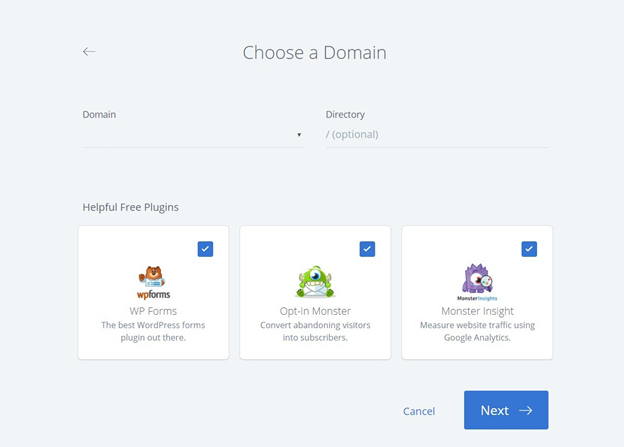
- Click Next to install WordPress on Bluehost and finally, click on Log in to WordPress
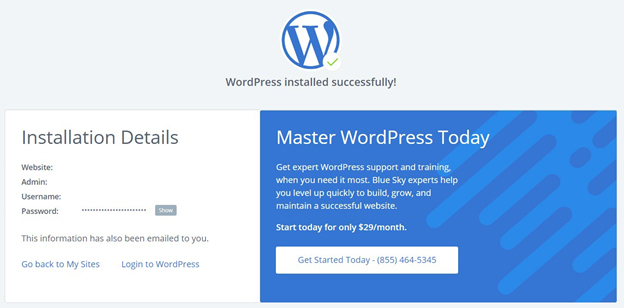
When you log in with the username and password created in WordPress.com, you can see the WordPress Tools and you can manage your website easily.
If you don’t know how to use different parts of WordPress, follow our next instruction “Get familiar with WordPress and Dashboard”.
how to install WordPress on cPanel
- To install WordPress on cPanel, you must register in this site and purchase a domain and a host.
Then you have to go to the below address on your browser:
www.”your domain name and extension’/cpanel
You can easily enter to your cPanel by your username and password.
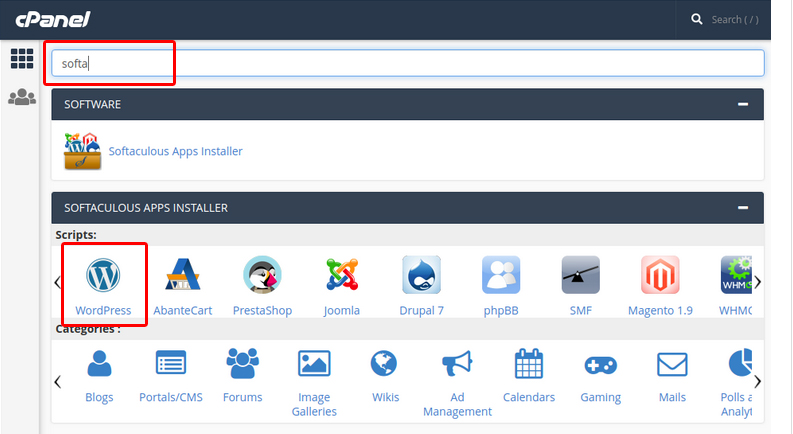
- To install WordPress on cPanel, you have to use Softaculous app installer. As shown in the below picture enter Softaculous on the search part which is an app installer of cPanel. Then you can find WordPress Icon to choose and install.
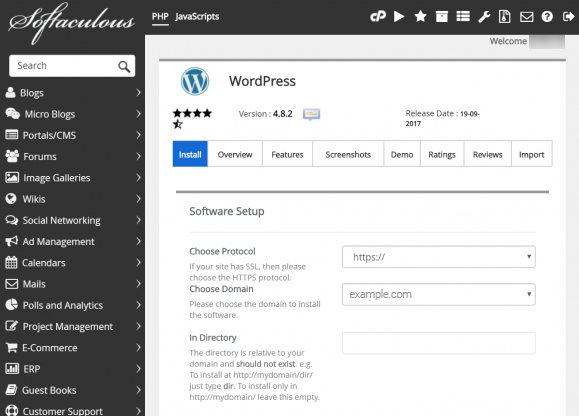
- Choose a Protocol for example ‘http://www.’ or ‘https://www.’
Then enter your domain name and the extension. No need to fill in other part. Just click Quick install.
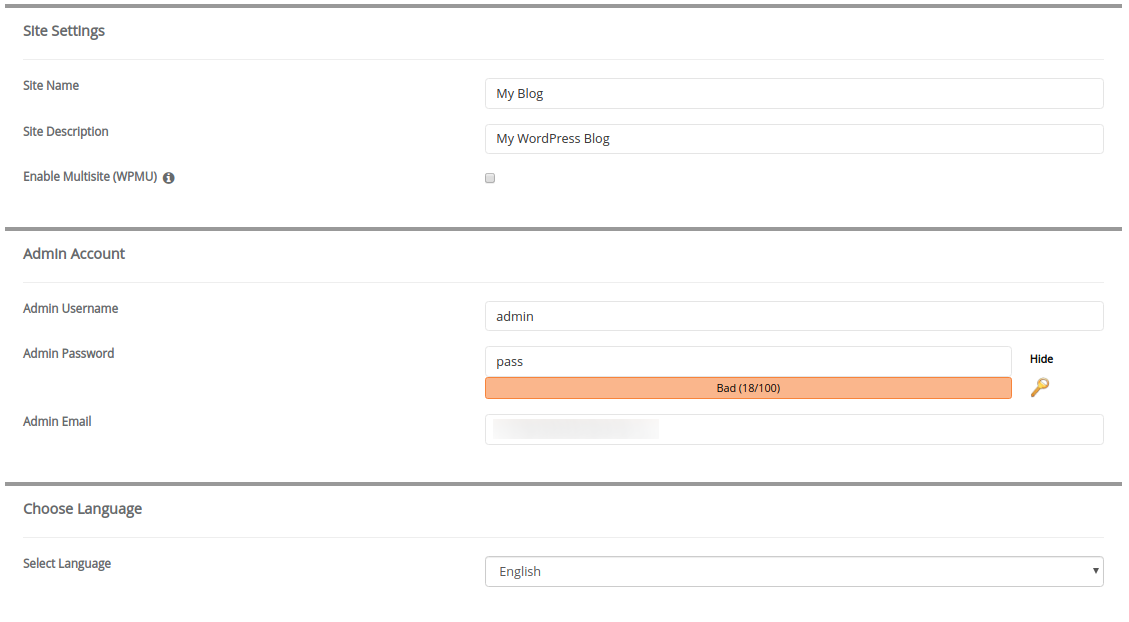
- In the new screen, please choose a user name and password and also enter the admin Email, precisely.
- Next, you have to choose plugins and a theme. If you are not sure which one is suitable for you, just pick one of them. We will teach you how to change everything in WordPress, later. Finally, click Install.
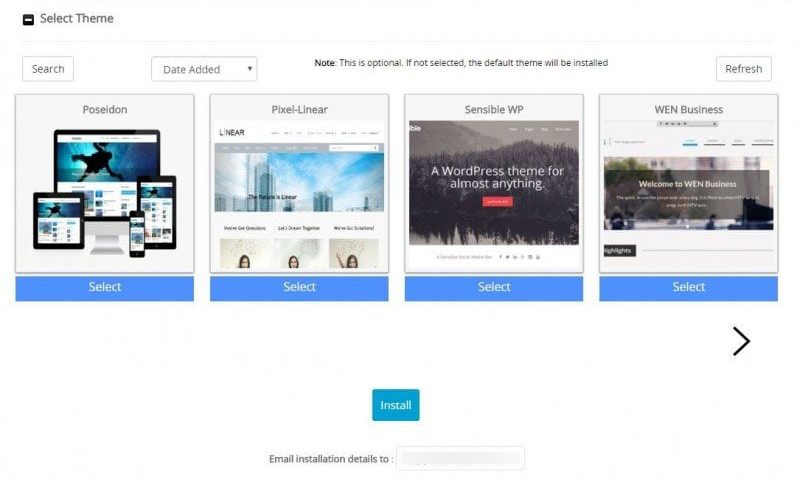
The Softaculous apps installer starts installing WordPress on your website. When the software installation is completed, you can use administrative URL as below to see the result:
http://www.your domain name and extension/wp-admin/
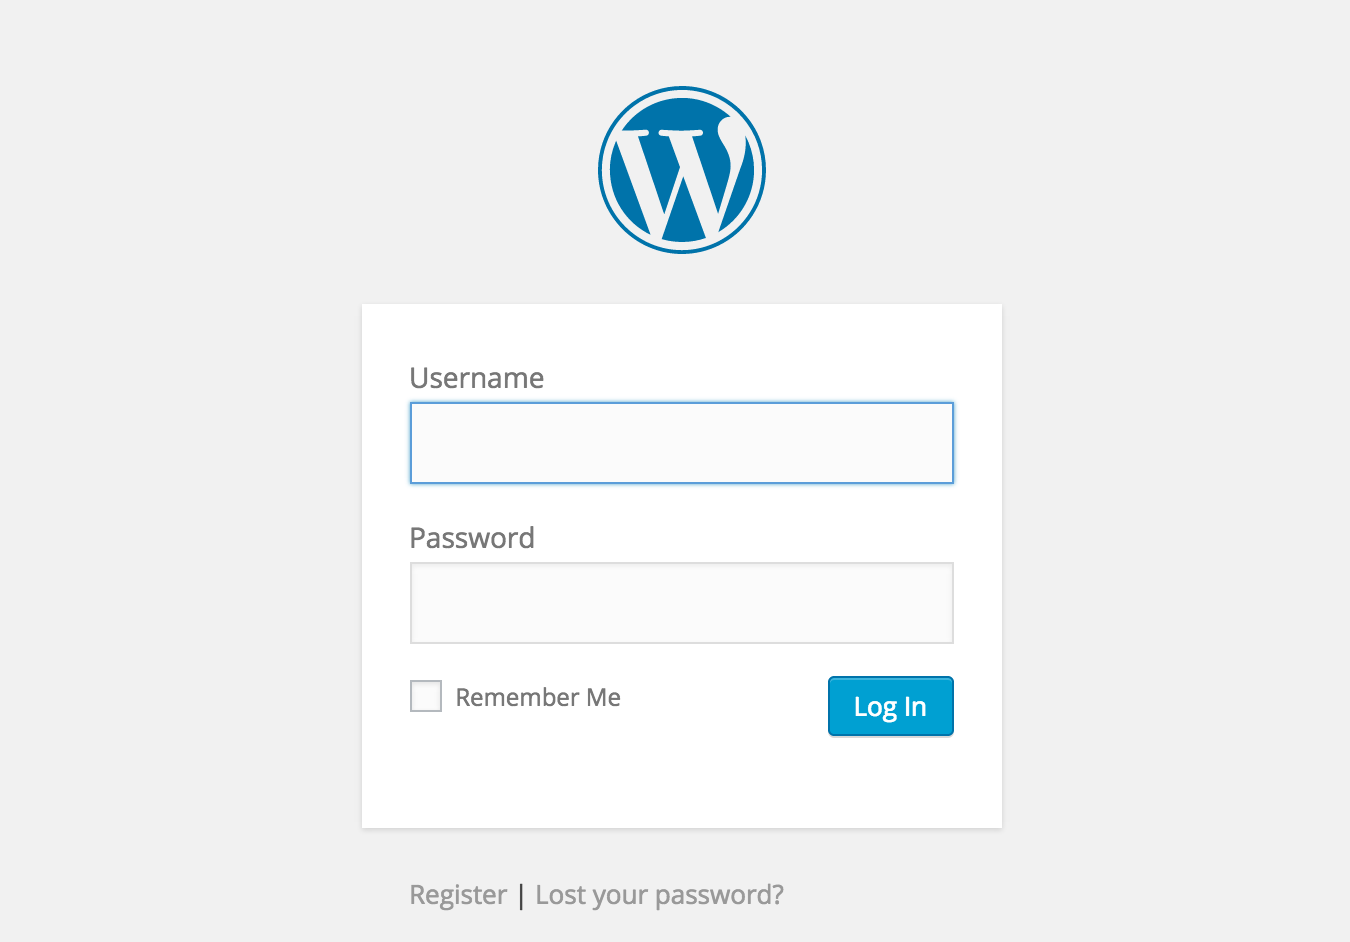
- Enter your username and password of WordPress to log in and see directly the WordPress Dashboard.
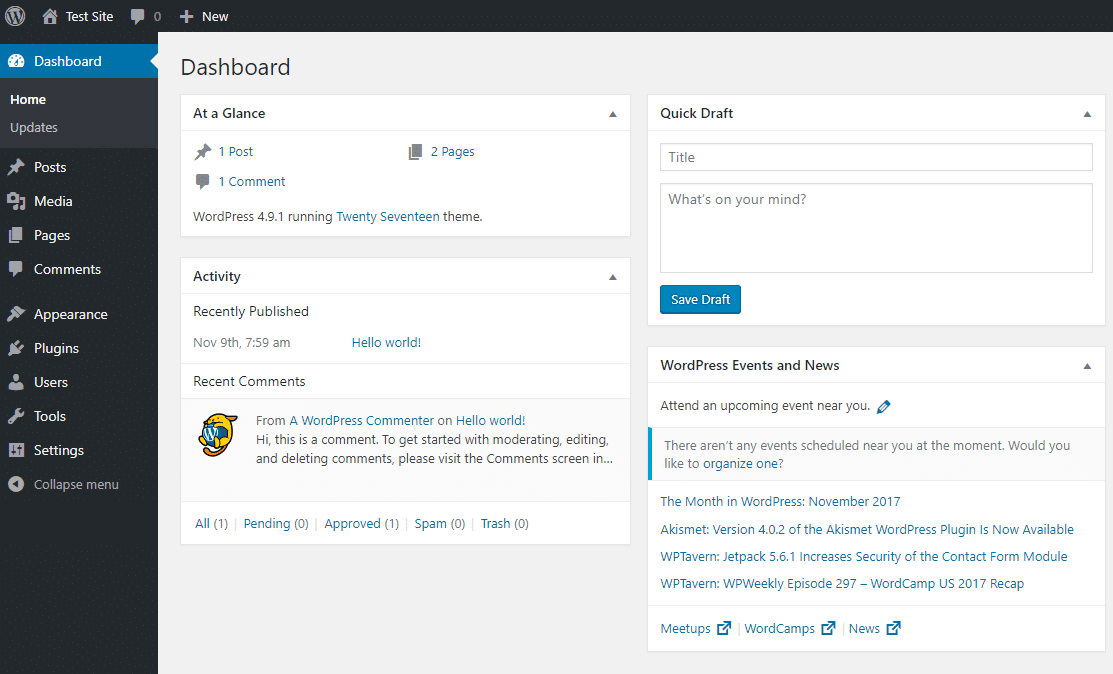
Now, Your site is ready to be designed with WordPress. Follow our next learning step to know how to work with WordPress.
How to Install WordPress on DirectAdmin host?
To install WordPress on DirectAdmin host you need to follow below steps:
- Log in to DirectAdmin host and create a new database
After registration and purchasing a host on DirectAdmin, you can easily log in and click on MySQL management to create a new database.

You have to keep the username, password and database name to use them in the next step.
- Create a new FTP log in
At the same page you can find FTP management item and create FTP account.

The username and password of FTP account is needed later. So, please write them down.
- Download latest version of WordPress
You can always download latest version of WordPress from official website for free and extract the file. Please keep the WordPress windows open and follow the next steps.
- Download a software to upload WordPress files to the host (Filezilla is recommended)
Now, you have WordPress and a host. But you need a software to connect them. Filezilla as a useful software helps you to upload WordPress on DirectAdmin. So, download Filezilla and open it.
Click on File > site manager > new site and fill in the below information and finally click connect:
- Your domain name (Host)
- The FTP username from step 2 (User)
- The FTP password from step 2 (Password)

On the right side of Filezilla, a folder named “Public” or “Public_html” is shown. You have to open it and copy all content of extracted WordPress folder from step 3 to it.

- Install WordPress on DirectAdmin
To install WordPress on DirectAdmin, you have to open the domain used in DirectAdmin in a browser.
Then the installation of WordPress starts automatically.
In the new page, as you can see in the below picture, please select a language for WordPress and click Continue> Let’s go.

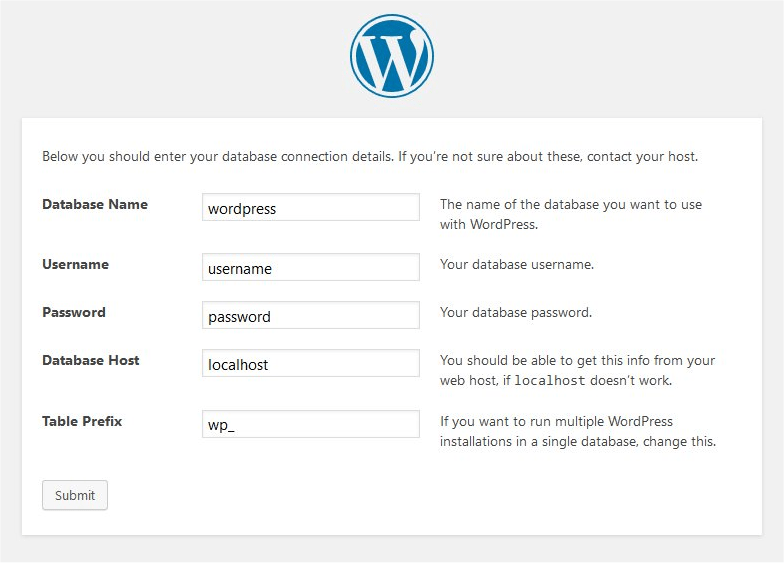
The below information is needed to continue installation of WordPress:
- database name,
- database username and
- database password,
Finally, click Submit > Run the installation.

To complete the installation, you have to enter the below information and click Install WordPress:
- Site name
- Username and password for administration.
- Email address to remind you the password or send other related messages.

When you see the Success massage, WordPress has been installed successfully and you can log in to your website through WordPress.
To access administration panel of WordPress, simply enter the below URL in your browser and use the Username and password for WordPress:
Domian.extension/wp-admin (For example, http://yourdomain.com/wp-admin)
How to Install WordPress locally?
To install WordPress locally on your windows you need the below requirements:
- A server-side programming language like PHP
- A web server application. We recommend Apache
- A database management technology like MySQL
If you are not familiar with them, you can install an application like XAMPP to provide Apache, MySQL, Pearl and PHP on your system. Then you can download and install WordPress to your computer and design your website offline.
Why install WordPress locally?
The advantages of having a local install of WordPress on your computer:
- Make it easier to learn WordPress and develop themes and plugins, offline.
- Other people have to access to your website, so there is no need to worry about the appearance or anything that go wrong with your website.
- Nothing publishes on a server, so you don’t need to modify the website online
How to install WordPress on localhost – XAMPP
- At first, please visit XAMPP website and download the app. For your operating system.
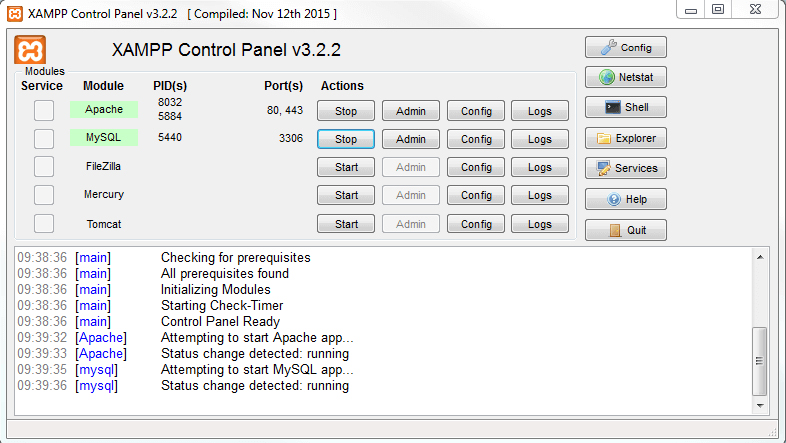
- After installing XAMPP, Start Apache and MySQL.
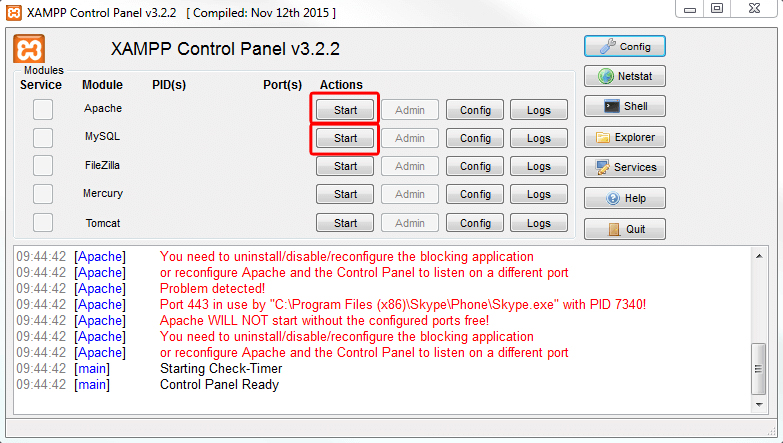
Then you can see the Apache and MySQL are running on XAMPP.
- Download WordPress
You can download the latest version of WordPress from the official website in a ZIP format. Extract the file and copy in the XAMPP registry: C:xampphtdocs. You can rename the file as “testwebsite”.
- Launch website in a browser
Make sure that XAMPP is still running, then you can type localhost/testwebsite in a browser like chrome to see the below page:
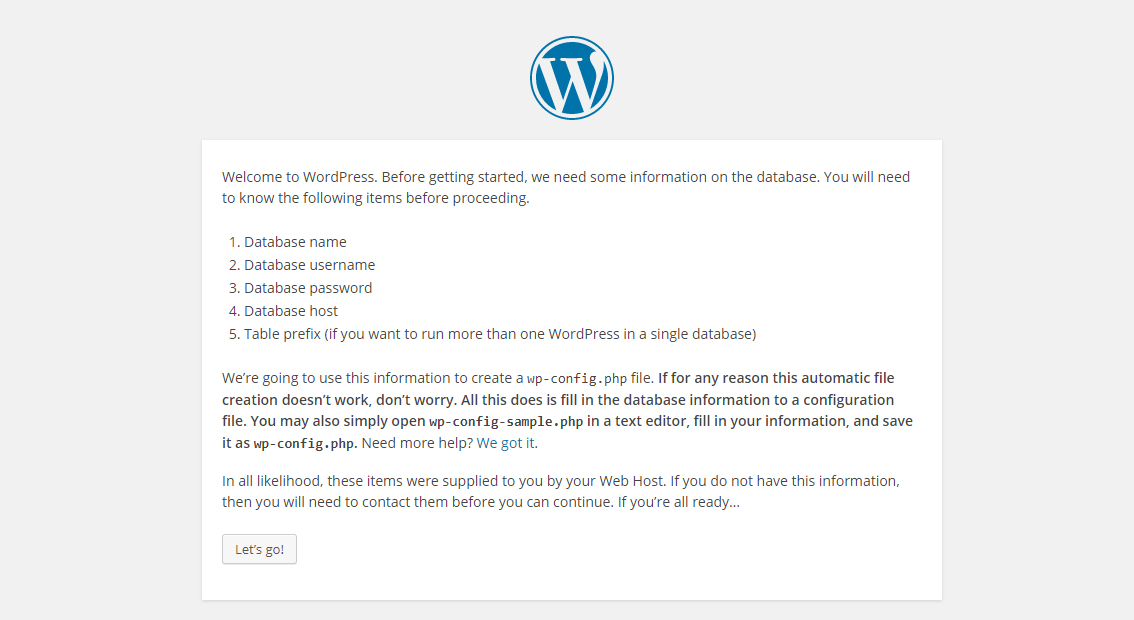
As you can see, a database is needed. So, go back to the XAMPP and click on Admin in front of MySQL.
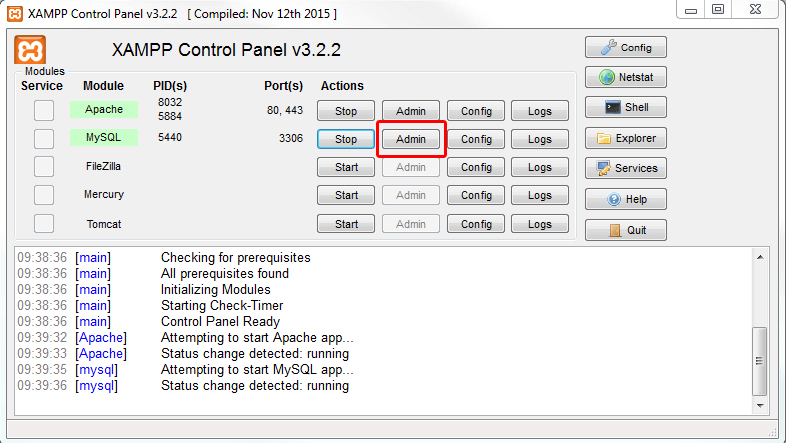
Click on Database as you can see in the below picture:
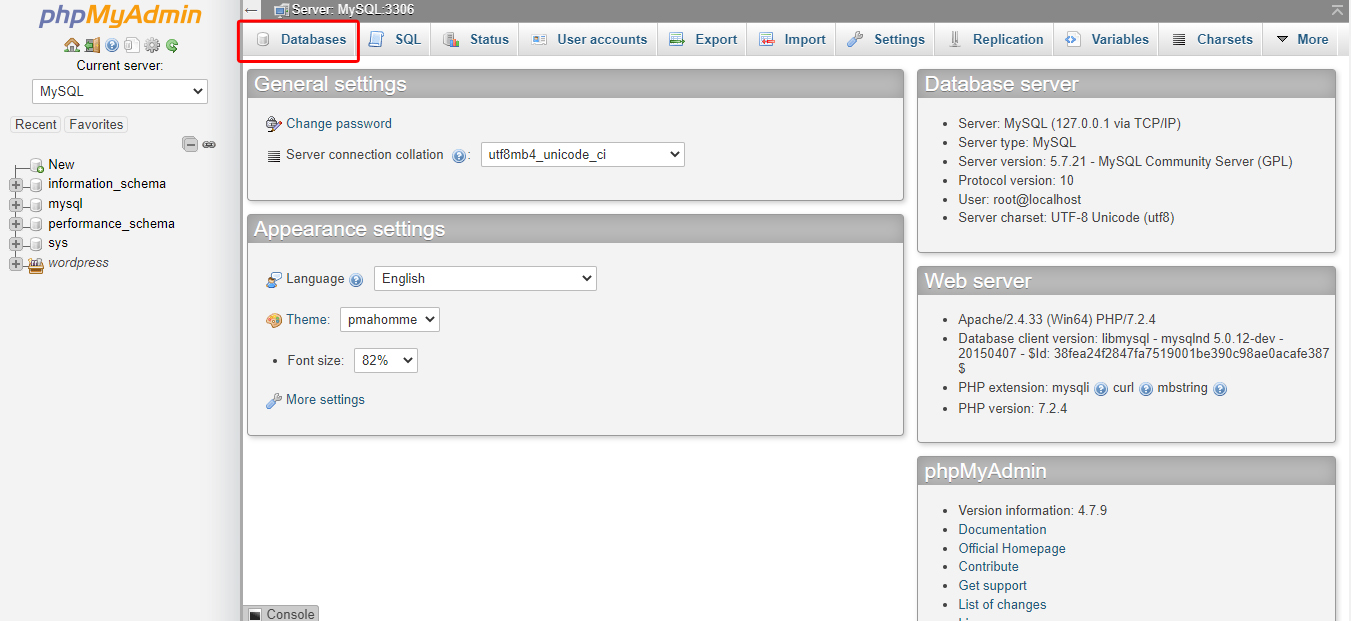
Type a name for your database for example “testwebsite”, and then click create.
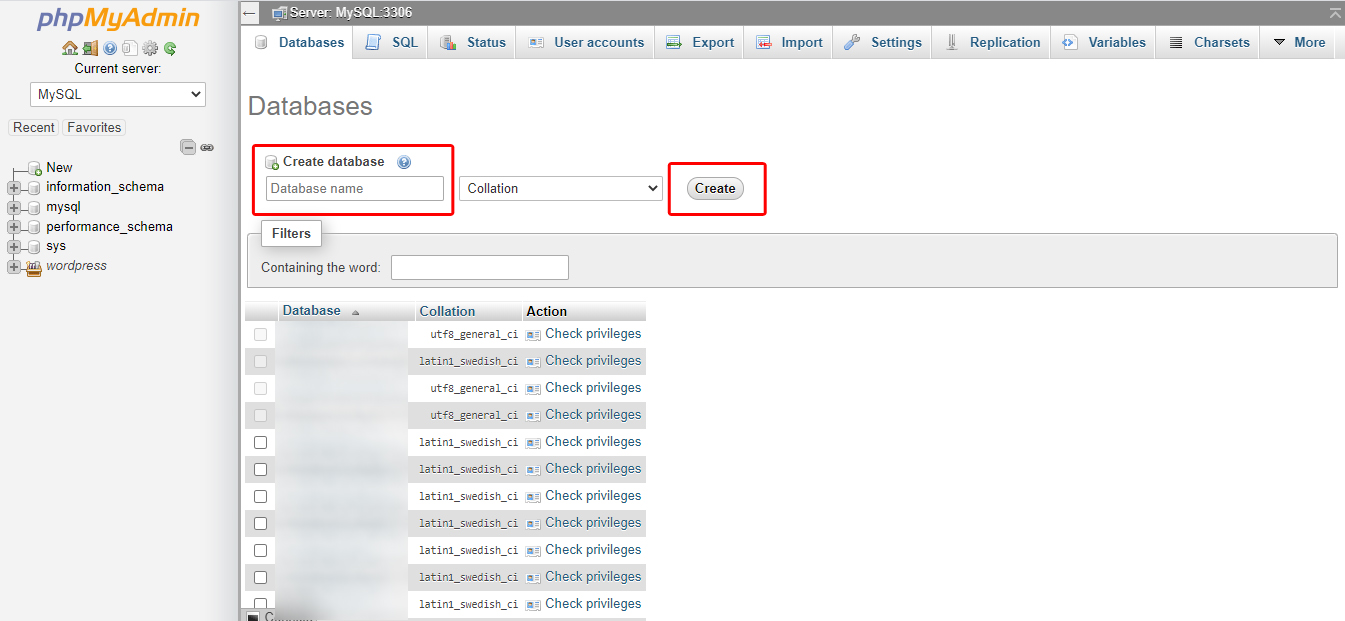
In the new page, fill in the part according to the below picture:

You almost finished. Just set a username and password and write your Email address correctly to install WordPress on XAMPP.
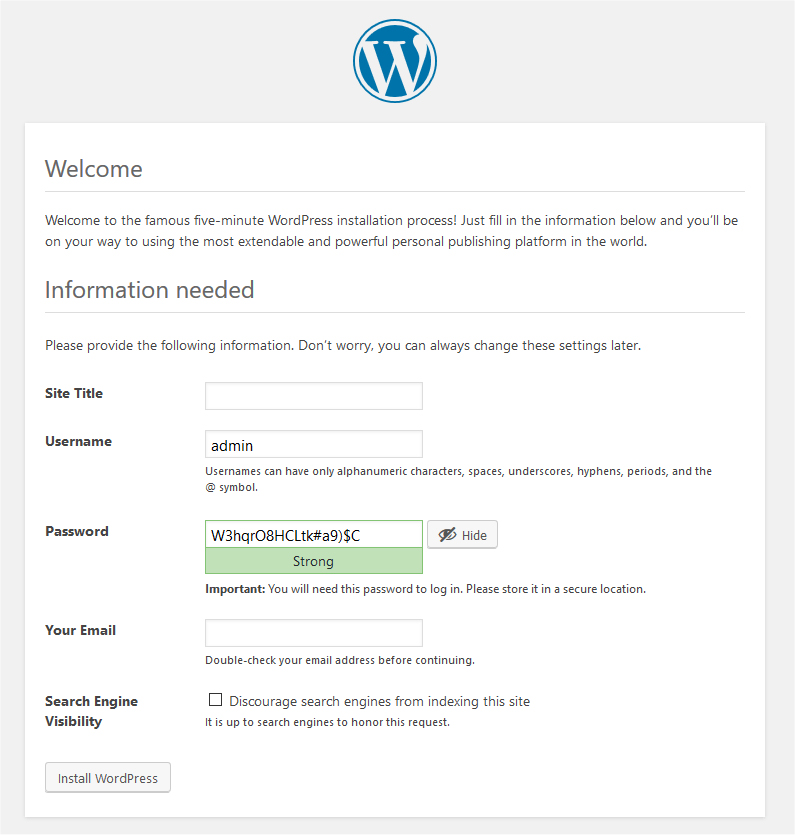
After Installation, you can access to the WordPress Dashboard by going to localhost/testwebsite/wp-admin from your browser and using your username and password.
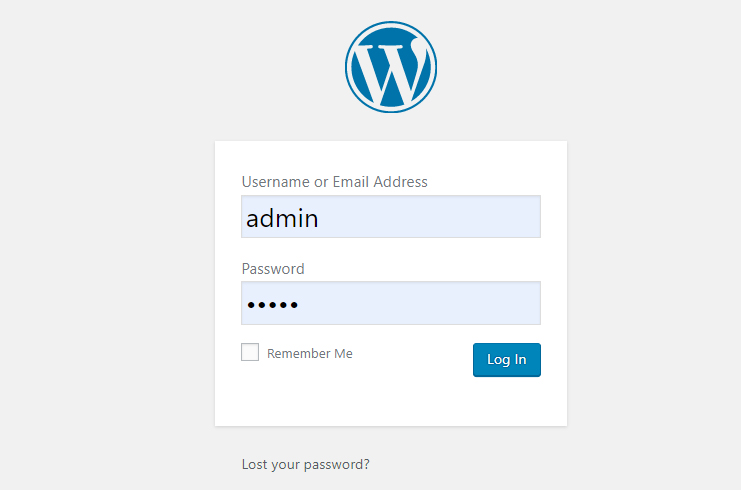
With this method you can locally design and manage your website before moving it to a live site. By following our next steps you can work with the features and designing your website exactly according to your requirements.
Finally you have to move your local site to a live site to let the world see your amazing WordPress website.
Now, let’s see …
How to Move WordPress from Local Server to Live Site, manually.
At first, you have to buy a domain name and a host for example from Bluehost as we mentioned in “What is needed to build a website in WordPress”.
Now, you have to export your database and WordPress file to a server. So, please follow the below instructions:
How to export your Database?
- Open xampphtdocs and find the file you rename as “test website” then open it.
- Find wp-config.php file and open it with a text program.
- Find the below line:

You may see different name instead of ‘standardwp’. Write this name to use it later.
- Run XAMPP
- Go to http://localhost/phpmyadmin from your browser
- On the left, you can see the name of your database. For us, the name ‘standardwp’ was shown:
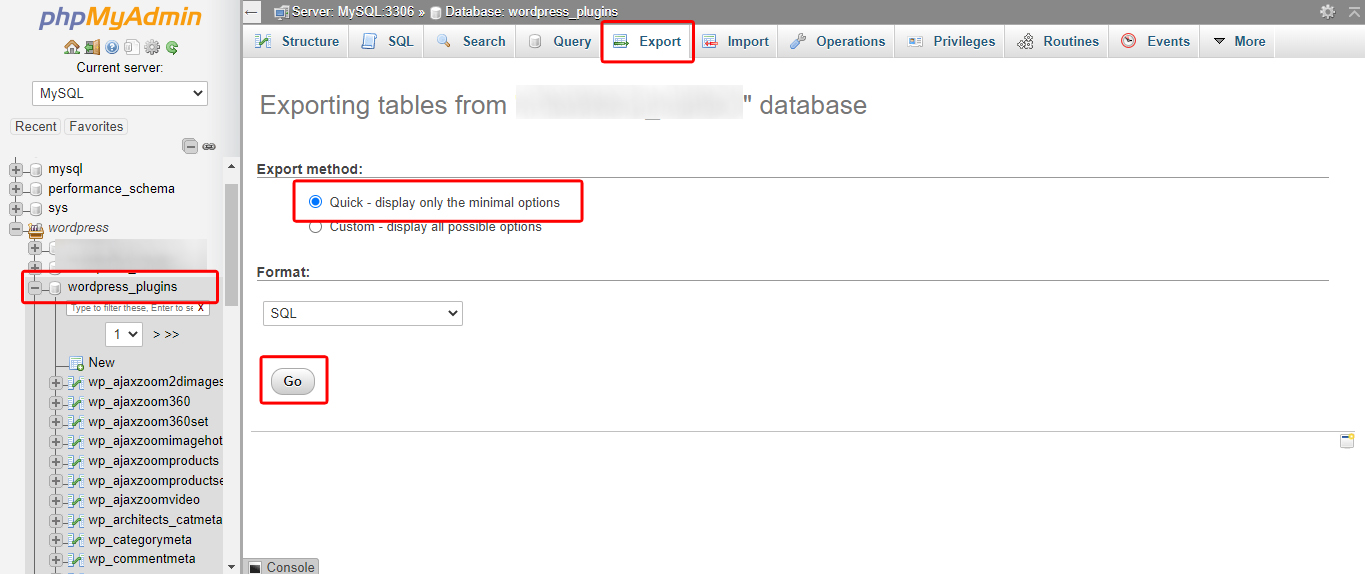
Then click on Export and select quick. Finally, click on Go.
Next, it is better to choose MySQL to create a new database as most of the host server including Bluehost uses this kind of database.
Now you have to create MySQL database from your host. For example in Bluehost:
- Log in to Bluehost.
- Under the Database section of control panel, click MySQL databases.
- In the New Database field, type a new name that you can recognize later.
- Click Create Database.
- Go back. Find the name of your new database and click on.
The only thing that you have to do is to import your local database from XAMPP to your host.
By clicking on Import then Choose file, you can import the database from your local computer to the host.
After importing, you have to change the URL from local host to the address of your live site. To do that follow the below instruction for example in cPanel of Bluehost:
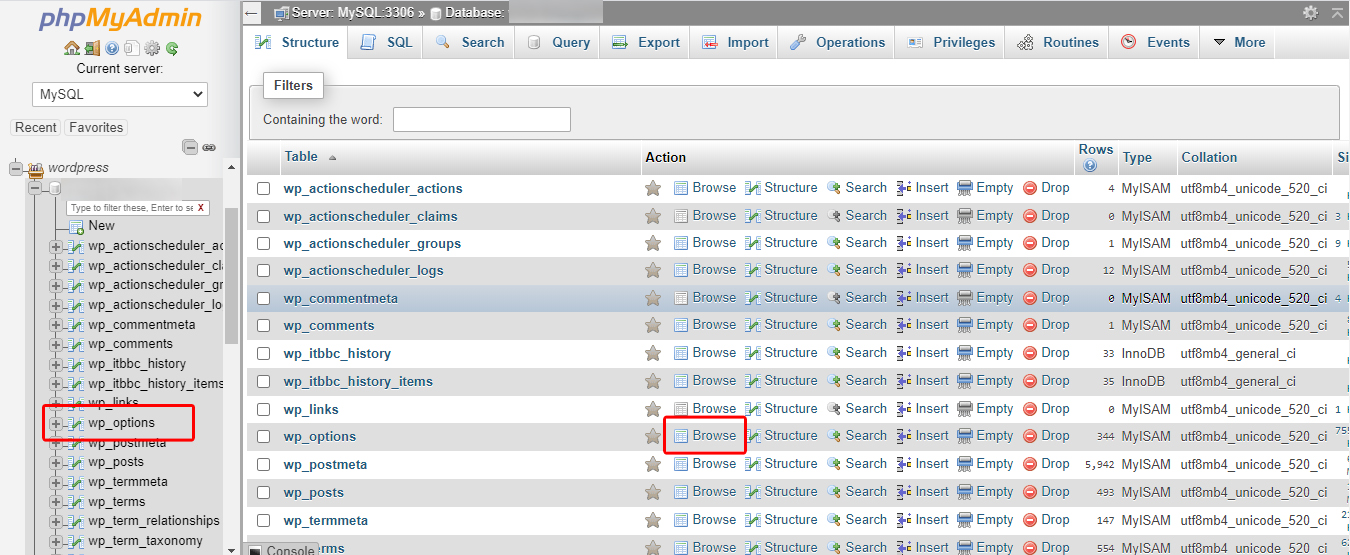
- Find wp-option and click on Browse.
- Click on Edit and change the http://localhost/testwebsite to your domain name.
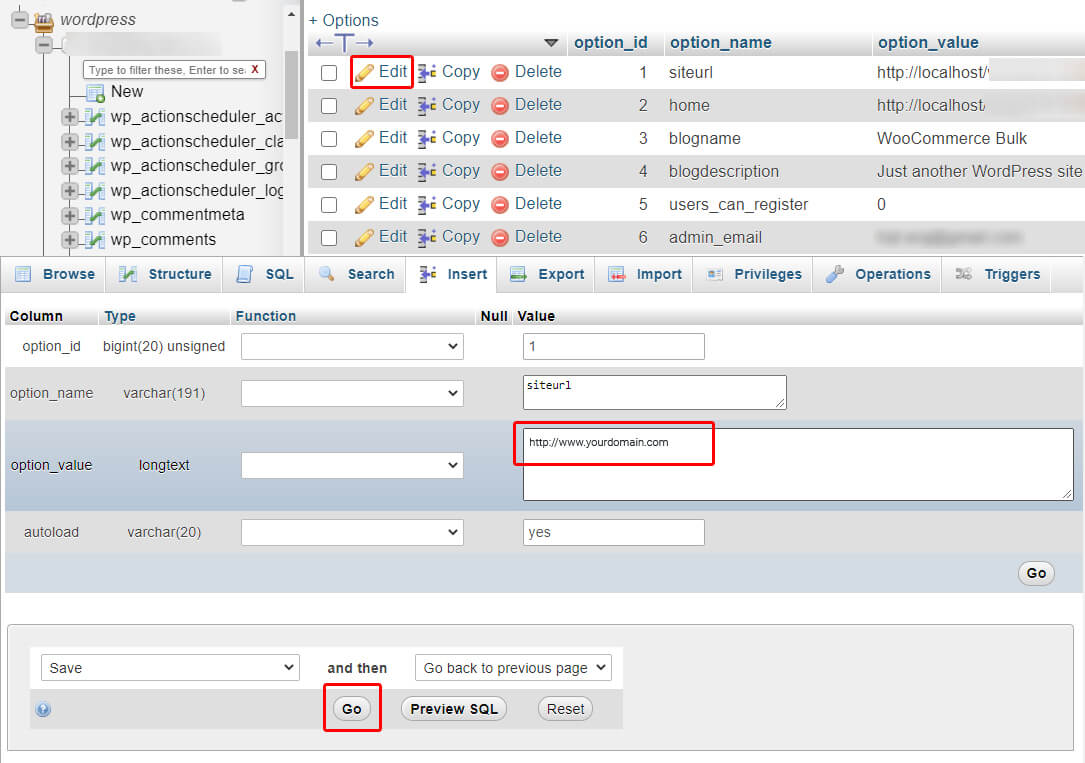
At the end, repeat these 2 steps for home URL as well.
How to export your website file?
To export your website file, it is better to use FTP with WordPress .
- Go to your FTP client with your hosting account.
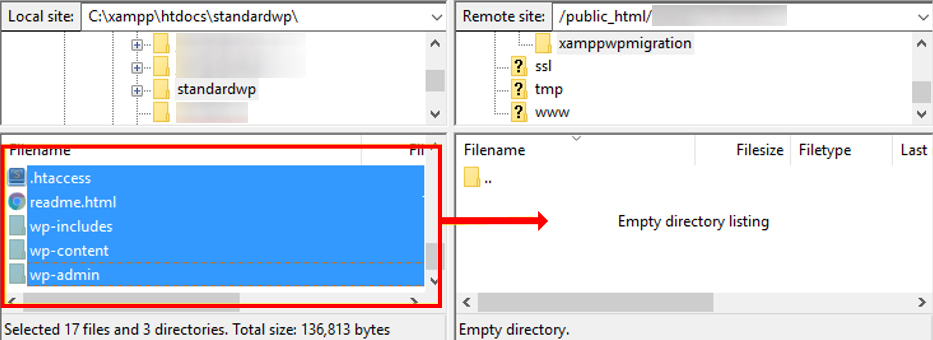
- Then, find the public_html directory on the web server and create a directory to import your website files.
- Import your website files from xampphtdocs by dragging them into the created directory on the web server.
Finally, you have to modify wp-config.php. So, open the wp-config.php and click View/Edit.
Find the line “database name” and update this line as well as following lines including username and password.
Then in WordPress website files you have to modify the URL where they’re now hosted. To do that, add the WP_HOME and WP_SITEURL definitions to wp-config.php.
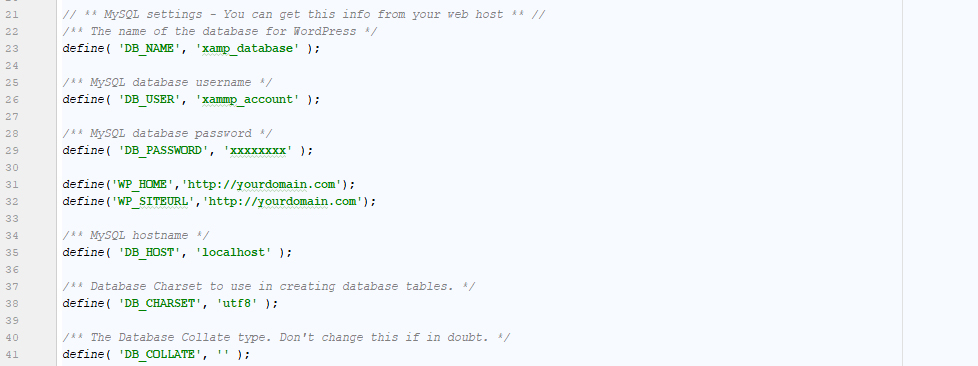
Now, save and close wp-config.php, then overwriting the existing copy in the server.
Congratulation, you configure your domain, properly, import your website files and database correctly, and modify wp-config.php, appropriately. You can now open and see your WordPress website live on the web.
Summary
In the first step of Learning WordPress for beginners, you find out how to purchase a domain name, a host and also how to download and install WordPress on a host or locally on your computer. You can continue to get familiar with WordPress and use Dashboard by following our next step.


