
Product sorting can make a big difference in how customers browse a WooCommerce store. When shoppers can sort products by price, attributes, custom fields, stock, or other product details, they can find the right item faster instead of scrolling through long product lists.
WooCommerce has basic product sorting options, but they are not always enough when you want to build a custom product table with sortable columns. For example, you may want customers to sort products by color, size, price, SKU, rating, custom fields, or any other product data that matters in your store.
In this tutorial, you’ll learn how to create a WooCommerce product table with sorting using TABLEiT – Product Table for WooCommerce. We’ll show you how to add sortable columns, sort products by attributes, create custom sorting options, and publish the table on your shop page without writing code.
Sorting helps customers compare products without opening multiple pages. The WooCommerce product table navigation guide shows how sorting fits into a complete discovery workflow.
Quick Answer:
A WooCommerce product table with sorting lets customers arrange products by useful fields such as price, SKU, stock, rating, attributes, categories, or custom product data. The easiest way to create this layout without coding is using TABLEiT – Product Table for WooCommerce.
After installing the plugin, go to WordPress Dashboard > iThemeland > TABLEiT and create a new product table. Use Query to choose which products should appear, add the required fields in Columns, then enable sorting for the columns customers need to compare. You can also add search, filters, pagination, and add-to-cart buttons to improve the shopping flow.
This is useful for large catalogs, wholesale stores, technical products, restaurant menus, and B2B shops where customers need to compare many products quickly. TABLEiT plugin is better than the default WooCommerce grid for these cases because it turns product browsing into a structured, sortable table.
How to create a product table with sorting by using WooCommerce product table plugin?
The WooCommerce product table plugin is one of the advanced WooCommerce plugins that provide you with all the essential features you need to create eye-catching and responsive tables. This plugin has an easy and intuitive user interface with which you can easily create your own tables and add various features such as sorting, filtering, and a quick search box.
Now, let’s see how to create a custom WooCommerce product table with sorting by attributes and beyond in three simple steps.
Step 1: Install WooCommerce product table plugin
The first step for using the WooCommerce product table plugin is to download and install it on your WordPress website.
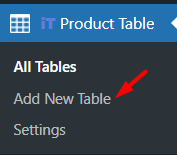
By activating the plugin, a new item was added to the WordPress dashboard called the IT Product Table. To start working with this awesome plugin, you need to click on this tab and go to the Add New Table page.
On this page, some preset templates allow you to quickly create your product table with some default columns set in the templates.
However, you can ignore them and press Get Start at the bottom of the page to create your table from scratch.
By clicking on Get Start, all of the WooCommerce products will be imported to the plugin automatically. So, if you want to show some specific categories or products to your customers, go to the Query tab and make a new query to be displayed in your table.
Now, you are ready to create a custom WooCommerce product table with a sorting option in the next step.
Step 2: Create a custom WooCommerce product table with sorting option
The easy to use interface of the WooCommerce product table plugin enables you to create your product table in a few minutes. Let’s review the simple steps you need to follow to customize the columns of your table:
- Go to the Columns tab and press the Add New Columns button in the middle of the page to create a new column in your table.
- For this new column, you can customize the Header and Cell Content by adding elements to the new box that just appeared on the page.
- To add elements for both Header and Cell Content simply click on the Add Element option to see a list of elements in the left panel.
- Choose one of the Elements and try to customize it by changing the items in the General and Style tabs of the Element Setting Panel.
- Repeat the above mentioned steps to add as many columns as you need to your table.
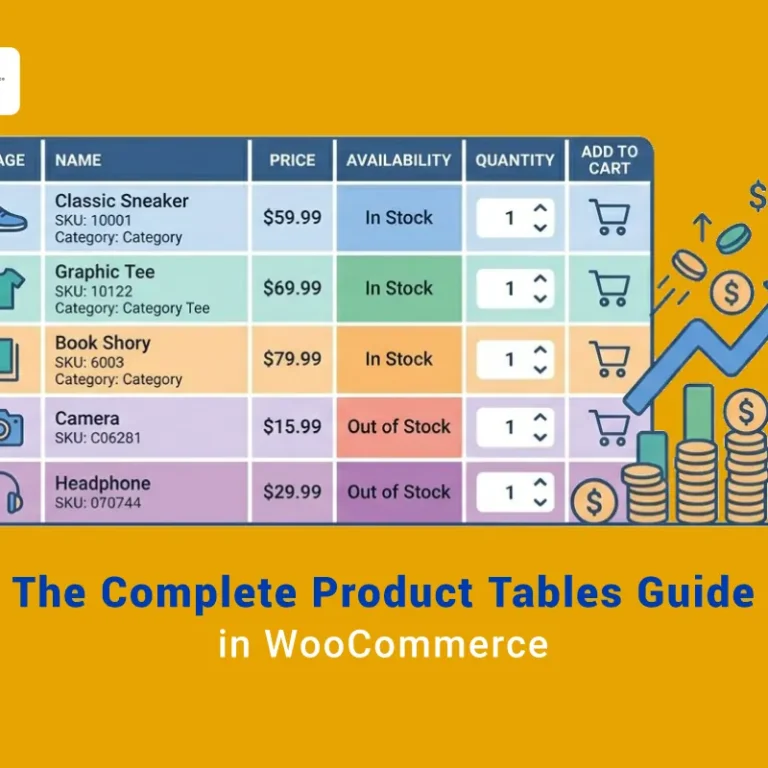
Now, let’s suppose that you have created a sample product table like below, and you want to add sorting options to it.
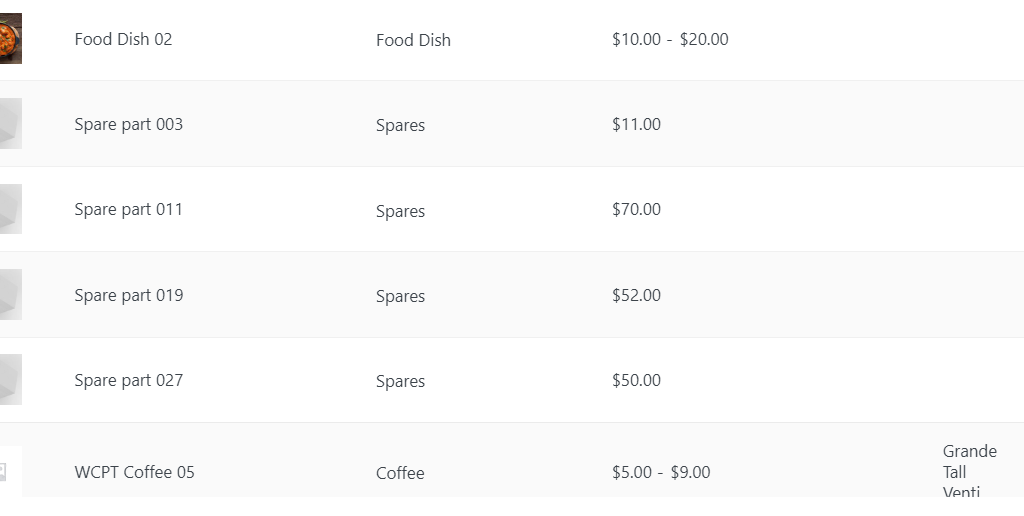
To do this, you can use two different methods that we are going to completely describe them in the following:
TABLEiT – Product Table for WooCommerce
The easy way to create custom WooCommerce product table with sorting by attributes
Method 1: Enable products sorting in each table column
The first method for adding sort options in the product table is displaying the sorting option on each column. You definitely see the Up and Down arrow keys in the Header of some columns allowing you to sort the data of one specific column on each page in ascending or descending orders.
You can display this sorting option on one or more columns of your table by following the below instructions:
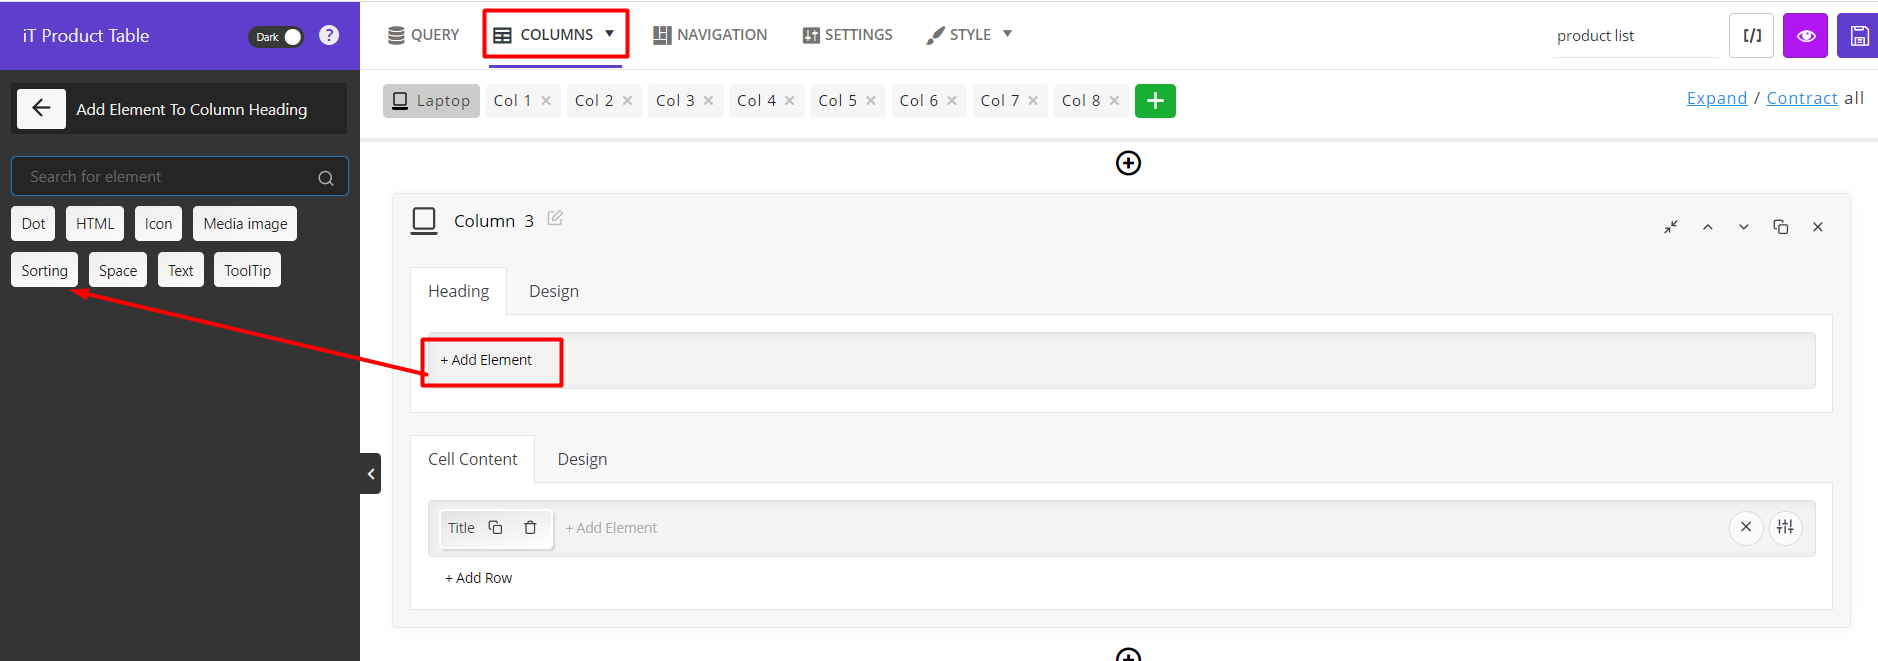
- On the Heading section of the column, click on the Add Elements to see the list of elements in the left panel.
- Choose the Sorting element from the list.
- Customize the Sorting option based on the element you have chosen in the Cell Content tab.
Let’s make some examples to see how you should customize the sorting element.
Create a custom WooCommerce product table with sorting by attributes
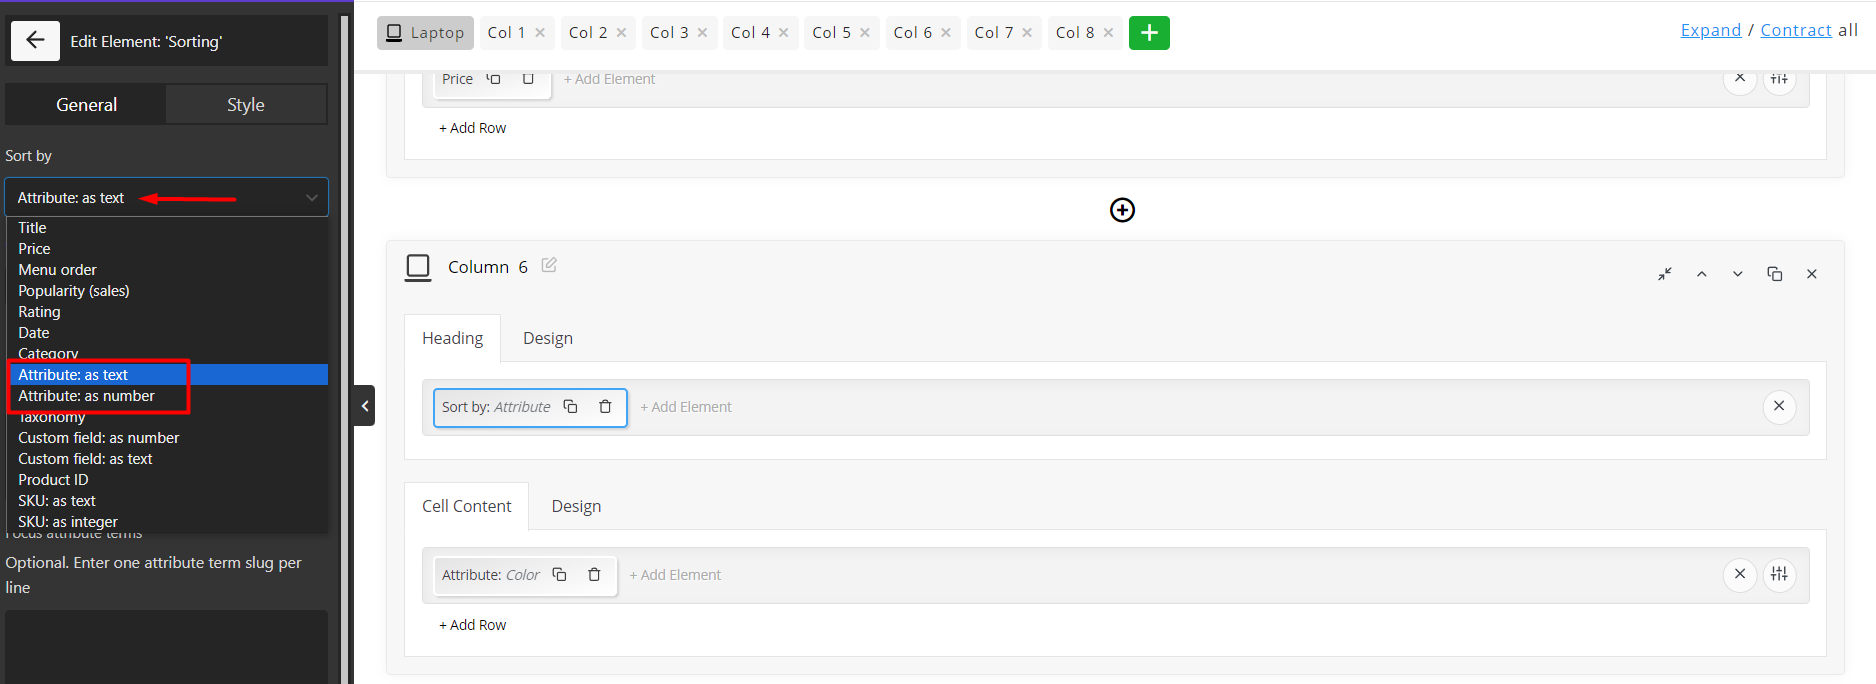
To add sorting by attributes and let your customers sort the product based on the attribute items in the table, first, you need to add one of the Attributes like Color in the Cell content to show the data in the table. Then, after adding the Sorting element to the Header, you need to open the dropdown list of Sort by field and choose one of the below options:
- Attribute as text: If the values related to the attribute are displayed as text in the table like Red, blue, Large, Small, etc.
- Attribute as number: If the values related to the attribute are displayed as a number in the table like 2, 100, etc.
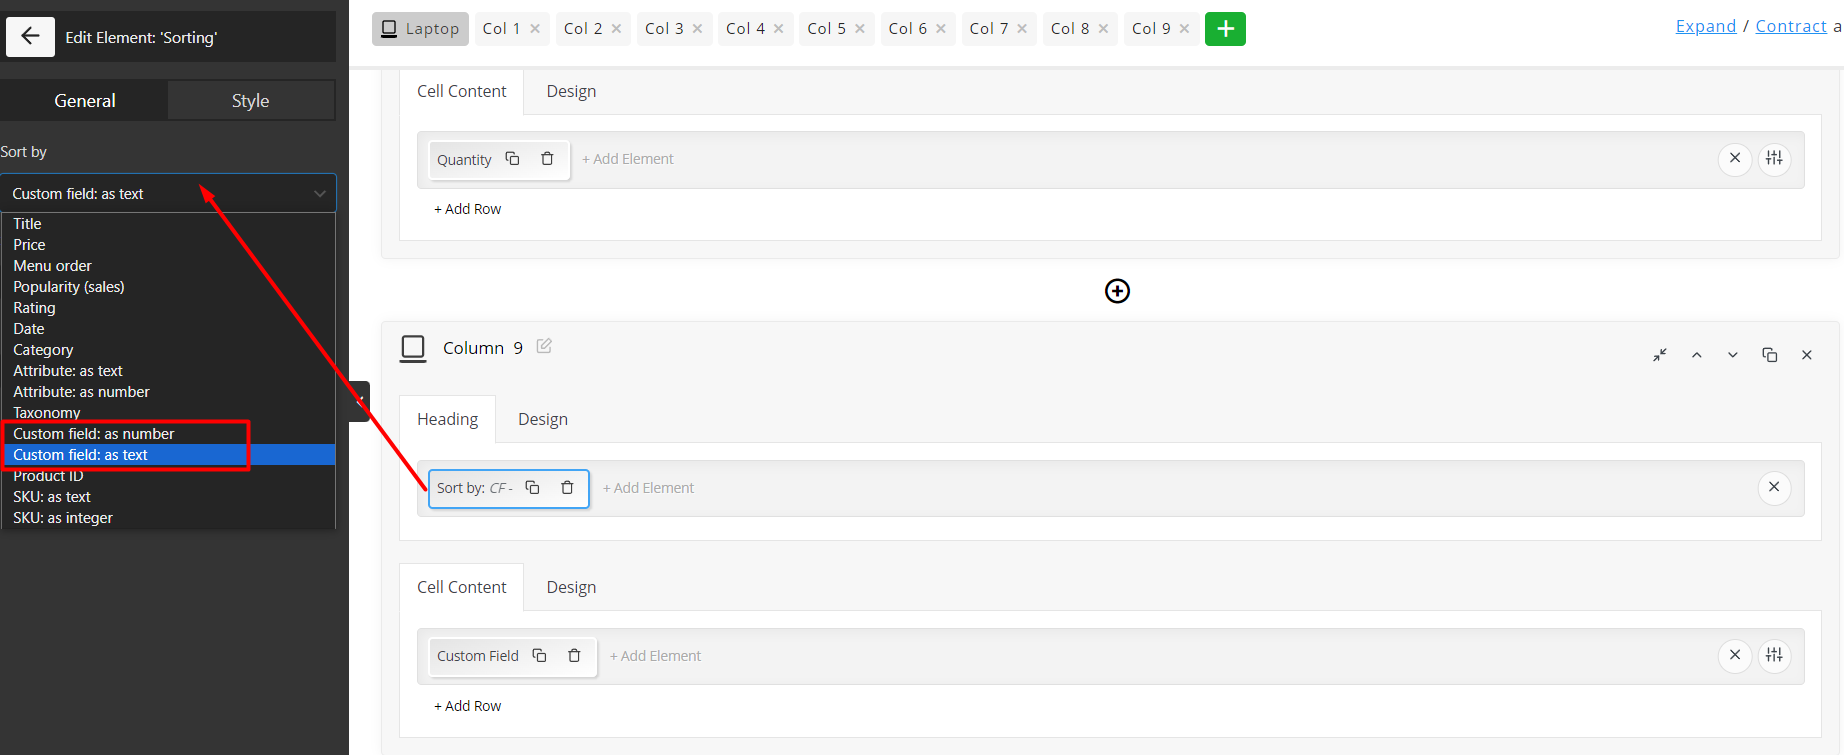
Create a custom WooCommerce product table with sorting by custom field
One of the amazing features of the WooCommerce product table is supporting all custom fields that you have added to the WooCommerce. If you add any custom field to the Cell content of the column, it is possible to choose one of the below options for the Sorting Element in the Header to let your customers sort the products based on the custom field values:
- Custom field as number
- Custom field as text
As we described before, you need to choose the right option based on the values of the Custom Field in the column.
Create a custom WooCommerce product table with sorting by price
Sorting by price is the most popular sorting option that almost all customers use to see which products are affordable for them.
You can simply create a column and add the Price element to the Cell Content, then add Sorting from the list of Heading elements and choose Price from the list of Sort by field in the General tab to add this sorting option to your product table.

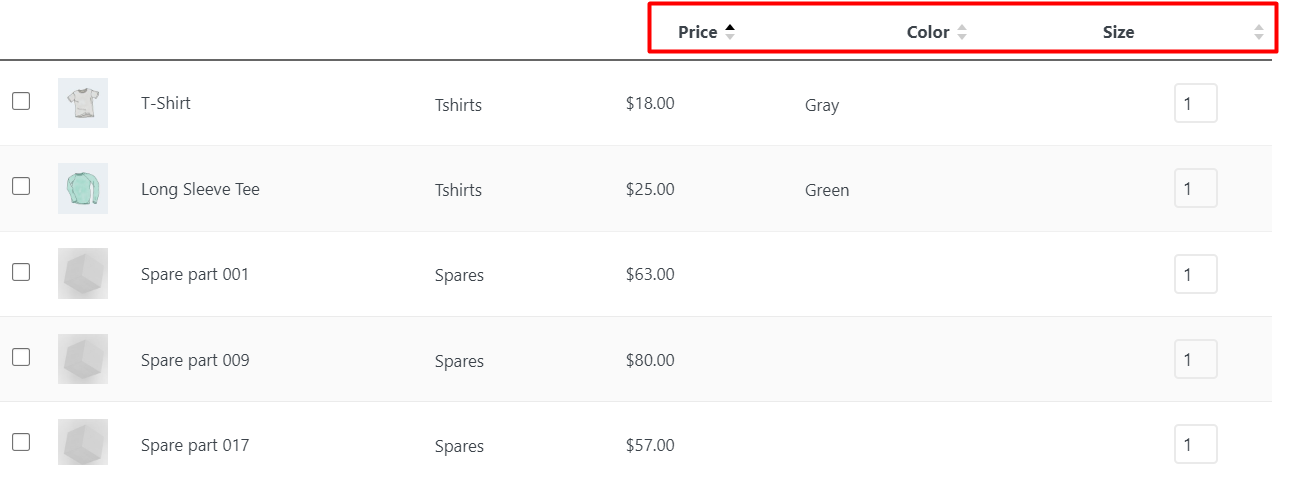
Now, if you want to observe how these sorting options are displayed in the table, click on the Eye icon on the top right corner of the screen.
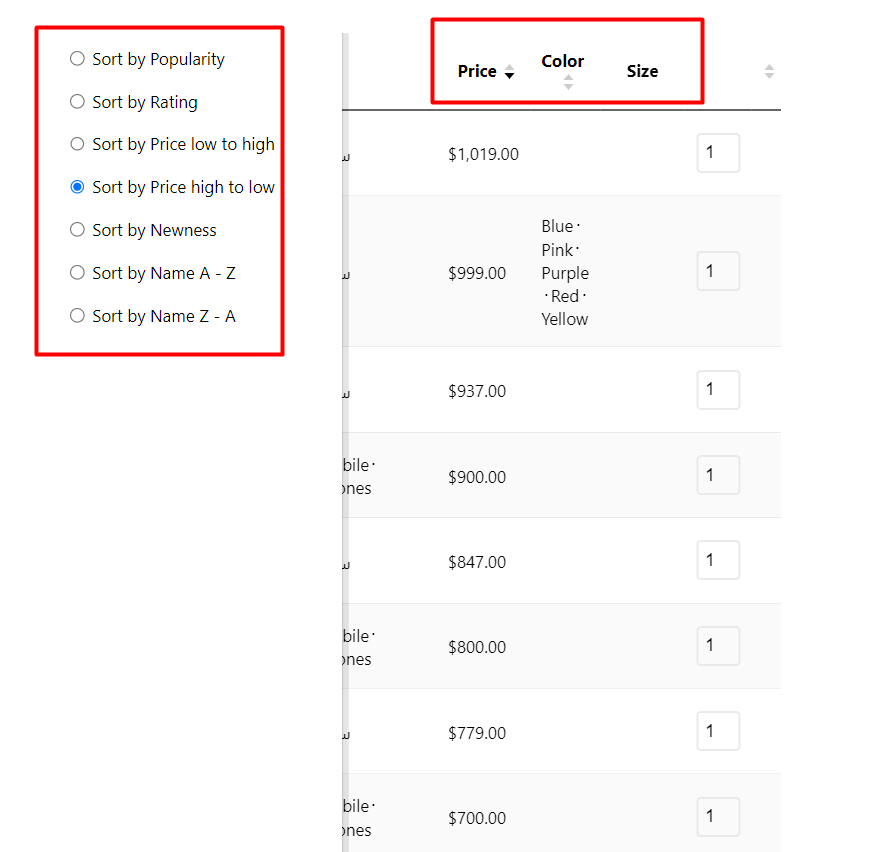
As illustrated below, the Up and Down arrows are displayed next to the Price, Color, and Custom field columns allowing your customers to sort the products on each page based on them:
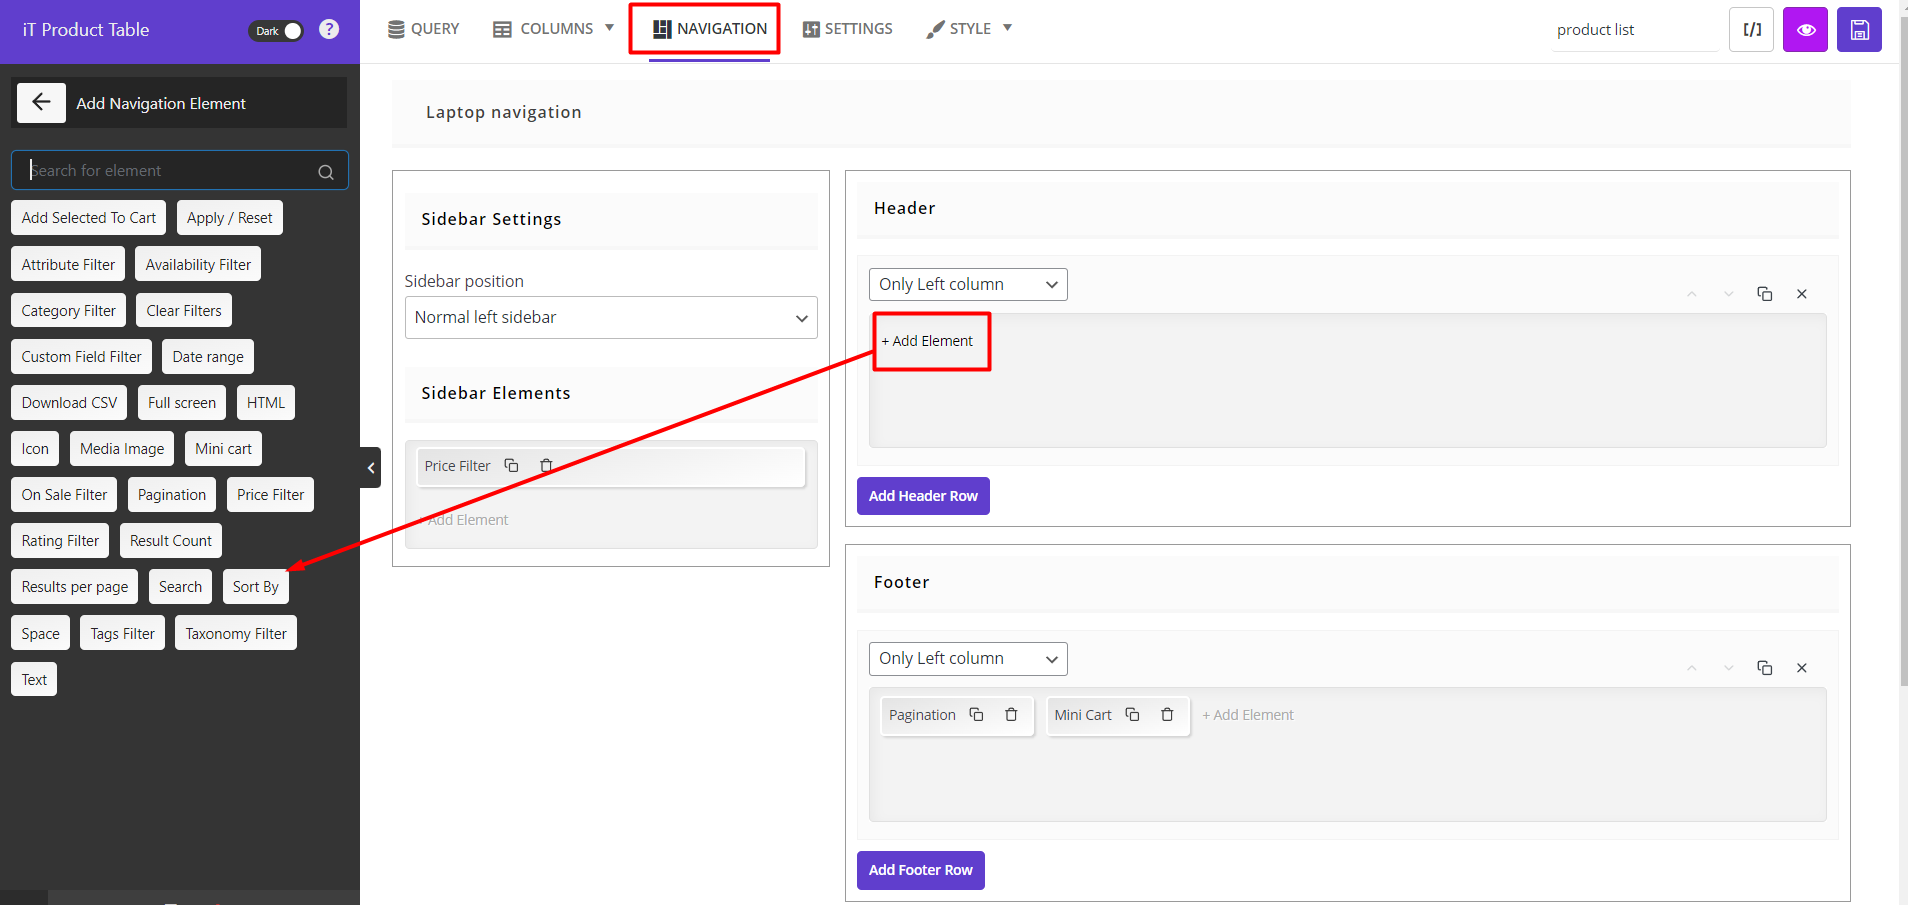
Method 2: Enable WooCommerce product sorting on all query
The second method is to show sorting options in one of the navigation bars in the product table and let the customers sort all products in the table by choosing the sorting option.
To make this happen in the WooCommerce product table plugin, following the below steps is required:
- Go to the Navigation tab.
- Press Add Element in one of the Navigation bars including Header, Footer, and Sidebar to see the list of elements in the left panel.
- Choose Sort by element from the list.
- Customize the Sort by element in the General tab as follows:
Display type
There are two options in the Display type field: Dropdown and Row.
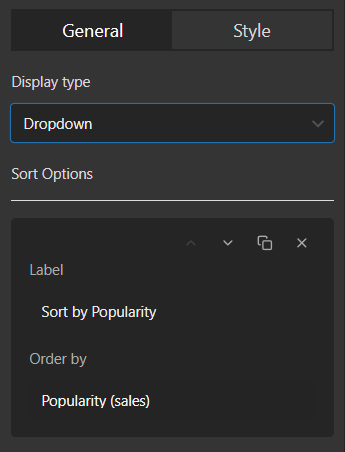
If you choose Dropdown, a list of all sorting options will be displayed to the customers in a dropdown and they can choose one of them to sort the products.
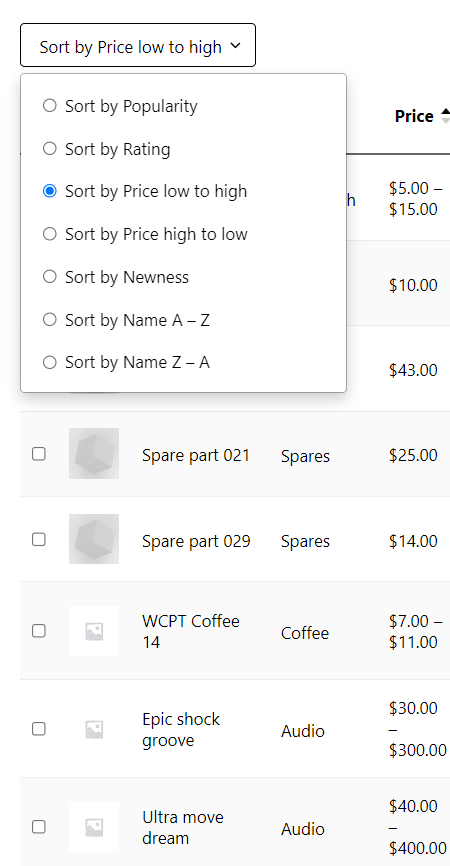
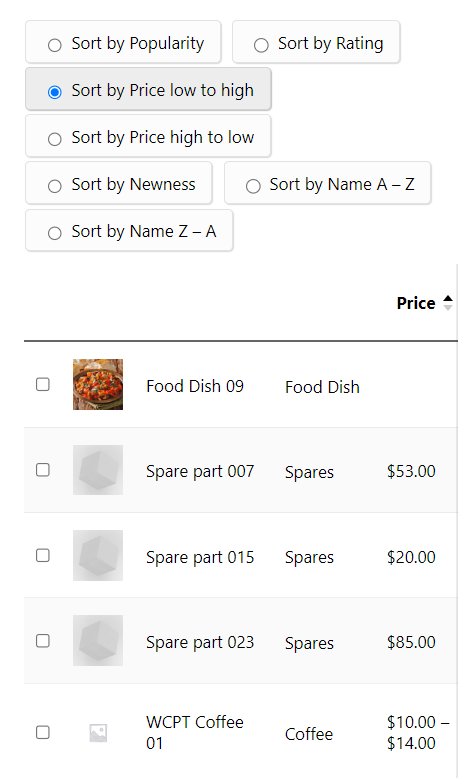
If you choose Rows, the sorting options are displayed in separate rows in the navigation bar and customers can choose one of them to sort the products.
Sort Options
In the Sort Options of General tab, you can press Add an Option button to add as many sorting options as you need to the table.
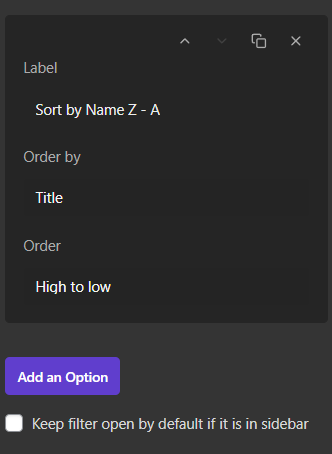
By adding a new option, a new box will appear with the below sections:
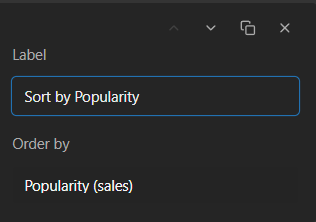
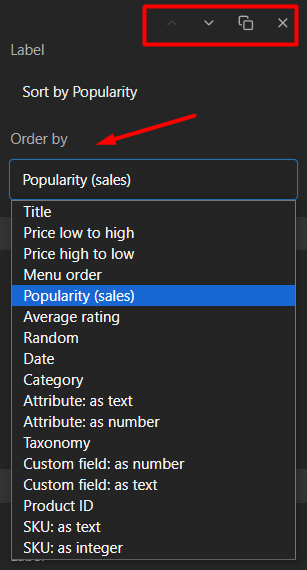
- Label: The title of the sorting option that you can write manually.
- Order by: choose one of the sorting options from the list to let customers sort the products based on.
Keep Filter open by default if it is in the sidebar
This item is useful if you add the Sort By element to the sidebar area. If you mark this item, the sorting options will be always displayed to the customers on the sidebar. Otherwise, there is a toggle that customers should click on to see the sorting options.
Step 3: Use Shortcode to show the WooCommerce product table on the shopping page
Finally, when you create your custom WooCommerce product table with sorting by attributes and other options, you can save it by inserting a name on the text box on the top of the table and pressing the Save button.
Then to show this table on the Shopping page to your customers, try to:
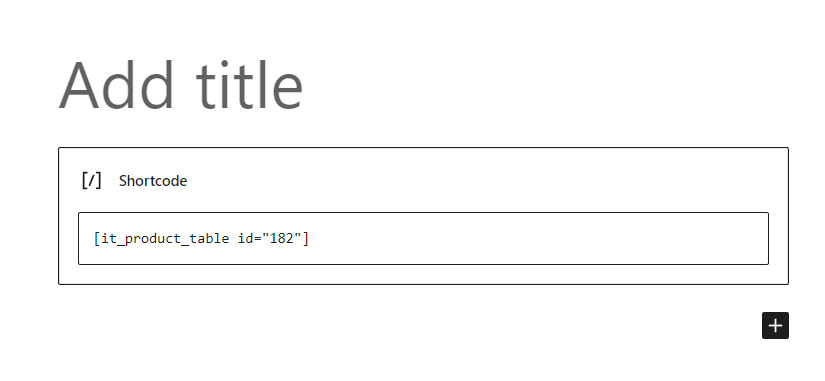
- Copy the Shortcode by clicking on the Shortcode icon.
- Open a new page in WordPress and paste the shortcode.
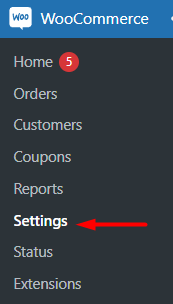
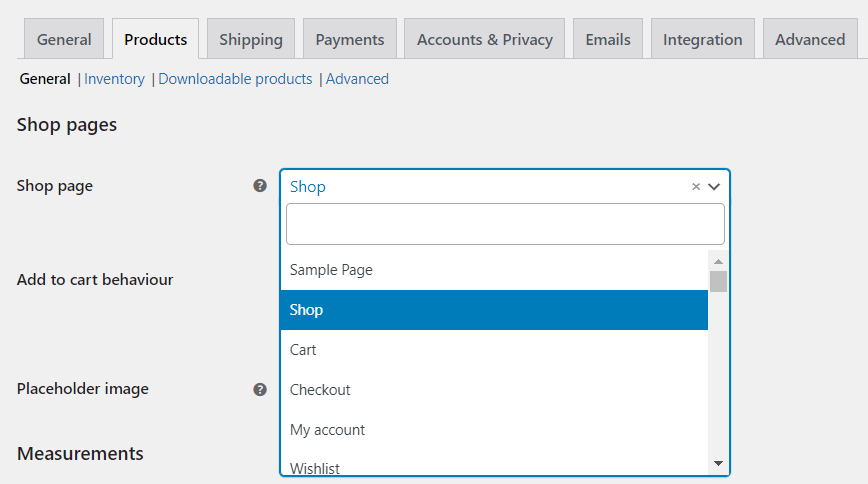
- Go to the WooCommerce > Settings > Products.
- Choose the new page from the list of Shop Page.
This is how the product table with the sorting options is displayed to your customer if you add the sorting options to the sidebar:
How to download the WooCommerce product table plugin?
The WooCommerce product table plugin is an advanced WooCommerce plugin that allows you to display your product page to users using very beautiful tables. Creating customer friendly product tables with various features such as filtering, sorting, adding multiple products to a cart at the same time, etc. can definitely help you attract more customers and boost your sales.
To download the product table plugin and create a customized product table with sorting option, click here.
TABLEiT – Product Table for WooCommerce
The easy way to create custom WooCommerce product table with sorting by attributes
Conclusion
Adding sorting options to a WooCommerce product table helps customers compare products faster and make better buying decisions. Instead of browsing products in a fixed order, shoppers can sort the table by the information that matters most to them, such as price, attributes, custom fields, or product details.
The default WooCommerce sorting options are useful for simple shop pages, but they can be limited when you need a table layout or more control over sortable product data. If your store has many products, custom attributes, technical specifications, or wholesale-style ordering, a sortable product table can create a much better shopping experience.
With TABLEiT – Product Table for WooCommerce, you can build custom product tables, add sorting to selected columns, create Sort By options, display product data clearly, and place the table on any page with a shortcode. This gives store owners and WooCommerce developers a flexible way to improve product browsing without relying on the default shop layout.
Sorting is most valuable when customers can act on the results immediately. Continue reading here for the broader discovery and ordering approach.
FAQ
1. How do I sort products in WooCommerce?
WooCommerce lets you sort products by default options such as popularity, rating, latest, and price. You can also manually change product order from the product list or customize sorting options depending on your store setup.
2. Can I create a WooCommerce product table with sorting?
Yes. With TABLEiT, you can create a product table and add sorting options to columns such as price, attributes, custom fields, and other product data.
3. How can I sort WooCommerce products by attribute?
To sort WooCommerce products by attribute, the attribute should be displayed in the product table as a column. Then you can enable sorting for that column so customers can sort products by values like size, color, weight, or other attributes.
4. What is WooCommerce custom product sorting?
WooCommerce custom product sorting means changing how products are ordered beyond the default sorting options. This can include sorting by custom fields, attributes, SKU, price, stock status, or other product information.
5. Can I manually sort products in WooCommerce?
Yes. WooCommerce allows manual product sorting, but it can become time-consuming for large catalogs. A sortable product table gives customers more control because they can choose how they want to sort products on the frontend.
6. What sorting options should I add to a WooCommerce product table?
Useful sorting options include price, product name, SKU, stock status, rating, category, attributes, and custom fields. The best options depend on what customers need to compare before buying.
7. Is product sorting useful for large WooCommerce stores?
Yes. Product sorting is especially useful for stores with many products because it reduces browsing time and helps customers find relevant products faster.