
Your WooCommerce shop page is the heart of your online store. It’s the first place customers explore products, compare options, and decide whether to buy. A well-optimized WooCommerce shop page design can improve user experience, increase conversions, and help customers find products faster.
Unfortunately, the default WooCommerce shop page layout is limited to simple grid or list views. If you want advanced filtering, custom layouts, quick add-to-cart options, or a more professional WooCommerce store design, you need to customize the shop page.
In this guide, you’ll learn how to customize WooCommerce shop pages using three practical methods: coding, Elementor, and the TABLEiT – Product Table for WooCommerce plugin. Whether you want to build a custom WooCommerce shop page template or improve your store’s shopping experience, these methods will help you create a faster and more user-friendly store.
Before rebuilding the shop page, it helps to review the full table-based approach. The iThemeland product table guide brings the main UX and catalog decisions together.
Quick Answer:
You can create a custom WooCommerce shop page with blocks, page builders, theme templates, or a product table layout. The best approach depends on whether you want a visual landing page, a category-focused layout, or a fast shopping interface where customers can search, filter, compare, and add products to cart quickly.
For a table-based custom shop page, use TABLEiT – Product Table for WooCommerce. After installing the plugin, Go to WordPress Dashboard > iThemeland > TABLEiT, create a new table, and use the Query tab to decide which products or categories appear. Then add product fields, filters, quantity selectors, variation options, and add-to-cart buttons from the table settings.
After styling the table, copy its shortcode and place it on your custom shop page. TABLEiT plugin is useful because it allows advanced filters, multi add-to-cart, mini cart support, responsive table layouts, and a faster product browsing experience than the default WooCommerce shop grid.
What is a WooCommerce shop page?
The WooCommerce shop page is a complete archive of your products that can be customized with various settings. When customers visit an online store to choose a product and finish their purchase, the first page they interact with is the shop page.
By default, the layout and appearance of the shop page depends on your theme and is usually as follows:
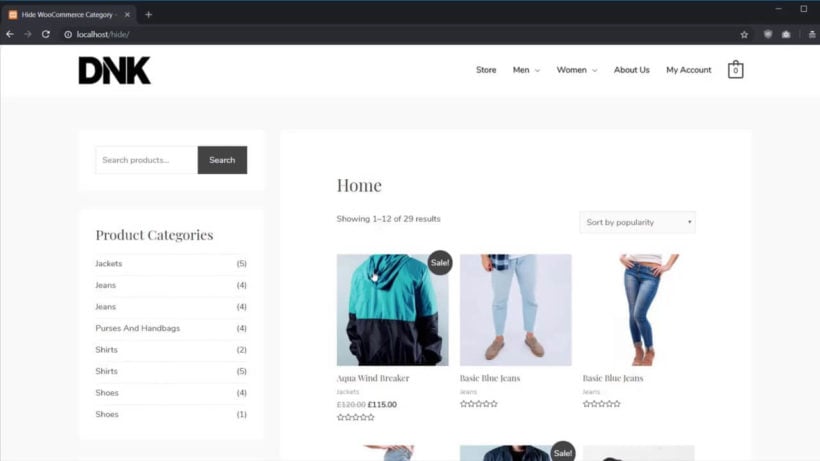
Of course, you can change the settings in the WooCommerce dashboard so that the products are displayed in a list instead of a grid mode.
The grid shop page design includes a large image, product name, and price. However, customers cannot view other information such as variables, or descriptions. They have no access to select the quantity or add to the cart on this page.
Although WooCommerce allows you to add a sidebar that displays some widgets like filters to customers, they are not enough to improve the customer buying experience.
According to a survey, customers tend to see all the information about the products on the shop page to quickly compare them. They want to go through all the steps of selecting products and purchasing them on the same page without any need to visit the page of each product, individually.
Therefore, you should customize the WooCommerce shop page and allow customers to:
- Filter the products they want based on different features such as price or category
- View different product information such as description, photo, price, variables, and even custom fields on the same page.
- Add as many products as they want to the shopping cart at the same time
- Change the number of products
- See the subtotal amount of their carts
- Etc
As a result, to keep your customers satisfied, you should use the following methods to build a custom WooCommerce shop page.
Custom WooCommerce shop page programmatically
The first method you can use for WooCommerce shop page customization is to add some simple codes to the WooCommerce theme. We introduce elementary codes to you, but if you have no experience in coding, we recommend that you do not use this method and look at the second and third methods of this guide.
Even if you’re an expert in coding, it is better to consider the following two points before going further:
- Backup your site data so that you can restore the information in case of any problems
- Instead of manipulating the main WooCommerce theme, create a child theme and insert the codes.
Now you can use the following codes for WooCommerce shop page customization:
Divide the store page into different columns and rows
If you want to display your products in 2 columns and up to 6 products in each row, you should open the created child theme text, then find the below two lines in the text:
 <main id=“main” class=“site-main” role=“main”>
</main><!– #main –>.
Now delete any text written between these two lines and replace it with the following code:
<?php echo do_shortcode ('[products limit="6" columns="2"]') ?>Then, Save the changes to apply this new layout to the WooCommerce shop page.
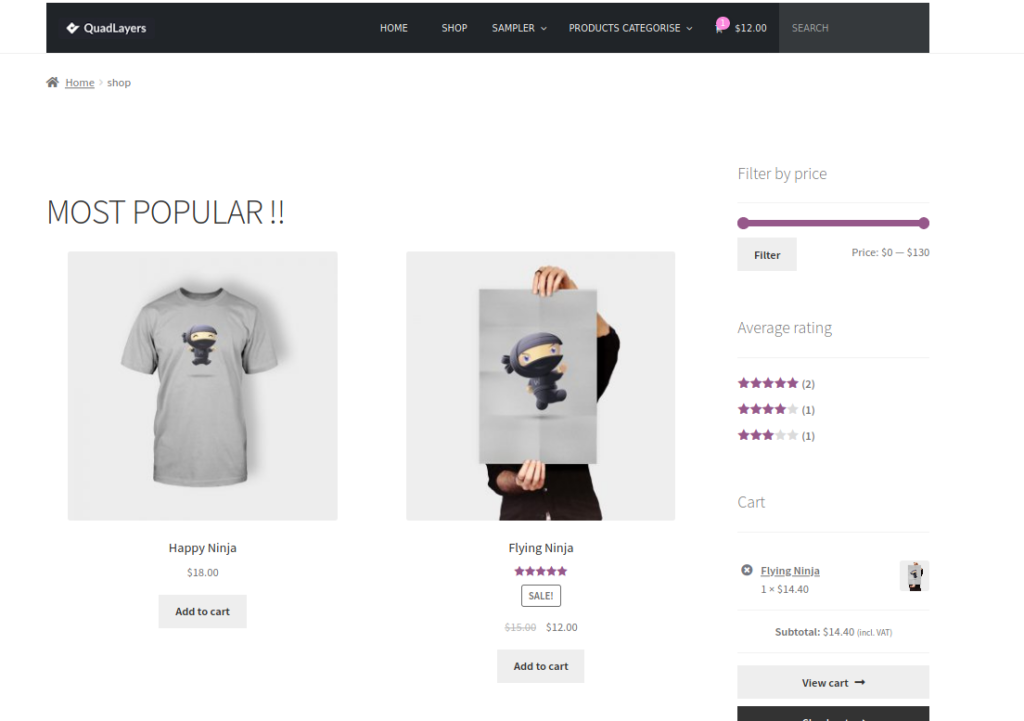
Display the most popular products on the shop page
Another way to customize your WooCommerce store page is to showcase your most popular products. For this, we use the following shortcode:
do_action('WooCommerce _before_shop_loop');
echo '<h1>MOST POPULAR !!</h1>';
do_shortcode('[products orderby="popularity" class="m-popular" columns="2" limit="2"]'); do_action('WooCommerce _after_shop_loop');
In this code, the products are displayed in two columns and two rows (columns=”2″ limit=”2″), but you can adjust these numbers based on your needs.
With a slight change in the above code, you can display top-rated products, best-selling products, and other products on the store page.
If customizing a WooCommerce shop page programmatically takes you a lot of time or you think you don’t have enough experience to insert different codes into the WooCommerce theme, don’t worry, you can easily give your shop page a great look with the help of two other methods.
Customize the WooCommercr shop page with Elementor
To customize the WooCommercr shop page with Elementor, first, you need to install Elementor Pro 2.1 on your WordPress website and please note that you must have already installed WooCommerce 3.4 or higher.
When you successfully activate the Elementor Pro, follow the below steps:
- Go to the below address in the Elementor Editor
Templates > Theme Builder > Product Archive
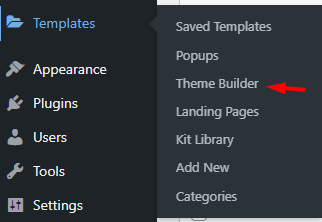
- Click Add New on the top right corner of the screen.
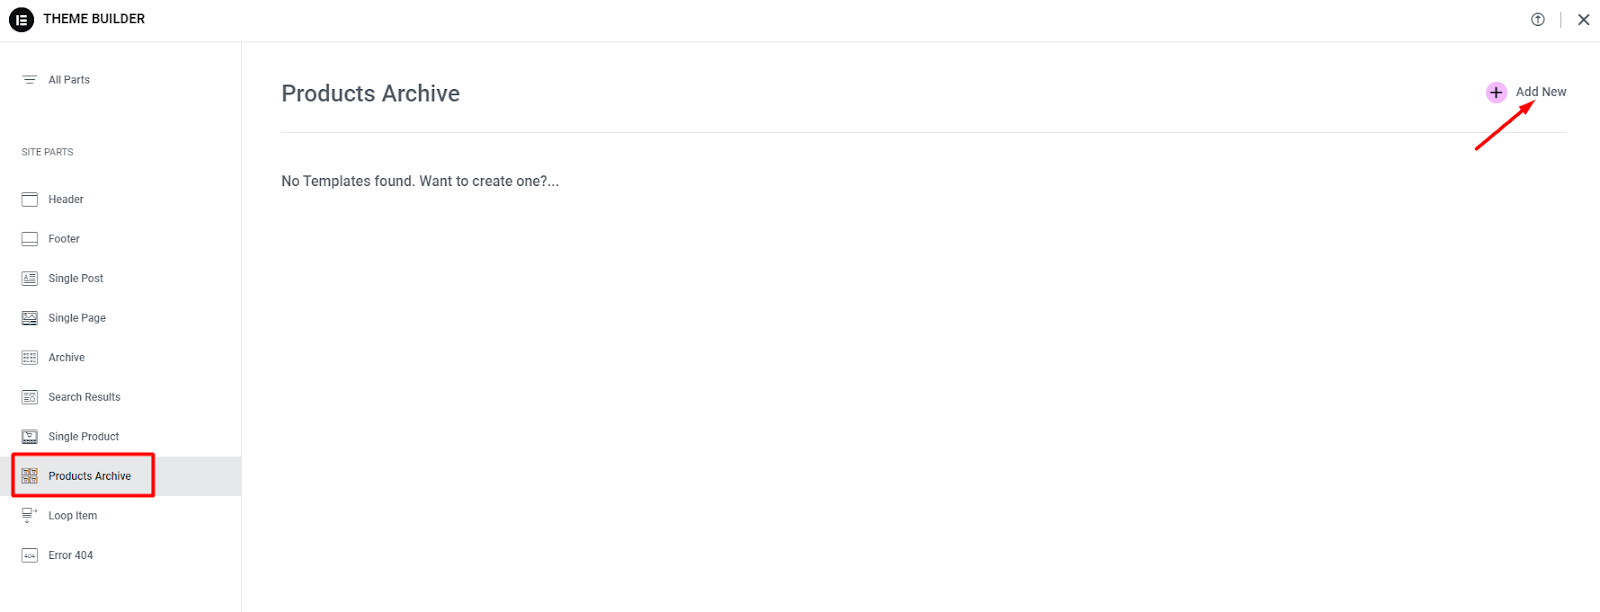
- Select Product Archive from the dropdown

- Choose one of the templates and press Insert
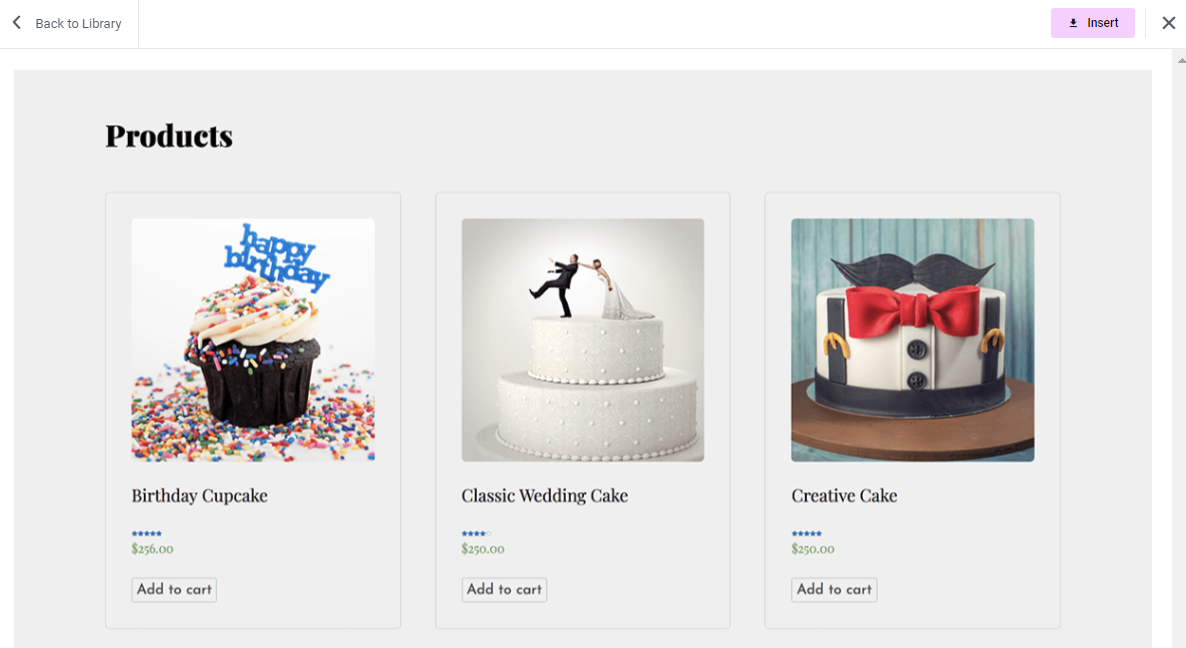
if no product archive templates have been created yet, you need to create one by using the two below options:
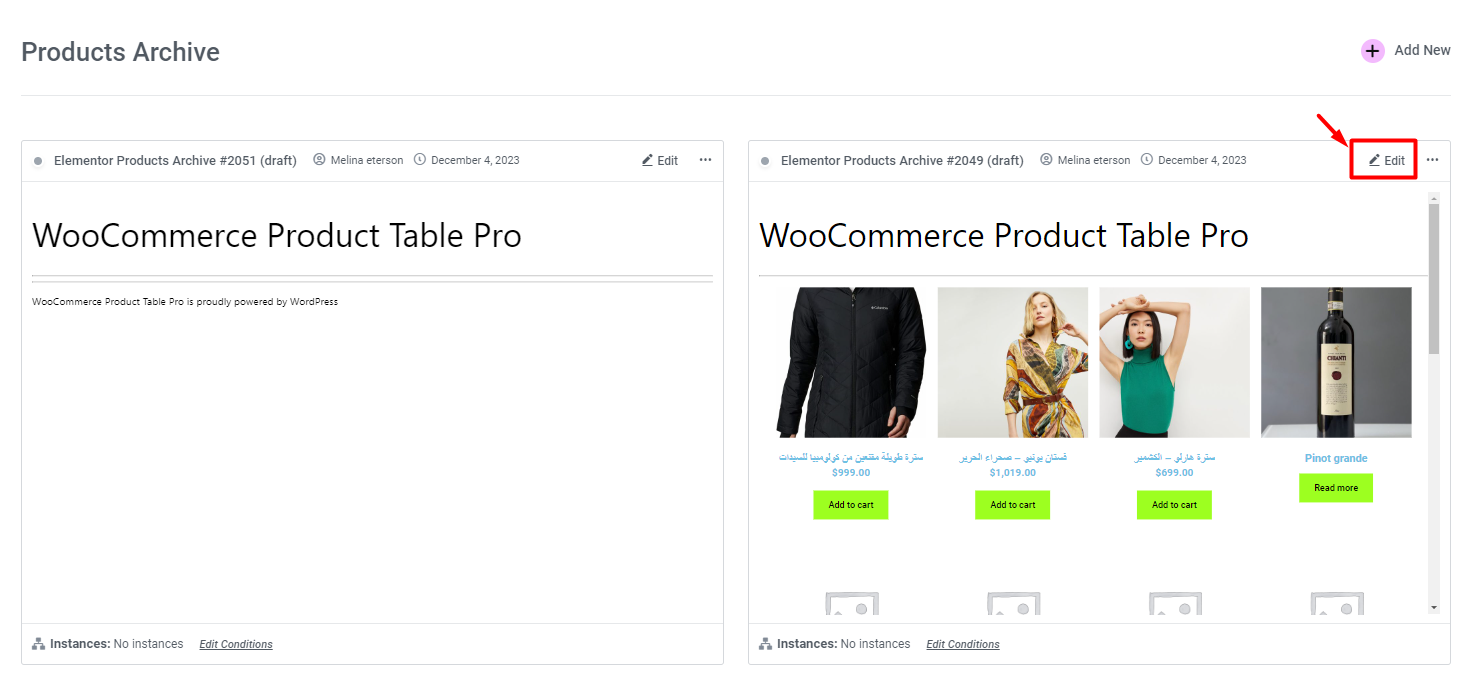
- Products label in the sidebar: Click on this icon to show all Products on the page.
- Edit link in the top right corner of the Template: Click on this link to open the Elementor editor
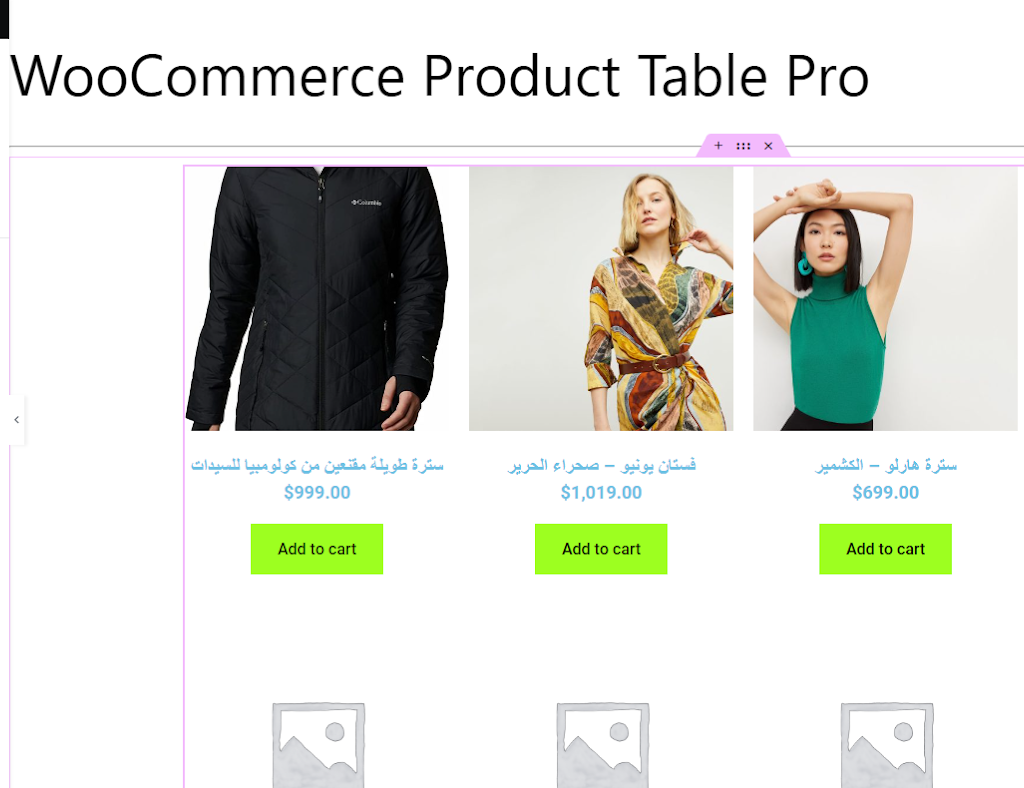
- When customizing the WooCommerce shop page with Elementor has been finished, press the Publish button.
This Archive Template will automatically replace the shop page of your website and it may look like this:

WooCommerce shop design with Gutenberg WordPress
One of the easiest ways to change WooCommerce shop design is by using the WordPress Gutenberg editor. To use this method, you can follow the below instructions:
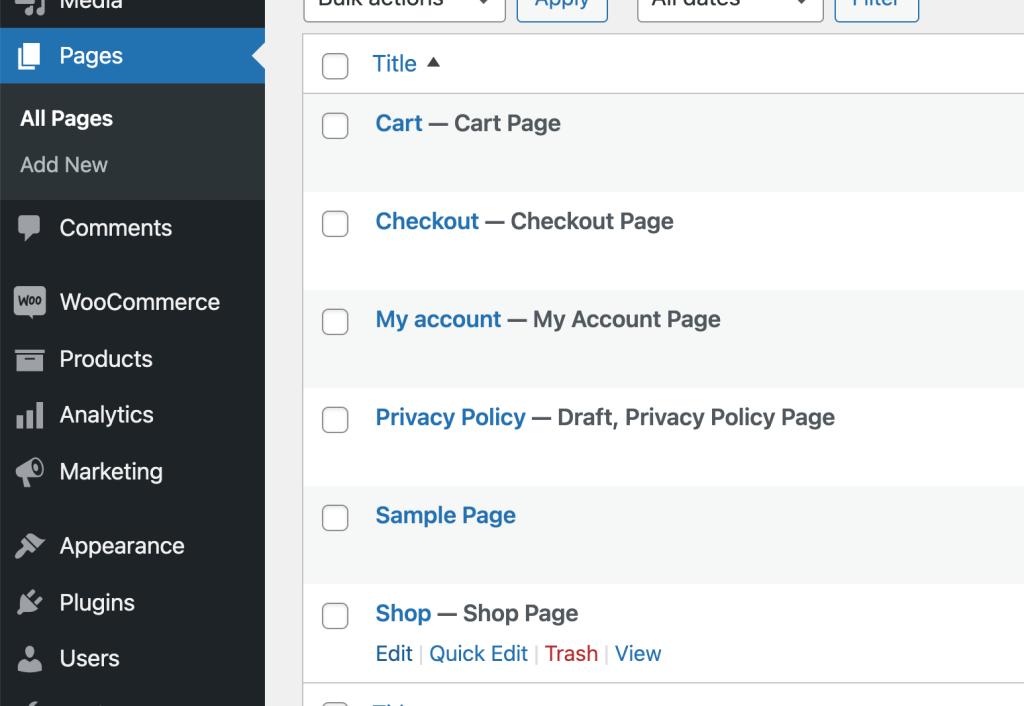
- Go to WordPress Dashboard > Pages > Shop
- Hover over the shop page and click on Edit to open the page in the Block Editor.
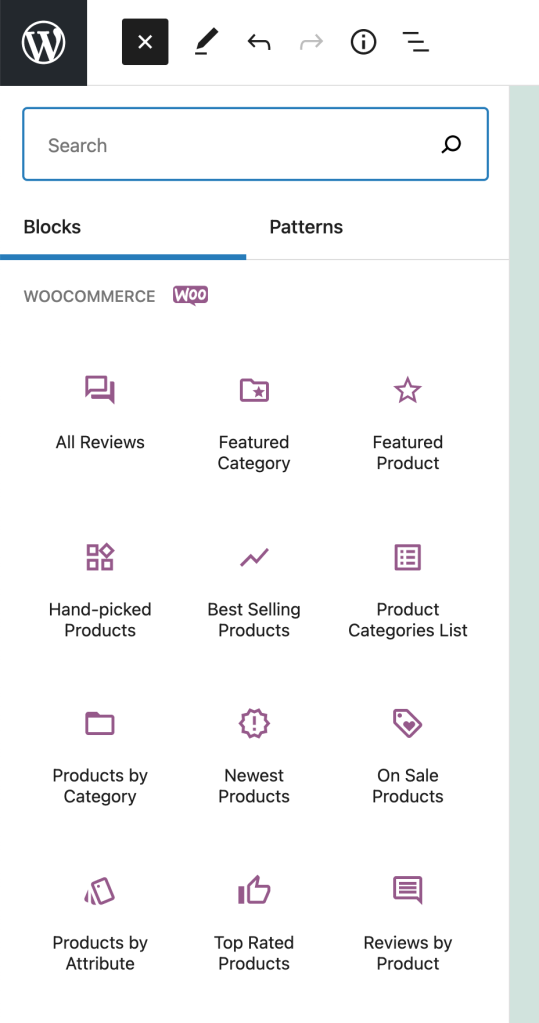
- Click on the Blocks tab and find the special section just for WooCommerce blocks.
- Simply select one block to add it to your WooCommerce shop page.
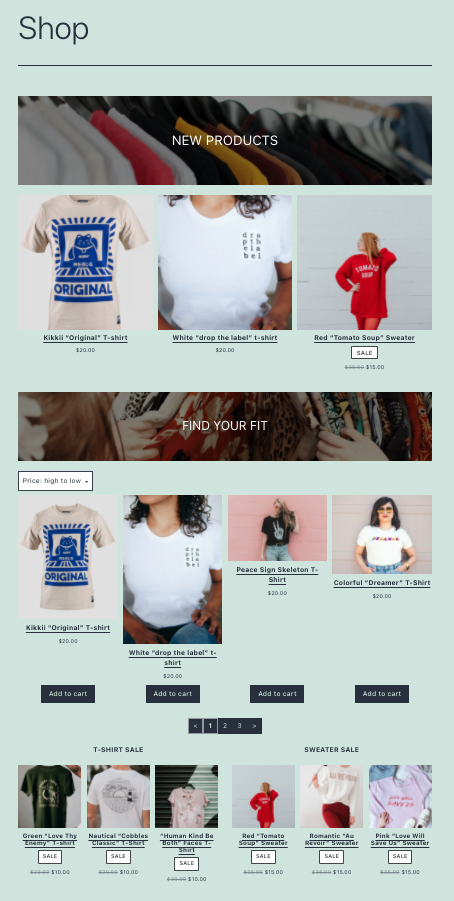
– Keep adding blocks one after the other until you see your favorite shop page layout.
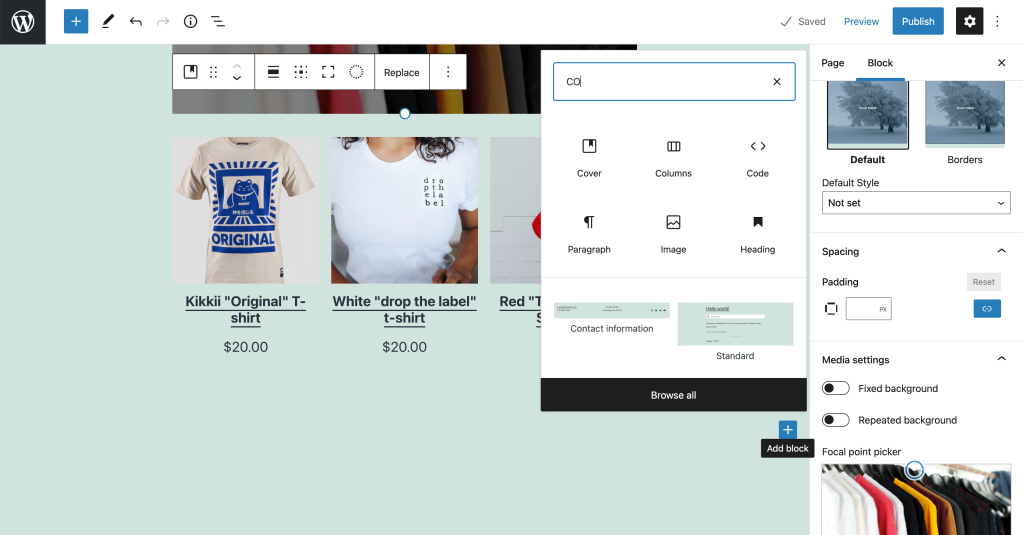
- Add different columns if you want to show blocks next to each other.
- Add a new row of columns by repeating the process to edit the WooCommerce store page.
- Customize the WooCommerce shop page by:
- Changing the number of columns and rows.
- Toggling on or off the product title, price, rating, and more.
- Revising the order of the products.
- Click on each block you added and explore the Block settings that appear in the right-hand section.
- Press the Preview button in the top right-hand corner of the page, to see the result of the WooCommerce shop page customization.
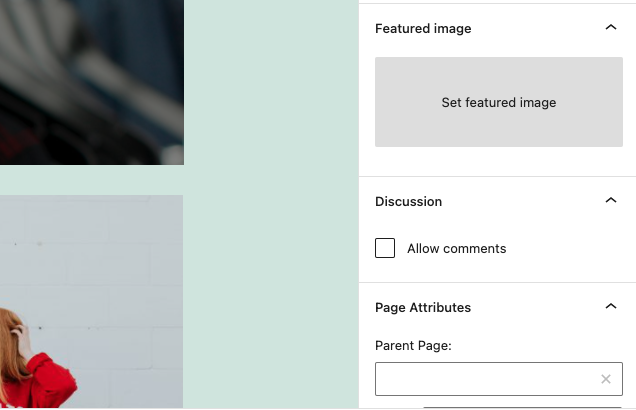
- Set a beautiful featured image from Media Library for the shop page to have a great look on social media.
- Press the Publish button in the top right corner of the screen.
- Open the WooCommerce shop page in the front end, and test the filter and sort tools and make sure that the products are displayed correctly.
Also, visit your WooCommerce Shop page on the mobile, and make sure everything looks perfect.
WooCommerce shop page customization plugin
The best and easiest method to build a custom WooCommerce shop page is the WooCommerce product table plugin. This plugin provides you with a lot of useful tools for making a customer-friendly product table with all the options you need to satisfy the buyers.
Let’s review the step-by-step guide for creating a custom WooCommerce shop page template with this plugin.
Step 1: Install WooCommerce shop page customization plugin free
Just like other WordPress plugins, first you need to download the plugin here, and then install it on your website.
TABLEiT – Product Table for WooCommerce
The easy way to build a custom WooCommerce shop page in table list view
As soon as you activate the plugin, you can see the iT Product Table tab in the WordPress dashboard.
To create a new table, click on the Add New Table option then scroll down the page and press the Get Start button.
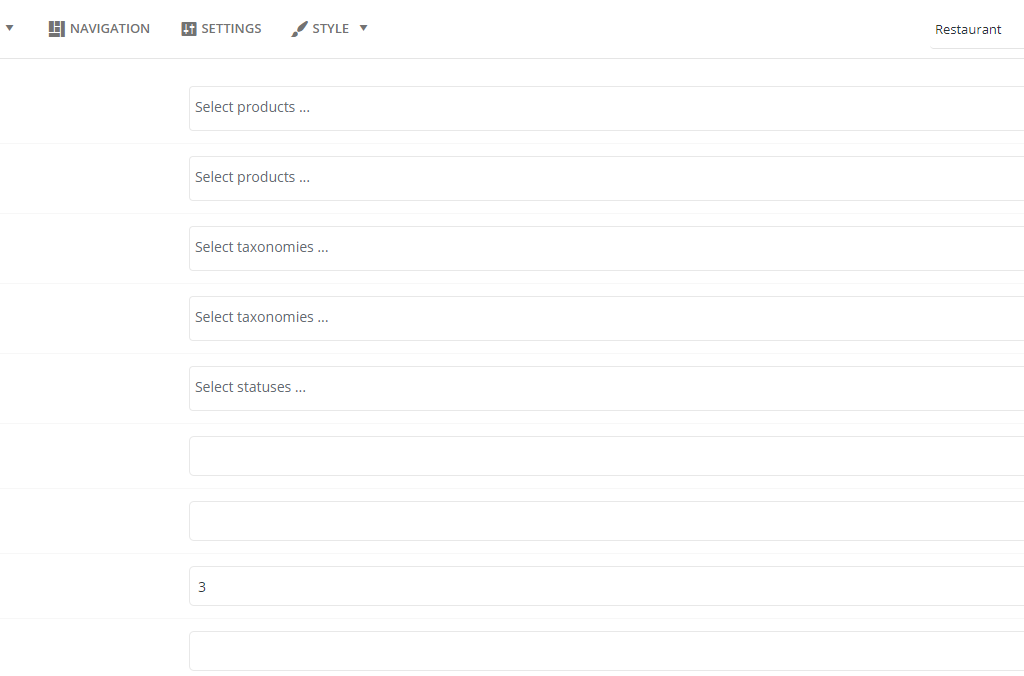
By doing this, all products of your WooCommerce store will be Imported to the new table automatically. However, you can specify to display some products or categories by making a query in the Query tab as illustrated below:
In this guide, we have completely described the options available in the Query tab of the WooCommerce product table plugin.
After adding the desired products to the table, you are now ready to customize the WooCommerce shop page by displaying product features in separate columns.
Let’s see how.
Step 2: Add Columns to customize the WooCommerce shop page
Adding columns to the product table is the easiest task you have. To fulfill this task, you just need to follow the below steps:
- Press Column tab and choose one of the devices from the list: Laptop, Table, Mobile
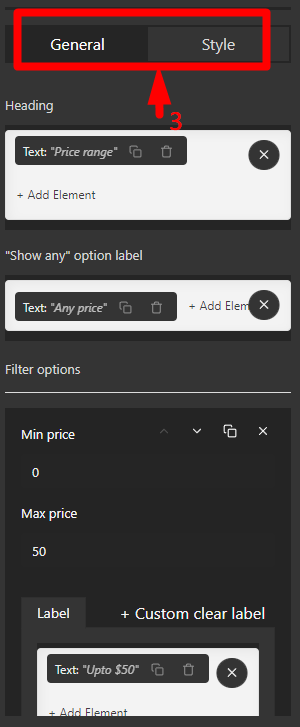
- Click on Add a Column button to see a new box on the page with two sections: Heading and Cell Content
- Click Add Element in either box to see the list of elements you can use in the left panel, then choose one of the elements to see in the Heading or Cell Content of the columns
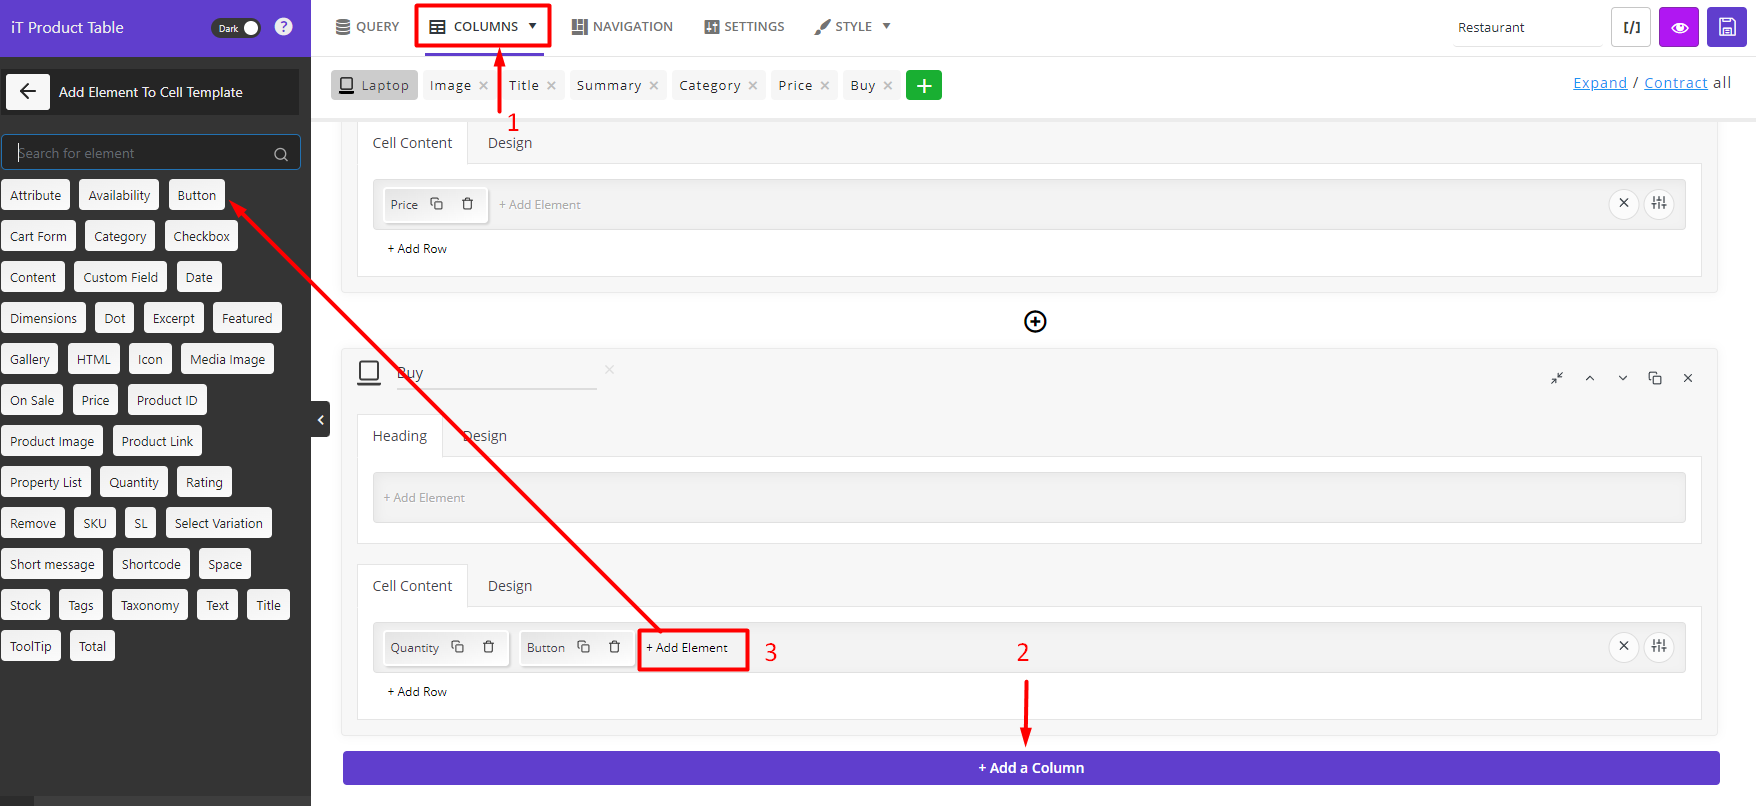
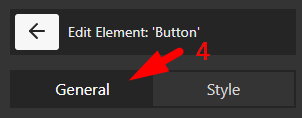
- Change the items in the General and Style tabs of the selected Element to customize it on the WooCommerce shop page
By repeating the above-mentioned steps, you can add as many columns as you need to build a custom WooCommerce shop page.
There are more options available for WooCommerce shop page customization in the Columns tab. Click here, to learn about them.
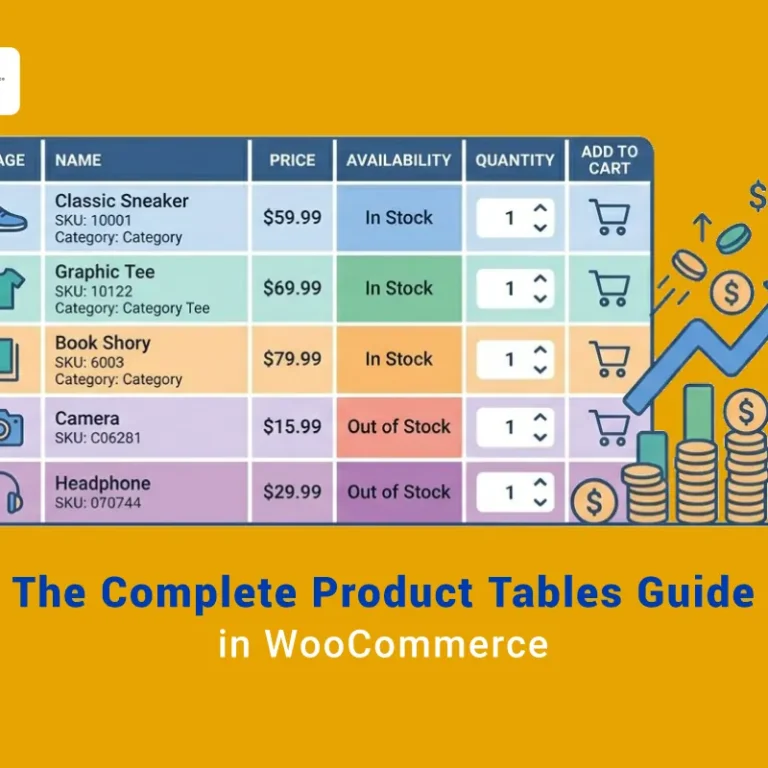
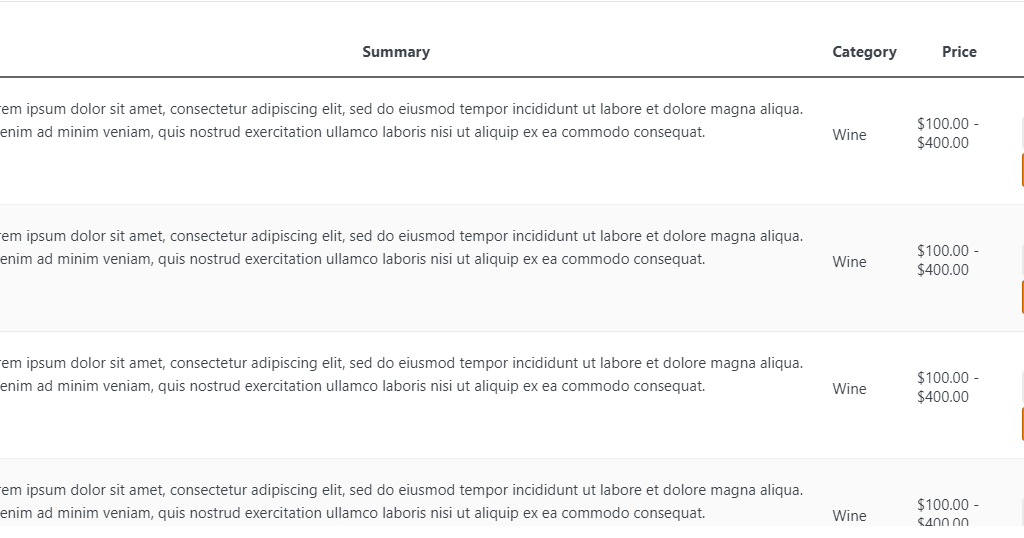
For example, we tried to build a custom WooCommerce shop page for a restaurant menu by adding the below columns to the table:
- Check box: This element is useful when customers need to select dome products and add them to their carts directly on the shop page
- Name: We chose Title from the list of elements to display the product title in this column
- Summary: We added Content from the list of elements for this column and customized it to display a brief description of the product on the shop page
- Category: By adding Category from the left panel, we tried to show product category in the table to the customers
- Price: We chose the Price element for this column to let customers see the product’s regular prices in the table
- Quantity: We added this element to allow customers to change the product quantity directly on the shop page
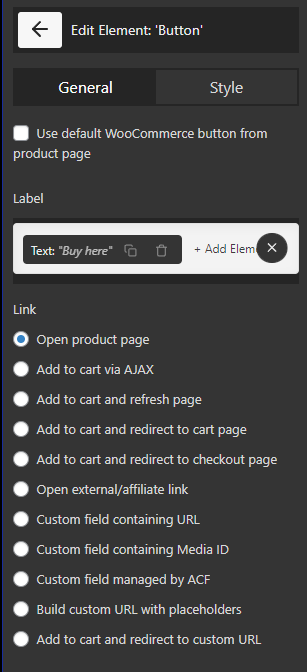
- Add to Cart and Buy Here buttons: By adding a button from the list of elements two times and customizing them individually, we tried to let customers Add products to the cart or see the product page if they want by pressing Add to Cart or Buy Here button, respectively.
To see how the shop page of our restaurant menu looks, we pressed the Preview icon on the top of the table and the result was exactly as we expected:
Step 3: Add Extra Features to the Navigation bars of the WooCommerce shop page
The next step to building a custom WooCommerce shop page is to add extra options like filtering, sorting, or search boxes to the navigation bars.
All elements you need to customize the navigation bars of your shop page are available in the Navigation tab of the WooCommerce product table plugin.
So, you can add any feature to your product table by following the below instructions:
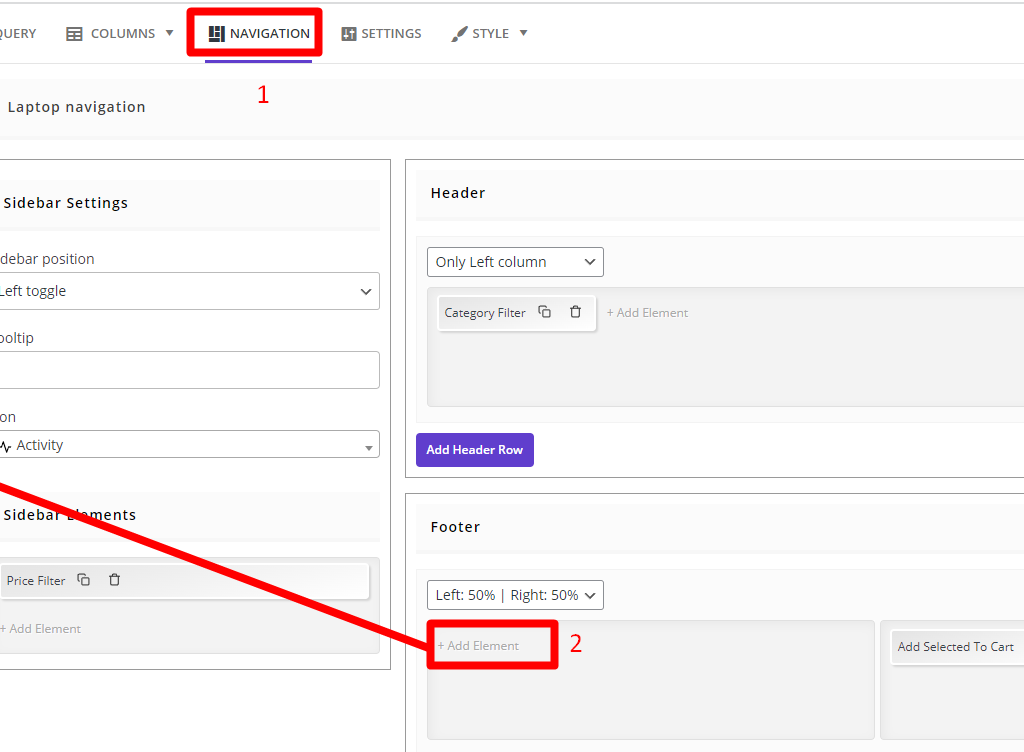
- Open the Navigation tab to see the navigation bars’ editable boxes including Header, Footer, Sidebar
- Click on the Add Element option in one of the Navigation bars to see a list of elements in the left panel. Then choose one of the Elements
- Edit the items in the General and Style tabs of the selected element to customize it on the WooCommerce shop page
In this example, we tried to add the below features to our table:
- Price Filter to the sidebar
- Add Selected to Cart to the footer
- Category Filter to the Header
If you are curious to see what these features look like in the product table, don’t worry we will show you in the last step.
Now, let’s try to customize the style of the WooCommerce shop page.
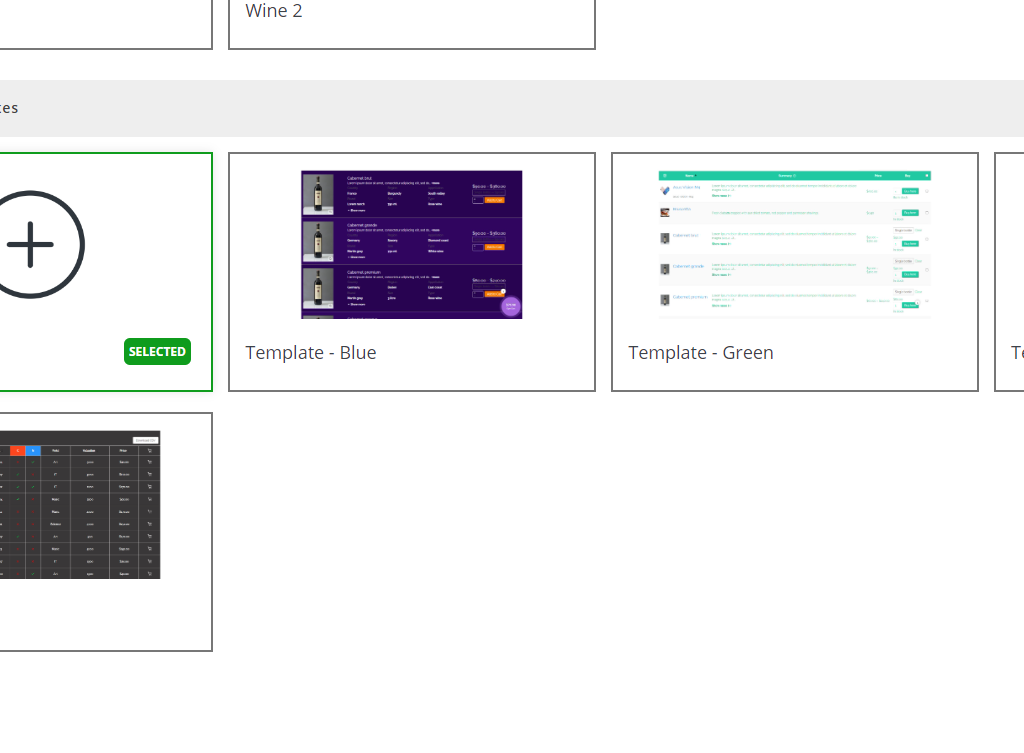
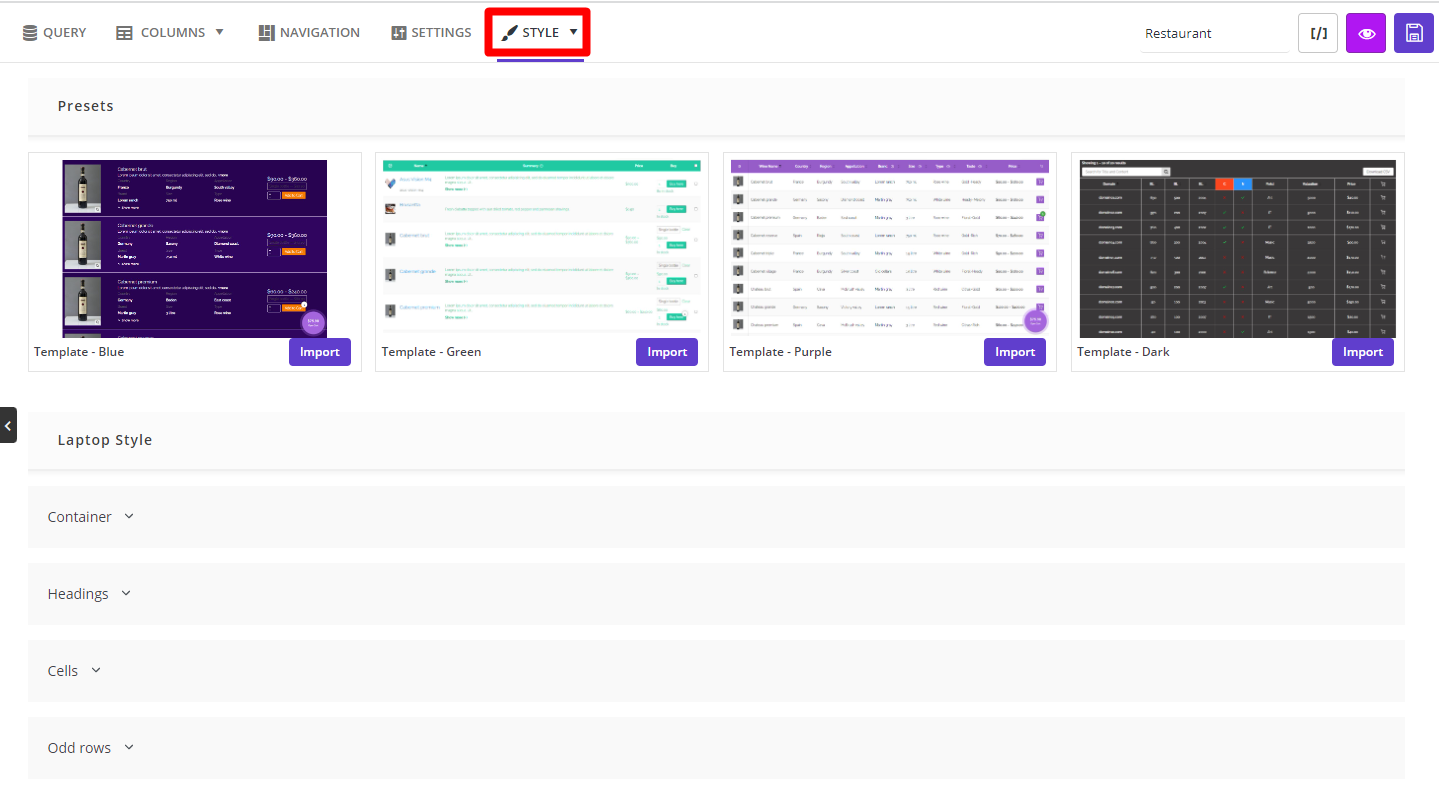
Step 4: Choose a Template or customize the WooCommerce shop page style
The final step to creating a customer-friendly product table is to set up a custom WooCommerce shop page template. To do this, go to the Style tab of the WooCommerce Product Table plugin, then choose one of the preset templates or try to customize the table by editing the items available in different parts like Container, Headings, Cells, etc.
Now let’s see how you can display the customized shop page to your customers.
Step 5: Use Shortcode to display the product table to the customers
To display the customized shop page you have created with the WooCommerce product table plugin, you can simply copy the shortcode by clicking on the icon designed in the top right corner of the page:
Then paste this shortcode to the WordPress page by using either the default editor or Elementor.
Let’s review both methods together:
Use WordPress page editor
This is the simplest way you can display the custom WooCommece shop page to the customers:
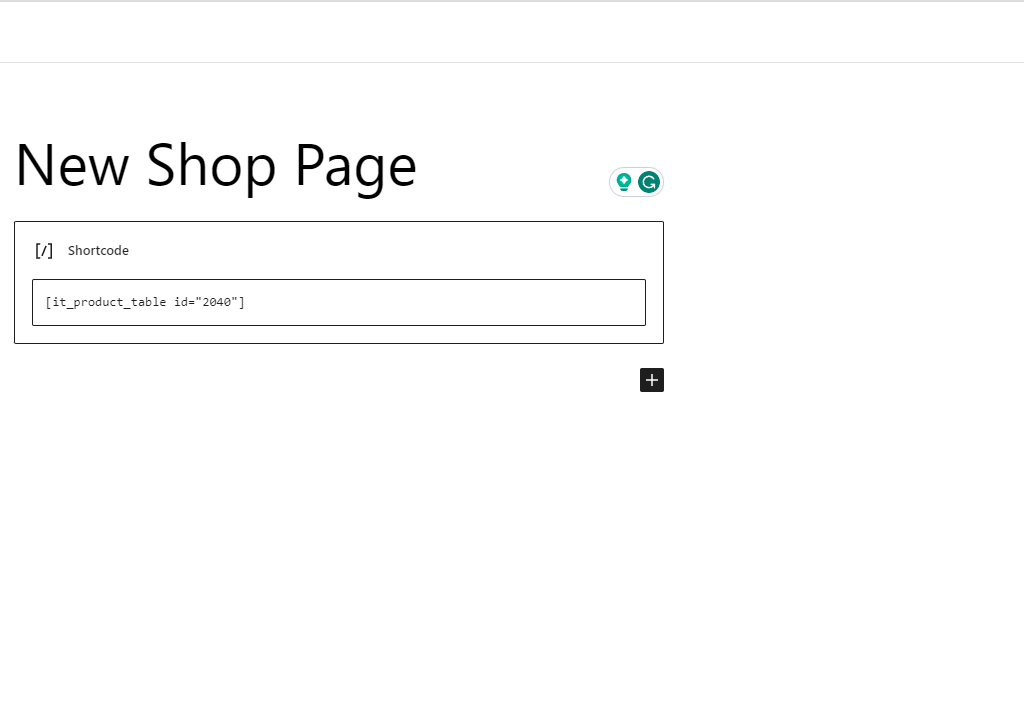
- Create a new page in WordPress
- Paste the copied shortcode to the page
- Save and publish the page
- Go to the WooComemrce Settings page and open the Product tab
- Locate the Shop page field and choose the page you have created from the dropdown list
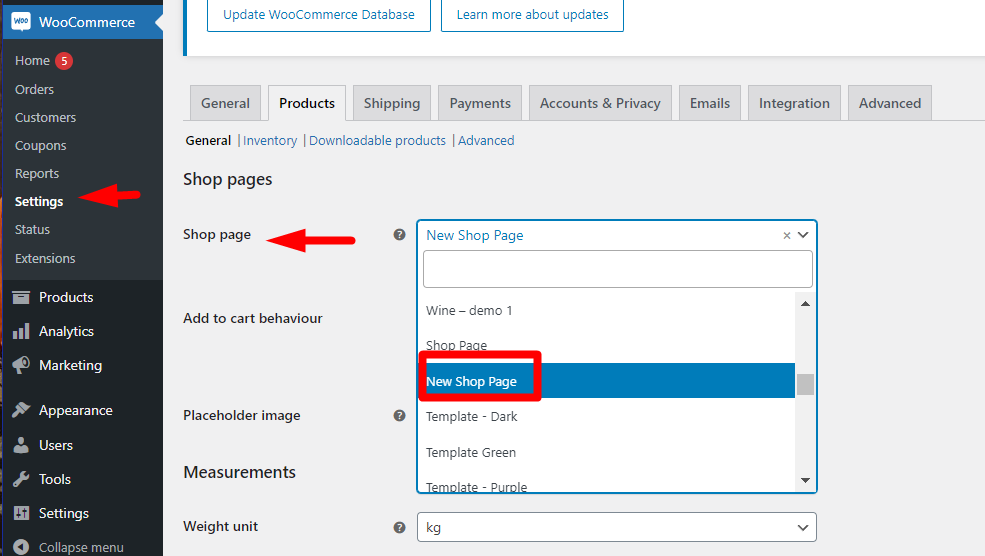
- Click on the Save Settings button
Now if you open the shop page of your website you can see the product table with all the features that you have added:
Bonus features of the WooCommerce product table plugin
WooCommerce product table plugin has many awesome features allowing you to add extra options to your product table and make a more memorable experience for your customers.
Here, you can find some of them:
Add a mini cart option to your shop page
A mini cart is an essential feature for customer customer-friendly WooCommerce shop. It allows direct checkout and lets customers add or remove products from their cart easily. They can review the items, and total amount of their orders and change the quantity with one click.
You can display the mini cart as floating or toggle in different sections of your shop page like header, footer, or sidebar.
To enable your customers to enjoy using the Mini Cart on the WooCommerce shop page, follow the below instructions:
- Go to the Navigation tab.
- Locate one of the Navigation areas like the footer.
- Press the Add Element option.
- Choose Mini Cart from the list of elements from the left panel.
- Customize the Mini Cart Type -For example Float Toggle.
- Set other configurations in the General and Style tab.
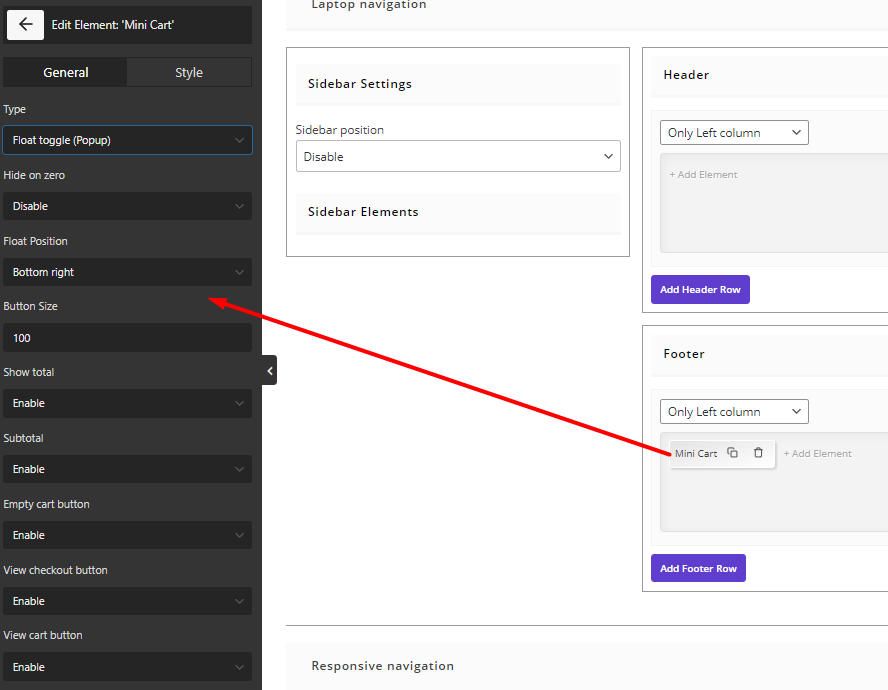
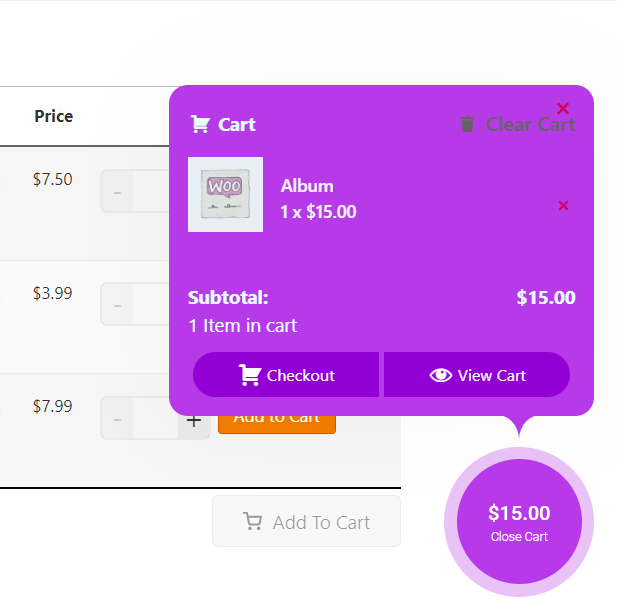
- Save the table and go to the shop page to see the result.
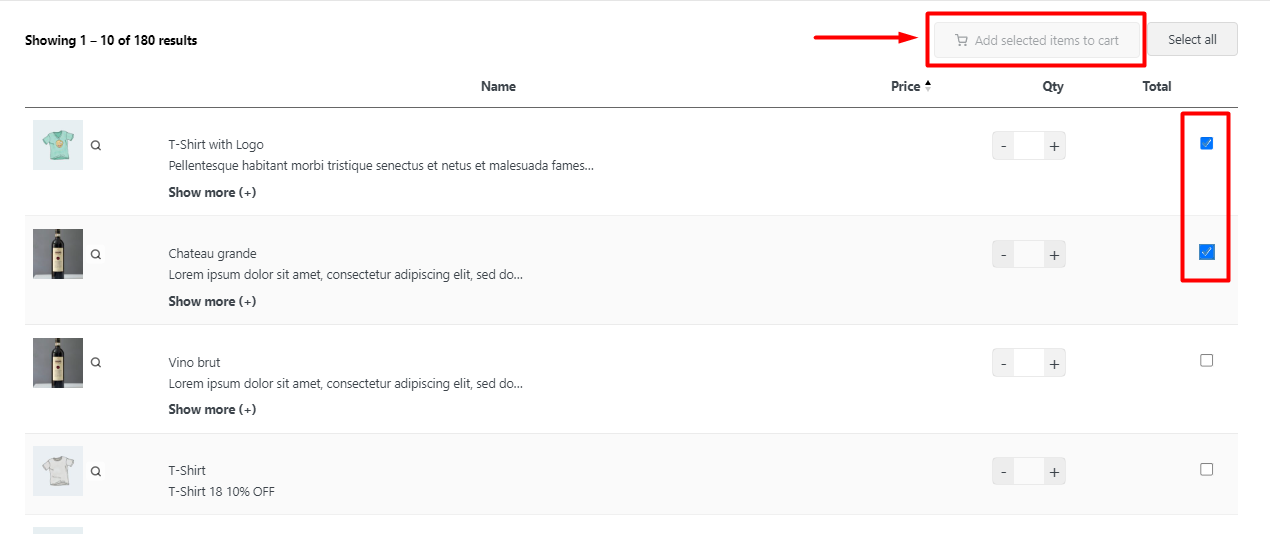
Add multiple products to the cart
Multi add to cart is another useful feature satisfying your customers when they need to order more than one product from your store. By activating this option, you can let them mark some products on the WooCommerce shop page and add them to their carts simultaneously.
To make this happen, try to:
- Go to the Columns tab and add a Checkbox column to the table.
- Open the Navigation tab and locate one of the navigation areas like the header.
- Press Add Element then choose Add selected to Cart.
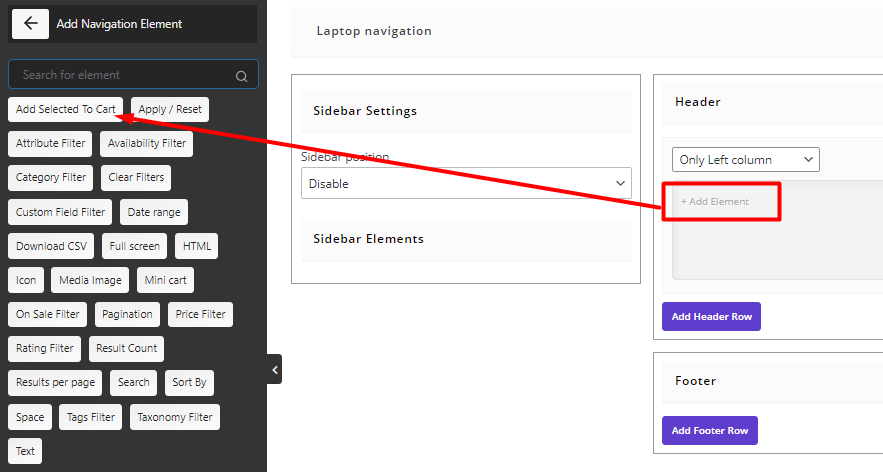
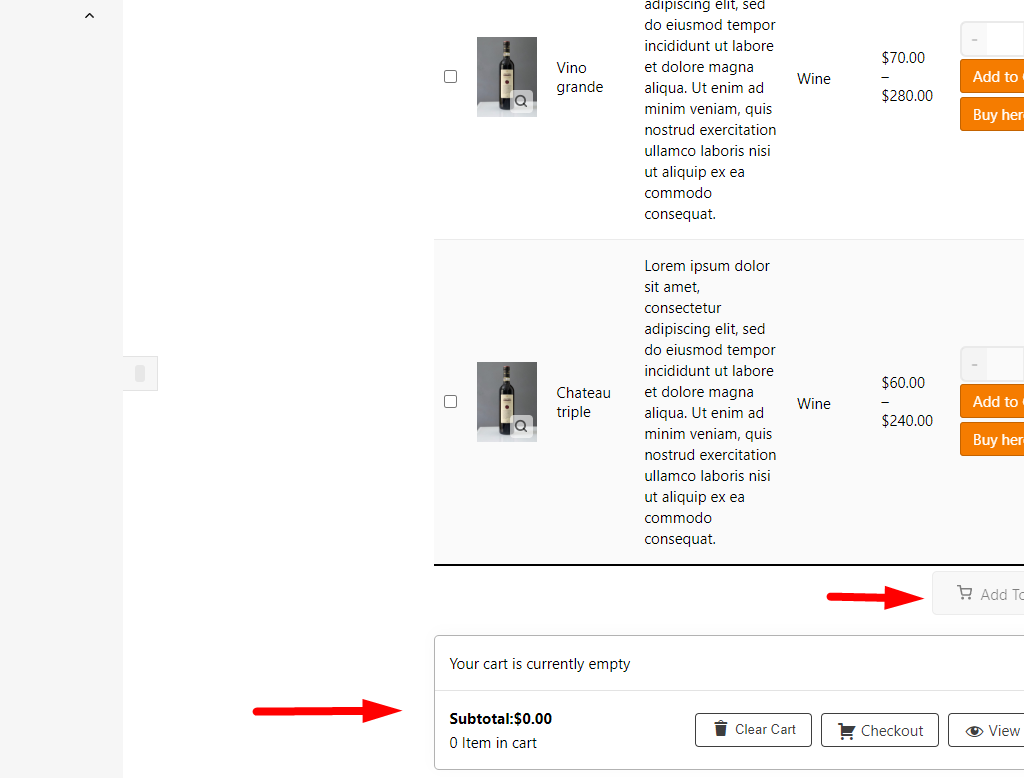
- Save your table and you can see the result as below:
Use Elementor
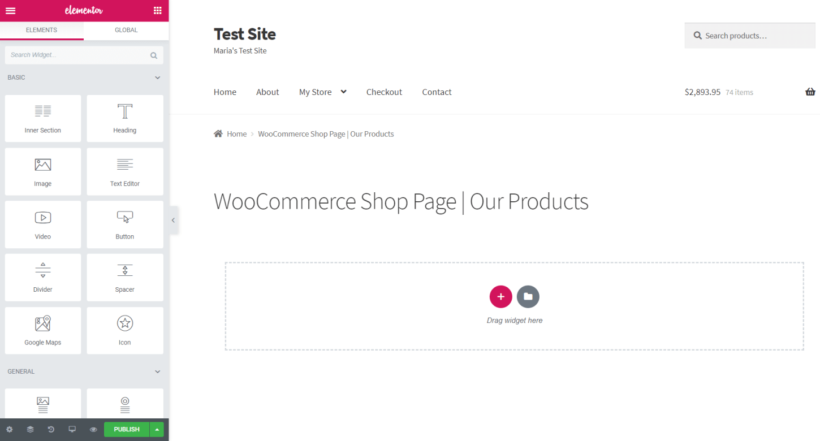
Create a new page or post in WordPress and click the Edit with Elementor button.
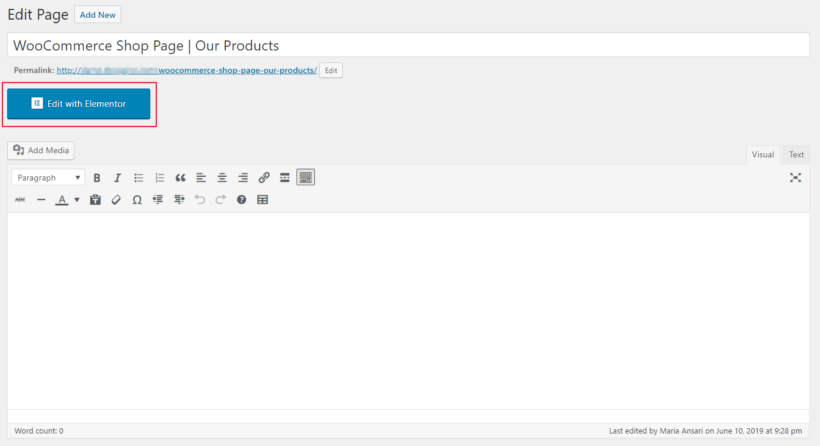
Add the Shortcode widget to the page from the left panel:
Paste the copied shorts into the widget’s text box:
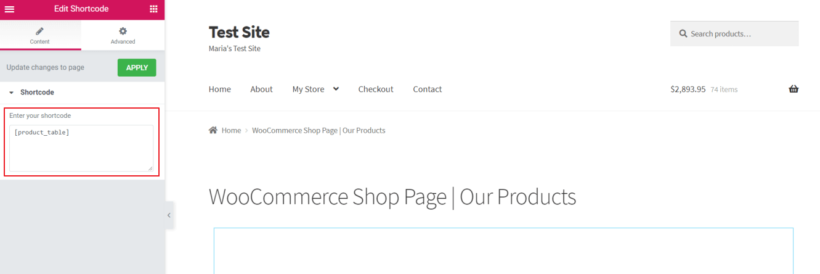
Click the Apply button then publish the page.
Why does WooCommerce shop page design matter?
WooCommerce shop page customization is a strategic move to increase the effectiveness and attractiveness of your online store. Attractive and user-friendly design can significantly influence the shopping experience of customers and their decision to buy. Here are the key reasons why you need to customize the WooCommerce shop page:
Increase brand awareness
The design and functionality of your store page help create a memorable first impression on customers. A unique and well-designed layout can convey your brand values and encourage customers to explore further.
Customizing the WooCommerce shop page can help you stand out from the competition, provide a cohesive look to your site and other company profiles, and build trust by providing reviews and other symbols of trust.
Improve user experience
Easy navigation and optimization for quick and easy shopping are very important in WooCommerce shop page design. Customization allows you to organize products in a way that makes sense to your target audience. It can also make it easier for customers to find what they’re looking for. The faster they find the products and get the information they need to make a comfortable purchase, they are more attracted to your store.
Increase product sales and conversion rates
A WooCommerce shop page customization can include targeted calls to action (CTA), compelling product descriptions, and Reviews and Ratings that are strategic to encourage purchase.
Head over competitors
In a crowded online marketplace, a WooCommerce custom shop page helps differentiate your store from the competition and provides a unique shopping experience that can foster brand loyalty and repeat purchases.
Meet the customer demands
Customization means you can quickly adapt your layout and content based on customer feedback and shopping behavior. Ensuring a continuously improving shopping experience, helps you provide an experience tailored to your products and audience. For example, a combination product categories filter with multi add to cart option allows customers to quickly scan the options and add them to their shopping cart.
Highlighting special products and promotions
With WooCommerce shop design, you can highlight offers, or promotional plans and make sure your key offers immediately grab attention. Editing your WooCommerce store page allows you to capture the attention of your customers and direct their interest to special products and categories, promotional offers, and things like free shipping or satisfaction guarantees.
TABLEiT – Product Table for WooCommerce
The easy way to build a custom WooCommerce shop page in table list view
Conclusion
A custom WooCommerce shop page can dramatically improve the shopping experience, help customers discover products faster, and increase your store’s conversion rate. Whether you choose coding, Elementor, Gutenberg blocks, or a plugin-based solution, customizing your WooCommerce shop page gives you more flexibility and control over your store design.
If you want the fastest and easiest way to create a professional WooCommerce shop page template with advanced filters, multi add-to-cart, mini cart support, responsive layouts, and product table views, the TABLEiT – Product Table for WooCommerce plugin is an excellent solution for WooCommerce shop page customization.
A custom shop page should support discovery as well as visual design. The complete guide to WooCommerce product tables explains how to balance both goals.
FAQ
How do I customize the WooCommerce shop page without coding?
You can customize the WooCommerce shop page without coding by using Elementor, Gutenberg blocks, or plugins like the TABLEiT plugin. These tools allow you to change layouts, add filters, create custom product tables, and improve navigation visually.
What is the best plugin for WooCommerce shop page customization?
One of the best plugins for WooCommerce shop page customization is TABLEiT plugin because it allows you to create custom product layouts, advanced filtering systems, mini carts, bulk add-to-cart functionality, and responsive table views.
Can I create a custom WooCommerce shop page template?
Yes, WooCommerce allows you to create a custom shop page template using code, page builders like Elementor, or WooCommerce customization plugins. This helps you fully control the design and functionality of your shop page.
How can I improve the WooCommerce shop page design?
You can improve WooCommerce shop page design by adding product filters, search bars, quick add-to-cart buttons, product comparison features, better layouts, and mobile-friendly navigation. A clean and user-friendly design usually increases conversions.
Can Elementor customize WooCommerce shop pages?
Yes, Elementor Pro includes WooCommerce widgets and product archive templates that allow you to edit and customize WooCommerce shop pages visually without writing code.
How do I change the WooCommerce shop page layout?
You can change the WooCommerce shop page layout through your theme settings, custom code, Gutenberg blocks, Elementor templates, or plugins that offer custom product grid and table layouts.
Why is WooCommerce shop page customization important?
WooCommerce shop page customization improves user experience, helps customers find products faster, increases average order value, and makes your online store stand out from competitors.
Can I add filters to the WooCommerce shop page?
Yes, you can add filters such as category filters, price filters, stock filters, and search boxes using WooCommerce blocks, Elementor widgets, or WooCommerce product table plugins.
What is the easiest way to create a custom WooCommerce shop page?
The easiest method is using a WooCommerce customization plugin like TABLEiT because it allows you to build advanced shop page layouts without coding.
Does customizing the WooCommerce shop page improve SEO?
Yes, a better WooCommerce shop page structure can improve SEO by increasing user engagement, reducing bounce rate, improving navigation, and helping search engines better understand your product pages.