Bulk edit multi WooCommerce products status settings is one of the easiest tasks you can do in the PBULKiT – Bulk Edit WooCommerce Products – Plugin in order to manage and control the status of your products.
Filtering in our plugin can help you to select exactly the products to bulk edit their status.
Read More: How to filter products on PBULKiT – Bulk Edit WooCommerce Products – plugin?
After filtering the preferred products by using the “Filter Form“, everything is ready to bulk editing status settings in the bulk edit option.
Click on “Bulk Edit” in the main page of our plugin to start bulk editing status.
A new screen will appear which is by default in the General Tab. In this tab, you have to scroll down to see the “Product Status” Option:
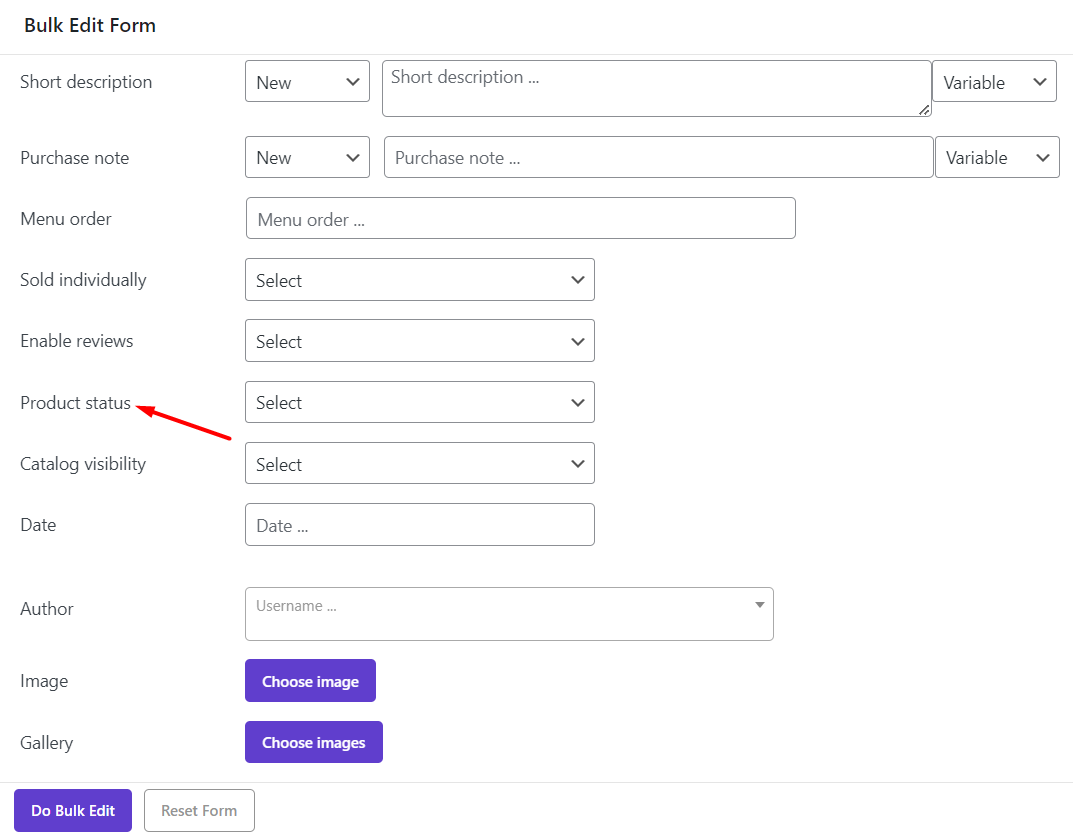
As you can see in the below picture, There are four different options. You can use them to Change multi-product status settings, Such as:
- Draft: The products which are not ready for publication and need more details before publishing.
- Pending Preview: These products need to be reviewed to be published in the online store.
- Private: A product with private status is manufactured by another producer or manufacturer, so it must be sold under a retailer’s brand name.
- Published: All of your products that the customers can purchase from your eCommerce Website are under this category.
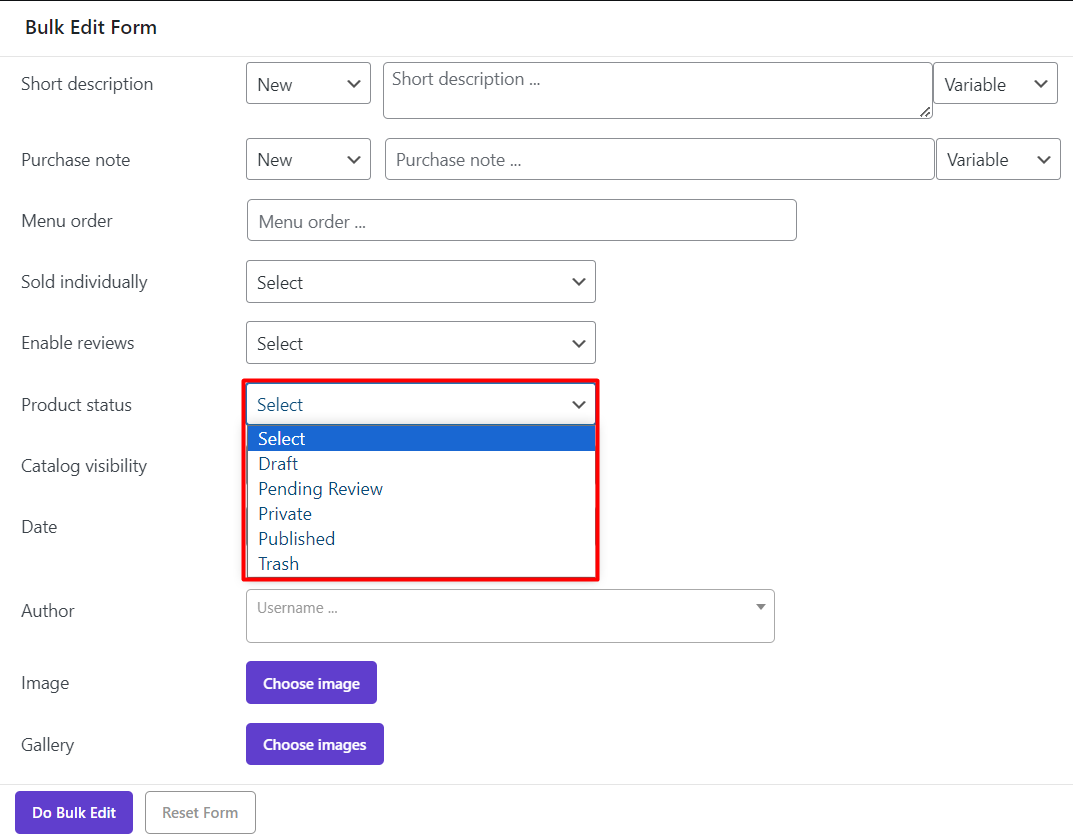
After choosing one of these status settings and clicking on “Do Bulk Edit”, the status of the filtered products will change according to your selection.
Changing multi WooCommerce products status settings from the table
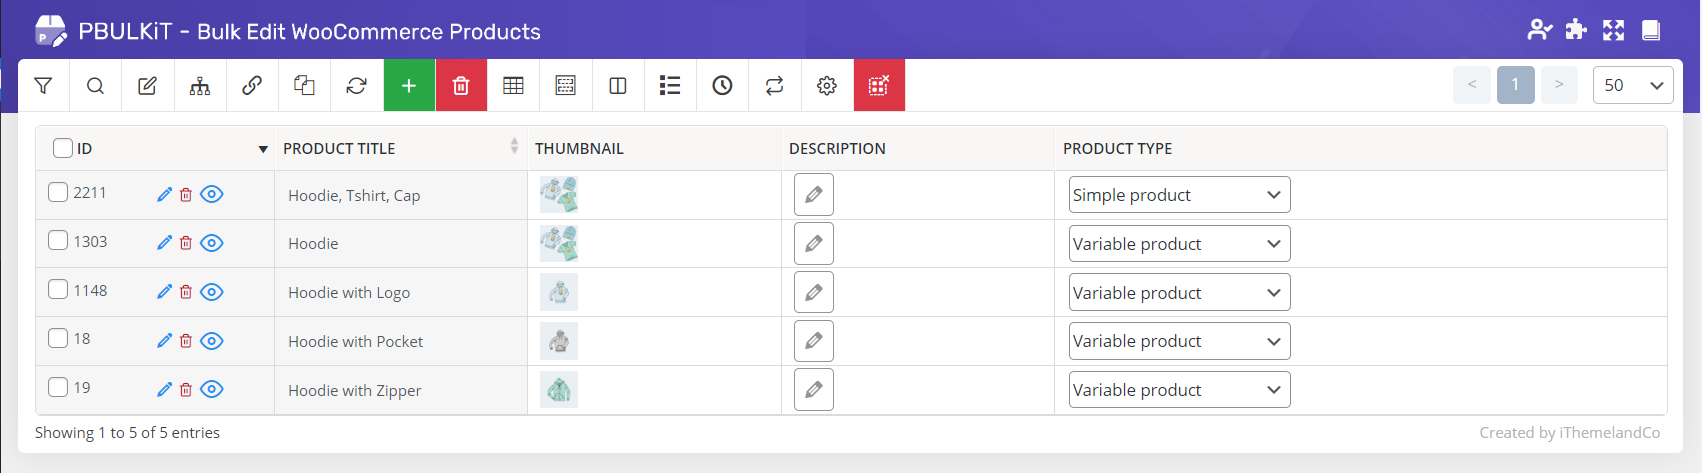
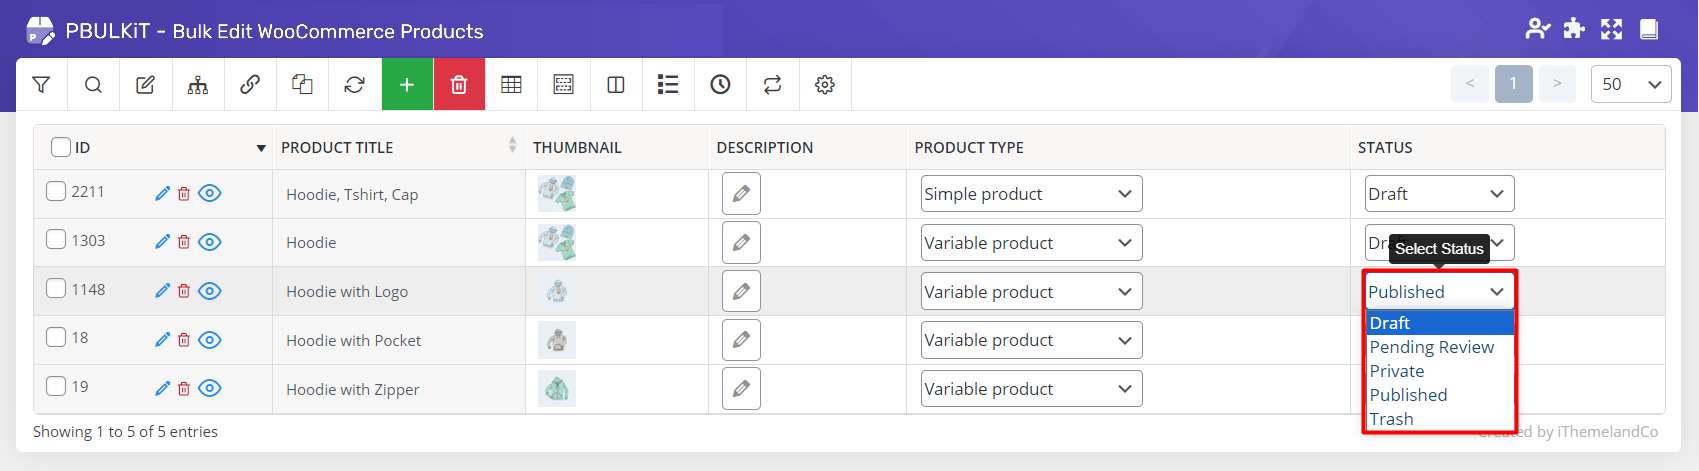
There is also one possibility to bulk edit multi WooCommerce products status settings from the table of products in the main page.
At first, The status column is not displaying in the table of products, so the store manager must add the “Status Column” to the table.
you should click on “Column Profile” on the main page of our plugin and select your columns.
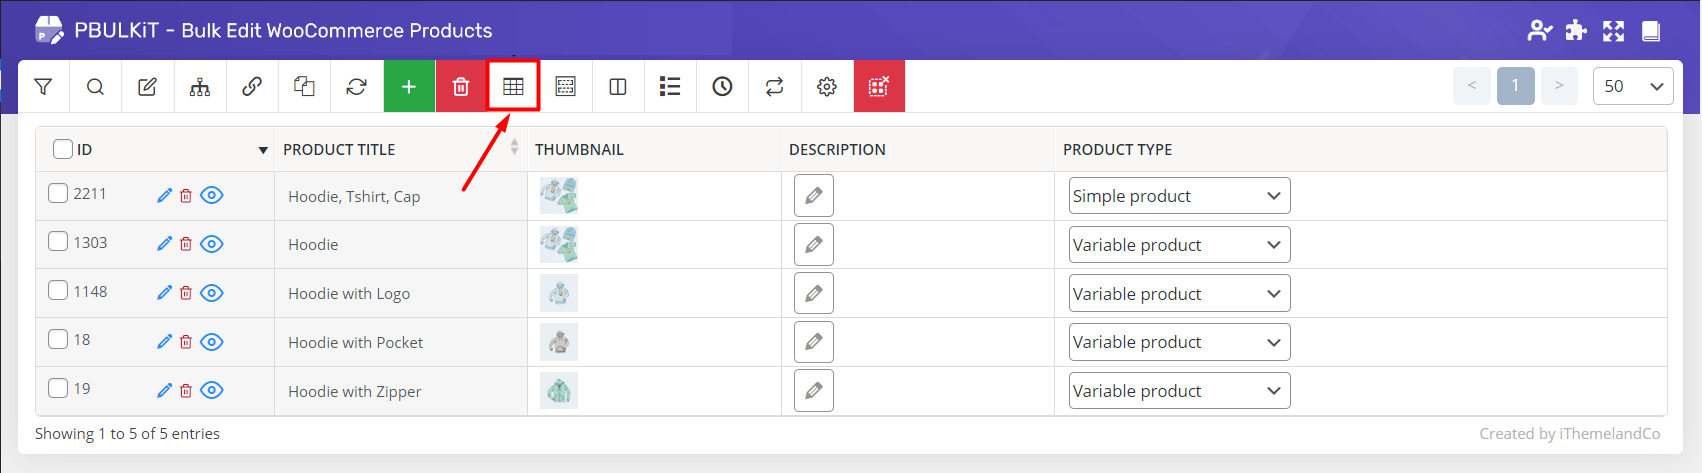
In this page, you can easily check the “Status” Option and click on “Apply to Table”.
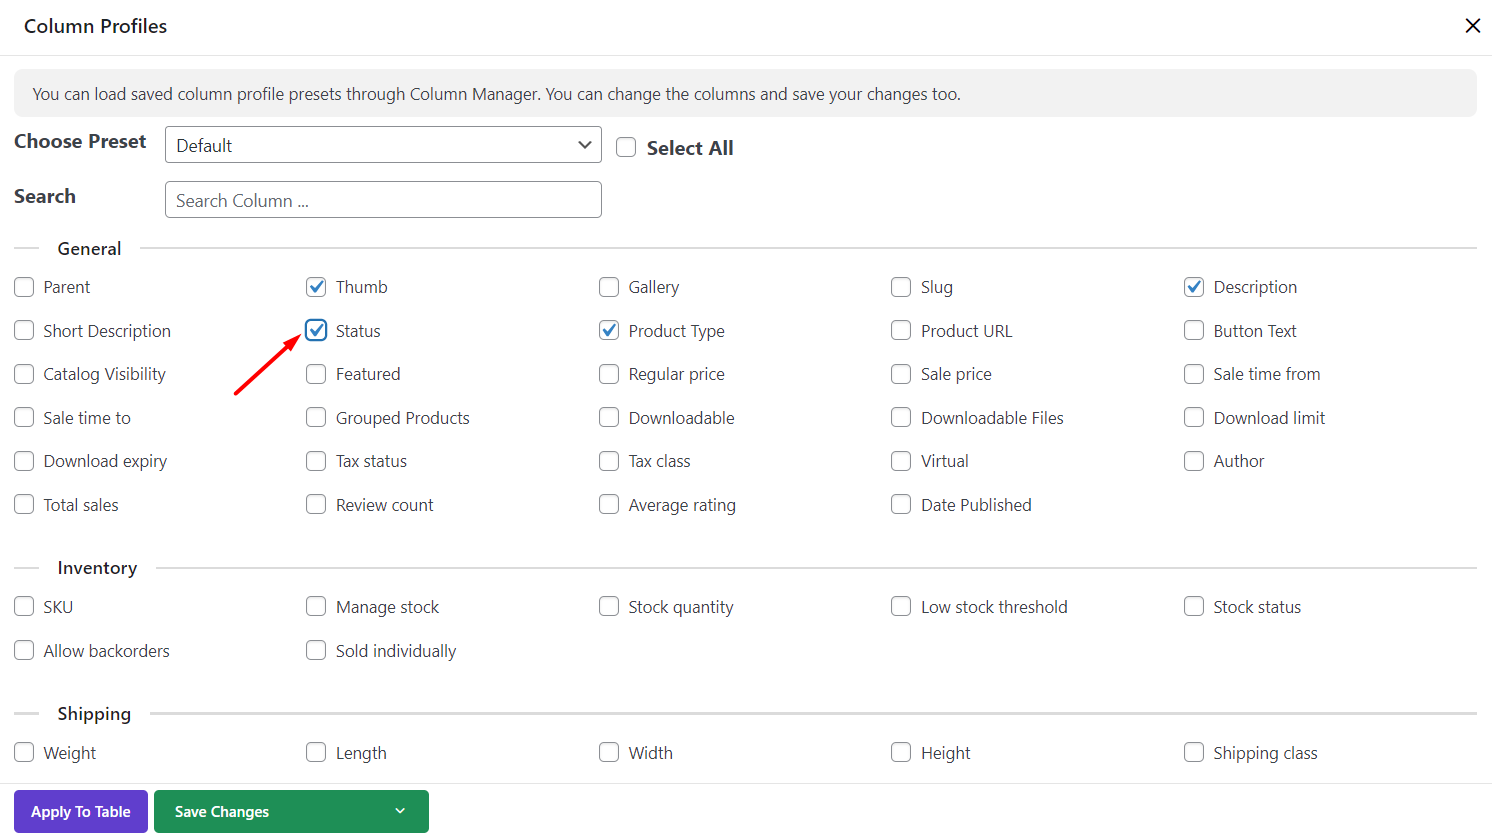
As you see, our plugin added the “Status column” to the column and you can change the status setting of each product directly from the table.
Comments