Attaching a new product variation to some products in WooCommerce without using a powerful plugin is a time-consuming and boring process. Because you need to open the product pages one by one and add the variable to them.
In this tutorial, you can find how the VBULKiT – Bulk Edit WooCommerce Variations – plugin simplifies attaching variations to the products for store managers.
Attach specific attribute to the individual products
In this example, we want to add Red as a new variation to the products which have already Blue in their variations.
To reach this goal, following the three simple steps is needed:
- Filter products with Blue variation.
- Mark one of them in the product table.
- Attach Red to the variation by Variations bulk edit form.
Now, let’s take a closer look at each step.
Filter products with specific variation
The first step is to open the Filter form by pressing the filter icon on the toolbar.
In the Filter form, open the Categories/Tags/Taxonomies tab to filter products with blue variation by choosing Blue from the drop-down list in front of the Product Color field.

Now by pressing Get Products, you can see all products with blue variation in the table.
Mark one product and open the variations bulk edit form
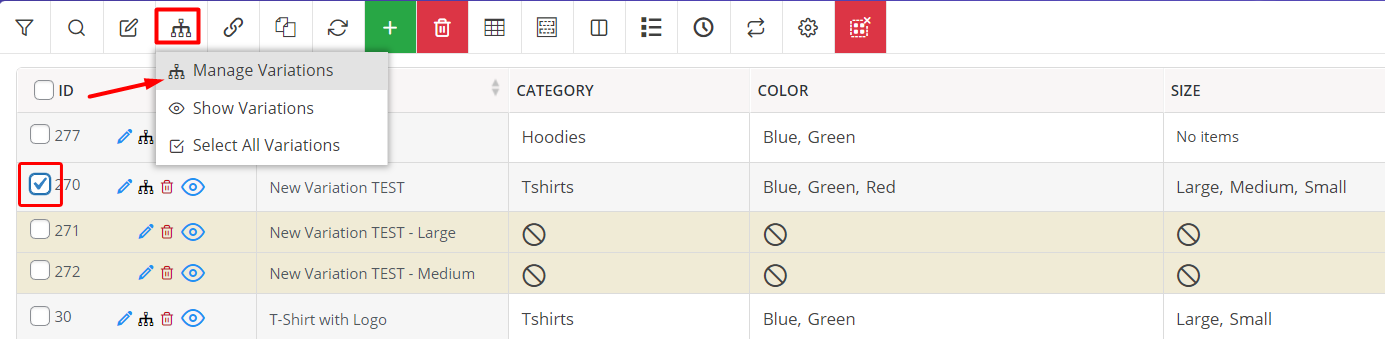
To attach variation in the VBULKiT – Bulk Edit WooCommerce Variations – plugin, you have to choose one product from the table, then click on the Manage Variations option on the toolbar.
Note: if you mark more than one product in the table, the Attaching tab is not available in the Variations Bulk Edit form. Therefore it’s available just for single product.
Attach product variation by using the variations bulk edit form
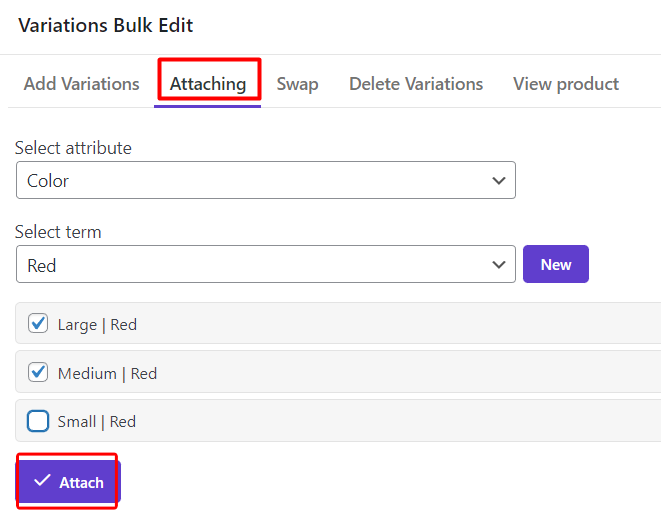
After choosing the Manage Variations option, you have access to the Attaching tab of the Variations Bulk Edit form. By referring to this tab, you can follow the below steps to attach variation to your product:
- Open the drop-down list of Select attribute field and choose the right attribute – Color in this example.
- Wait for the plugin to load the terms related to this attribute.
- Choose the term you want to attach to your product from the list – Red in this example.
- Wait for the plugin to display all possible variations of this attribute.
- Mark one or more variations to attach to the product- Large | Red, Medium | Red in this example.
- Click on the Attach button.
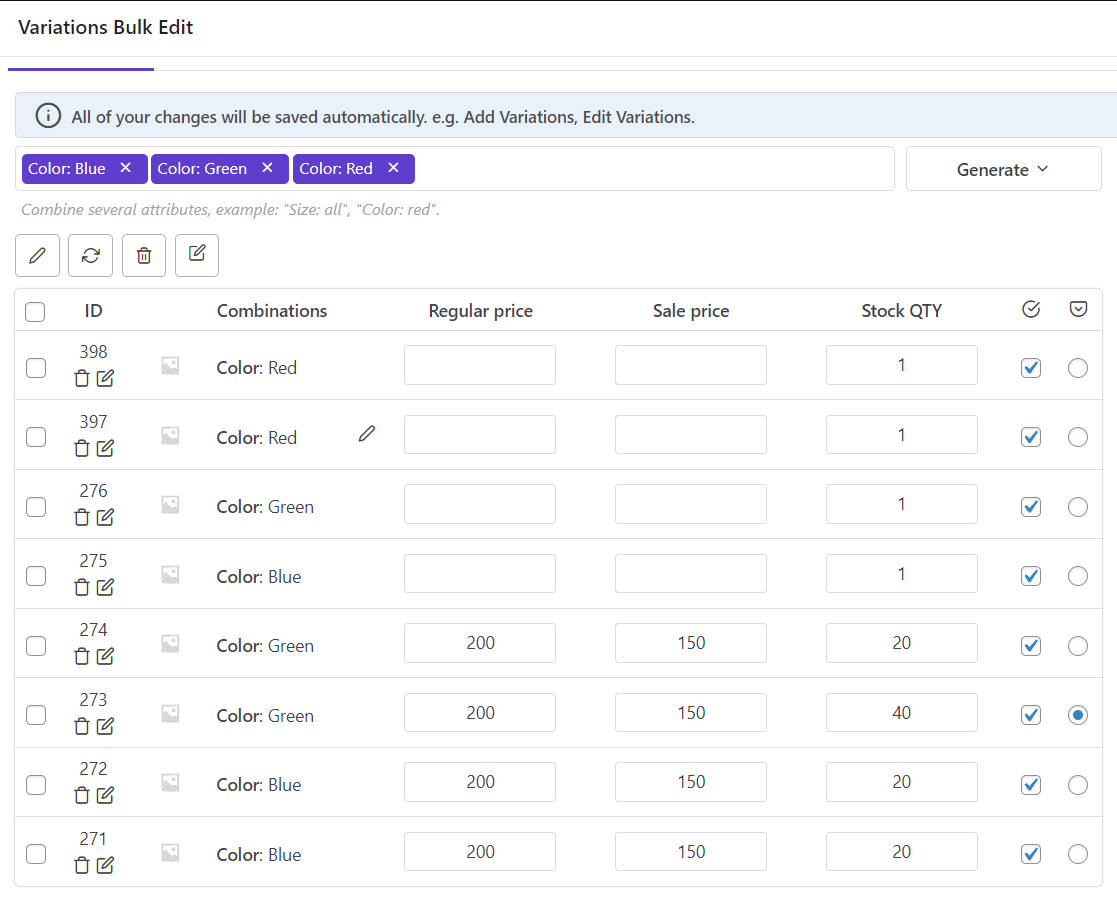
As illustrated in the below picture, Red has been added as the product variation, and a specific ID is assigned to each variation that is created with Red.
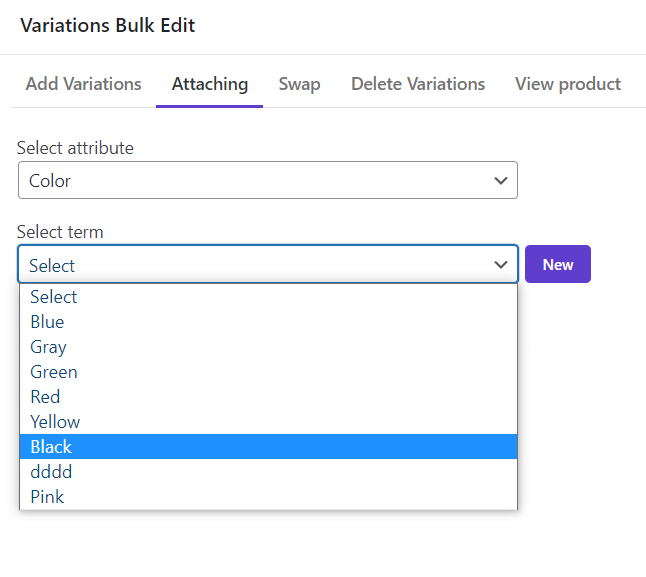
In the attaching tab of the Variations Bulk Edit form, there is another option to add a new attribute if needed. For example, consider that you want to attach Black to the product variations which is not in the color terms.
So, you can easily click on the New button, and write Black in the textbox of the pop-up screen.
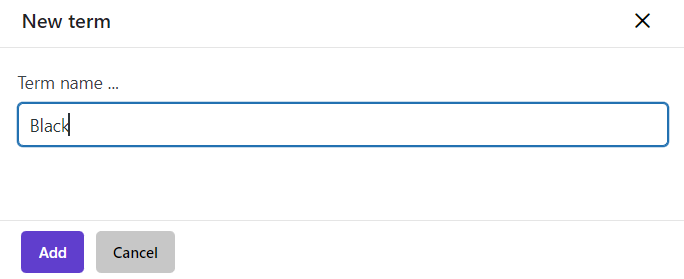
When you press Add, the Black variation is in the list of Select terms and you can choose it to be attached to the variation product.
Comments