Specific price range is an essential requirement of customers. It’s important when they decide to buy products from an online store regarding their limited budget.
Although WooCommerce is a fantastic plugin for online selling of any type of products. Unfortunately, there is not any option to display products in specific price or as a pricing table.
But, if you have already purchased the WooCommerce product table plugin, there is no need to worry about making a specific price range for your products.
You can use WooCommerce Product Table for multi-purpose, such as:
- Creating a Price table
- Displaying specific products in a certain price range
Creating a price table with specific price range
Most WooCommerce stores end up installing a generic WordPress pricing table plugin and manually entering the prices. That makes store managers crazy because the product prices are already stored in the WordPress database but they have to re-enter them again in the table!
Display specific products in a certain price range
You can set a price range in the query builder. So that products with their price in a certain range are shown in the product table. This will allow the customers to find products according to their budget.
To meet this requirement, we designed the price option in the column and query sections of our plugin.
Price option in WooCommerce product table plugin
WooCommerce Product Table is one of the most useful plugins that supports price tables. It takes any or all of your WooCommerce products and instantly displays them in a searchable and sortable table with filters.
WooCommerce Product Table also creates a pricing table of several or all of your products. You can show as many columns of information as you like, including
- A price column,
- A qty column,
- or optional add to cart column.
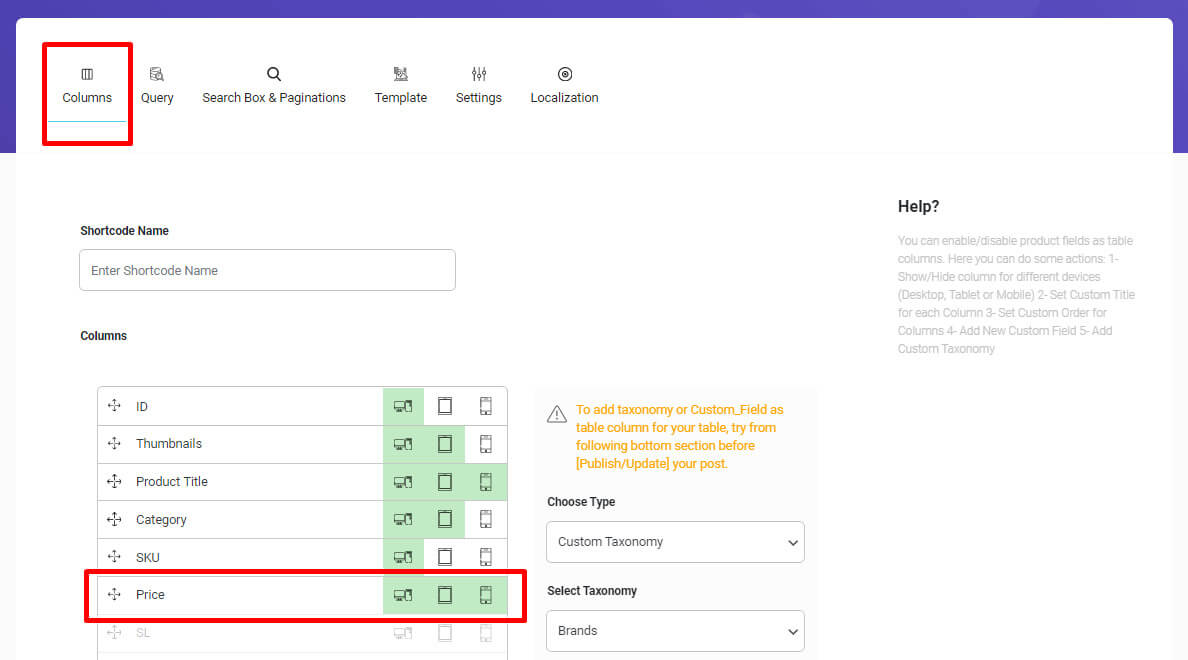
To create these columns, you will have to go to the ‘Columns’ tab in ‘Add New Table’.
Here you can add as many columns as you like.
For the purpose of this tutorial and to add specific prices for your product, you have to add a ‘Price’ column to your table. For that you should find the ‘Price’ column and enable it to display in the table.
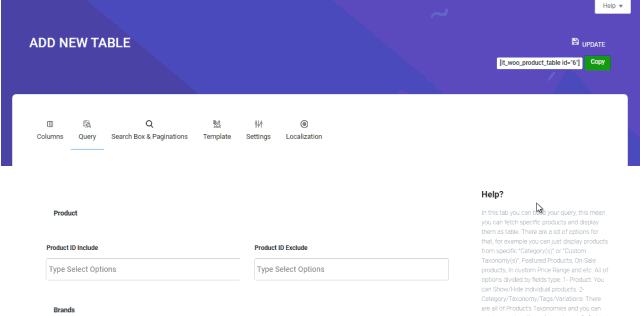
Now you have a column that displays product prices, and to choose a specific range of price you have to go to the ‘Query’ tab.
Here, you can set some conditions for the products that are shown in the table.
To do this, you will have to set a minimum and maximum price in ‘Conditions’.
Now only products with a price ranging between the minimum and maximum that you have set will be shown in the product table of your ecommerce website.
If you set other conditions for the query, you can create tables that contain only certain groups of products and with a certain price range.
For example, if you create a table based on category, the table will include only a certain category with a specific price range for that category.
Conclusion
Web design is critical when creating an ecommerce website. Good ecommerce web design is all about using the right colors, fonts, images, words, settings and graphics to convince visitors to make a purchase.
Your ecommerce website design should attract potential customers, provide great user experience and present your shop in the best light. So, not only does your site have to look good and feel on-brand, but it also needs to drive your website visitors to take action and buy your products.
Creating tables with specific settings such as
- Specific price range,
- category
- Tags
- And etc…
Containing certain products will help better organize your website.
It will help customers navigate through hundreds of products easier and give them a better online shopping experience.
This will make customers not only buy your product this time but also come back for their next purchases in the future.
Comments