
Custom fields are one of the most powerful features of WordPress. They allow developers and website managers to store additional metadata for posts, pages, and custom post types. This metadata can include information such as product details, reading time, pricing data, featured flags, or any other structured content required by your website.
Many modern WordPress websites rely heavily on custom fields to build dynamic layouts and advanced content structures. Plugins such as custom fields WordPress plugins or Advanced Custom Fields (ACF) make it possible to add and manage these metadata fields easily. However, once a website contains hundreds or even thousands of posts, managing these fields becomes a serious challenge.
One of the biggest limitations of the default WordPress editor is the inability to bulk edit custom fields. By default, WordPress requires you to open each post individually and update the metadata one by one. This process can take hours if you need to modify values across many posts.
For example, imagine you need to update the reading time field for hundreds of blog posts or change a pricing meta field across multiple products. Performing these changes manually would be extremely inefficient.
Fortunately, there are two practical approaches that allow you to bulk edit custom fields in WordPress. Developers can add or modify post meta programmatically using WordPress functions such as add_post_meta or update_post_meta. Another much easier approach is using a WordPress bulk editing plugin that allows you to filter posts and edit custom fields directly from a powerful table interface.
In this guide, we will explore both methods and show you how to bulk edit advanced custom fields quickly and safely in WordPress.
Quick Answer:
There are two practical ways to bulk edit custom fields in WordPress: adding custom code to manage post meta or using WPBULKiT – Bulk Edit WordPress Posts / Pages.
The programmatic method is suitable for developers who can safely use functions such as add_post_meta or update_post_meta in a child theme. Before using code, always create a backup because a small mistake in theme files can affect the website.
For a no-code workflow, install WPBULKiT and go to WordPress Dashboard > iThemeland > WPBULKiT. On the plugin page, open Meta Fields from the toolbar and add the custom fields manually by entering the field name, or automatically by inserting a post ID and importing the meta fields assigned to that post. After setting the field type, these custom fields become available in the table, Filter Form, and Bulk Edit form.
To update custom field values, open the Filter Form, use the Custom Fields tab or other filters to find the target posts, click Get Posts, and select the matched items in the table. Then open Bulk Edit, go to the Custom Fields tab, choose the required field, select an operator such as New, Append, Replace, Clear, or Delete, enter the value, and click Do Bulk Edit. You can also use Inline Edit or Bind Edit in WPBULKiT for faster table-based custom field changes.
Bulk edit custom fields in WordPress programmatically
If you are familiar with coding, you don’t need to install any plugins for WordPress quick edit custom fields, and you can do this with just a few pieces of code.
Of course, before doing this, it is better to make a backup of your site so that you can restore your data to the original data in case of a malfunction.
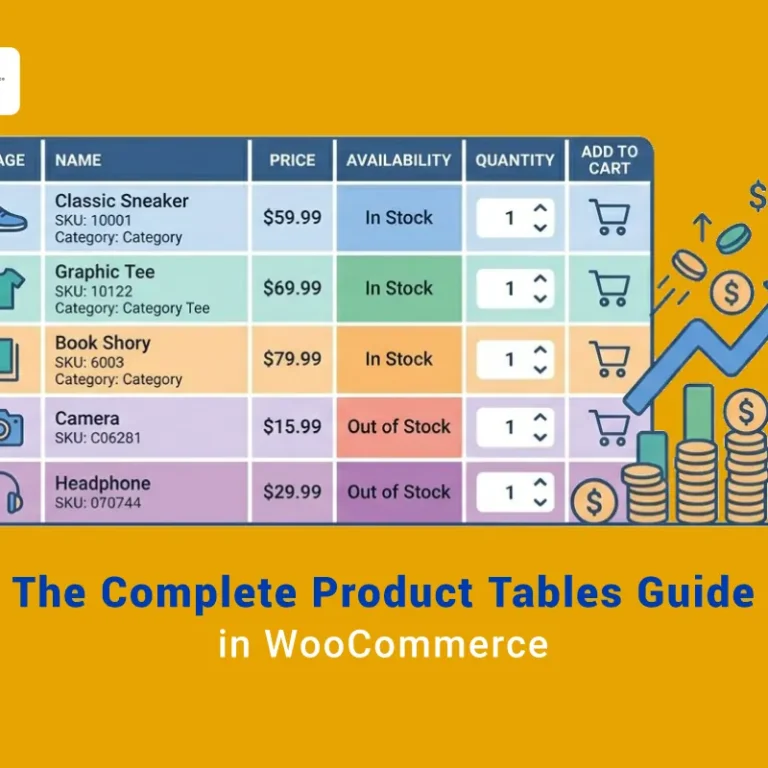
Now, suppose we want to add the “Price” and “Featured product” columns to the post table, as shown in the image below. So that we can bulk edit them by the default editor of WordPress:
To do this, you need to add the three below codes to the functions.php file of your current theme or create a child theme for that.
First code: Create a column for every custom field
In the first step, you have to add custom field columns to the post table. The below code is written to add Price and Featured products to the table. It is worth mentioning that you can replace these two words in the code below with the name of your custom fields to see their columns in the post table.
// add new columns
add_filter( 'manage_post_posts_columns', 'ithemeland_price_and_featured_columns' );
//The above hook will add columns only for the default 'post' post type for CPT:
// manage_{POST TYPE NAME}_posts_columns
function ithemeland_price_and_featured_columns( $column_array ) {
$column_array[ 'price' ] = 'Price';
$column_array[ 'featured' ] = 'Featured product';
//The above code will add columns at the end of the array
//If you want columns to be added in another order, use array_slice()

return $column_array;
}
// Populate our new columns with data
add_action( 'manage_posts_custom_column', 'ithemeland_populate_both_columns', 10, 2 );
function ithemeland_populate_both_columns( $column_name, $post_id ) {

//If you have to populate more than one column, use switch()
switch( $column_name ) {
case 'price': {
$price = get_post_meta( $post_id, 'product_price', true );
echo $price ? '$'.$price : '';
break;
}
case 'featured': {
echo get_post_meta( $post_id, 'product_featured', true );
break;
}
}

}
You can also play with CSS to make columns wider or thinner.
If you don’t want to overload your admin pages with custom field columns, it is easily possible to hide them in the “Screen Options”. Please note that by hiding those columns, you can not use quick edit functionality anyway.
Second code: Make the fields appear in bulk edit
In the second step, you should use the bulk_edit_custom_box action hook to make the added custom fields appear in the bulk edit. Please note that the action hook is fired for every column, so we add an opening <fieldset> tag when displaying the first field in a group and a closing </fieldset> tag when displaying the last one.
<?php
// bulk_edit_custom_box allows to add HTML in Quick Edit
add_action( 'bulk_edit_custom_box', 'ithemeland_quick_edit_fields', 10, 2 );
function ithemeland_quick_edit_fields( $column_name, $post_type ) {
switch( $column_name ) {
case 'price': {
?>
<fieldset class="inline-edit-col-left">
<div class="inline-edit-col">
<label>
<span class="title">Price</span>
<input type="text" name="price">
</label>
</div>
<?php
break;
}
case 'featured': {
?>
<div class="inline-edit-col">
<label>
<input type="checkbox" name="featured"> Featured product
</label>
</div>
</fieldset>
<?php
break;
}
}
}
By adding this code, you can bulk edit custom fields in WordPress.
Third code: Save WordPress custom fields
As the last step, you need to use the save_post action hook, which is a nonce check, and get form values from $_REQUEST, not $_POST. Please note that in this nonce check, we are using bulk-posts action. If you want to use this code for pages, it must change to bulk-pages.
add_action( 'save_post', 'ithemeland_bulk_edit_save' );
function ithemeland_bulk_edit_save( $post_id ){
// check bulk edit nonce
if ( ! wp_verify_nonce( $_REQUEST[ '_wpnonce' ], 'bulk-posts' ) ) {
return;
}
// update the price
$price = ! empty( $_REQUEST[ 'price' ] ) ? absint( $_REQUEST[ 'price' ] ) : 0;
update_post_meta( $post_id, 'product_price', $price );
// update checkbox
$featured = ( isset( $_REQUEST[ 'featured' ] ) && 'on' == $_REQUEST[ 'featured' ] ) ? 'yes' : 'no';
update_post_meta( $post_id, 'product_featured', $featured );
It is also possible to add custom fields to quick edit by using the below action hook:
add_action( 'quick_edit_custom_box', 'ithemeland_quick_edit_fields', 10, 2 );Although you can successfully add as many custom fields as you need to the quick edit or bulk edit of WordPress by adding the above codes, repeating these steps need a lot of time and effort.
In addition, you just have access to bulk edit custom fields in the default editor of WordPress, which is really a nightmare for bloggers. This editor has many limitations because there are neither enough filtering options nor editing fields to meet the requirements of site managers.
Despite that, if you make any mistake in adding codes to the WordPress theme, it may be a complete disaster and ruin your website.
For all these reasons, it makes sense if you use the WordPress post bulk edit plugin.
WordPress quick edit custom fields by posts bulk edit plugin
The WordPress posts/pages bulk edit plugin allows you to bulk edit all WordPress post fields such as categories, tags, titles, and most importantly, custom fields just with one click. If you want to easily filter your custom posts and, pages and quickly bulk edit them, you need to use this plugin in the following four simple steps:
Step 1: Install the WordPress bulk edit posts plugin
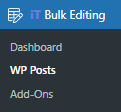
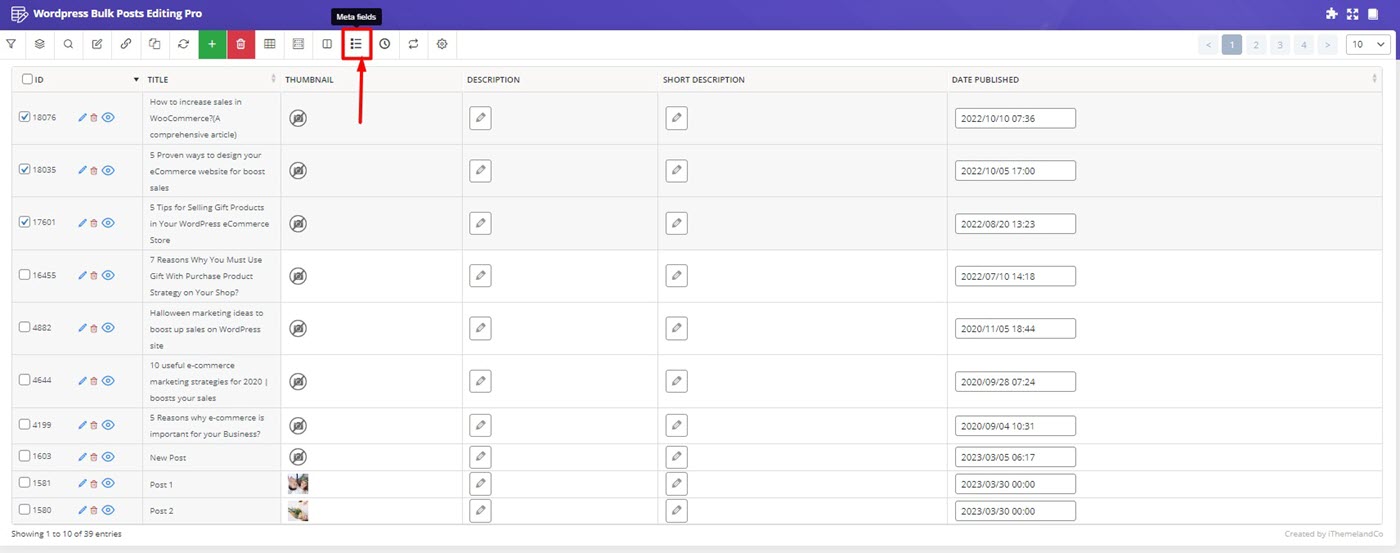
For the first step, you need to download and install the WordPress bulk edit posts plugin on your website. Then you can see the iT bulk editing menu in the WordPress dashboard. Now, by clicking on the WP Posts menu, you have access to the main page of this plugin.
Step 2: Add WordPress advanced custom fields to the plugin
In the plugin’s main page you can see a list of all WordPress posts in a table with a useful toolbar on the top of the table. To bulk edit custom fields in WordPress, you have to add them to the plugin manually or automatically in the Meta Fields form.
To open this form, press the Meta Fields button on the toolbar.
In this form, you can find two separate sections:
- The first section allows you to manually add the WordPress custom fields to the plugin and have access to them in the filter form and bulk edit form.
- The second section is designed to let you automatically add all custom fields of one post to the plugin.
Let’s review both methods, briefly.
Add WordPress custom fields to the plugin, manually
Try the below steps in the Manually section to add any custom field to the WordPress posts bulk edit plugin, individually:
- Write the Custom Field name in the textbox.
- Press the + button to see the custom field settings in the right panel.
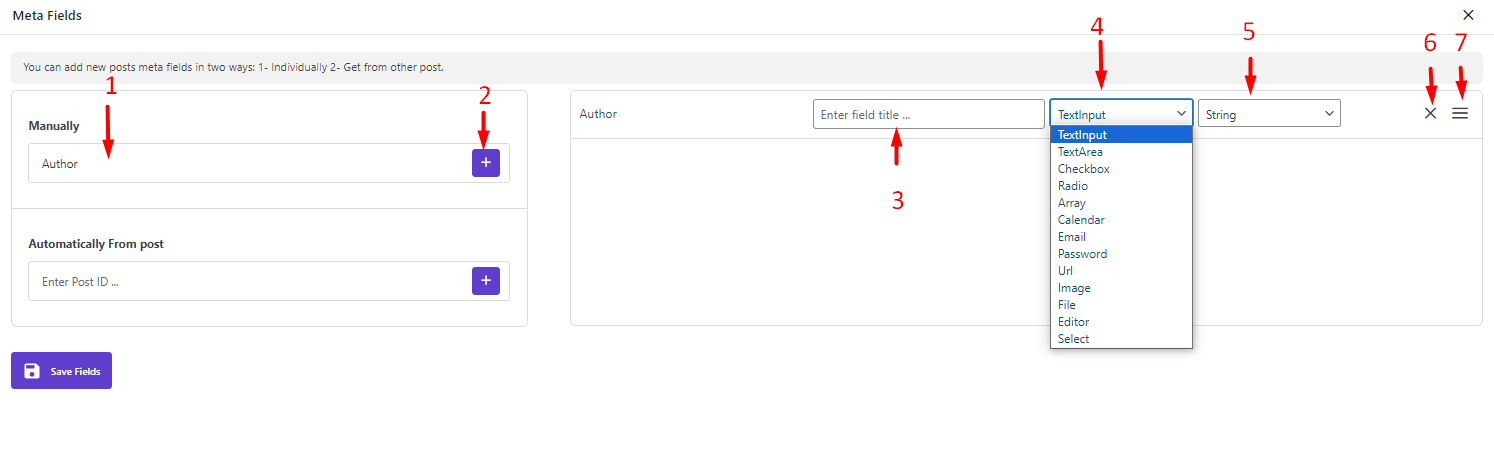
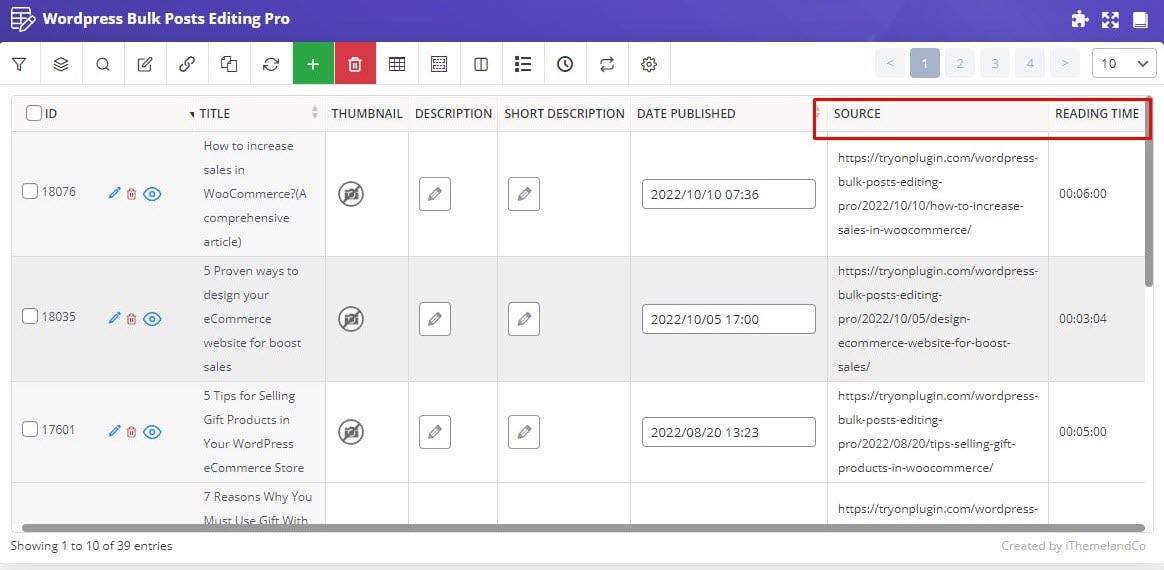
For example, we have added Source and Reading Time custom fields by repeating the above two steps. Now, it is time to specify the type of custom fields in the right panel. To do this, the following steps are required:
- Set a name for the Custom Field.
- Choose the custom field type from the dropdown list, including:
- Textinput
- Textarea
- Checkbox
- Radio
- Array
- Calendar
- Password
- URL
- Image
- File
- Editor
- Select
- After selecting the custom field type, you can select the type of value that can be assigned to it. The plugin will automatically show you some options related to the custom field type, and you need to choose one of them from the list.
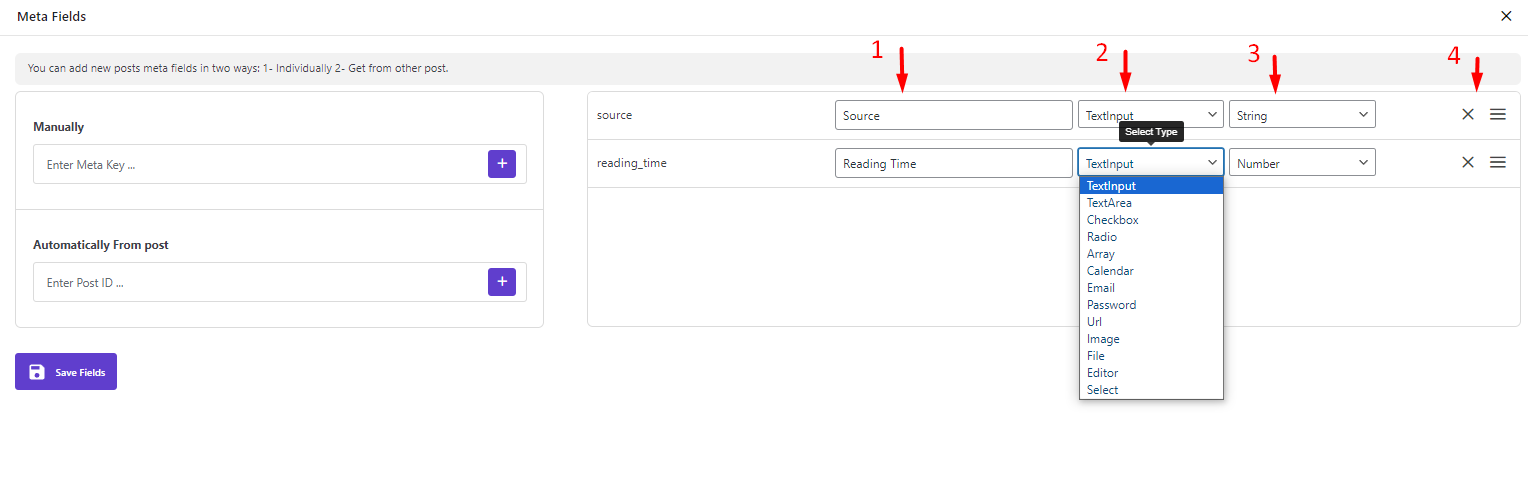
For example, when we added the Reading Time as the custom field and set its type to Textinput, two options were available for the value type: Text and Number. As the Reading Time is specified by a number, we chose the same from the list.
- Finally, you can customize the order of displaying custom fields in the table or remove them by clicking on the appropriate icons.
Add WordPress custom field to the plugin, automatically
To make the process of importing WordPress custom fields to our plugin faster, we designed to add custom fields automatically from the post. In this section, you can easily insert the ID of any post in the textbox, then press + to see a list of all custom fields assigned to that post in the right panel.
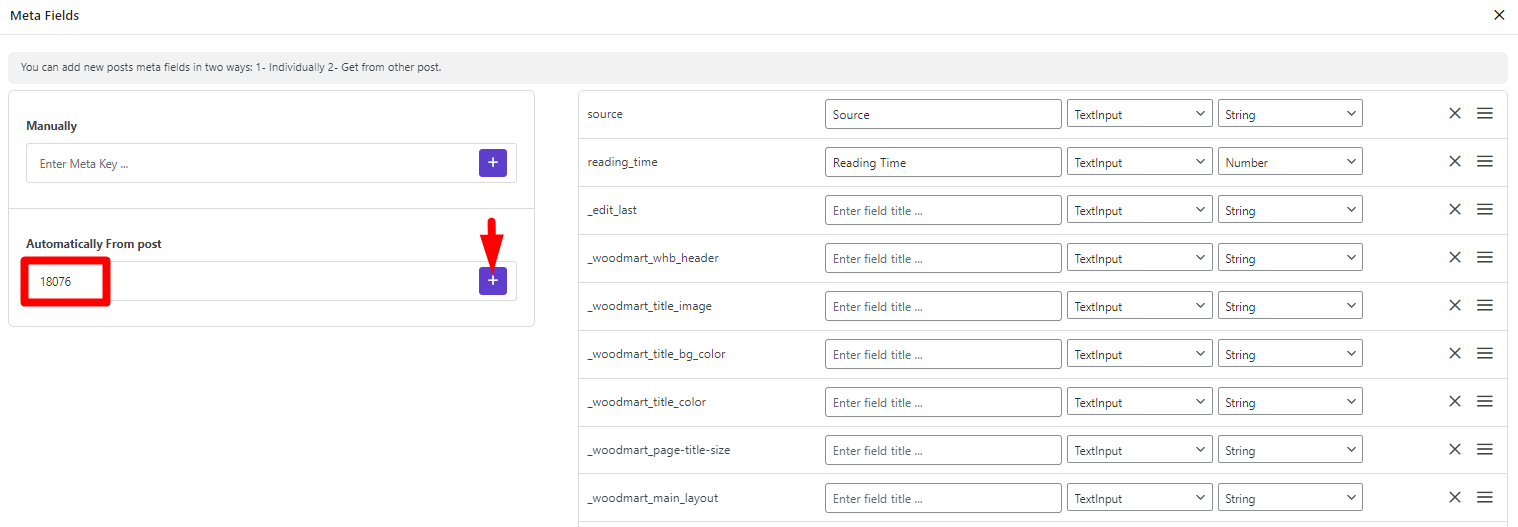
By repeating the steps mentioned above, it is possible to set the type and value of each custom field.
After adding the meta fields in this form, you have access to them in the post table, filter form, and bulk edit form.
Now, let’s see how this plugin simplifies WordPress bulk edit custom fields.
Step 3: Filter WordPress custom fields
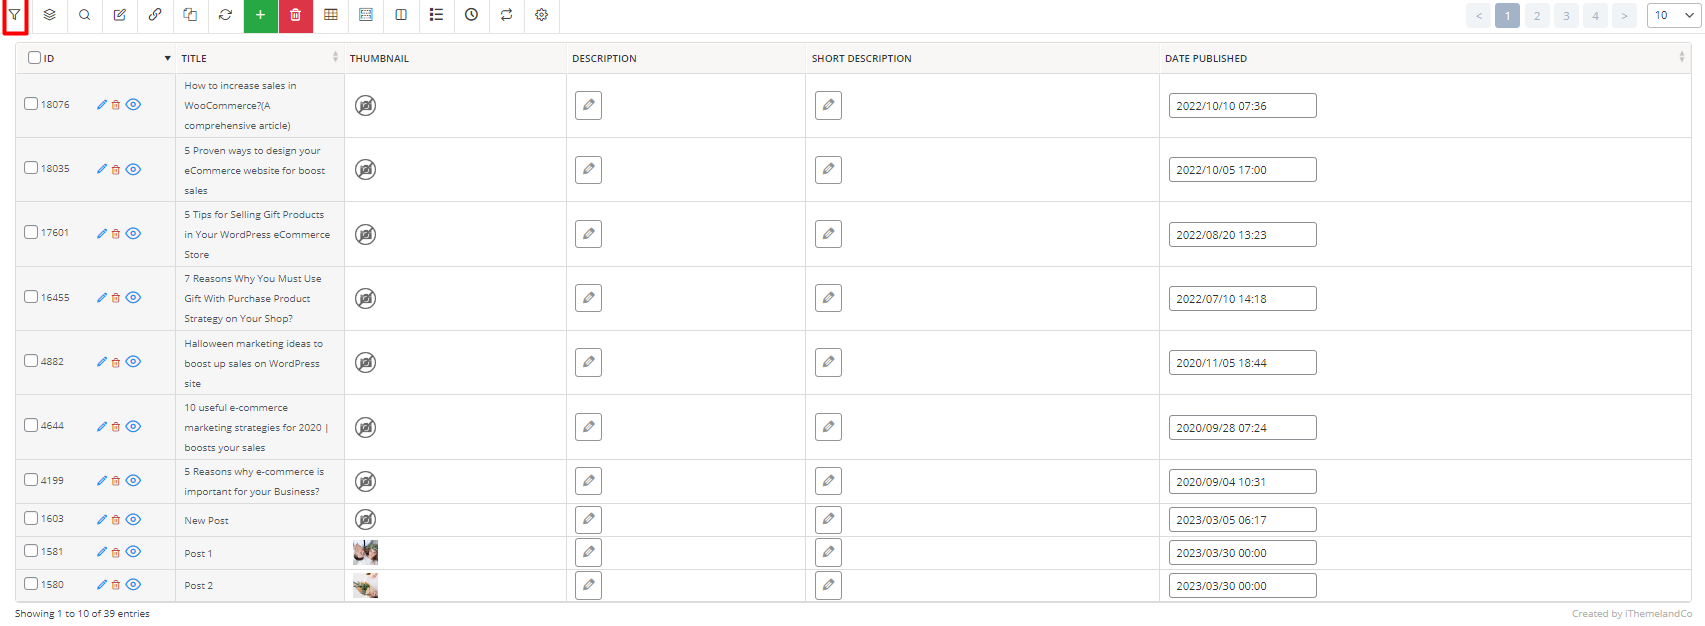
The next step for WordPress to quick edit custom fields is filtering the required posts. For this purpose, you can:
- Open the filter form by pressing the Filter icon on the Toolbar.
- Open one of the filtering tabs, including:
- General
- Categories/Tags/Taxonomies
- Date & Type
- Custom Fields
As we mentioned before, you can see all metadata you have imported to the plugin in the custom fields tab and filter your posts based on.
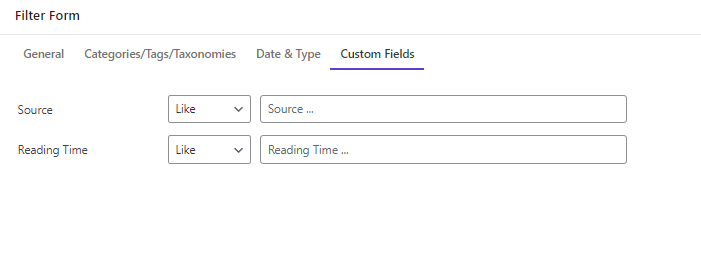
- Set filtering options and press Get Posts.
Step 4: WordPress bulk edit custom fields
After filtering the posts, a list of your desired posts is displayed in the table and you can follow the below instructions to quickly bulk edit custom fields in WordPress:
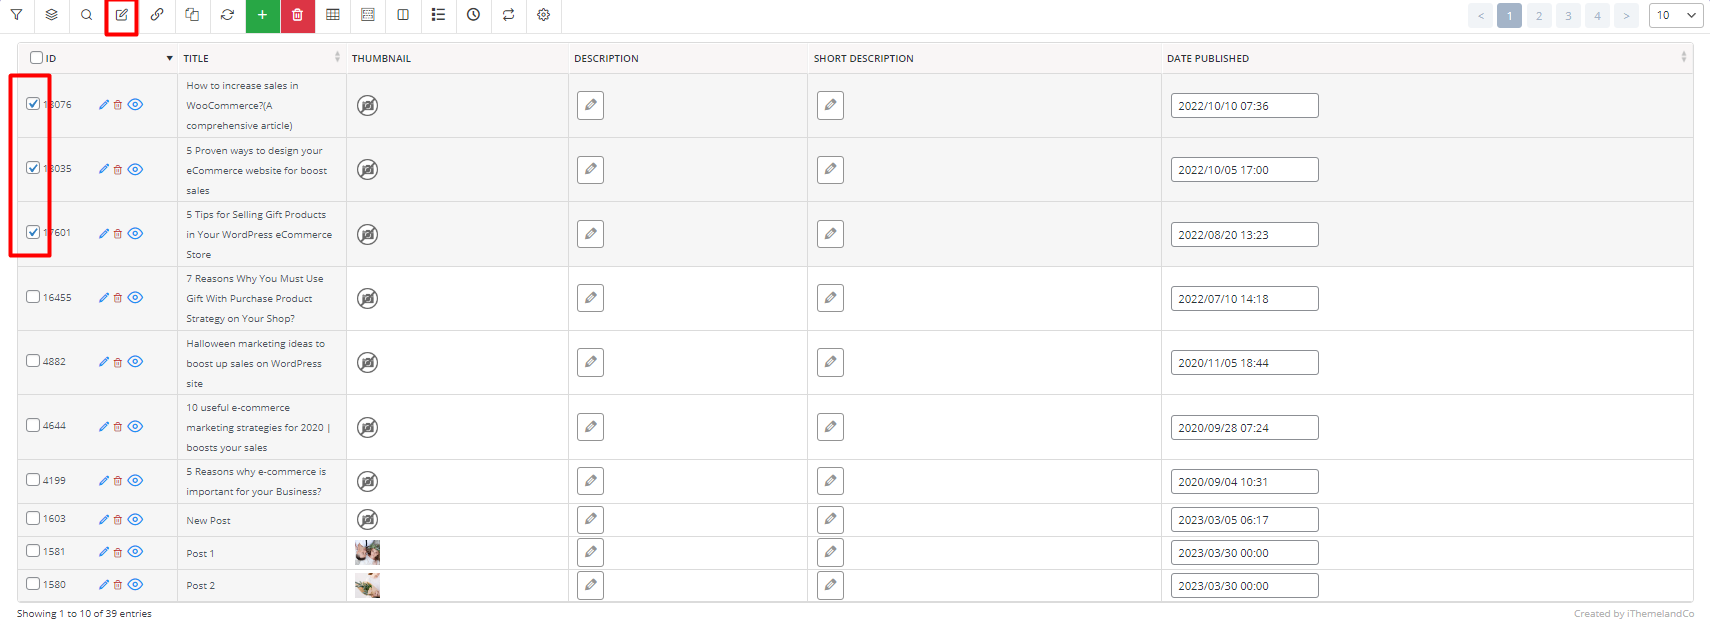
- Mark some posts in the table.
- Open the Bulk Edit form by pressing the bulk edit icon on the Toolbar.
- Go to the Custom Field tab and find the meta field you want to bulk edit.
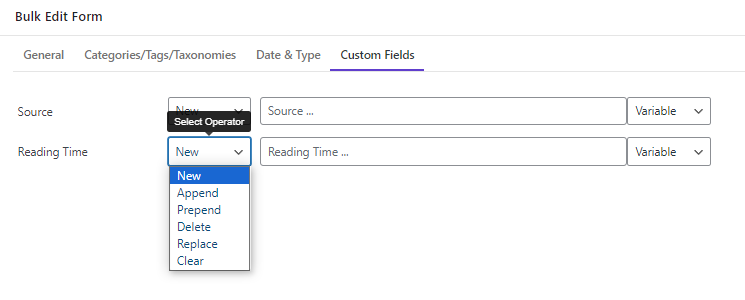
- Select one of the Operators from the first combo box. The list of Operators is automatically changed based on the Custom Field Type. For example, to bulk edit Reading Time, which was set to Textinput type, the following Operators are available:
- New
- Append
- Prepend
- Delete
- Replace
- Clear
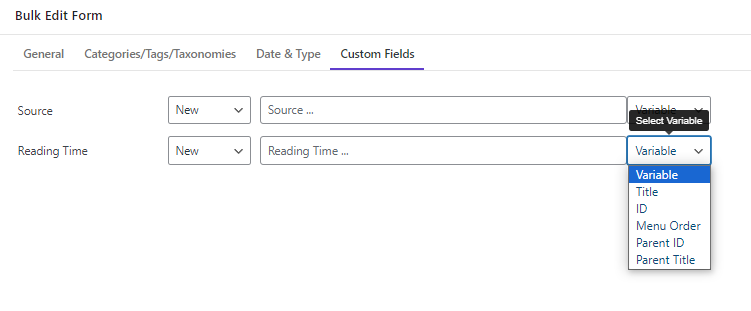
- Insert value in the second box.
- Choose one of the variables from the third list if needed. The available variable by default is:
- Title
- ID
- Menu Order
- Parent ID
- Parent Title
Read more: How to manage bulk edits for WordPress posts and pages
- Press the Do Bulk Edit button to make changes in the custom fields of selected posts.
To clear it for you, let’s review some examples.
WPBULKiT – Bulk Edit WordPress Posts / Pages plugin by ithemeland
The easy way to bulk edit custom fields in WordPress
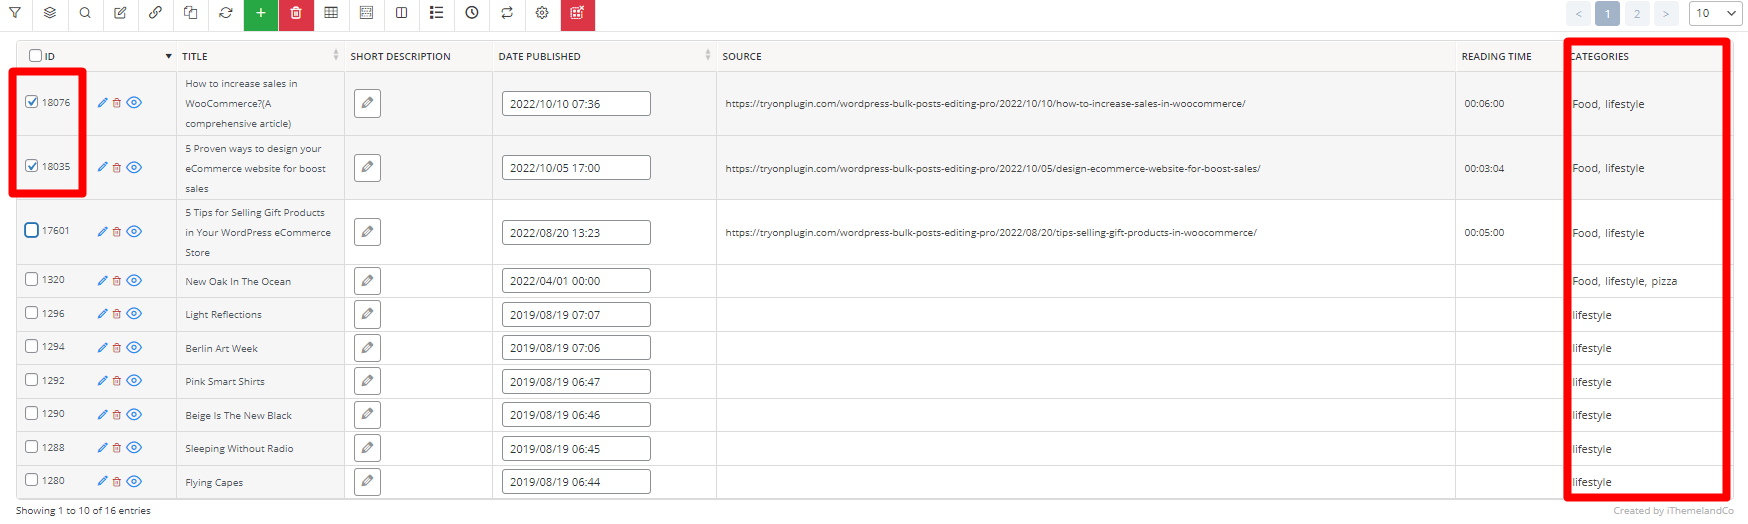
Example: Add (min) at the end of reading time in food or lifestyle posts
To fulfill the purpose of this example, try to:
- Open Filter Form and go to Categories tab.
- Choose OR from the Operator list of Categories field and select Food and Lifestyle from the list of categories.
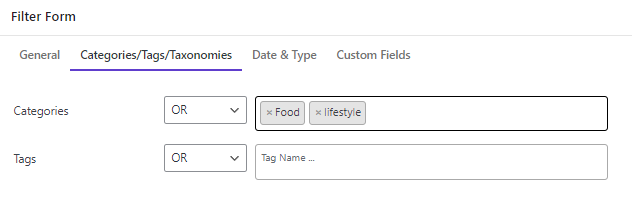
- Press Get posts to see a list of Food or Lifestyle posts in the table.
- Mark all or some of the posts in the table.
- Open the Bulk Edit form and go to the Custom Fields tab.
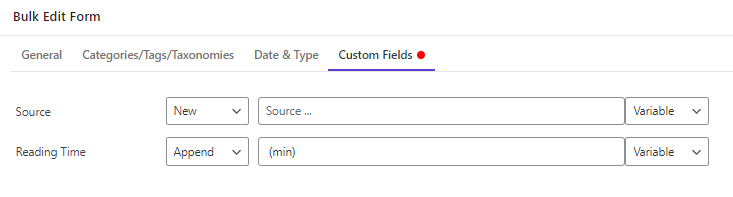
- Find the Reading Time field, choose Append from the Operator List, Write (min) in the Textbox.
- Press Do Bulk Edit.
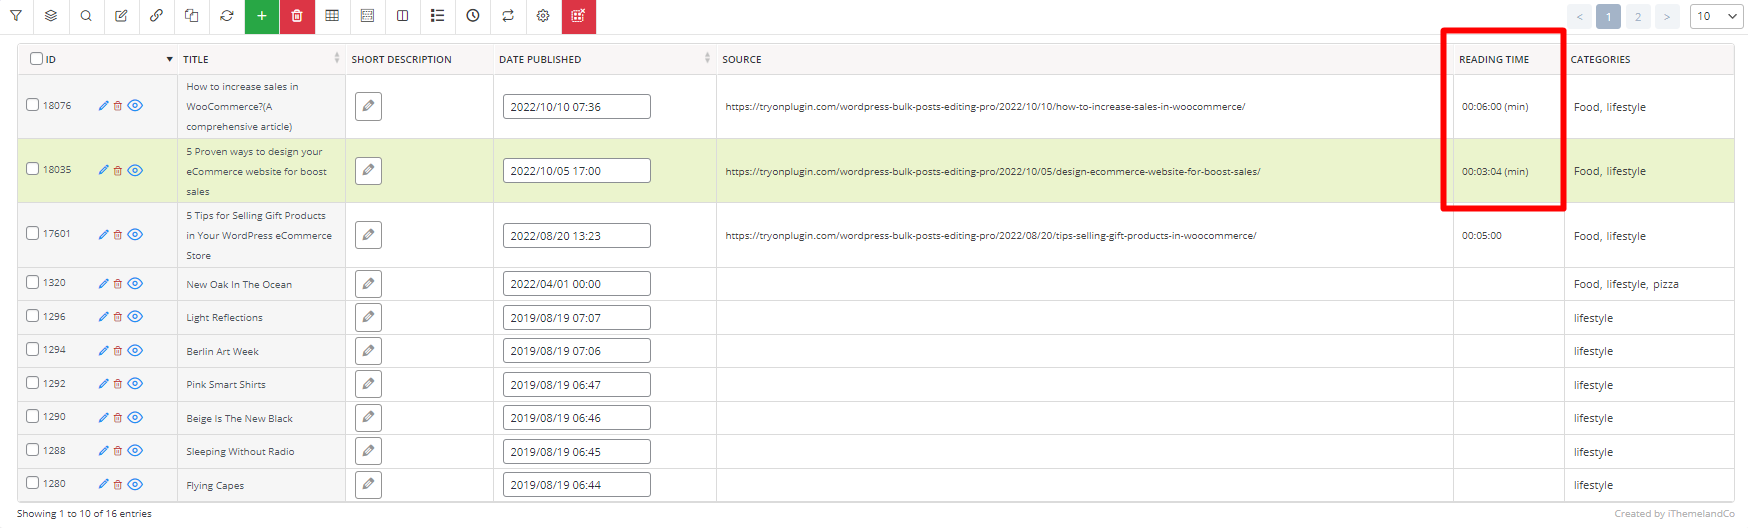
As you can see in the below picture, the desired changes were made on the selected posts:
Read more: How to undo bulk changes in WordPress if you edit custom fields by mistake
Read More: How to bulk edit multi WordPress post/custom post custom fields at the same time?
Extra features of WordPress posts/pages bulk edit plugin
In addition to using the bulk edit form in the WordPress bulk edit posts plugin, you can change the value of multiple custom fields by using Inline Edit and Bind Edit. These methods allow you to make your desired changes directly in the table without the need to open a bulk edit form.
Let’s review both methods by giving some examples.
WordPress quick edit custom fields by inline editing
To use the inline edit method, first you have to add the custom fields columns to the table by opening the Column Manager form. The Column Manager icon is designed in the Toolbar as illustrated below:
In this form, you can find the Custom Fields section and mark any meta fields that you want to see in the table:
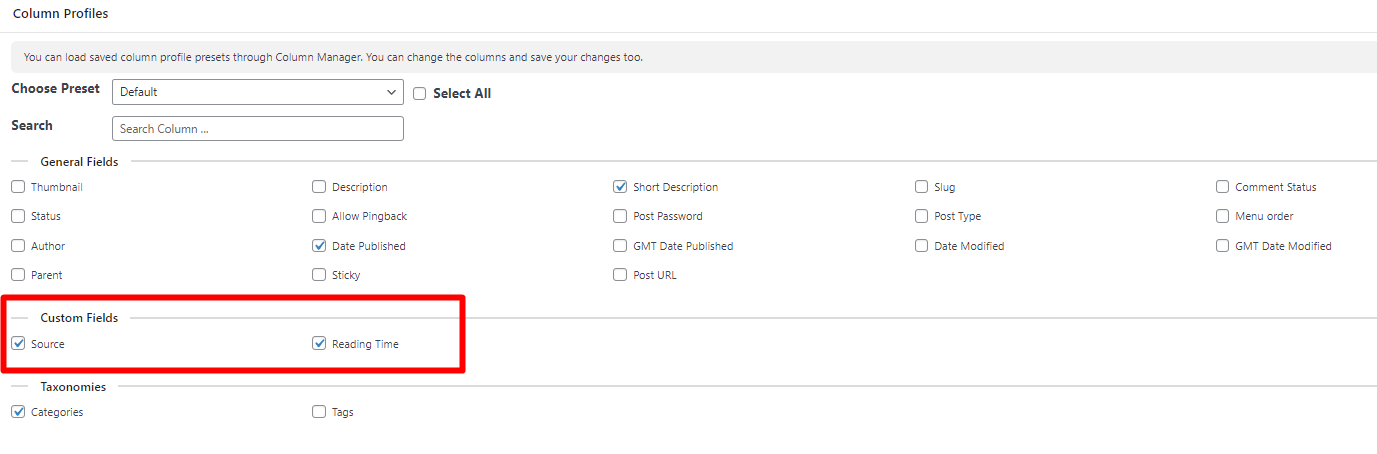
By pressing Get Columns, the marked WordPress custom fields are displayed in the table.
To inline edit custom fields in WordPress, click on the custom field cell in front of your desired post and edit it directly in the table.
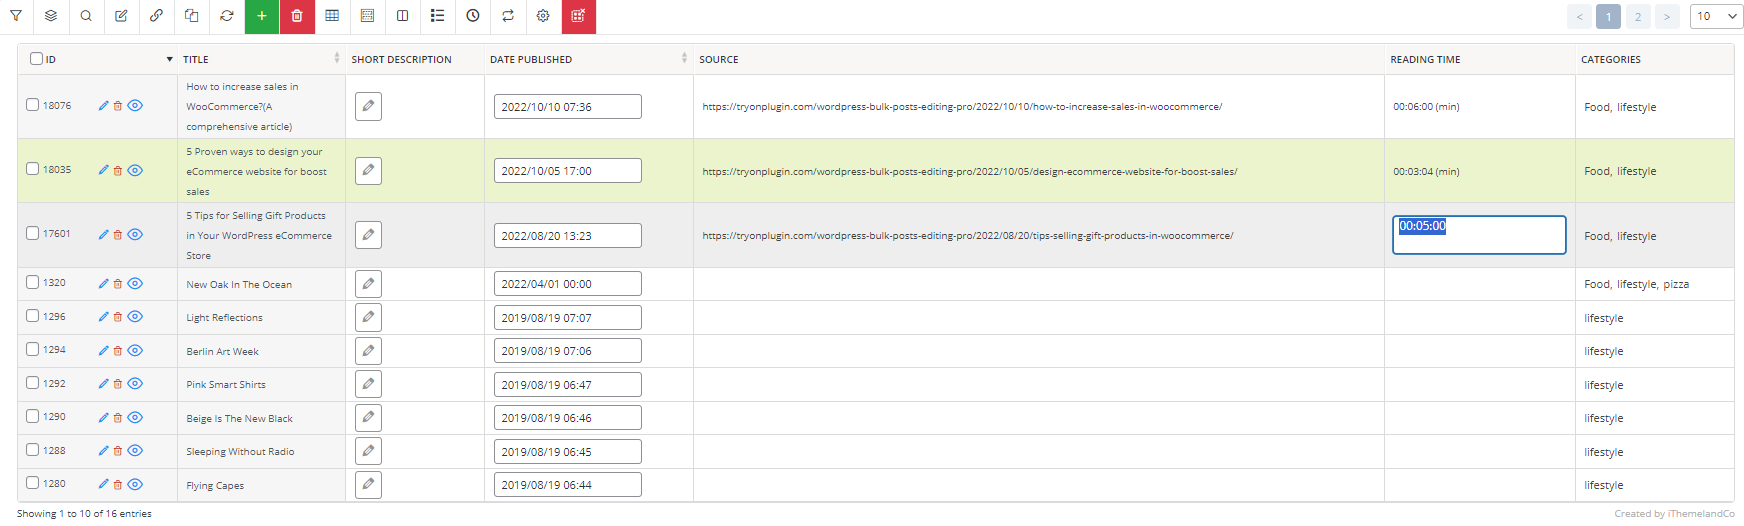
Read more: How to inline edit WordPress posts, pages, and custom fields
WordPress bulk edit custom fields by bind edit
To bind edit the meta fields, first add the custom fields you need in the table as we described before. Then:
- Mark the posts that you want to change their value in the table.
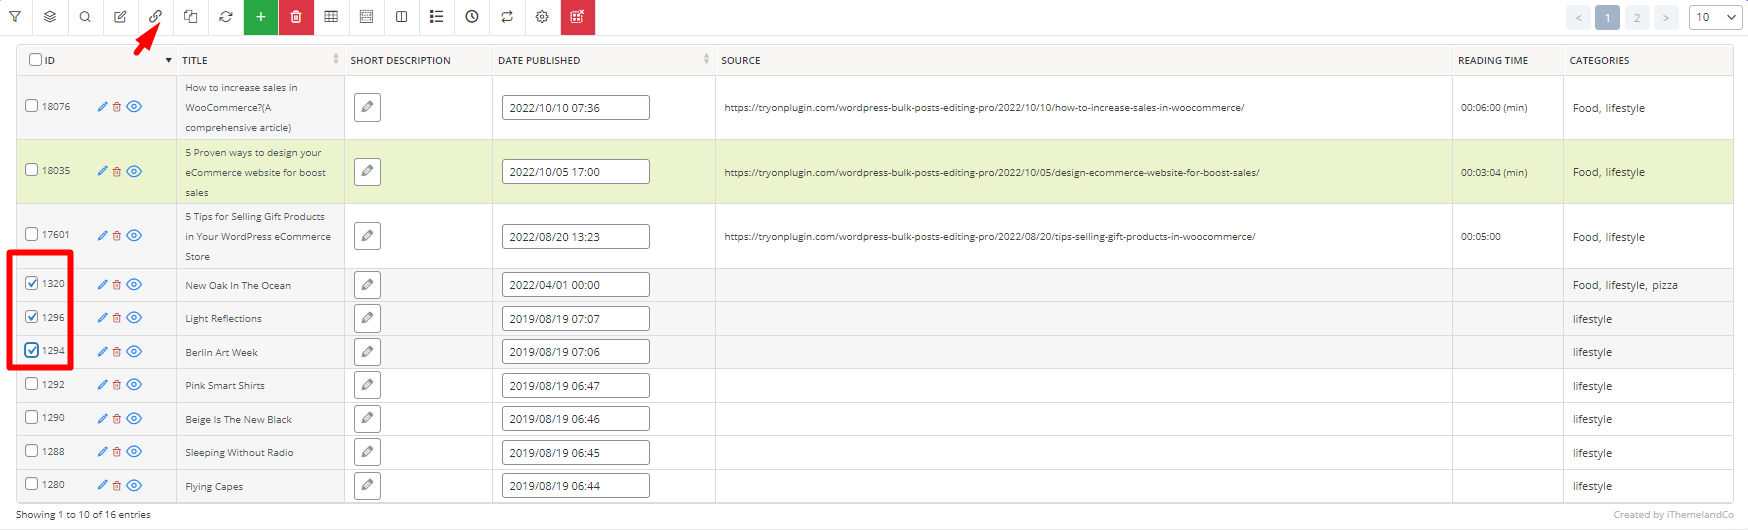
- Click on the Bind Edit option in the Toolbar.
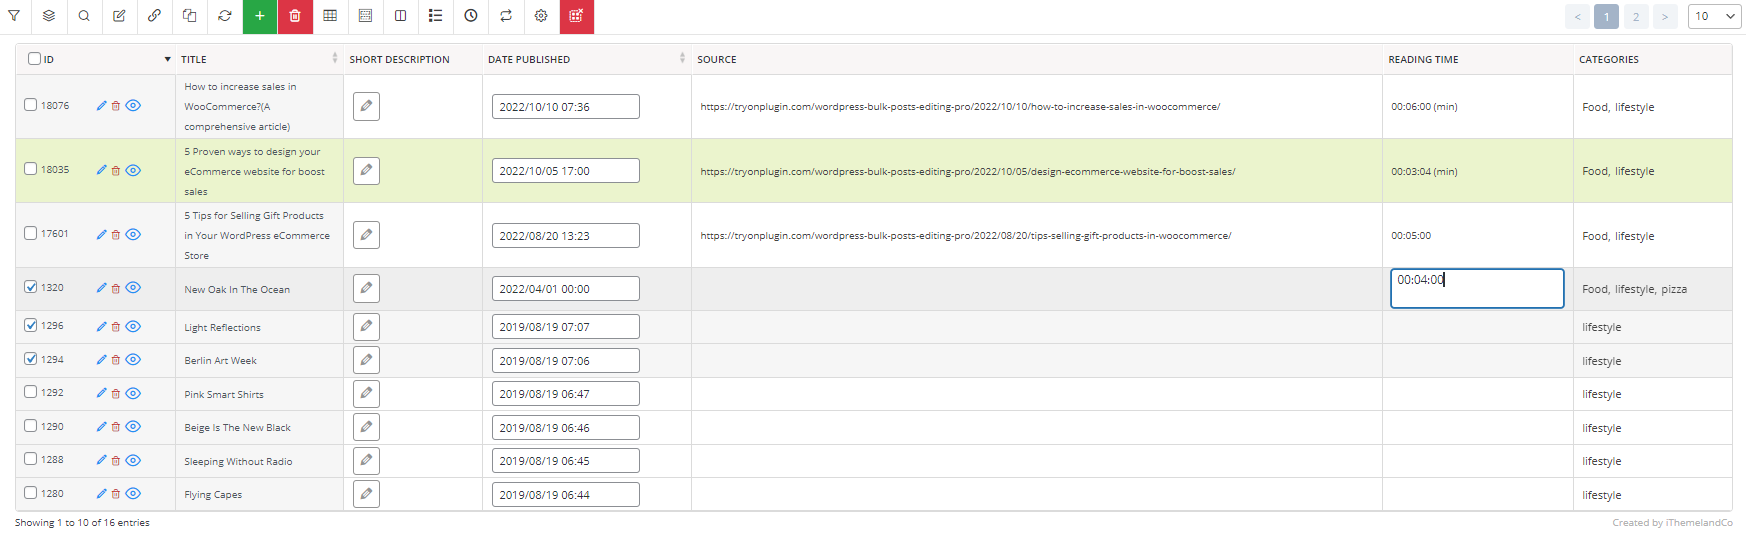
- Press one of the custom field cells of the marked posts and make the changes you want, then press Enter on the Keyboard.
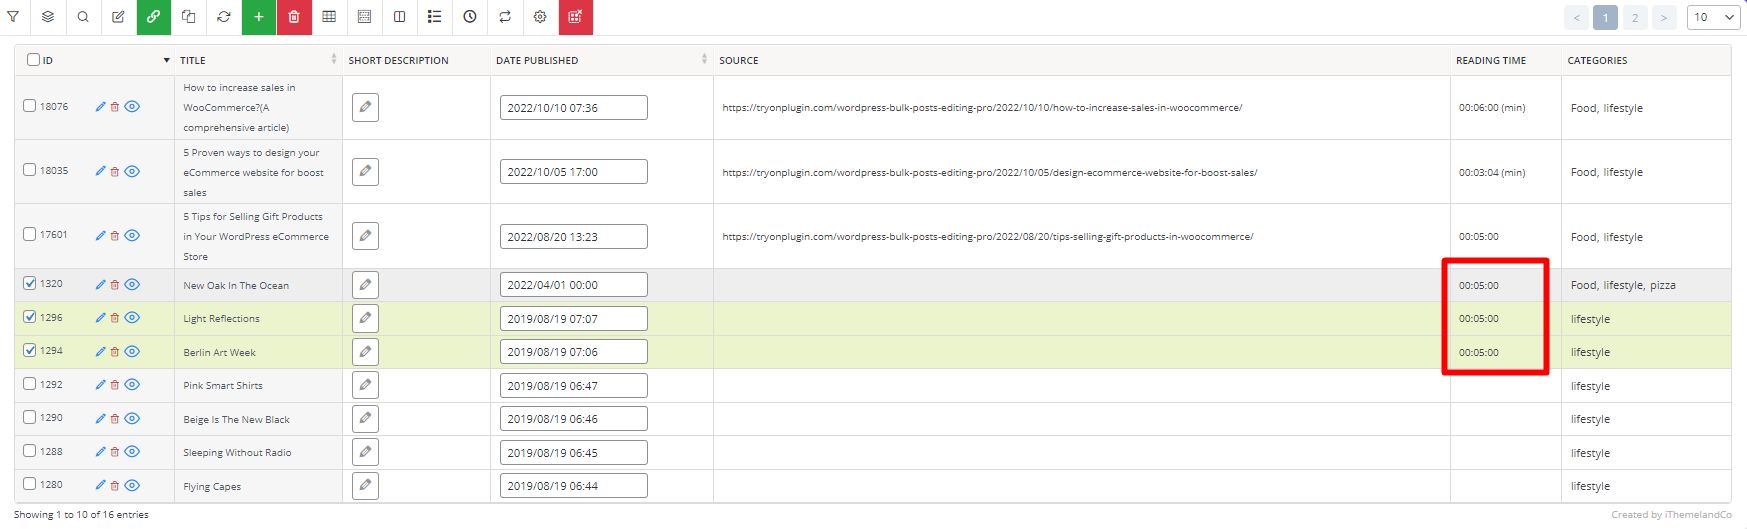
- After a few seconds, the plugin will automatically change the value of other cells.
WPBULKiT – Bulk Edit WordPress Posts / Pages plugin by ithemeland
The easy way to bulk edit custom fields in WordPress
Conclusion
Custom fields play an essential role in extending the functionality of WordPress and transforming it into a powerful content management system. They allow website owners to store structured data such as product information, reading time, custom attributes, or any other metadata associated with posts and pages.
However, managing custom fields becomes increasingly difficult as the number of posts grows. Updating metadata manually for each post is inefficient and prone to errors, especially on large websites with hundreds or thousands of entries.
Learning how to bulk edit custom fields in WordPress can significantly improve workflow efficiency. Developers can modify custom fields programmatically using WordPress hooks and functions, but this approach requires coding knowledge and careful implementation.
For most website managers, using a WordPress bulk editing plugin is the simplest and fastest solution. With the right tool like WPBULKiT plugin, you can filter posts, locate specific metadata, and update custom fields across multiple posts in just a few clicks.
By using WPBULKiT plugin, you can maintain large WordPress websites more efficiently, update metadata faster, and keep your content organized without spending hours editing posts individually.
FAQ
What are custom fields in WordPress?
Custom fields in WordPress are pieces of metadata attached to posts, pages, or custom post types. They allow you to store additional information such as product details, author data, reading time, or any structured content that is not included in the default WordPress fields.
Can I bulk edit advanced custom fields in WordPress?
Yes, it is possible to bulk edit advanced custom fields in WordPress. While the default WordPress editor does not support bulk editing for custom fields, you can achieve this either programmatically using WordPress functions or by using a bulk editing plugin like WPBULKiT designed to manage post metadata.
How do developers edit WordPress custom fields programmatically?
Developers typically edit WordPress custom fields programmatically using functions like add_post_meta, update_post_meta, and get_post_meta. These functions allow developers to add, retrieve, or update metadata values for posts directly through custom code or WordPress hooks.
Is there a plugin to bulk edit custom fields in WordPress?
Yes, WPBULKiT plugins allow bulk editing of metadata. This plugins provide advanced filtering tools and table-based interfaces that allow users to modify custom field values across multiple posts simultaneously.
Why do websites need to bulk edit custom fields?
Bulk editing custom fields is useful when managing large websites with many posts or products. It allows administrators to quickly update metadata values, maintain consistent data structures, and save time compared to editing each post individually.