Product pricing table is the best way to help customers pick their product easily by observing the sale prices. Also comparing them with the regular prices as well as seeing a list of products available to be purchased in one view.
Creating a WooCommerce pricing table is an easy task in the WooCommerce product table plugin by following the below steps:
- Add your products to the WooCommerce. Then, make sure that you have precisely assigned Regular price, Sale price and Prices of different variations to your products.
- Go to WordPress Dashboard > Woo Product Table > Add New
Now you have the full access to the WooCommerce product table to build your product price table.
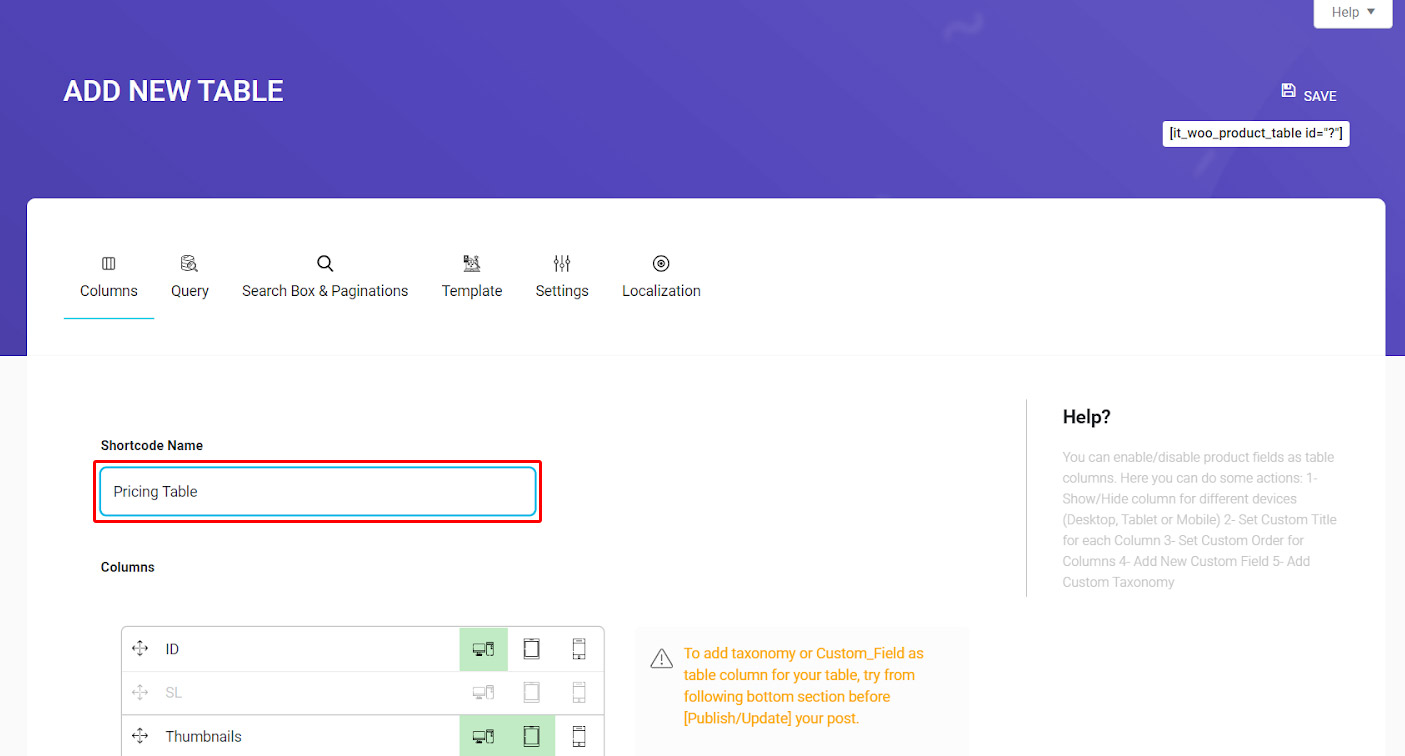
Add new WooCommerce pricing table
In the “Add New Table” page, you can:
- Set the name of your table as “Pricing Table” under “Shortcode Name” field.
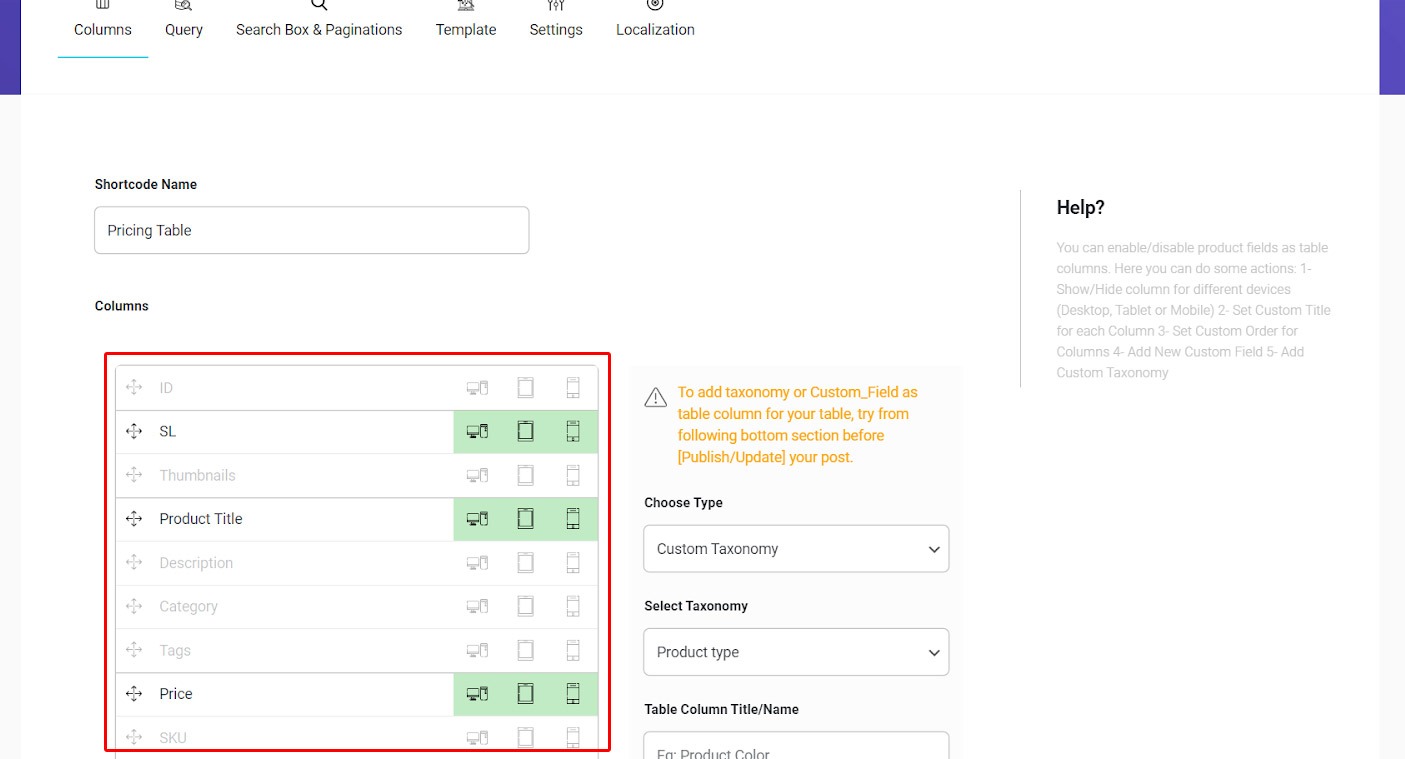
- Add your favorite columns to be displayed in the product price table.
As this must be a simple table, it is better to select just the important columns which are:
- SL: Serial Number of the Rows
- Product Title: The name of each product
- Price: The price column including Regular, Sale or Range Price
In this part, you can also set which columns to be shown in the large, medium or small screens.
As there are no extra columns in the product price table, it is better to choose all three options for the selected columns.
Click on “Save” at the top right of the page. After this “Pricing Table” will be added to the list of tables available in the “Woo Product Table” list page.
if you want to see how our product price table is displayed in the front-end, you have to add WooCommerce product price shortcode in one of the WordPress pages as we described it in “How to insert product table shortcode in WordPress” tutorial.
After inserting the shortcode to the new page, we published it:
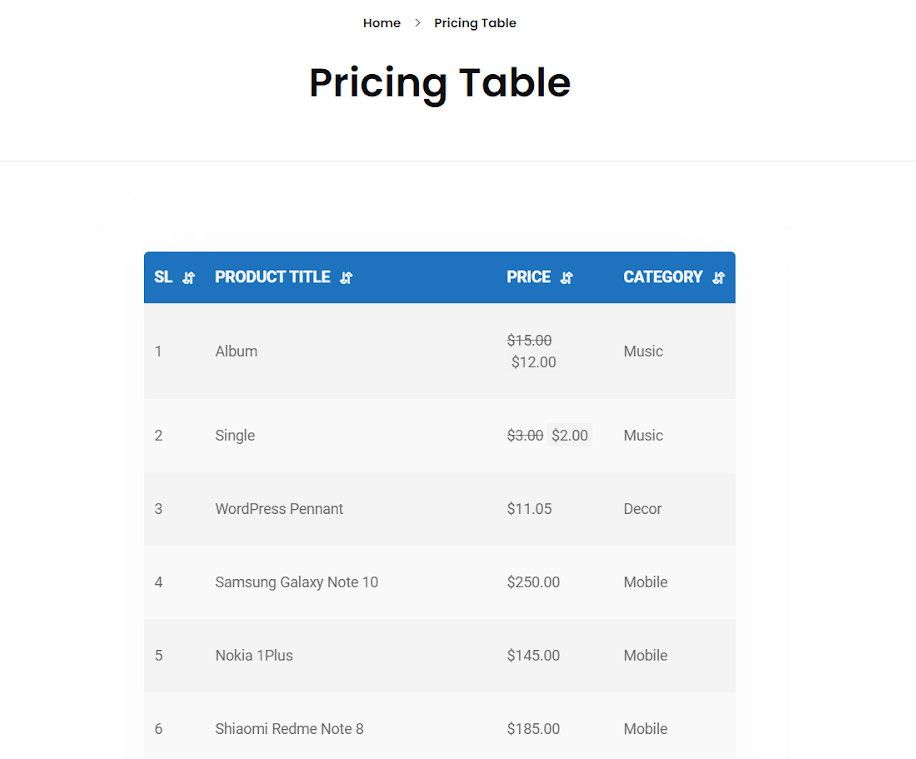
If you open the page, our product price table has been displayed as below:
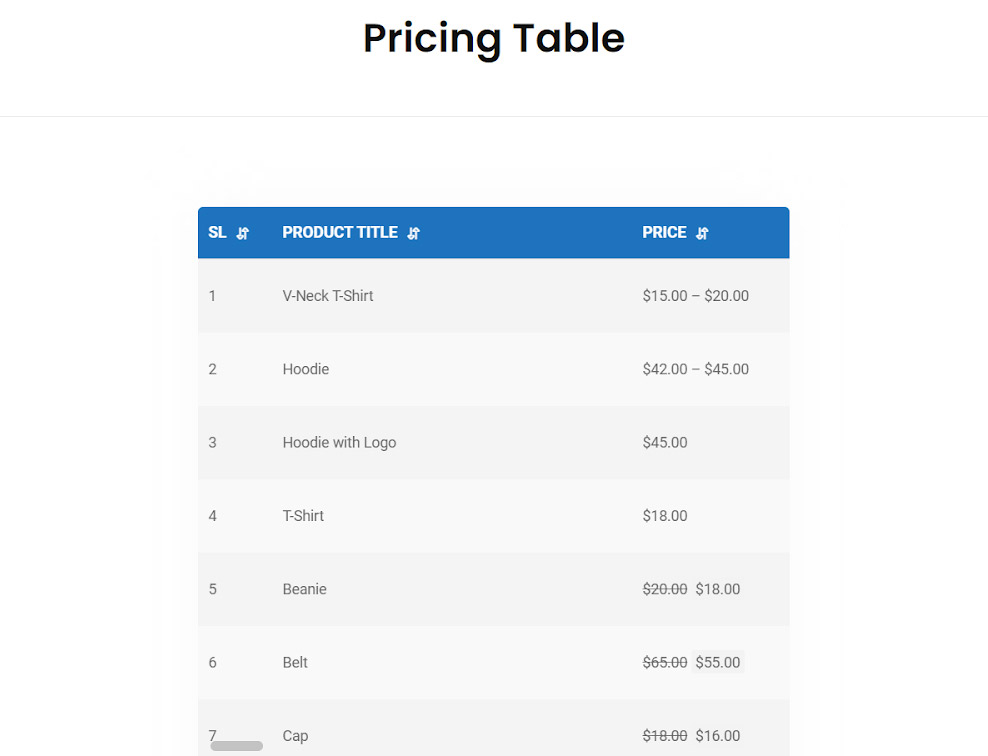
As you can see all of the products you have entered to the WooCommerce is displaying in the table, however you can return to the WooCommerce product table plugin back-end and change everything as you prefer.
Now let’s see some examples:
Add a new column to product price table
To add a column, you can go to the list of tables and click on “Pricing table” as shown below:
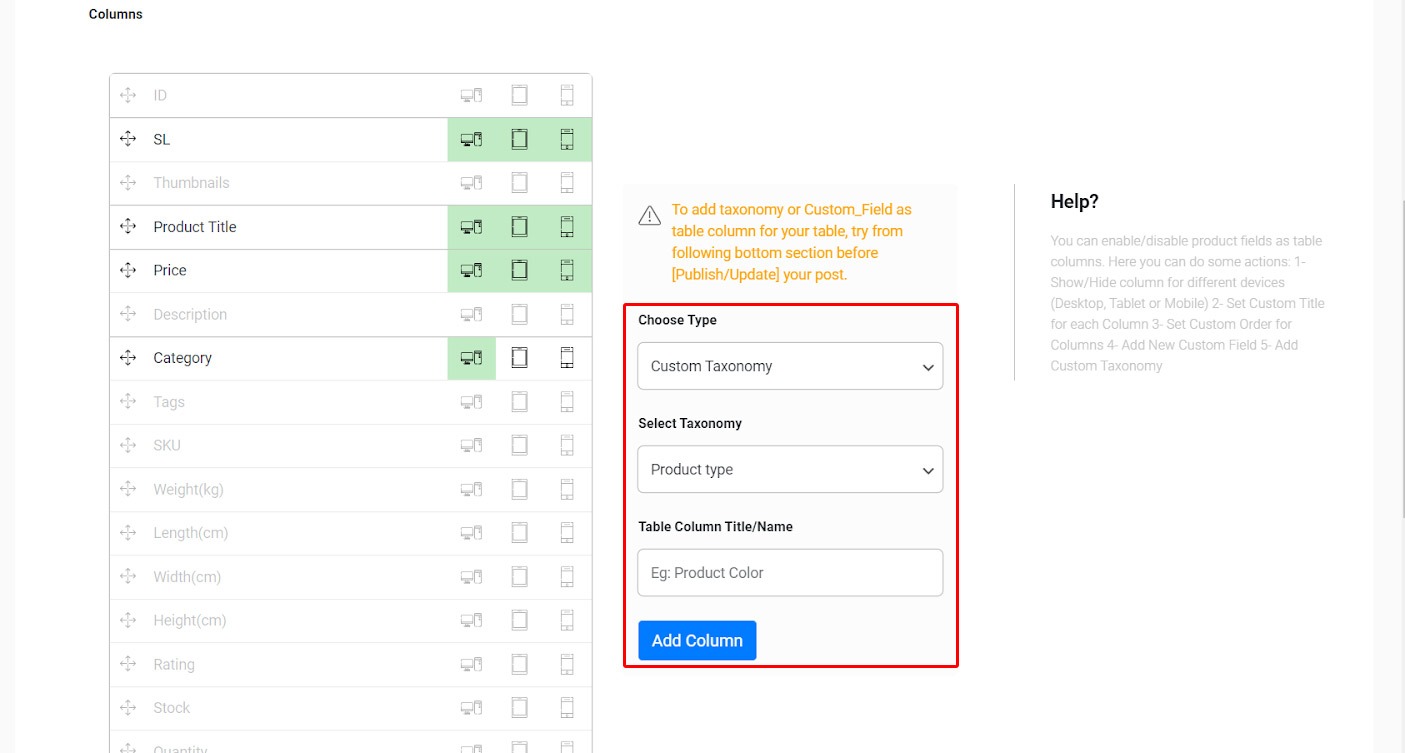
Now, you can click on any columns to be displayed in the table. In this example, we tried the “Category” column and just clicked on the large screen option. If you uncheck other devices, this means the “Category” column is not going to be displayed on mobile phones or tablets.
Make a custom query for product pricing table
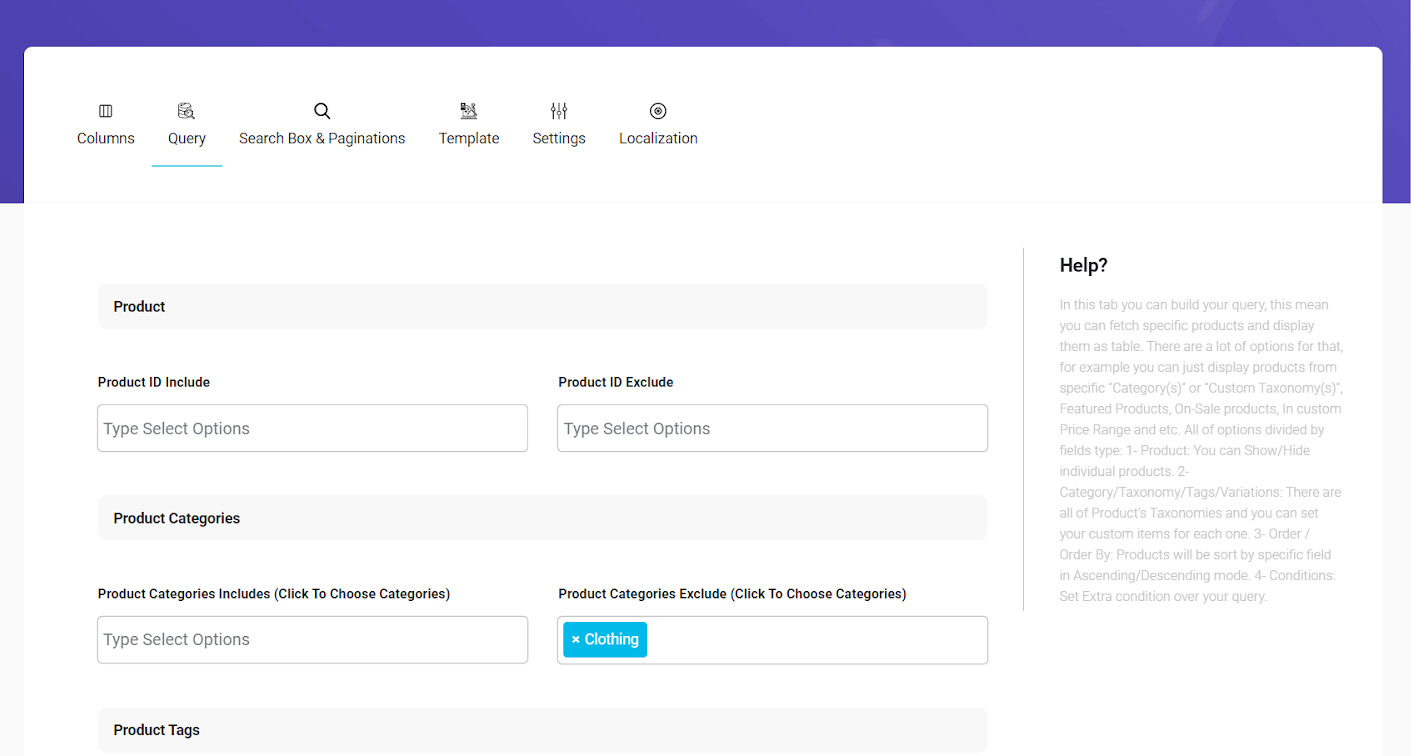
You can easily go to the “Query” tab and filter products by setting conditions in different fields.
For example, in this tutorial we need the product price table to consist of products other than clothing. So, we chose “Clothing” under “Product Categories Exclude” as below:
Note 1: To get more familiar with options in the “Query” tab please refer to “How to create a product table with custom query” tutorial.
Note 2: You can go to the “Setting” tab and change the appearance of your product price table as you wish. Don’t limit yourself to what we just described in this tutorial; let your creativity build an awesome pricing table to attract more customers.
Don’t forget to click on “Update” after making any change in the product table. Then, you can open the page of pricing table to see what has happened:
How to show products with a specific price range in the table?
Sometimes you need to show some products with a specific range in your product table. To filter the price range, you can specify the minimum and maximum prices under condition box of “Query” tab, as you can see in the below picture:

For example, we want to see the products from $10 to $150 in our product table. So, our conditions are:
- Minimum Price = 10
- Maximum Price = 150
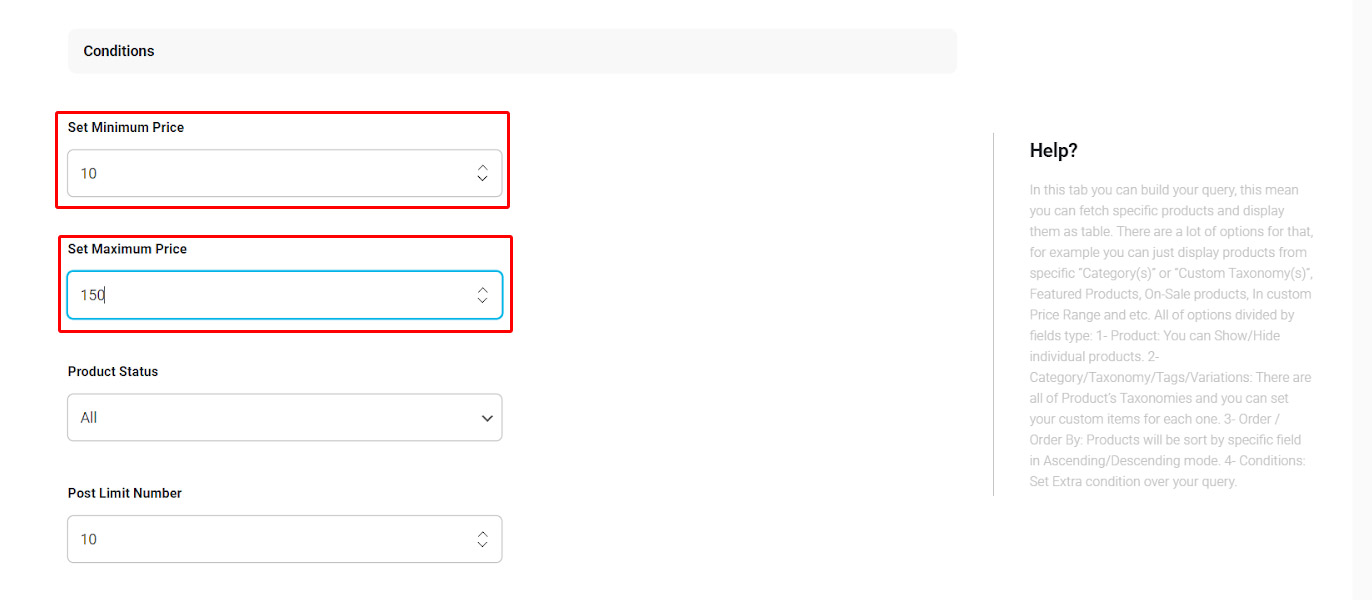
You can directly type the value or use the up/down button to increase/decrease the value in the box.
After clicking on “Update” button on the top right of the page and viewing the table, we can see that the changes we have made resulted in the below:
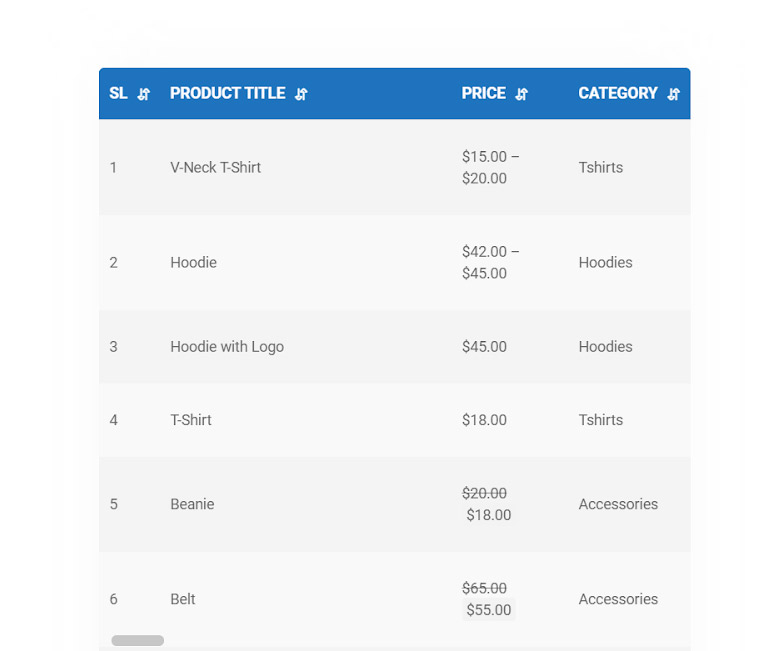
As we expected, just products whose prices ranged from $10 to $150 are displayed in the product table.
How sale price or range price are displayed in the product pricing table?
It is important for a product price table to exactly show the sale prices or range prices to the customers. Now let’s see how they are displayed on the product price table created by WooCommerce product table plugin:
Show Regular price in price table
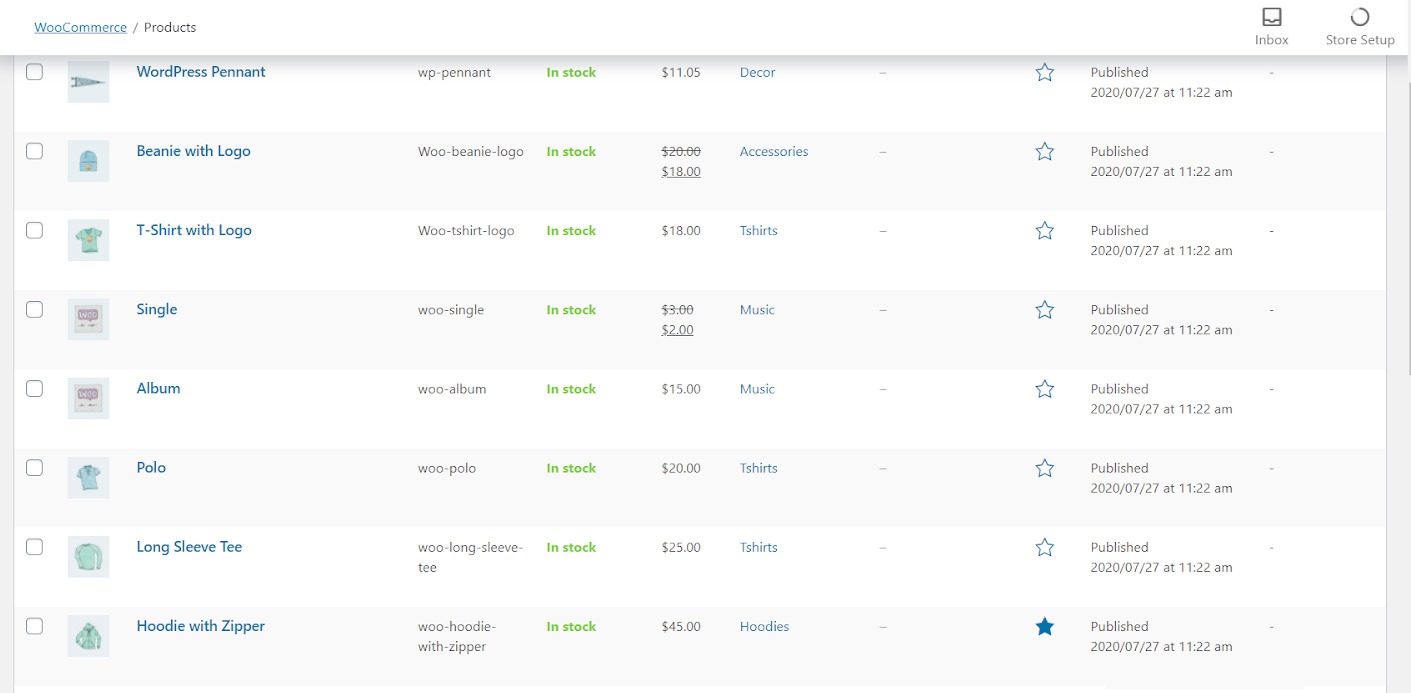
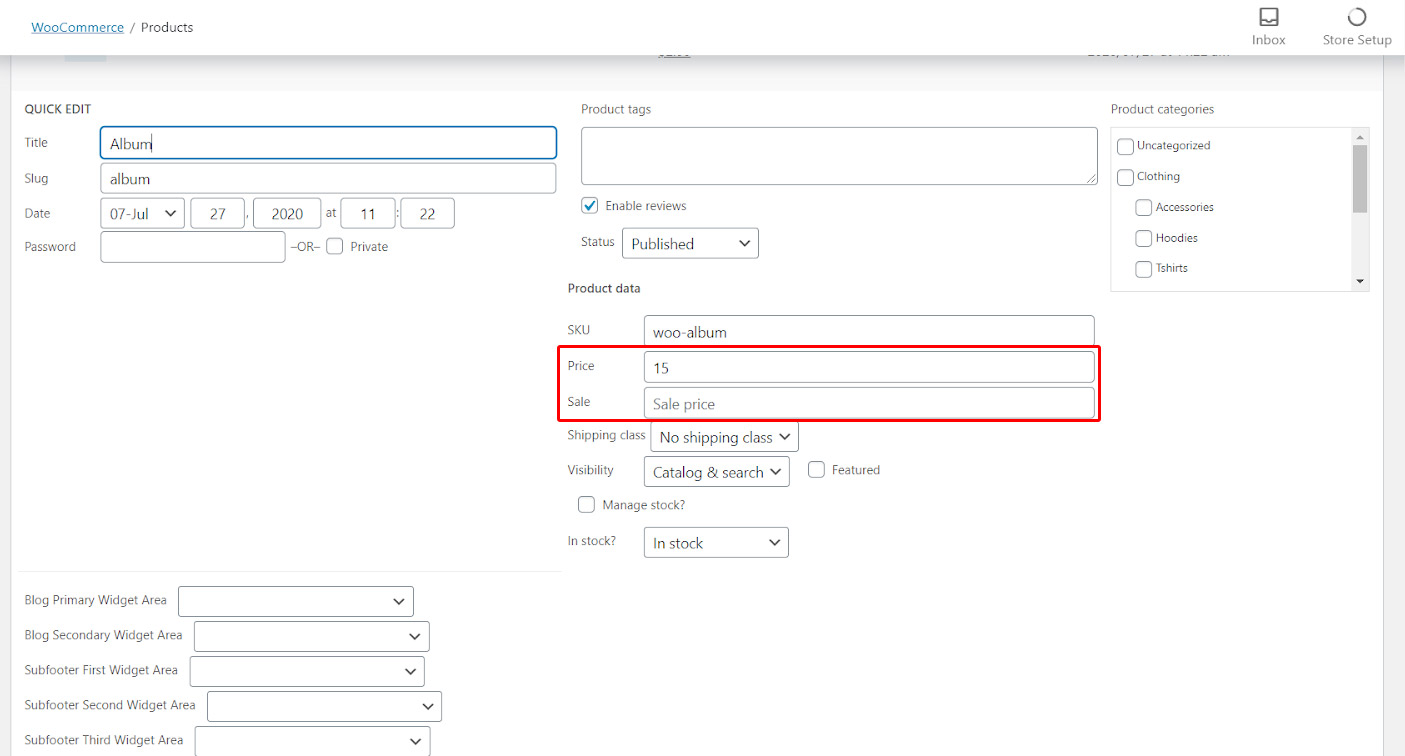
The regular price is exactly displayed as you have typed in the product page. For example, in the above table the price of “Album” is $15 as we had assigned to it before in the product page according to the below picture:
Show sale price in pricing table
To better observe how sale price are shown in the product price table, let try to enter “$12” as a Sale Price for “Album”:
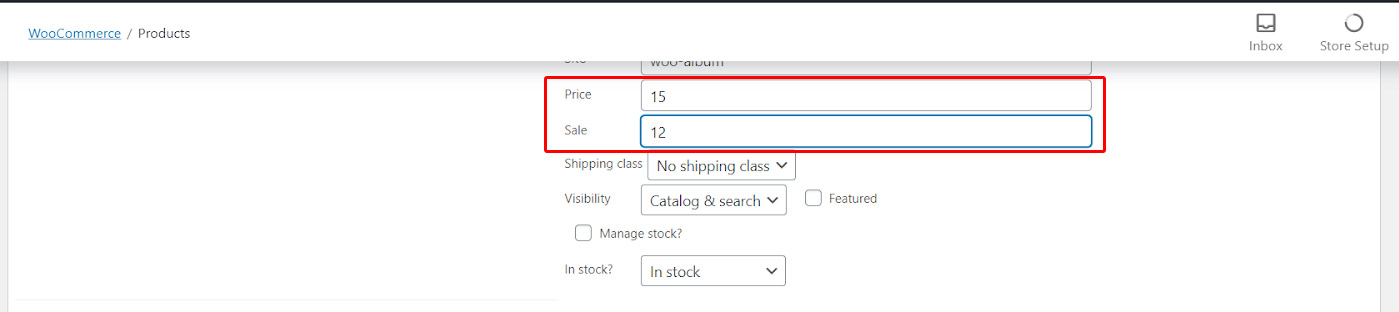
Now, click on “Update” and open the page of Product Price Table. You can see that the Regular price is crossed and the Sale Price is showing next to it:
Show range price in pricing table
If you have products that the prices of some variations are different from others, the range price will be shown in the pricing table.
For example, for “V-Neck T-Shirt” as a variable products, we assigned “$15” for “Blue” one and “$20” for the “Green” one:
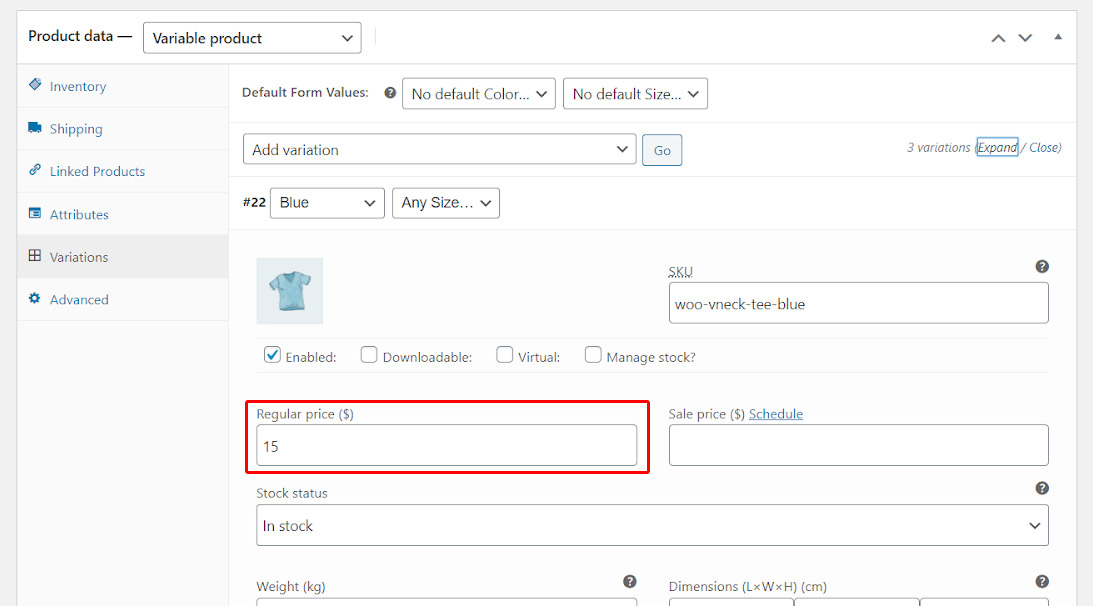
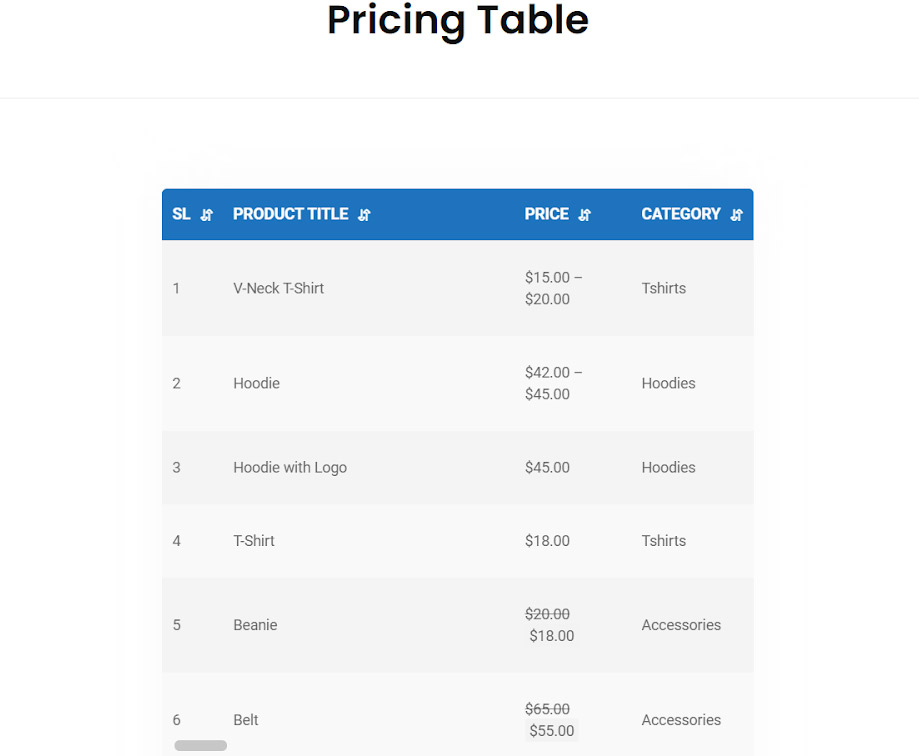
As you can see in the below picture, a range of price is displayed in front of “V-Neck T-Shirt” as $15.00-$20.00:
Comments