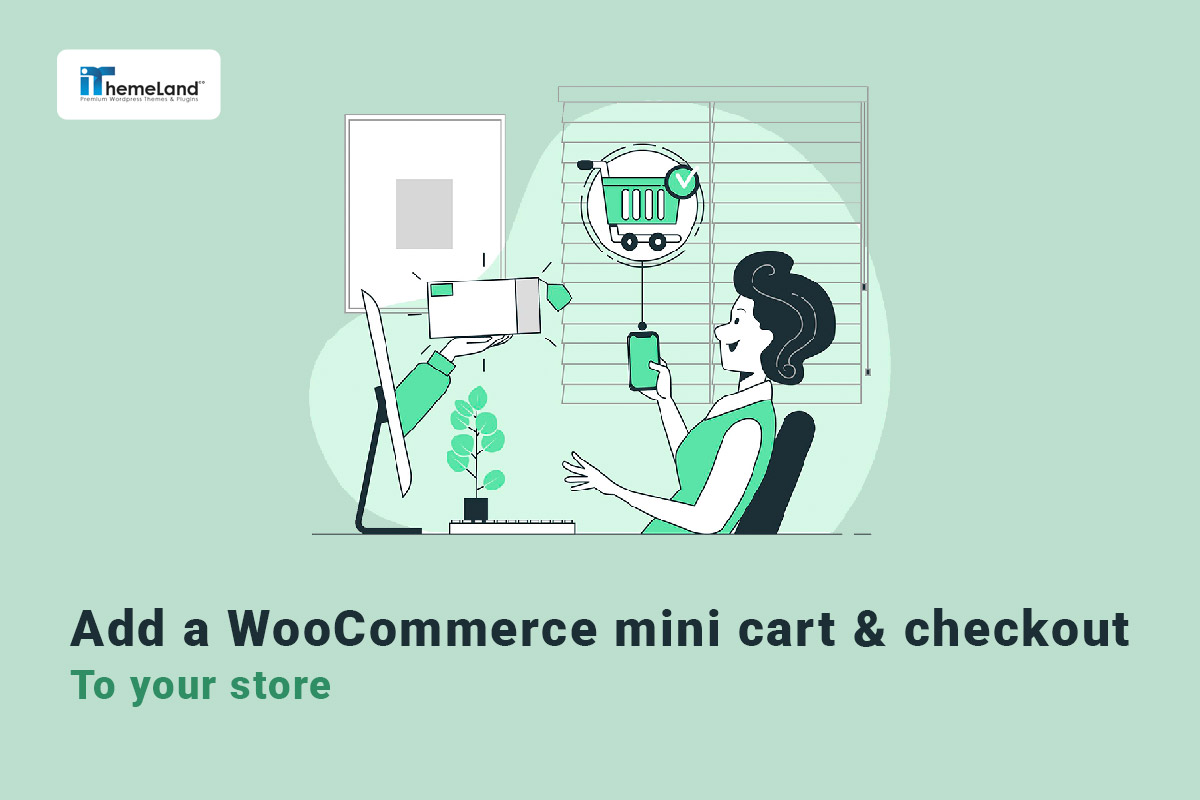

A WooCommerce mini cart gives customers a quick view of the products they have added to their cart without forcing them to leave the shop page. This small feature can make the shopping process smoother because customers can review cart items, check totals, remove products, and continue browsing with less interruption.
For stores with many products, a better add-to-cart experience can directly affect how easily customers complete their orders. If shoppers have to move between the product page, cart page, and checkout page too often, the buying process may feel slow—especially when they want to buy multiple items.
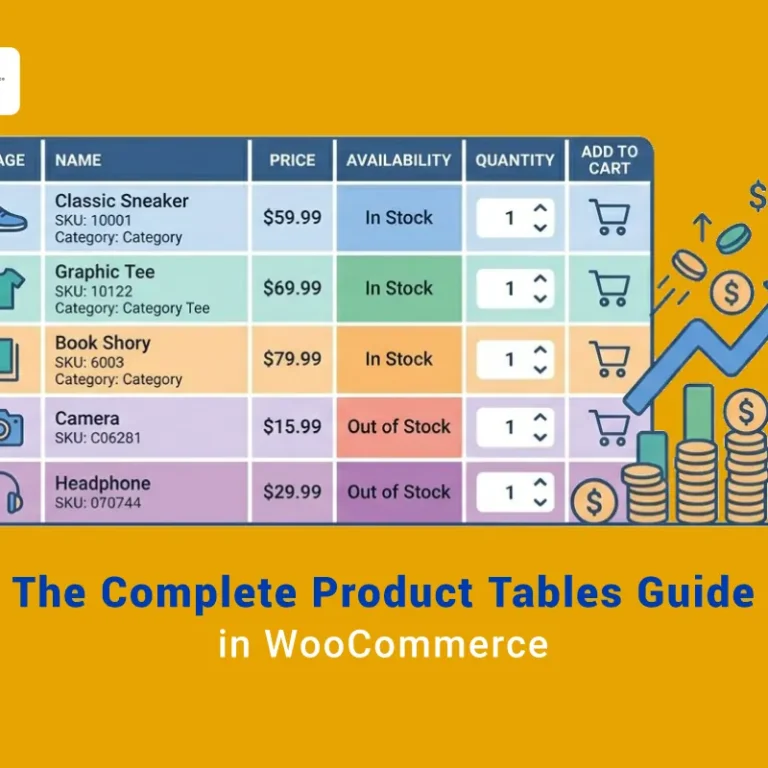
In this tutorial, you’ll learn how to add a WooCommerce mini cart to your store using TABLEiT – Product Table for WooCommerce. We’ll show you how to create a product table, add an Ajax mini cart, display the cart in header, inline, or sticky mode, and improve the WooCommerce shopping cart experience without coding.
A mini cart works best when customers can continue browsing and ordering from the same interface. Explore the wider quick-purhcase workflow for the complete strategy.
Quick Answer:
A WooCommerce mini cart lets customers review selected products, cart totals, and checkout options without leaving the current page. It improves the shopping flow because customers can keep browsing while still seeing what they have added to the cart.
To add a mini cart inside a product table, use TABLEiT – Product Table for WooCommerce. After installing it, go to WordPress Dashboard > iThemeland > TABLEiT, create or edit a product table, then open the table navigation settings and add a Mini Cart element to the header, footer, or sidebar area. Choose the display mode, link behavior, and style options before publishing the table.
This is useful for wholesale stores, food ordering systems, large catalogs, and any shop where customers add several products in one session. TABLEiT plugin is a strong option because it combines product table browsing, add-to-cart buttons, and Ajax or sticky mini cart options in one no-code workflow.
How WooCommerce display mini carts can boost your sales?
Imagine you’re shopping at an online store and your cart starts to fill up with all the things you can’t resist. At the same time, you don’t want to leave the shop page to check the items already added to your cart, this is exactly where the advantage of the WooCommerce mini cart widget comes in!
Woo mini cart is always ready to give you a quick and easy overview of everything you’ve added to your cart. It’s like a window into your shopping world, displaying all the fantastic items you’re just a click away from.
According to the Baymard Institute, 18% of US online shoppers have abandoned their orders simply because of a “too long/complicated checkout process”. Having a WooCommerce shopping cart in your online store is a great way to make the shopping process faster and easier and reduce cart abandonment.
Add mini cart WooCommerce can increase your sales for the following reasons:
- Customers don’t have to go through multiple pages to view their shopping carts and place their orders.
- Improve user experience by allowing customers to add or remove products in their cart and purchase them from a single page.
- Customers can review and purchase multiple products added to their carts with one click.
How to add WooCommerce mini cart to the shop page?
If you would like a WooCommerce custom mini cart to be displayed on the shop page, you can provide this feature with the help of a mini cart plugin for WooCommerce. In addition to creating beautiful and eye-catching product tables with custom columns, the WooCommerce product table plugin allows you to add a WooCommerce mini cart in different modes.
Customers can directly review all products in their carts on the shop page and even remove items on the same page. This plugin gives you the functionality of Ajax mini cart, WooCommerce add mini cart in header, sticky mini cart for WooCommerce, and any custom WooCommerce mini cart that you need. The good news is that you don’t need to install any other plugin to display this feature on your shop page.
In the following, we review the steps of adding a WooCommerce mini cart with this plugin:
Step 1: Install the WooCommerce product table plugin
The first step to use the WooCommerce product table plugin is to download and install it on your WordPress. After activation, navigate to the below address:
WordPress Dashboard > Product Table > Add new table
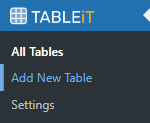
On this page, press Get Started to visit the main page of the plugin.
TABLEiT – Product Table for WooCommerce
The easy way to add WooCommerce Mini Cart & Checkout to your store
Step 2: Create your custom product table with WooCommerce mini cart
The next step before displaying the Woo mini cart is to create your product table with custom columns, navigations, and style.
All tools and options you need for your product table customization are provided in the below tabs:
Query: You can set configurations to show some of your products in the table. For example, you can make a query for a specific category, tag, or attribute.
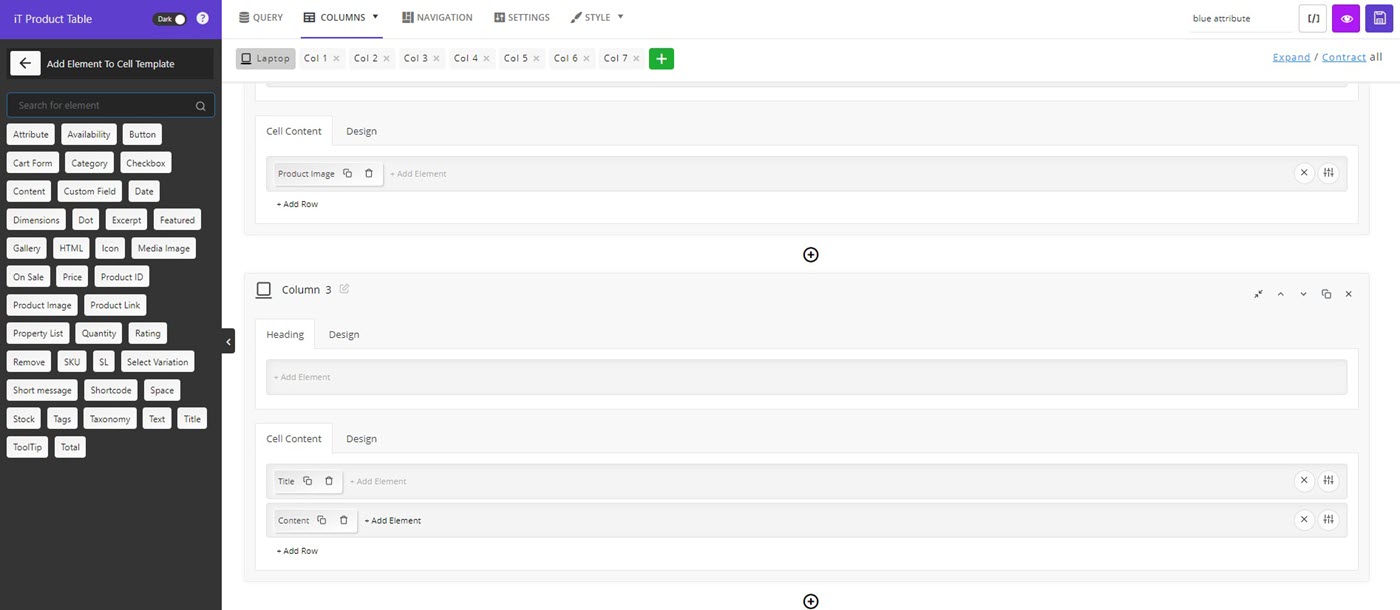
Columns: You can add as many columns and rows as you need in this tab and assign different elements to them.
Navigations: The extra features like multi add to cart, WooCommerce mini cart in header, Filters, Search boxes, Sorting, etc. Are available in this tab and you add them to your product table based on your needs.
Style: In this tab, some preset templates are provided to let you easily customize the appearance of your product table with one click.
For example, we tried to add the following columns to the product table:
For example, we tried to add the following columns to the product table:
- Check box
- Product image
- Title
- Description
- Price
- Quantity
- Add to cart button
Now, let’s see how we can add a WooCommerce mini cart widget to the product table.
Step 3: Add a mini cart for WooCommerce
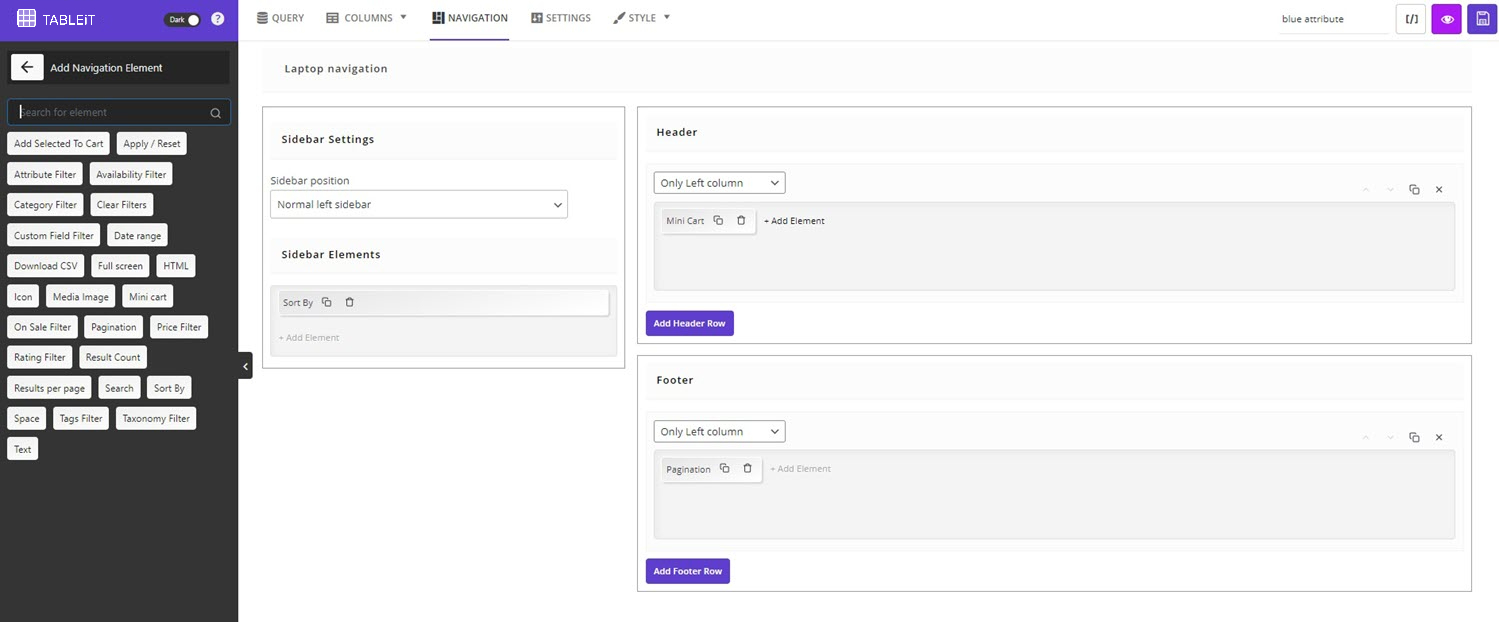
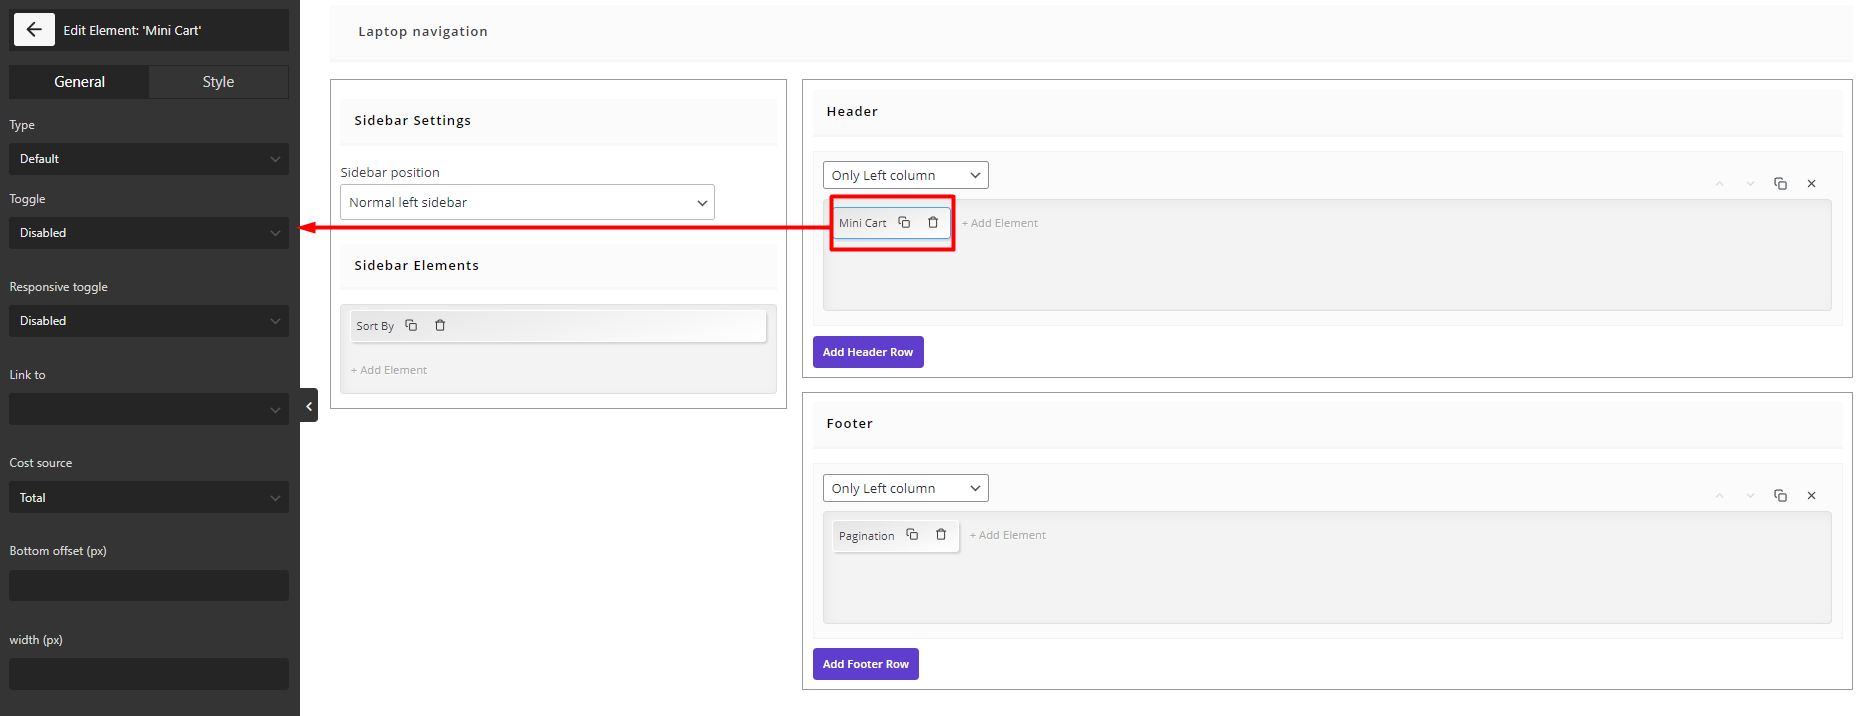
To add a mini cart for WooCommerce, you need to open the Navigation tab. As illustrated below, three areas are available here:
- Header
- Footer
- sidebar
In the following, we review how to add a WooCommerce mini cart in header. However, you can try these steps for the Footer or Sidebar if you need them.
Add WooCommerce ajax mini cart in the header
Follow the below steps to add a WooCommerce Ajax mini cart:
- Click on Add element of Header to see the list of elements in the left panel.
- Choose the Mini cart from the list.
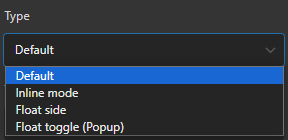
- Open the Type dropdown list and select Default.
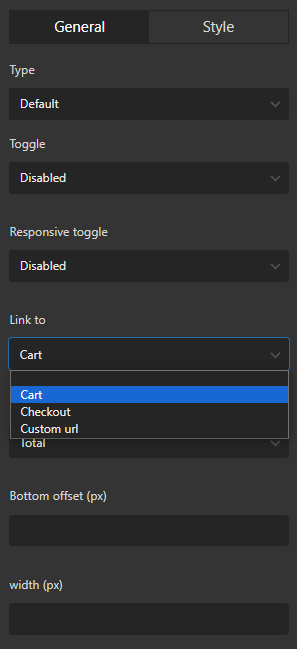
- Open the combo box of the Link field and set WooCommerce mini cart Ajax to one of the options including:
- Cart
- Checkout
- Custom URL
It is also possible to set other configurations in the General tab like enable/disable toggle, Bottom offset, width, etc.
You can also customize the Ajax mini cart appearance in the Style tab.
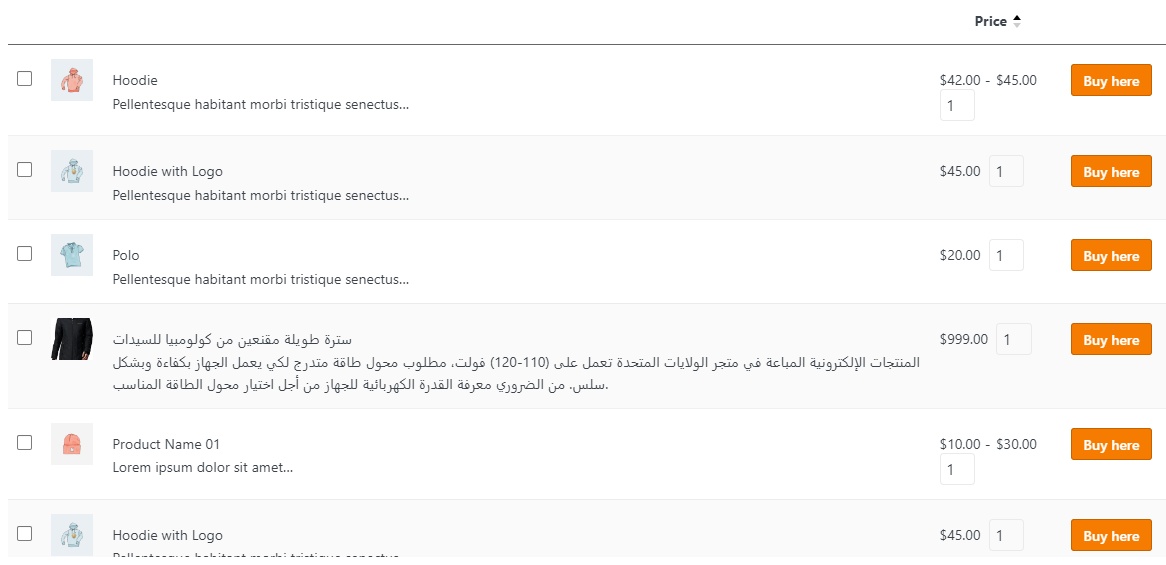
The final result is like the below in the product table:
WooCommerce display mini cart in inline mode
If you want to display the mini cart as a wide box in the Header or Footer of your product table, follow the below instructions:
- Add a mini cart element to the header or footer.
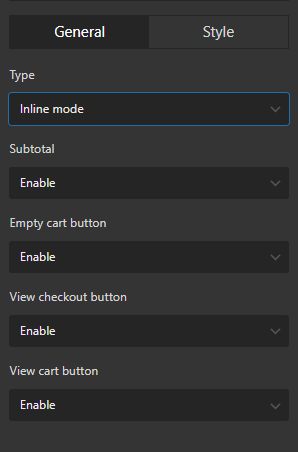
- In the General tab, set Type to the Inline mode.
- Set other items to customize which information is displayed to the customers in the Mini cart, including:
- Subtotal
- Empty cart button
- View checkout button
- View Cart Button
If you enable all items, the mini cart in the inline mode will be displayed like below:
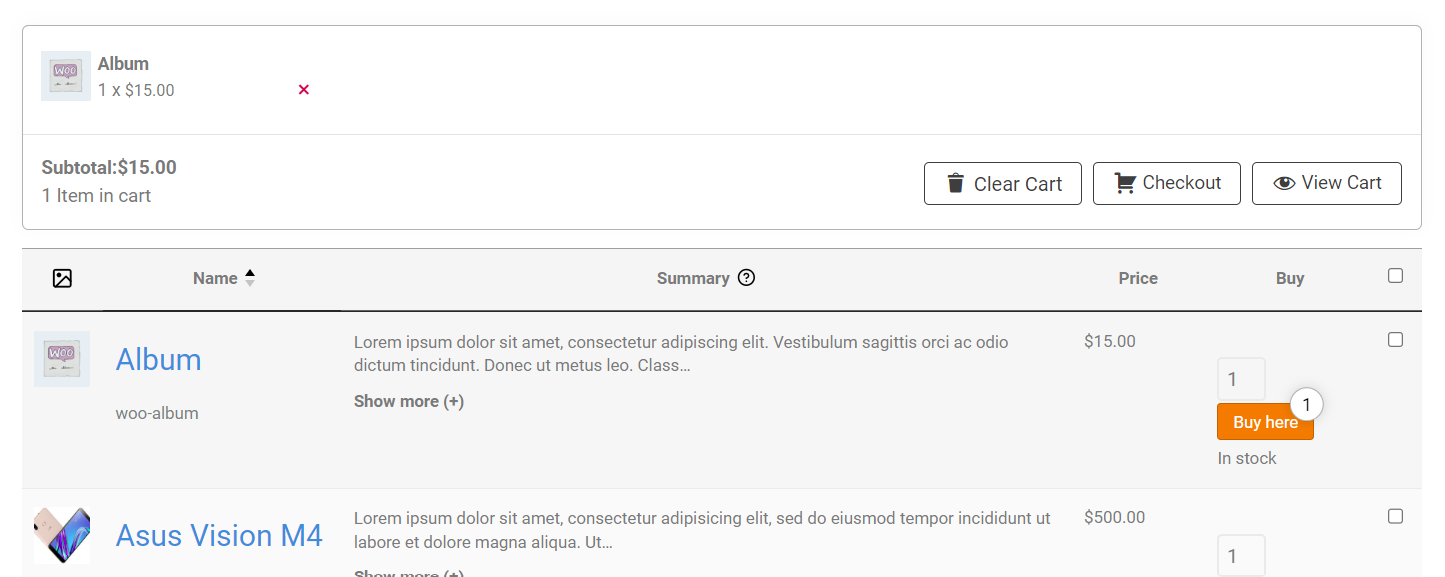
You can also customize the mini cart appearance in the Style tab.
Sticky mini cart for WooCommerce
Add a sticky mini cart for the WooCommerce shop page is very popular in e-commerce websites. In the mini cart WooCommerce plugin, you can set one of the below modes to show a sticky mini cart in the product table:
- Float side
- Float toggle
Let’s review the custom mini cart you can set in the table by choosing each mode, briefly:
Sticky mini cart for WooCommerce as float side
By choosing Float Side in the Type field of the Mini Cart General tab, some extra options are displayed like Title, Position, Button Size, etc.
You can change these options to customize which information is displayed to the customers in the sticky mini cart as well as where and how to show it on your table.
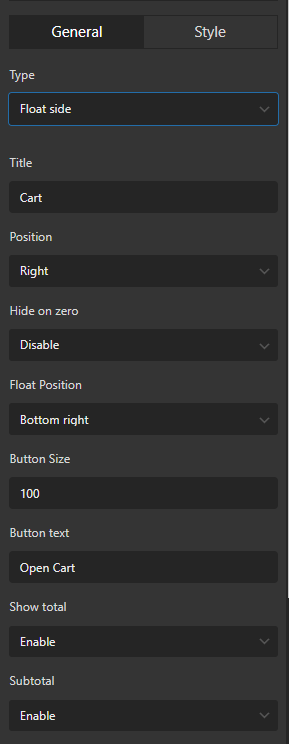
For example, we set the position of the sticky mini cart to the button right of the table and wrote Open Cart in the Button Text:
So, the sticky mini cart is displayed like below to the customers:

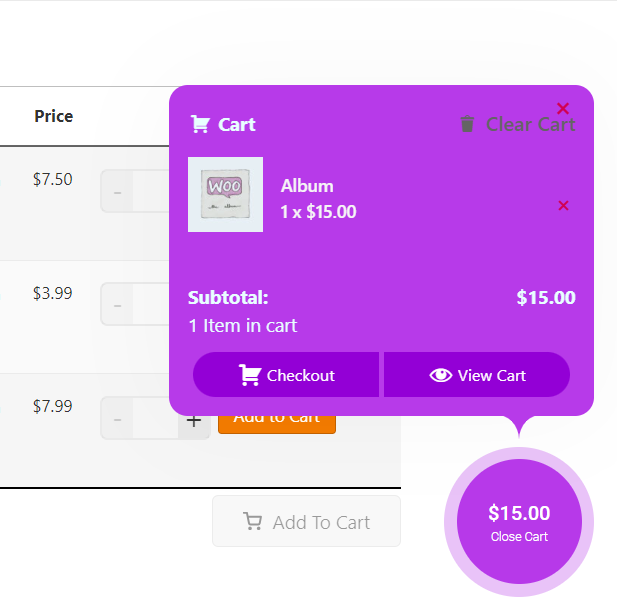
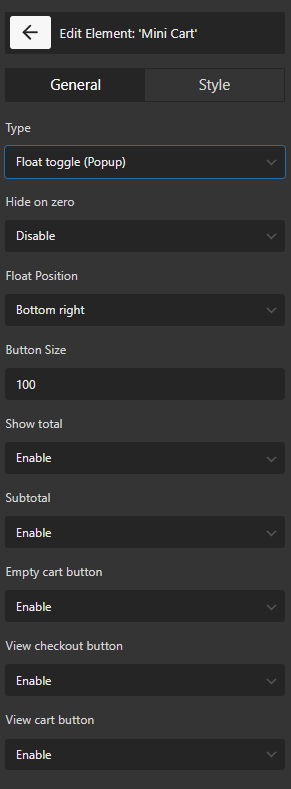
Sticky mini cart for WooCommerce as float toggle
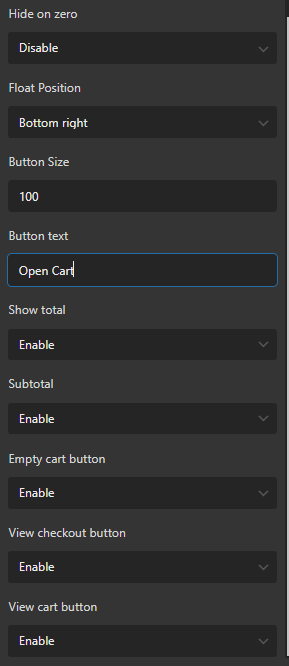
The float toggle option allows customers to see a pop-up in the WooCommerce mini cart on hover. You can customize the items displayed to the customers in the General tab.
For example, you can enable Show Total, Subtotal, View Checkout button, View Empty button, etc.
WooCommerce mini cart customization
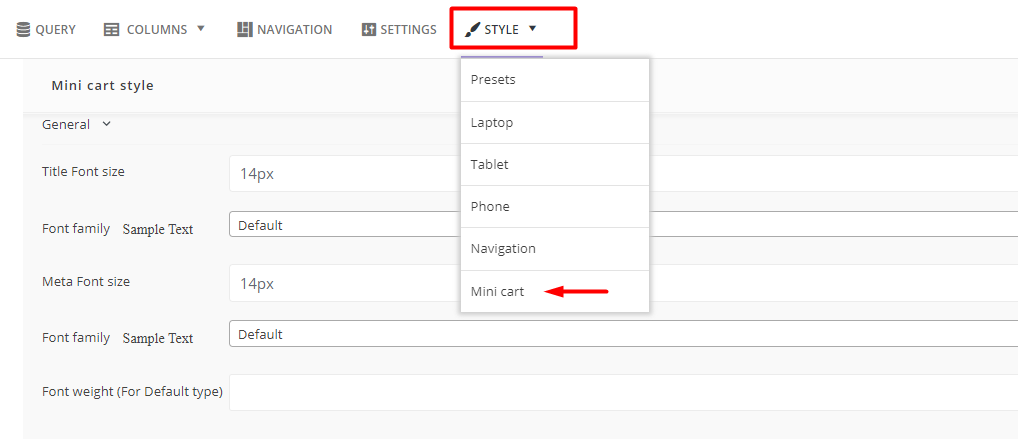
In the WooCommerce product table plugin, you have full control over tweaking the style of custom mini cart WooCommerce. To customize the Woo mini cart, simply click on the Style tab and choose Mini cart from the list:
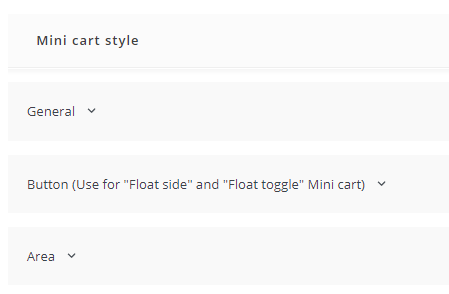
In the Mini cart Style, three options are available:
- General
- Button
- Area
Click on each tab, to see the items you can set to make the style of mini cart exactly as you need.
Let’s review some items in each tab.
General
The items available in the General tab allow you to customize the font of the mini cart by size, type, weight, etc.
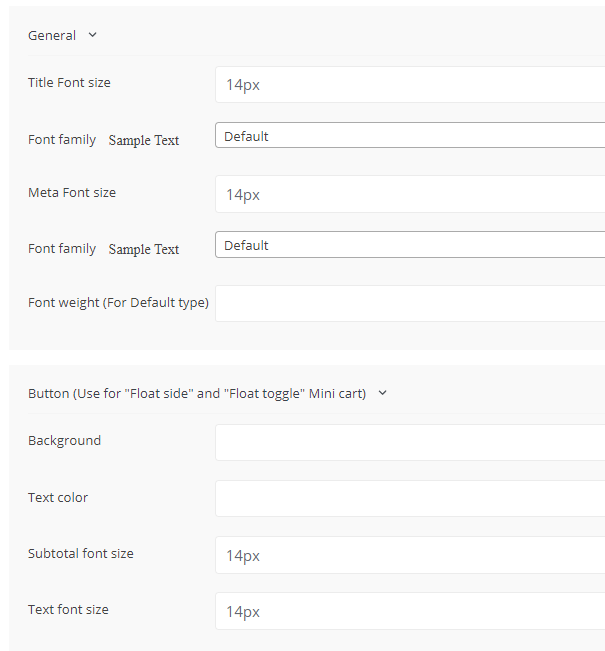
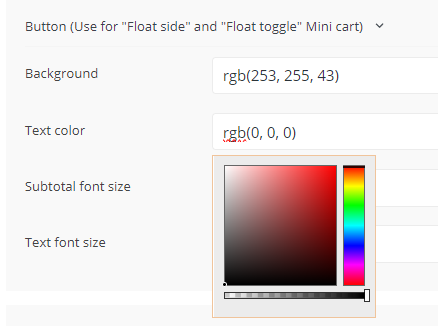
Button
In the button section, you can set configurations for background, text color, and font size of subtotal as well as Text.
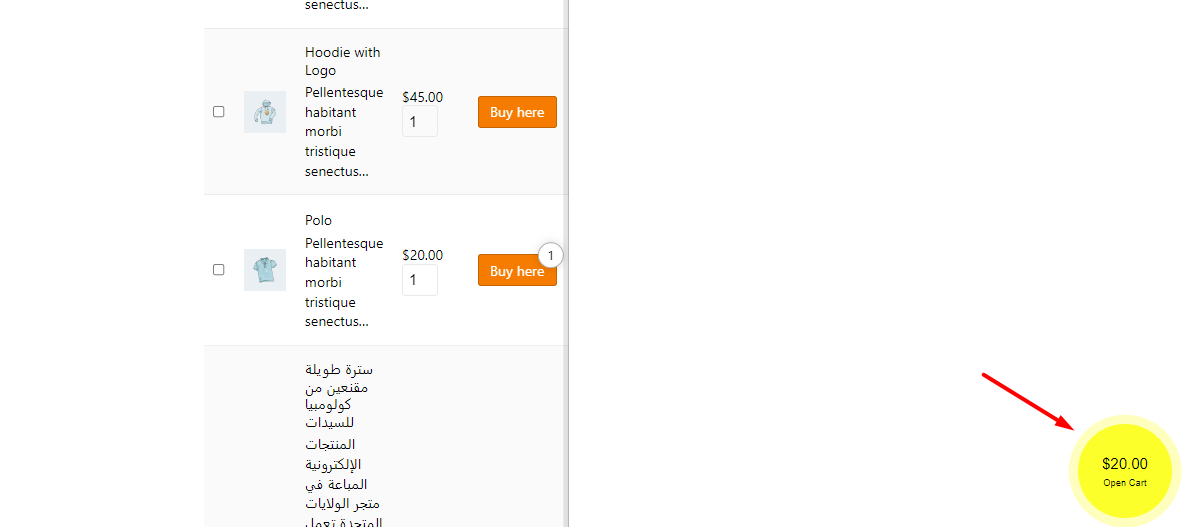
For example, we have chosen a Yellow background with black text and the style of the mini cart changed like below:
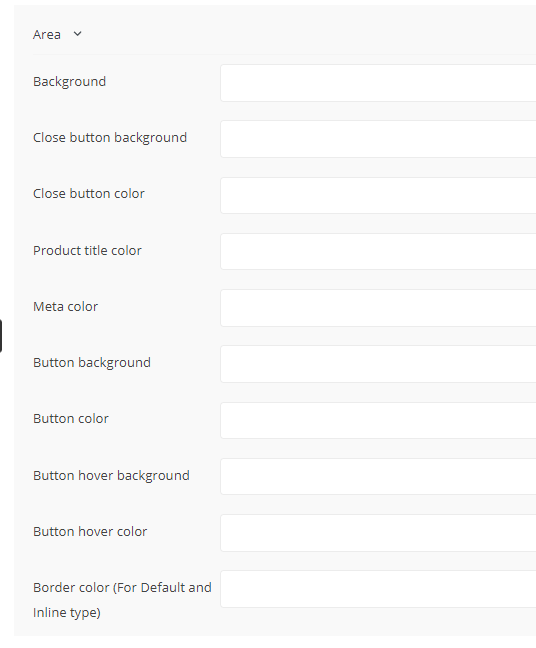
Area
Tweaking the items included in the Area tab is used for changing the style of the area background, close button color, product title color, etc.
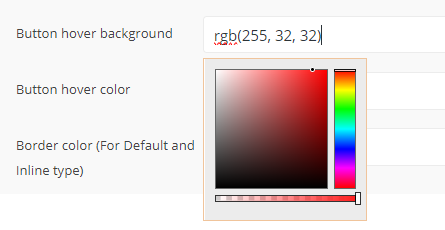
You can also change the WooCommerce mini cart on hover style by configuring the button hover background, color, and other items as illustrated below:
How to get the WooCommerce product table plugin?
Now, you learn how to use the WooCommerce product table plugin to make the purchase process easier and faster for your customers.
WooCommerce product table is the best solution for creating and customizing product tables with customer-friendly options like add to cart button, sticky mini cart, filtering, pagination, etc.
It has an easy-to-use interface allowing you to convert the entire appearance of a WooCommerce shop page.
Other advantages of using this plugin are:
- No coding skills are required.
- Simplifying the purchase process for the customer.
- Boosting sales and increasing conversion rates.
- Fully flexible to make responsive product tables.
- Affordable pricing plans.
TABLEiT – Product Table for WooCommerce
The easy way to add WooCommerce Mini Cart & Checkout to your store
Conclusion
Adding a WooCommerce mini cart is a simple way to make the shopping experience faster, clearer, and more user-friendly. Instead of sending customers away from the shop page every time they want to review their cart, you can let them check selected products, view totals, remove items, and continue shopping from the same page.
The default WooCommerce cart flow can work for basic stores, but it may feel limited when customers need to add multiple products, compare items, or place orders quickly. A mini cart becomes especially useful for product table layouts, wholesale stores, food ordering websites, product catalogs, and stores where customers often buy several items in one order.
With TABLEiT – Product Table for WooCommerce, you can add Ajax, inline, floating, or sticky mini cart options to your product table and customize how the cart appears for customers. This helps create a smoother WooCommerce add-to-cart experience and can reduce friction before checkout.
The mini cart should support—not interrupt—the shopping flow. Review iThemeland’s complete product table resource for related UX recommendations.
FAQ
1. What is a WooCommerce mini cart?
A WooCommerce mini cart is a small cart section or widget that shows customers a quick summary of the products they have added to their cart. It can display cart items, quantity, subtotal, checkout button, and remove options.
2. Why should I add a mini cart to WooCommerce?
A mini cart helps customers review their cart without leaving the current page. This improves the shopping flow, reduces extra clicks, and makes it easier for customers to continue browsing or move to checkout.
3. What is the difference between a mini cart and the WooCommerce cart page?
The cart page is a full page where customers review their order before checkout. A mini cart is a compact cart preview that appears on the shop page, header, sidebar, popup, or product table area.
4. Can I add an Ajax mini cart in WooCommerce?
Yes. An Ajax mini cart updates cart information without reloading the page. With TABLEiT plugin, you can add an Ajax mini cart to a product table and make the cart experience smoother for customers.
5. Can I show a sticky mini cart in WooCommerce?
Yes. A sticky mini cart stays visible while customers browse the page. This is useful for stores where shoppers add several products to the cart and need quick access to cart details.
6. Is a WooCommerce mini cart useful for product tables?
Yes. A mini cart works very well with product tables because customers can add products from the table and immediately review their cart from the same page. This is useful for wholesale stores, food ordering, spare parts, and large catalogs.
7. Can customers remove items from the mini cart?
Yes. A well-designed mini cart can let customers remove products, review the subtotal, and go to the cart or checkout page. This makes the buying process easier and more transparent.
8. Do I need coding to add a WooCommerce mini cart?
No. You can add a WooCommerce mini cart without coding by using TABLEiT. It lets you add mini cart elements to your product table and customize the display from the plugin settings.