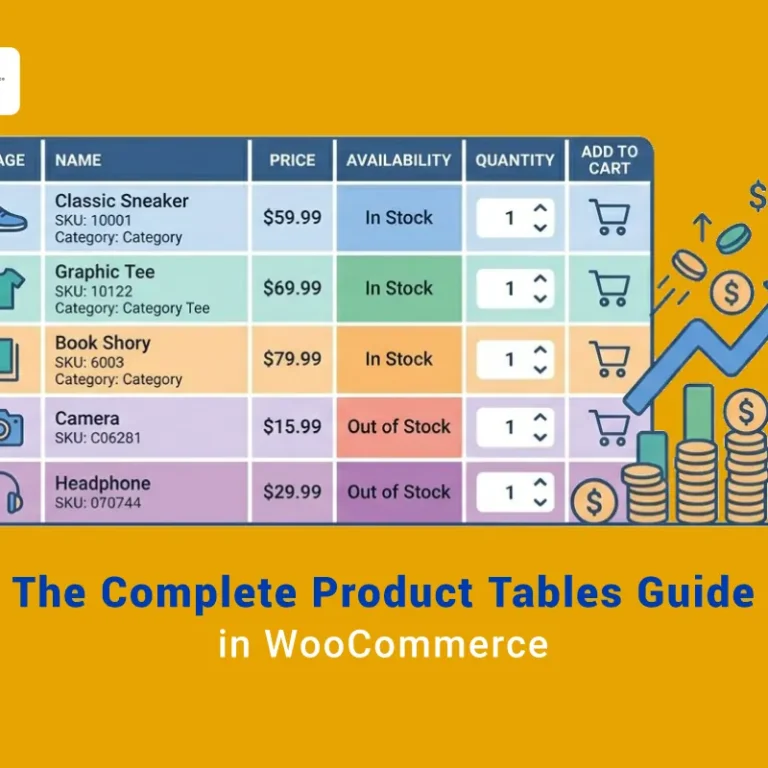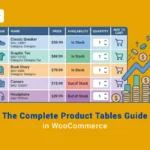

Understanding where your customers are located is one of the most valuable insights for any online store. By analyzing WooCommerce sales reports by state, store managers can identify which regions generate the most revenue and which locations need targeted marketing campaigns.
Location-based analytics helps businesses optimize advertising strategies, improve inventory planning, and identify new growth opportunities. For example, if a particular state generates significantly more orders, you can focus marketing campaigns, shipping strategies, or regional promotions on that area.
Unfortunately, WooCommerce does not provide a detailed sales report by state in its default reporting system. Store managers who want to analyze their WooCommerce business performance by state usually need to use custom code or a specialized reporting plugin.
In this guide, you will learn two simple methods to generate WooCommerce sales reports by state. First, we will show how to create a report programmatically using a code snippet. Then we will explain how to generate advanced WooCommerce reports using the REPORTiT plugin that provides deeper analytics and customizable reporting tools.
State-level reports become more actionable when they are compared with other store metrics. This broader guide can help you compare the main options.
Quick Answer:
There are two practical ways to get WooCommerce sales reports by state: adding a custom PHP code snippet or using REPORTiT – Advanced WooCommerce Reporting.
The coding method creates a custom Sales by State submenu in WooCommerce and calculates order totals by billing state. This approach is suitable for developers, but it should only be used after creating a backup and adding the code safely through a child theme or a controlled snippet workflow.
For a no-code reporting workflow, install REPORTiT and go to WordPress Dashboard > iThemeland > REPORTiT. To generate an order report by state, open Orders > All Orders, click the Search icon, set the date range, choose the required State field, and press Search. The report displays detailed order data such as order ID, customer information, state, status, payment method, coupon code, products, quantity, and net amount.
If you need product sales by location, open Cross > Product/State, set the date range in the Filter Form, and click Search. The result shows product performance across different states, helping store managers understand regional demand and plan targeted campaigns. REPORTiT also provides Select Columns, search, print, and export options so you can download the report as CSV, Excel, or PDF.
What is WooCommerce sale reports by state?
WooCommerce sales report by state helps you understand customer behavior and their needs in different states. In this report, you can see the amount of sales in each province separately and you can plan strategies for business development and targeted marketing.
Reviewing the product sale reports by state WooCommerce free, enables you to check the amount of product sales in different states and run marketing campaigns for the products with the lowest income. In addition, WooCommerce report by state lets you monitor the sales and overall performance of your store.
products report by state WooCommerce sales plays an important role in marketing processes. But WooCommerce doesn’t give you this calculation by default within its report options! Therefore, you should use coding or the WooCommerce report plugin to get the WooCommerce report by state.
Get WooCommerce sale reports by state programmatically
If you want to get WooCommerce sale reports by state programmatically, place the quick snippet below in functions.php and custom CSS in style.css of your child theme.
This is a useful code for generating the total sales amount of your orders in each state as a list in a second. If you need to customize the code, it is easily possible to change the year, the country, and the states in the snippet.
/**
* @snippet Get Sales by State @ WooCommerce Admin
* @author Rodolfo Melogli
* @testedwith WooCommerce 8
* @donate $9 https://businessbloomer.com/bloomer-armada/
*/
// -----------------------
// 1. Create "Sales by State" submenu page
add_action( 'admin_menu', 'it_wp_dashboard_woocommerce_subpage', 9999 );
function it_wp_dashboard_woocommerce_subpage() {
add_submenu_page( 'woocommerce', 'Sales by State', 'Sales by State', 'manage_woocommerce', 'bb_sales_by_state', 'it_yearly_sales_by_state', 9999 );
}
// -----------------------
// 2. Calculate sales for all states
function it_yearly_sales_by_state() {
$year = 2023;
$sales_by_state = array();
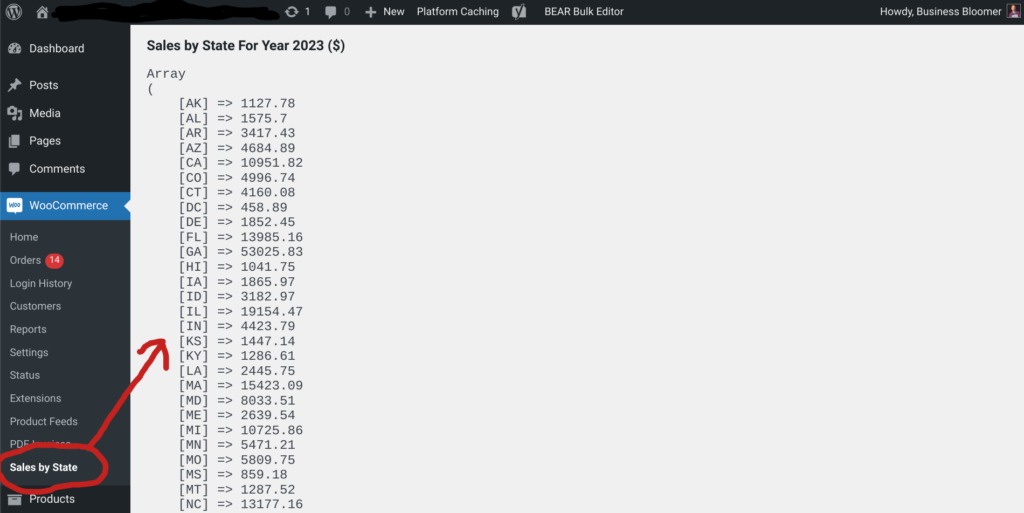
echo "<h3>Sales by State For Year {$year} ($)</h3>";
'billing_country' => 'US', // COUNTRY
'limit' => -1,
'return' => 'ids',
'date_created' => strtotime( "first day of january " . $year ) . '...' . strtotime( "last day of december " . $year ),
);
$orders = wc_get_orders( $args );
foreach ( $orders as $order_id ) {
$order = wc_get_order( $order_id );
$sales_by_state[$order->get_billing_state()] = isset( $sales_by_state[$order->get_billing_state()] ) ? $sales_by_state[$order->get_billing_state()] + $order->get_total() : $order->get_total();
}
echo '<pre style="font-size: 16px">';
ksort( $sales_by_state );
print_r( $sales_by_state );
echo '</pre>';
}By running this code, you will see the “Sales by State” submenu in the WooCommerce tab. So, to get WooCommerce sales report by state, simply click on this option to see the total amount of sales for each state as illustrated below.
To make the PHP code work properly, consider the below points:
- Back up your website before running this code.
- If you don’t have any knowledge about running PHP code, ask an expert or ignore this method and use the WooCommerce report plugin instead.
- To prevent any conflicts, temporarily switch to the Storefront theme, disable all plugins except WooCommerce, and run the snippet.
- This code snippet works properly with all WooCommerce versions offering reports or analytics sections. However, in case of any problem, disable WooCommerce analytics and run the code again.
- If the report causes the array_merge error, replace the below line:
$reports['orders']['reports'] = array_merge($reports['orders']['reports'],$array);With this:
if (isset($reports['orders']) && is_array($reports['orders']['reports']) && is_array($array)) { $reports['orders']['reports'] = array_merge($reports['orders']['reports'],$array); }Use WooCommerce report plugin to get WooCommerce report by state
Many website managers who are looking for a quick solution to generate WooCommerce sales reports by state and make better decisions for their online shops are using the WooCommerce report plugin. Because this plugin allows you to generate any type of sales report you need with one click.
In the following, we will show you how to get help from this plugin to generate WooCommerce reports by state in three simple steps.
Step 1: Install the WooCommerce report plugin
If you want to use the advanced features of this sale report by state WooCommerce plugin, first you need to download and then install it on your WordPress website.
After activation, click on the iT Woo Report menu in the WordPress dashboard to get to the main page of the plugin.
On this page, you can find a list of all required reports in the left panel which are divided into different categories like Orders, Products, Customers, etc. This makes the process of generating report much easier for you. You can simply open one of the categories, find the exact report you need in the submenu, and generate the report with one click.
REPORTiT – Advanced WooCommerce Reporting
The easy way to get WooCommerce sale reports by state
Now let’s review these simple steps for generating WooCommerce sales reports by state.
Step 2: Generate WooCommerce sales report by state
The user-friendly interface of the WooCommerce report plugin made generating various types of sale report by state WooCommerce quick and smooth for store managers. To better show you how to use this order report by state WooCommerce plugin, let’s make some examples.
Example 1: Get ordered by state in the WooCommerce report plugin
Follow the below instructions to get order report by state WooCommerce in this plugin:
- Open the Order tab and click on the All Orders submenu.
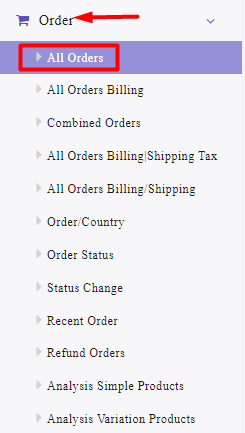
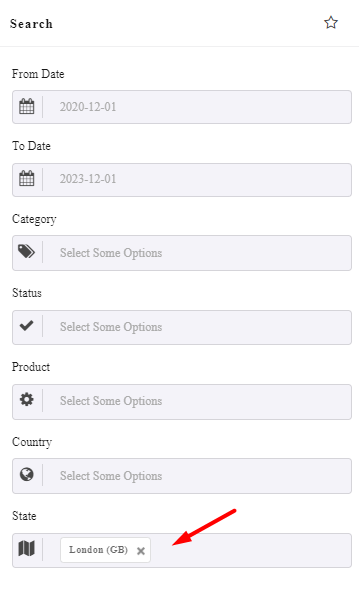
- On this page, press the Search icon to open the Filter Form.
- Set Date from and Date to fields using the built-in calendar in the plugin.
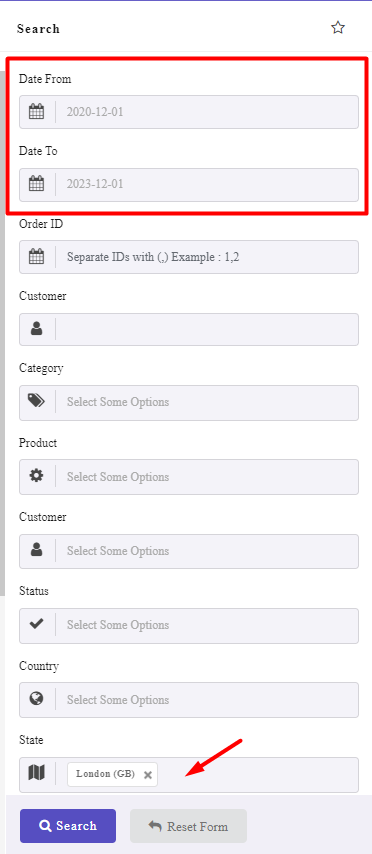
- Locate the State field and choose the state you want to get the order report from the list –London in this example.
- Set other filters if you need them (optional).
- Press the Search button.
You have successfully generated an order report by state in the WooCommerce report plugin.
As you can see in the below picture, all the information you need is reported in different columns of a table, including:
- Order Id: The specific order number assigned by WooCommerce.
- Name: The first name of the customer in the billing form.
- Customer: The last name of the customer in the billing form.
- Email: Customer email address.
- Phone No.: Customer Phone number.
- Date: The date of placing the order.
- Country: The country of order.
- State: The state of order, which is London in this example.
- Status: The order status like complete, processing, on hold, refunded, etc.
- Payment Method: The payment method that the customer chooses for the order.
- Coupon code: The discount coupon code used in the order by the customer.
- Products: The products ordered by customers.
- SKU: The SKU of products.
- Category: The product category.
- Variation: The product variation.
- Qty.: Total quantity of products ordered by customers.
Read more: How to get WooCommerce billing and shipping reports
There is also a summary report at the bottom of the table, which provides you with brief information about the order sales, which are the Total number of orders, Total number of products, Total quantity of products, Total amount of orders, Total discounts, and Net amount of orders.
This is useful when you want to have brief information about the performance of your online shop in the selected state.
Example 2: Get product sale report by state WooCommerce
To generate a product sale report by state WooCommerce free, try the below steps:
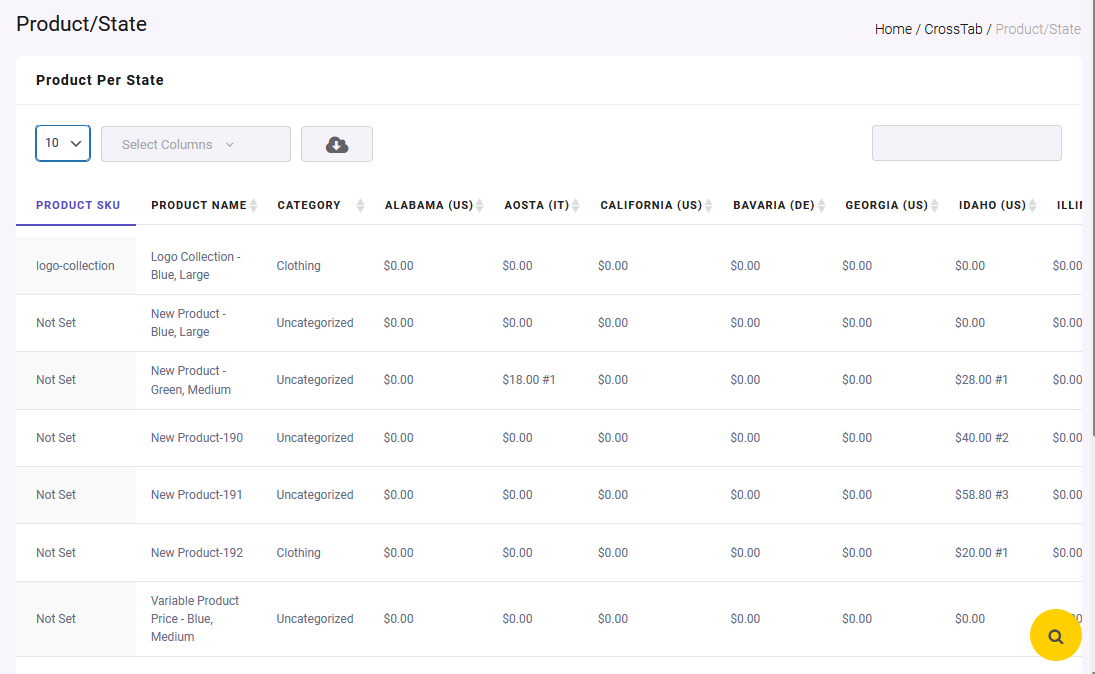
- Go to the Cross tab and choose Product/State report.
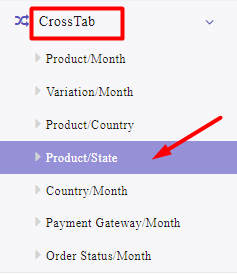
- Open the Filter Form by pressing the Search button.
- Set From Date and Do date by using the built-in calendar.
- Set other filters if you need (optional).
- Press the Search button.
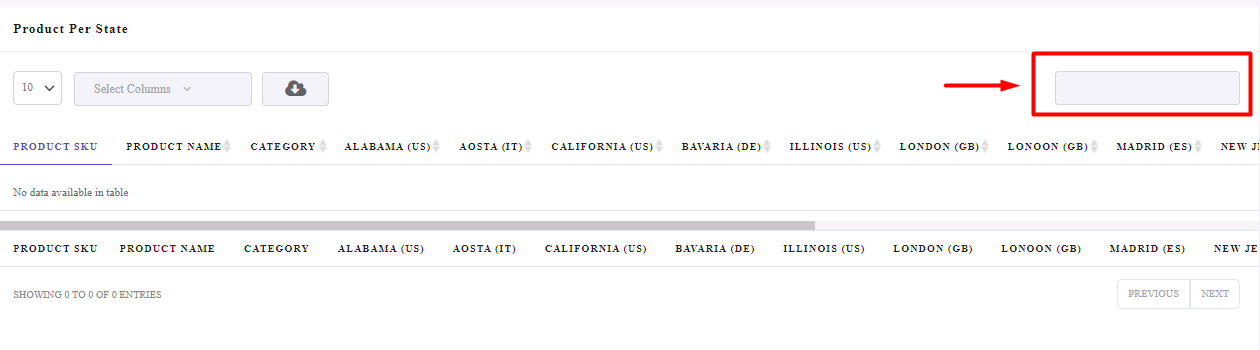
The result of this product report by state WooCommerce sales is a list of all products and their sales amount in different states, which are reported in separate columns of the table.
Step 3: Customize the order report by state in the WooCommerce report plugin
Despite generating sales reports by state, the WooCommerce report plugin comes with many tools for customizing the reports.
Here, you can get familiar with some of them:
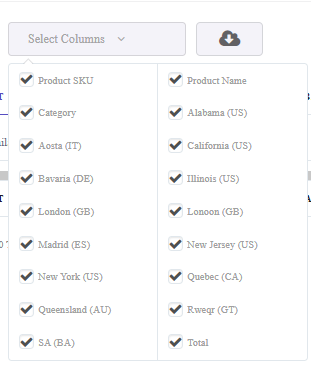
Customize the report Columns
There is a Select column field on top of the table reports, allowing you to display/ hide the columns in your report.
You can easily open the select columns form and mark those fields you want to be included in the report:
Filter the sales report by state based on WooCommerce fields
As we mentioned above, you can use a Filter Form in each report to instruct the plugin to show your required data in the report.
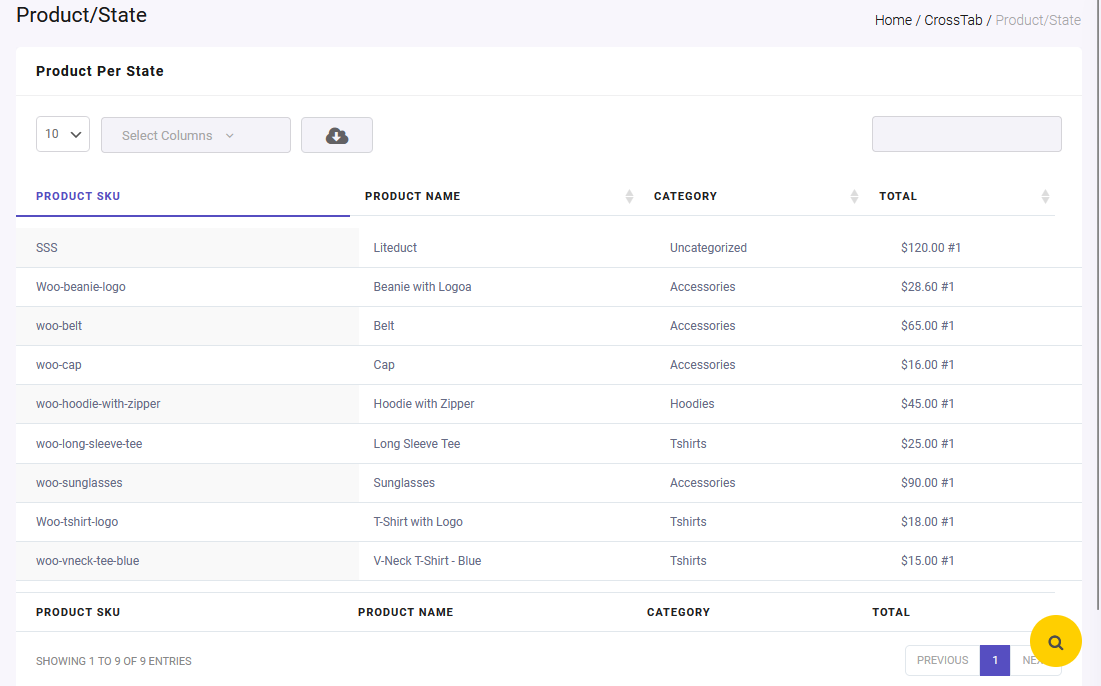
For example, if you use the Filter Form of product sale report by state WooCommerce (Example 2) and set London in the State field:

The data reported in the table is just related to this state, including:
- Product SKU
- Product Name
- Category
- Total
REPORTiT – Advanced WooCommerce Reporting
The easy way to get WooCommerce sale reports by state
Extra features of ordered by state WooCommerce plugin
In addition to customization options, there are some extra features available in the sale report by state WooCommerce plugin. Let’s get familiar with some of them:
Export WooCommerce sales report by state to CSV, XLS or PDF
Exporting tools are designed on top of the table report, allowing you to download the WooCommerce sales report by state in the below formats:
- CSV
- Excel
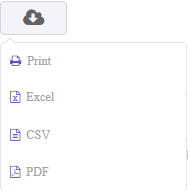
You can also print the report directly if you need a hard copy.
Search in ordered by state WooCommerce plugin report
Another useful feature enabling you to look for specific data in your report is the Search box. You can type any information like state name, product name, customer name, etc. To instruct the plugin, show the information about it in the table report.
Conclusion
Analyzing WooCommerce sales reports by state gives store managers a deeper understanding of where their customers are located and how different regions contribute to overall revenue. These insights allow businesses to optimize marketing campaigns, improve logistics strategies, and identify new growth opportunities in specific locations.
Although WooCommerce provides basic reporting tools, it does not offer detailed geographic reports by default. Store owners who need this level of insight usually rely on custom code or advanced reporting plugins.
Using a specialized WooCommerce reporting plugin like REPORTiT, is often the most efficient solution because it provides powerful filters, customizable reports, and export options without requiring technical knowledge. With the right reporting tools, businesses can transform raw order data into actionable insights that help improve their store’s performance and long-term growth.
To build on state-level insights, explore the full resource.
FAQ
What is a WooCommerce sales report by state?
A WooCommerce sales report by state is a geographic report that shows how much revenue your store generates from different states or regions. This type of report helps store managers understand where their customers are located and which areas contribute the most to overall sales.
Why are WooCommerce reports by state important for online stores?
Reports by state allow store managers to analyze regional sales performance and identify growth opportunities. By understanding which states generate more revenue, businesses can run targeted marketing campaigns, improve shipping strategies, and optimize advertising budgets.
Does WooCommerce provide a sales report by state by default?
No, WooCommerce does not include a detailed sales report by state in its default reporting tools. Store owners who need this type of analysis usually use custom code snippets or install advanced WooCommerce reporting plugin like REPORTiT that provide geographic reporting features.
What is the easiest way to generate WooCommerce reports by state?
The easiest way is to use a WooCommerce reporting plugin that automatically generates location-based reports. These plugins allow store managers to filter orders by state, analyze product performance in different regions, and export reports to formats such as CSV or Excel.
Can WooCommerce sales reports be customized?
Yes, WooCommerce reports can be customized using plugins or custom development. Advanced reporting tools allow users to filter data by location, product, category, date range, customer information, and many other parameters to generate detailed insights about store performance