The REPORTiT – Advanced Reporting for WooCommerce plugin includes a powerful automated email system, ensuring that key stakeholders receive vital store performance data without manual effort.
You can schedule comprehensive reports to be sent directly to managers, team members, or partners on a daily, weekly, or monthly basis by going to Settings > Email, and following the steps below:
- Active Email Reporting: The first step is to enable the entire feature by turning on this master switch. No reports will be sent unless this option is activated.
- Emails Report: Select the specific types of reports you want to include in the email. You can choose any combination of the following:
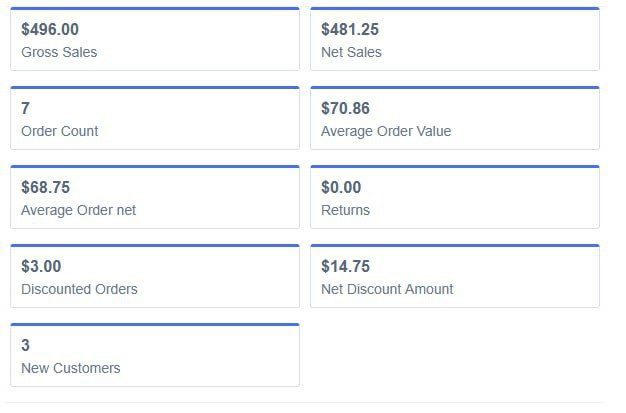
- Store’s Digest: A summary of key performance indicators.
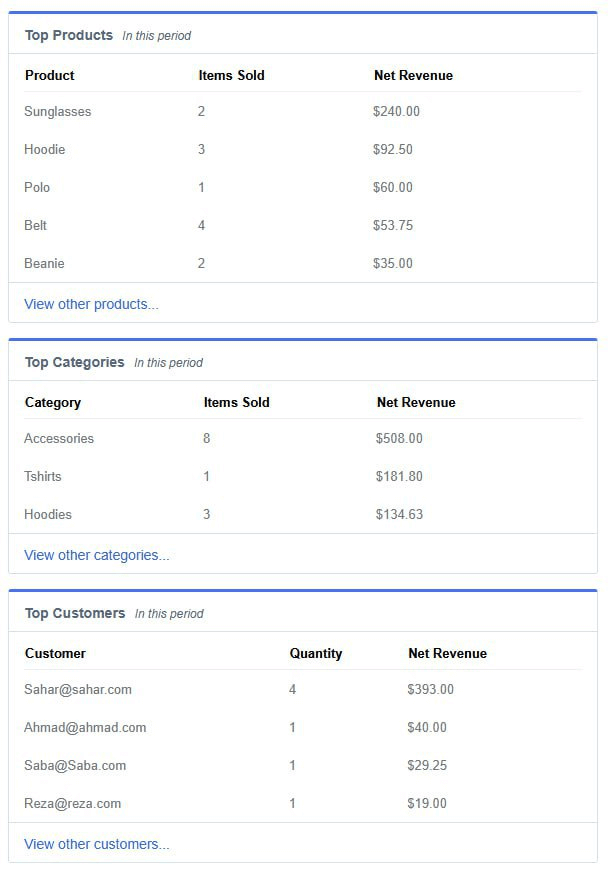
- Top Products: A report on your best-selling items.
- Top Categories: Performance data for your product categories.
- Top Customers: Insights into your most valuable customers.
- Email Send To: Enter the email addresses of the people who should receive the reports. You can add multiple addresses, separated by commas.
- From Name: Specify the sender’s name that will appear in the recipients’ inboxes (e.g., “Your Store Analytics”).
- From Email: Set the email address from which the reports will be sent.
- Email Subject: Customize the subject line of the automated email.
- Logo: Upload your company logo to brand the email report and give it a professional appearance.
- Email Schedule: This is where you define the frequency and timing of the reports.
Select the intervals: Daily, Weekly, Monthly, Quarterly, or Yearly.
For Weekly reports, you can select a specific day (e.g., Monday).
For Monthly reports, you can choose a specific day of the month (e.g., the 1st).
Set the specific time to send the email in the Send At field (e.g., 23:30).
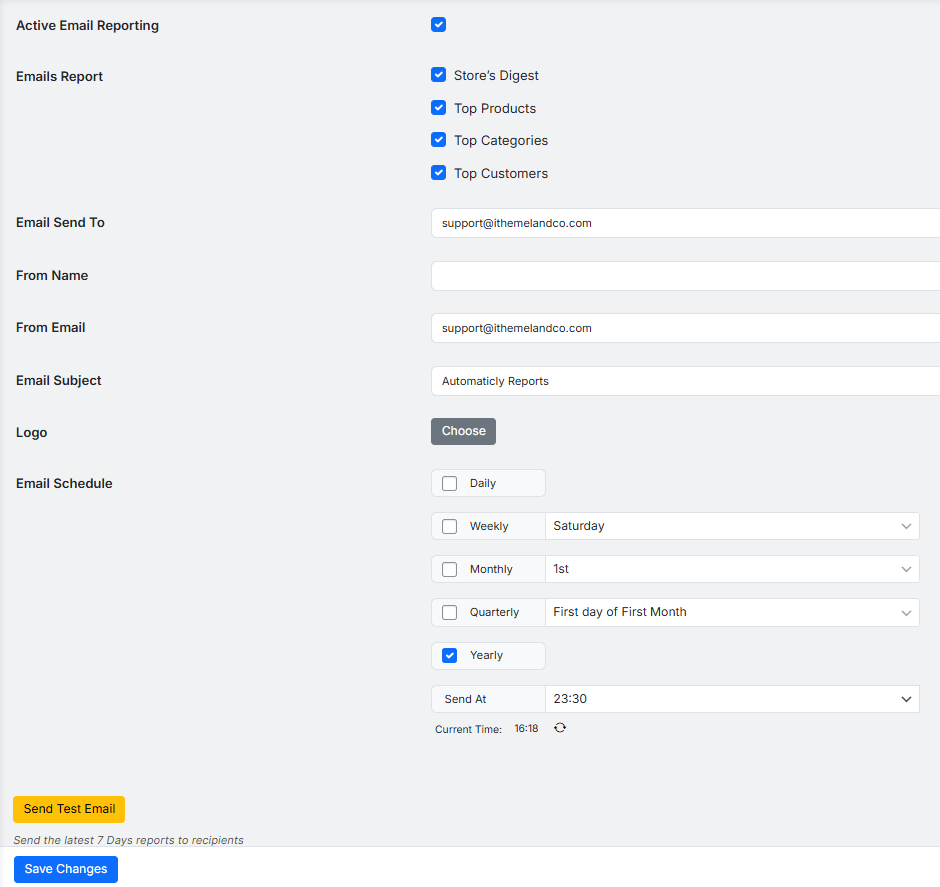
- Send test email: After configuring all settings, use this button to send a test email to the specified addresses. This allows you to verify that everything looks correct before the automated system begins.
Finally, click Save Changes to activate your scheduled email reports. The plugin will now automatically generate and dispatch the reports based on your defined schedule.
Comments